Citizens of Halloween Town and Christmas Town – I am so so SO very thrilled to announce that today the Tim Burton’s The Nightmare Before Christmas knitting pattern book is out, and that I have a pattern within its colorfully spooky pages!
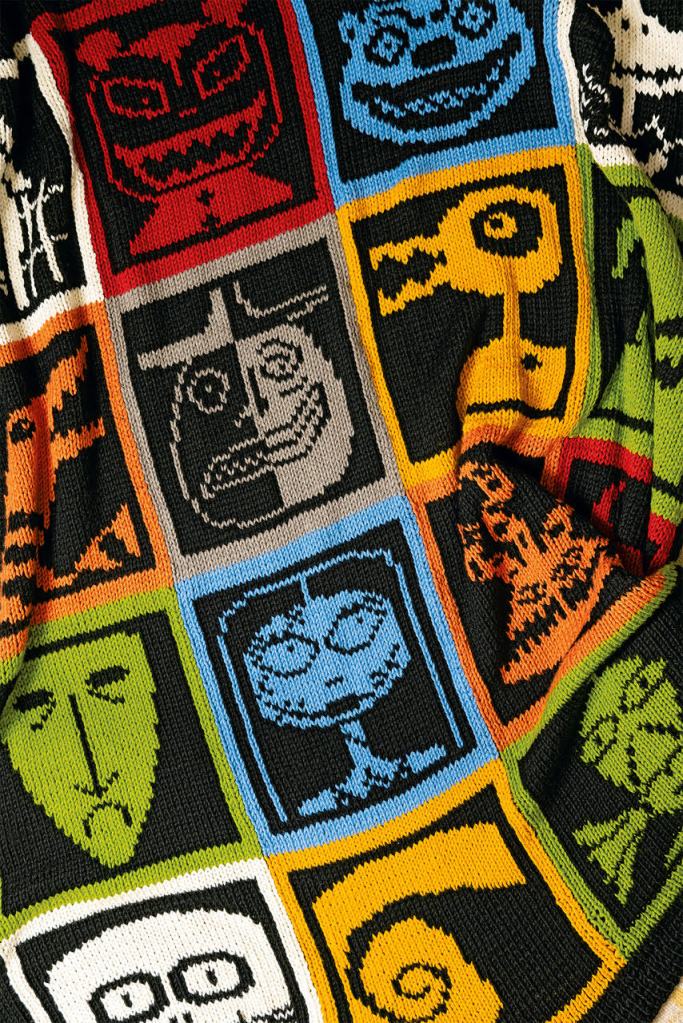
There are so many fantastic designs inside – everything from décor to toys to costume replicas. And amongst the pages is my blanket! I designed this colorful, reversible throw allowing you to snuggle up with Jack, Sally and the rest of the gang.
Sixteen charts represent Jack, the Clown with the Tear-Away Face, the Vampire Teddy, Zero in his doghouse, Oogie Boogie, the Killer Duck, the Mayor, the Striped Snake, Lock, Harlequin, Sally, Shock, Dr. Finkelstein, Undersea Gal, Spiral Hill and Barrel.
This throw is worked in one piece using a combination of double knitting and intarsia to create a fully reversible color-block blanket with the inverse of each character on the back. Slip-stitch edges create a tidy finish on this squishy home décor item.
I truly loved figuring how to represent each character in knitted form and am so honored that I could participate in this incredible book alongside all the other talented designers.
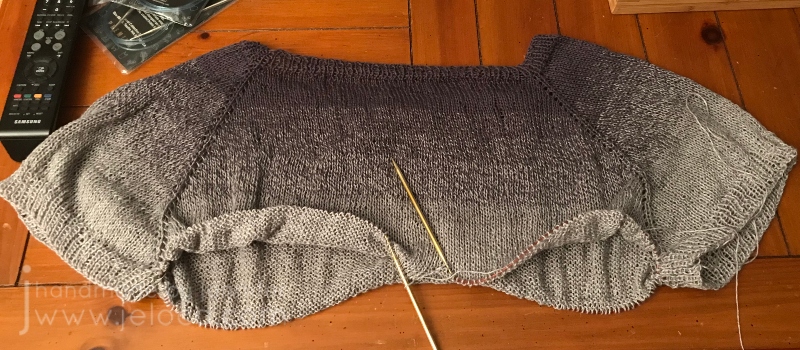
I’ve had a Billowing tee on the needles since August 18 2019. I’d been donated more yarn in exchange for review and after doing a lot of research and seeing this gorgeous version done in the identical yarn I knew it would be the perfect pattern.
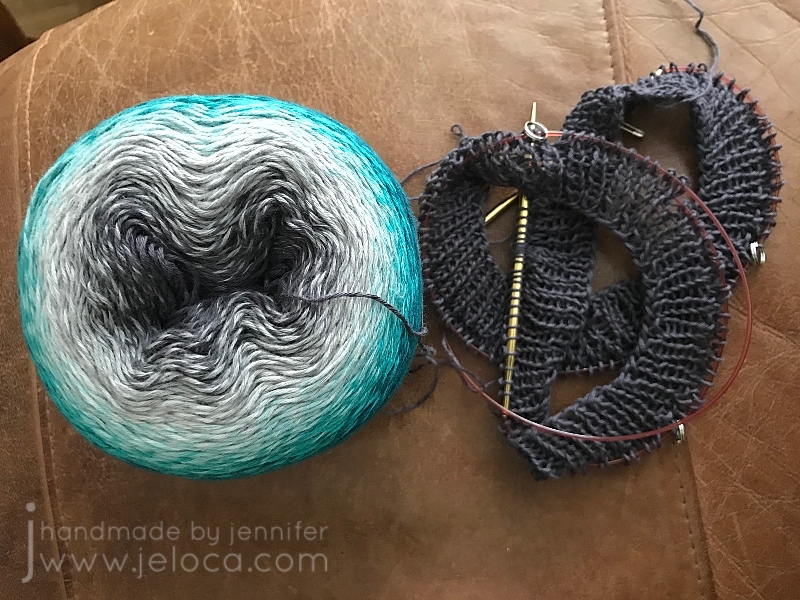
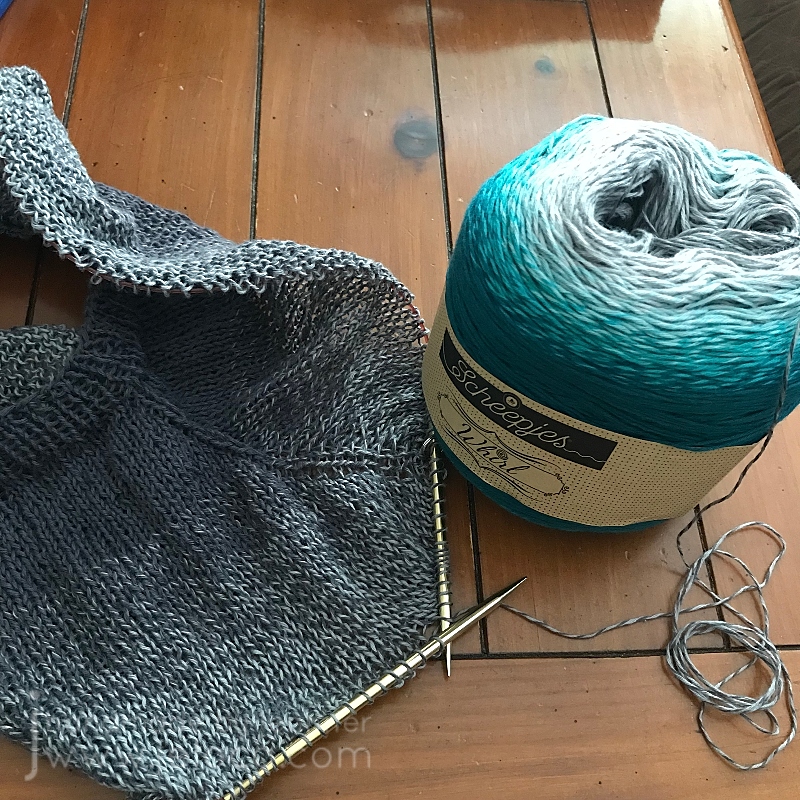
The yarn is Scheepjes Whirl in the Green Tea Tipple colorway. It’s a delicious fingering weight 60/40 cotton/acrylic blend with a whopping 1000m/1093y. It was graciously donated to me by YarnCanada.ca in exchange for review. Whirl blends colors beautifully by evenly changing out the color one of the 2 plies of yarn to create a subtle marled effect, and Green Tea Tipple does this by slowly shifting from from charcoal gray to a deep teal-ish green.
The in-person yarn is identical to the online image, and really lovely to work with. There are a few spots where the end of a blended color sticks out a little bit, and one or two knots, but nothing that creates any sort of inconvenience in the knitting.
As the cake began with gray in the center I went with it and decided my top-down tee would start with gray and blend down to the green.
I’d quickly zipped through a swatch and then cast on. I didn’t want a closed neck on my tee so I calculated how deep I wanted the neckline to fall and cast on a larger amount of stitches, adjusting my rate of increases accordingly.
It’s very addictive to work with yarns that change color like this. You want to keep going to see what the next area will look like.
I worked through the yoke, separated for the armholes (completing their ribbing first so the color would be right) and gotten about an inch or two down the body when I’d stopped. My first two nieces were born not long after and I’d spent my time working on a bunch of baby projects. My tee got put aside and then it languished in my UFO bin until this year.
In March of 2023 I was going to a pub knitting night and needed something with mindless stockinette so I could focus on the live music and not my hands. I remembered this project and pulled it from the depths of the forgotten pile only to realize I was no longer the same size as I’d been in 2019 and it was now too big. I also decided I wanted to start with the green instead of the gray.
I frogged the whole thing and re-wound the cake to be able to start with the green end. With two days to go before knit-nite I cast on for a smaller size and raced through the yoke and mini sleeves so I could get to the body. From that night onwards I kept working on the body, keeping it handy whenever I had the chance for mindless knitting.
I was hoping to use the full cake and get to the darkest charcoal but I tried it on last week and it was already at the length I wanted. So I measured out how many rows the ribbing would be, ripped back that many, and began to redo the rows as ribbing to finish off the bottom hem.
That’s where I was at at the start of UFO Day. My goal was to get through the ribbing and remaining modifications so I could present the finished garment, but I underestimated just how long fingering weight ribbing takes. I suppose it’s fitting that my UFO Day post ends with an unfinished sweater!
Yesterday was World UFO Day. Ok- yes the day is meant to focus on sightings of Unidentified Flying Objects…but I decided to be a bit liberal with my UFO definition and look around my house for an Un-Finished Object to tackle.
I’ve had this Bernat Top Down Button Front Capelet on my grandfather’s old dress form since December 2021 when I “finished” it. I made it to keep me warm at work during the winter. It’s perfect in that I can throw it on over any outfit and still have my arms free from the elbows-down so it didn’t interfere with computer work. However even though I omitted the fold-over collar, the neckline still bothered me.
The edges of the button bands would often shift up and touch my throat or the underside of my jaw and it wasn’t comfortable. I’d planned to sew the corners down as a faux lapel and even left out two lengths of the original yarn.
And then I forgot about it…until today. In the spirit of my alternate UFO day I set aside everything else I was working on and spent 5 minutes sewing down each side of the ribbed bands. The buttons still open but now it won’t hit me in the neck any longer and this “finished” project is now officially done.
If you’d like to make your own capelet the Ravelry link to the free pattern is here or a direct link to the PDF is here.
I really enjoyed using World UFO day to work on one of my own UFOs and plan to make this a yearly tradition. Join me?
Today is World Wide Knit in Public Day! I’ve usually got knitting out in the wild with me, but it felt especially required on today of all days.
I brought my current “purse project” with me to sound check before the Becket Players’ performance at the West Island Relay for Life event tonight. Didn’t get much knitting done but we did have a successful set up. We’ll be playing some great music for a great cause so if you’ll be around the Rive Boisée area come on by and check it out!
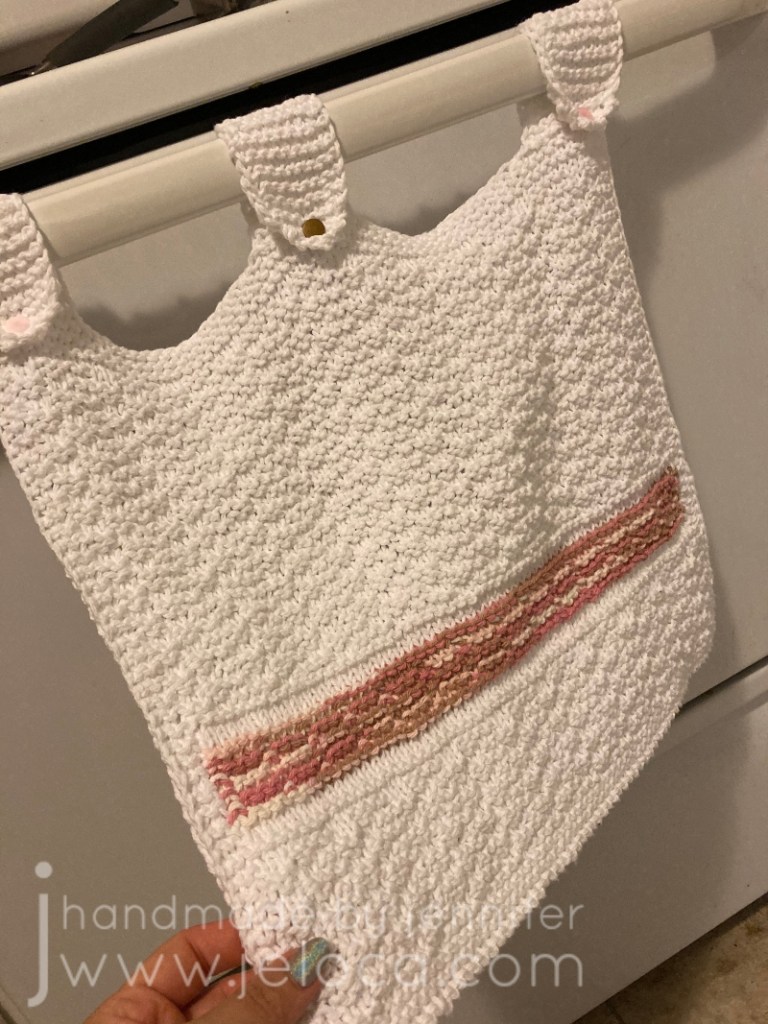
Happy Towel Day to all the hoopy froods out there! Here’s a free towel pattern (with custom mods) that you can work on while sipping your pan-galactic gargle blaster or some drink that is almost, but not quite, entirely unlike tea.
I first came across this pattern at Craft Time at work. (Yes- my job came with a craft club. YES- IT IS AWESOME). A few of my colleagues have knit this towel pattern, found for free online here (Ravely link here).
The version shared with me was the row-by-row Word Document version that is available here. (I’m not sure if/how it differs from Dixie’s original pattern above). I really liked the texture and stripe but am not a fan of the single hanging strap. In my experience there is too much strain on a single point and it winds up stretching over time until the towel is sagging lower than desired.
To fix this I reworked the final steps to have 3 hanging straps per towel. (You can also do 2 but I didn’t want the middle to sag either). I also worked the contrasting-texture stripe in intarsia for an inset colored band that used up scraps of cotton leftovers from previous projects.
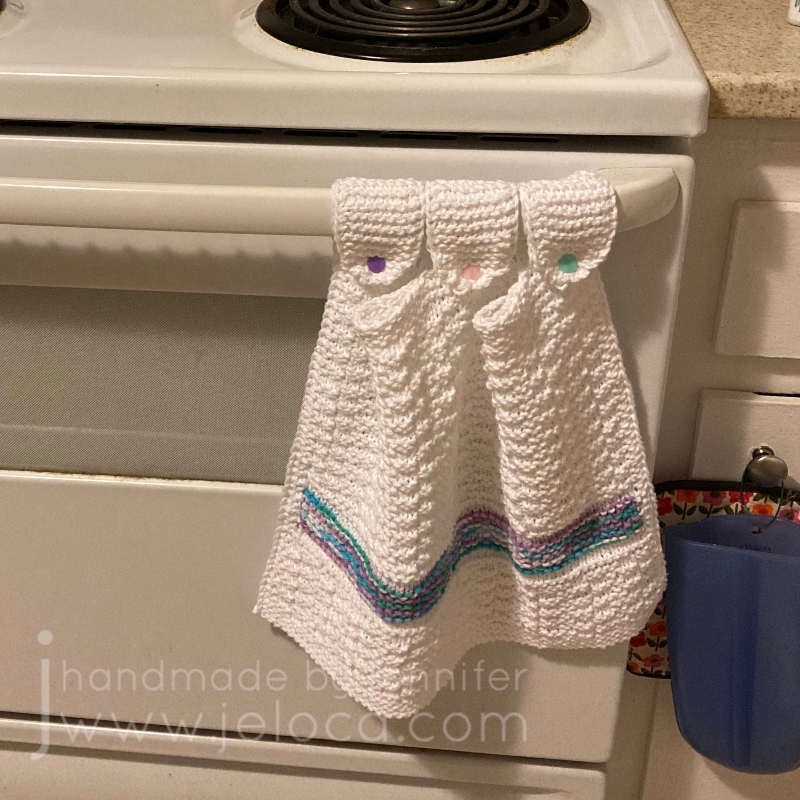
I’ve now made 4 of them (with matching washcloths using the leftovers) and have been consistently having 2 on my oven while the other 2 are in the wash, and swapping them out regularly.
The top two sets in the image below were made with Lily Sugar ‘N Cream cotton for the white and have buttons in colors that match the contrasting colors.
The two bottom sets were made with Bernat Handicrafter Cotton for the white and have plastic snaps in matching colors set through the natural holes in the knitting. (I’ve been using my snap kit paired with a set of assorted color snaps and have managed to always find the colors I need for my projects). They have held up wonderfully and none of the snaps nor buttons have come loose with time or multiple repeated washings.
Work the towel pattern as written through row 61, adding repeats if desired to make longer towels. (Note that my towels pictured have 7 extra repeats of rows 43-46)
Row 62: Slip 1st st as if to purl (yarn in back), k to last st, p1
Rows 63-67: rep row 62 for garter band at top of towel
Row 68: (hanging strips setup row) Slip 1st st aitp (yib), k9, BO 17, k10, BO 17, k9, p1. You will now have 3 sections of 10 live sts with 2 BO sections in between.
Row 69: (first hanging strip) slip 1st st aitp (yib), k to last st, p1
Rows 70-100: rep row 69
Row 101: SSK, k6, k2tog
Row 102: SSK, k4, k2tog
Row 103: SSK, k2, k2tog
Row 104: SSK, k2tog
Row 105: BO rem 2 sts
Cut yarn, leaving tail to weave in, then rejoin yarn to next set of 10 live sts.
Repeat rows 69-105 twice.
If you use snaps, wiggle the post of each side of the snap through an opening in a stitch before pressing. If using buttons, add a YO on row 101
This post may contain affiliate links. This means I might make a small commission on purchases made through the links, at no cost to you.
It’s World Creativity and Innovation Day so today’s post is a round-up of previous posts that I feel incorporated some outside-of-the-box thinking!
Ever need to transfer live stitches to waste yarn but can’t find your tapestry needle? No problem! Here’s an easy way to “knit” the live stitches over so you can keep working on your project.
If you find standard provisional cast-ons too difficult, here’s a super easy way to get your knitting started. No extra tools required!
Here’s a neat trick for making thin vines/ropes for use in decorating your cakes or cupcakes. They’re flexible, stretchable, and edible!
Here’s a hands-free way to hold your coloring books open!
Not getting the look you want with colored pencils in your adult coloring books? Here’s a great way to add more tooth to the paper.
Are your fondant balls/pearls coming out all different sizes? Here’s a super easy hack to get identical ones, every time!
Here’s a simple way to give a plain toy new life and make it work with your LEGO pieces.
Finally, for when you want to provide homemade, individual snacks, here’s a free & easy way to transport mini cupcakes by repurposing something you’ve probably already got on hand.
The last day of February is International Repetitive Strain Injury Awareness Day. Whether you knit, crochet, color, sew, cross stitch, embroider, or enjoy other crafty pastimes like diamond painting or LEGO building, you’ve likely done repetitive motions while in pursuit of your hobbies. I reached out to Alyssa Cape from Alyssa Massage for tips, tricks and helpful hints on ways to keep our mobility and flexibility healthy so we can continue to craft for many years to come.
Me: Hi Alyssa! Crafters (like myself) have a tendency to sit for long periods of time. We can be hunched over our desks during activities like coloring, sewing or diamond painting, or spend many hours cross-legged on the couch while knitting, crocheting or doing embroidery. Do you have any posture tips for long crafting sessions?
Alyssa: I’d put a small step stool or shoe box under the feet so the knees are slightly higher than the hips. This helps the small curve in your back from pinching and then your neck automatically goes forward. This way when your feet are slightly elevated, the pelvis is tilted back a bit so you can rest your back on lumbar support or pillow and your muscles relax.
I wouldn’t suggest sitting cross legged, however if you do, switch positions often. Get up to drink some water and to walk around to give your body a break.
There are multiple videos showing how to be comfortable while doing crafts like knitting or crocheting, like this one:
Me: Crafters can be prone to sore wrists, hands and fingers. Sometimes this pain can shoot up into the arm. Should we be doing exercises to keep our hands, wrists or arms in shape?
Alyssa: Here are 2 links, one shows 3 stretches for carpal tunnel and the other is self hand massaging. I do these myself as well! They can also be used for computer/ desk work.
I would recommend not to over-stretch as you can pull on the nerves. Nerves are like dental floss, they pass through the joints. They don’t stretch like muscle, tendons and ligaments. So if you feel tingling or burning in your fingers, stop!
Me: How hard should we be stretching? How often should we do them?
Alyssa: Do the stretches gently so you feel a slight stretch/ resistance and then stop. You’ll see mobility, flexibility and strength will come! Seeing a physiotherapist is also a good idea as they can provide you with multiple exercises and stretches and suggest the frequency of both as it’s different for each person.
Me: What should we do when in pain? Is that the time to stretch?
Alyssa: I don’t recommend when in pain to stretch and self massage. Rest hands as much as possible. There are thumb/ wrist/ arm braces that can be worn while crafting and at night as well to help stabilize the wrist during sleep.
Me: Do you recommend ice or heat?
Alyssa: You can alternate heat and cold compresses 15 minutes each. Heat allows for more blood flow which speeds up healing and cold reduces blood flow for swelling and inflammation.
Me: Any other tips?
Alyssa: A warm bath with 2 cups of Epsom salts really helps de-stress the muscles and then you can apply cold on the specific location. Drinking lots of water also helps with muscle soreness and tension!
That said- always consult with your doctor before doing any stretches or exercises to make sure there isn’t an underlying issue!!
About Alyssa:
Alyssa has been a registered & certified Massotherapist for over 12 years. She is professional, dynamic and intuitive in her practices and completely dedicated to your overall wellness. You can enjoy the benefits of preventative and ongoing massage therapy for your health and well-being by visiting her here.
Disclaimer: I reached out to Alyssa on my own and asked for her professional advice to share here today. There was no compensation given on either part in exchange.
As last mentioned in my plastic canvas wall hangings update, back in 2019 I’d given myself a pretty ambitious resolution: a challenge to turn 19 “works in progress” into “finished objects”. The first project added to my “19 WIP-to-FO Challenge” was my wall of Project Memory Jars
I’ve had a longstanding tradition of keeping a little length of yarn from each knitted and crocheted project I’ve made (later adding plastic canvas projects as my fiber hobbies crew). It started as keeping a bit of yarn in case there was need for repairs, but other than mending some knitted socks, it didn’t really wind up being a useful hoard item. That said, I have a strong visual memory and it was lovely to look back at the various yarns and remember the projects I’d made. The small colorful scraps would often bring up vivid memories of the gift recipient or technique I’d struggled with or laughter with crafty buddies in a workshop.
Originally these remnants were rolled into a ball and tied on one after another. It made them easy to store but impossible to see all the yarns on the inner layers.
My first “solution” was to make them into something tangible. They’d still have the same memory placeholder and all would be visible. Back in 2012 I eagerly cast on for a crochet granny square and made a few large blocks, intending to one day sew them into a large scrappy blanket.
This worked…fine actually. It was a chaotic mess and I knew I’d love the resulting blanket. The problem was that it would never be finished. I’d be storing a bag of 12″ granny squares for decades because even though I work on 50-100 projects yearly, the amount of triple-crochet stitches I’d be able to get from a few yards of leftover yarn was minimal.
So I thought about it and came up with a different idea. A silly little memory wall that makes no sense to anyone but me, but makes me smile and remember all the projects I put my time, effort, energy and care into.
My project memory jars
The shelves and brackets were extras from my previous job, so luckily I had those already on-hand.
Now that the wall was ready it was time to fill the jars. Which meant finally getting around to undoing the granny squares. Since it was the first item on my 19-for-19, it made sense to start with that one first.
1. FO Project Jars
What I said: I need to rip out all the individual lengths of yarn (1-10 yards long, each), match them up with what project they were from, and put the separated yarn into jars designated for each year.
What I did: basically exactly that. Only what took one sentence to type took hours to actually do. Frogging the granny squares was easy work, but before I could start I had to look at the center stitches of each block and figure out what project that was from, so I could put the blocks into a chronological order. (Luckily I take detailed project notes and my Ravelry page is mostly up to date!)
Once I’d figured out which blocks went where time-wise, I ripped them back and rolled them back into one big ball as I went, so the newest yarn was on the inside. Once everything was frogged I was able to start with the oldest scraps and begin to sort.
It was slow work but I moved through the yarn, cutting away the knots and putting a few inches of each yarn into the relevant year’s jar. Since the jars aren’t huge I only kept a bit of each and had a colorful pile of spaghetti left over at the end, which I later separated by length.
Anything that was a yard or more I rolled up and added to my mini ends bin, for use as waste yarn, stitch holders and row counters, or random craft projects.
I only undid knots for the cotton scraps because I had plans to re-use those. Every time I got to cotton yarn I added it to this growing ball, which I later turned into 2 scrappy dishcloths for my kitchen, using my own perfect, lay-flat, knitted diagonal garter dishcloth pattern.
I used about half of the scraps to make a smaller cloth with a hanging bit on the end, and then used up all the rest for the 2nd cloth. (The pattern is knit like a diamond so all you need to do to use up every bit of yarn is to find your center…work half the cloth until you hit the center point and then start the decreases to work the remaining half).
With all the jars filled and the extra bits used up, that officially marked the first of my 19 completed WIP-to-FO projects for my challenge, and now I have a silly bit of wall décor that confuses everyone who comes into my home office. I get to look at it and reminisce about all the people I’ve knit for and all the yarn-related creativity that moved between my fingers.
Here’s looking ahead to 2022 and all the projects it will bring.
Happy New Year!
This post may contain affiliate links. This means I might make a small commission on purchases made through the links, at no cost to you.
Have you ever done any charity knitting or crochet? There are so many ways to give back to your local community or to help others around the world. I’ve done a lot in the past…through the Montreal Knitting Guild, my local hospital or volunteer Facebook groups, my friends and I have made everything from Teddies for Tragedies to chemo caps to birds’ nests for Australia. Most recently the Warm Hands Knitting club from my local Federation CJA spent last winter making hats, scarves, and slippers to keep our elderly community warm.
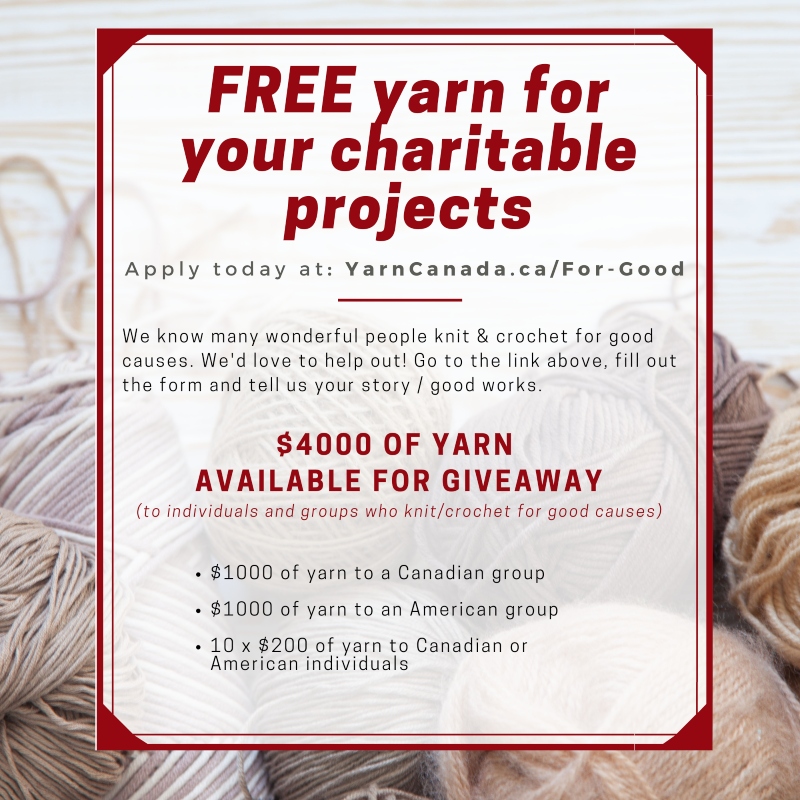
It feels great to give back and YarnCanada.ca is giving you the chance to get the yarn for your projects donated to you, free of charge.
Yes that’s right – they’re giving away yarn for FREE!
They’ve just started their 4th annual event of giving yarn to individuals and groups who knit or crochet for good causes!
In partnership with Bernat and Patons Yarn, they’re giving away $4000 (!!) worth of yarn to 12 different charitable individuals/groups. The hope is that the yarn goes to wherever it can do the most good.
And even better – this opportunity is open to both Canadians and Americans! Yes that’s right – they will ship the free yarn to the US!
To apply all you need to do is click the image above (or click here), fill in the form and tell them your story. Let them know what you will use the yarn for, what impact this or previous projects have had, or anything else important to your story. You can even attach photos to show them past charity projects you’ve done.
You have until January 13th 2022 to apply. Good luck!