

As we count down towards Halloween I’m going to share a few more quick and easy projects that can improve an existing costume or be a brand new one. Today’s post is the former.
A few years ago the boys got Ninja Halloween costumes from Walmart. They weren’t fans of the faux weapons that came with the outfits so we went to Spirit Halloween and picked up a sword for each of them.
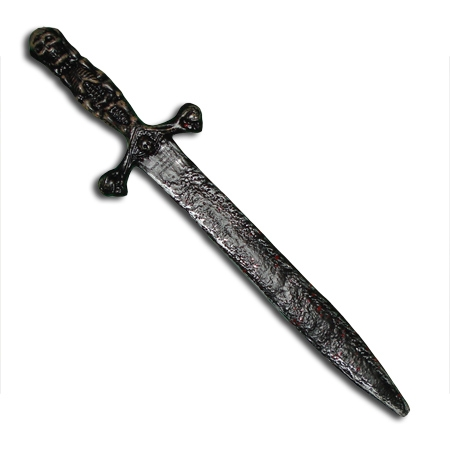
They both chose this one with a skeleton hilt. It probably belongs to a pirate, but they loved it, though they weren’t fans of the mixed color scheme. Henri wanted an all gold sword to match his Gold Ninja, and Jakob wanted an all silver look. I was quick to agree because differentiating between whose was whose would make my life as a parent easier.

Besides… how could I say “no” to these faces?*
The instructions are so easy I didn’t even take action photos! Using your gold and silver craft paint of choice, dab on paint over the raised areas. Leaving the grooves black will keep the depth and shadows. You can use a paintbrush, Q-Tip, even your finger, to dab on the paint. Wipe off any excess with a paper towel.

In this image I’ve repainted the bronzed skeleton silver to match the blade. I used DecoArt Crafter’s Acrylic from my local dollar store in Spun Gold and Silver Morning, but you can use any metallics that match your props. This gold and this silver are good options by the same brand.

You can see what a big difference it makes when comparing it to the original hilt! Luckily my silver matched the blade exactly but if it didn’t you could easily mix in some white or black to adjust the shade.

The second step was to do the same for Henri’s sword. Instead of a darker bronze like the hilt he wanted gold to match his costume. I brushed it on with a paint brush then quickly pounced on a crumpled paper towel to remove some of the paint and make sure the texture still showed through.

The last step for each was to fill in the skeletons’ eyes so they looked like gemstones. I used glitter nail polish for this but you can use anything sparkly you have on hand- glitter glue, nail polish, craft glue and loose glitter… even a tightly-packed glitter eyeshadow would work! Once dry, seal the eyes with clear nail polish or a protectant like Mod Podge. You can seal the rest of the sword if you like, with the same Mod Podge or a spray sealer, if you’re worried about the elements or long-term wear.

And that’s it! A few paint dabs to transform store-bought plastic swords into custom swords for my little Ninjas. So easy to do, and easy to adapt for any prop to add the color or wear you like. A touch of orange and green can add rust stains and oxidation, while dabbing on a few spots of red can imply the sword has seen more than the inside of a sheath.

You can find this year’s Halloween costume/prop/tip roundup here.

*Aside- it astounds me how much they’ve changed since 2017 when that pic was taken! This is the same duo in August 2021


Pingback: Annual Halloween Roundup |