Another year means another roundup of costume-related projects and tutorials! With almost 3 weeks left until Halloween you’ll still have plenty of time to make any of the projects below.
Back in January 2019 (!) I posted 19 projects I was determined to complete in 2019. Spoiler alert – I failed – but I have made significant progress on about half of the projects on the list. Inspired by the recent Masters of the Universe and Suicide Squad remakes, here’s the current progress on my trio of 80s cartoon girls.
What I said: I’ve never shown these before, except for the odd glimpse in the background of Instagram pics. I started this trio of plastic canvas portraits when I moved in August 2017. While I love how they look in black and white (and blue), I designed them to be in full color and I’d love to see them complete.
What I did: Quite a bit of progress!
I’d never shown them on the blog prior to that post, so here’s a look back at how they got to where they are now.
I’d moved in 2017 and was really excited to be able to fill my space with all the crafty, nerdy little things that make me who I am.
Every shelf and table has some item that references my varied interests, and I’ve even used some previous projects as home décor – see the Minecraft heads from my tutorials peeping from above the kids’ desk, along with an as-yet-unshown secret project hidden among the books – so I was really excited to fill a blank wall space in my dining room with a handmade project.
First I purchased three of the largest plastic canvas sheets I could find. When looking for inspiration for what to stitch on them I really didn’t need to look very far. There are Archie comics in nearly every room in my house, thanks to my kids enjoying them as much as I do. In addition to the coloring book from my last post, I’ve drawn Betty on the blog here before, and Henri had drawn Archie a few years back. (He was even an Archie comics character for Hallowe’en last year, and I’ll be sharing that project here in October.) So clearly, Betty Cooper would be one of my cartoon trio.
Initially I drafted up Betty, Archie and Veronica, and planned out a triptych of the three of them, but the more I thought about it the more I realized it was Betty specifically that I like, and that I didn’t care if I saw Archie and Veronica daily, so I scrapped them and looked around for more inspo. As soon as I had the freedom to look beyond Riverdale I knew Harley Quinn HAD to be one of them. I’ve adored her for decades, and she’s featured in assorted places around my house, including in two different spots on this one shelving unit:
Finally, it wasn’t hard to decide on Teela as my third girl. I grew up watching He-Man and playing with the toy sets along with my younger brothers. I don’t know if it’s that she’s a strong, independant woman or if it was because she often wore a cobra headpiece and had a snake staff, and I’ve always adored snakes… but either way she had to be the one to complete my cartoon trio. I’ve shared Teela and a portion of my 80s toy collection on the blog before, and they’ve now found a home in a cabinet along with other childhood relics:
The hard part done, the next step was to create charts for each character. Instead of doing it the easy way and importing reference images into a stitch software, I decided to go the hard route and chart them myself in Excel. I found reference images for each character, adjusted the Excel cells to be square and marked off an area with the same stitch count as my total canvas size. From there it was just a matter of redrawing each girl, pixel-art style, and tweaking the design until they looked right. I’d originally planned to use continental stitch to save time, but quickly realized the angles would be skewed and that cross-stitch would be best, using one stitch for every pixel/cell in my chart.
I ordered a bunch of yarn from Knit Pics, then got started.
Here you can see the initial stages. I didn’t want to have to refer to the charts throughout the entire stitching process so decided to start with the black outlines first, so I could then later fill them in, coloring-book-style. Plus I didn’t know how long they would take to complete into full color and wanted to be able to hang them on the wall in the meantime. Considering I started these in 2017 and I’m typing this post in 2021, I’m glad I had that foresight!!
After finishing most of Betty I moved on to chart HQ next. I bet you’re wondering why I left Betty mostly done instead of finishing the rest of her border? Took me a moment to remember too lol but it’s because I left myself things to work on that didn’t require concentration, so when I had more time I would work on HQ and follow my charts, and when I had the kids with me or was watching something that required more focus I could work on Betty’s border that didn’t require much thought or any chart reference. Basically it was the cross-stitch equivalent of having knitting or crochet projects of varying difficulty levels.
Once the outlining was all done I worked on each of their eyes, as I thought it would look better on the wall, and truthfully HQ was a bit creepy without them. Then, while I still had the blue out, I added Betty’s shirt. Her top was red in my reference image but blue is my favorite color so I swapped it out, plus I liked having a color that was in each of the 3 images, to help tie them together. The middle pic above is the one posted on the blog back in 2019, and where they sat for basically most of the last 3 years. At some point I filled in their mouths and got started on Betty’s skin, and that’s where I’d stopped and moved on to other projects.
Eventually I started working on them again. I’d always had it in mind to work on equal parts of each, so as they hung on the wall they’d look similar in completion. First Betty had the slow progress on her face and neck…
…and then this past summer Teela got the same treatment, using stash yarn so she wouldn’t have the exact same skin tone as Betty’s.
Technically I should have done Harley’s face next, for them to all match, but these sheets are large and get folded up against my body or resting under my arm as I work. Since Harley’s face is white, and clearly a focal point of the image, I decided to hold it off for last so it wouldn’t get dirty or faded, and work on her costume instead.
At that point I was on a roll! The new Netflix Masters of the Universe had just come out, and it was kinda cool to start working on Teela’s tiara while watching the premiere. In fact, I got so into it that I kept watching until I found I’d binged the whole first season!
Spoiler-free take: ignore the men complaining about the show. It’s awesome to see the old gang again, even Stinkor! (Man I can still remember the smell of that toy!) I love the focus on Teela and magic vs tech. Made me think about Skylanders and my girl Sprocket – guess I’m always drawn to my tech girls! Also, as a big Buffy fan, with Sarah Michelle Gellar as the voice of Teela, it’s fantastic to hear Buffy kicking butt again. ♥
This is where the girls are now. I’ll be working on HQ’s white bib and pompom next, to complete her outfit, and that will put me into the home stretch with only 2 sections left on each girl. At the end I’ll have to do one run of border around each one, as the edges are currently unfinished, and then finally attach rings for hanging them properly, as I’m currently holding them to the wall with thumbtacks.
I know it’s not conventional wall art for an adult woman, but I love them.
Halloween is in two weeks, so you know what that means- time to start scrambling for (not quite) last-minute costume ideas! To help out, here are some costume-related projects from my archives that are short enough to get done before the 31st. 🙂
Update: This tutorial is now also available as a downloadable PDF here. More details at bottom of this post.
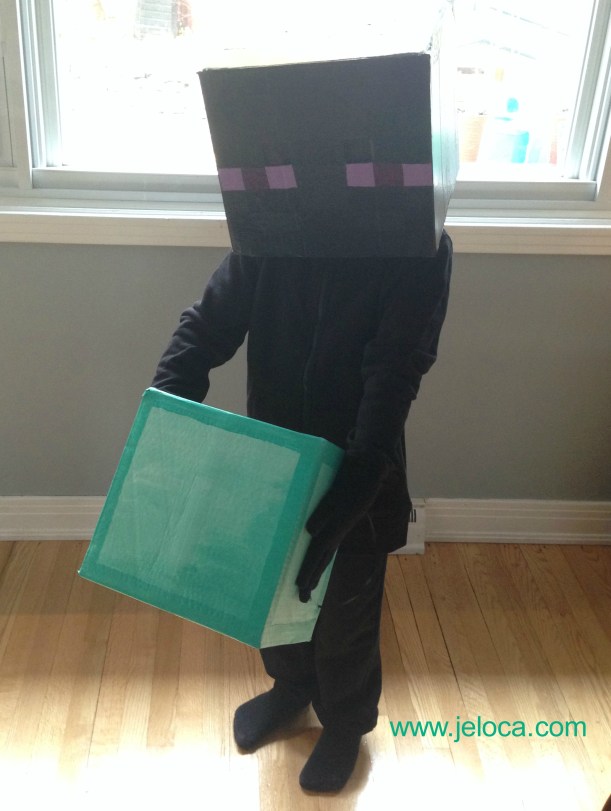
Some of you may, like me, be suddenly realizing there are only ten days left until Halloween. No stress – there’s still plenty of time to make a Minecraft Enderman costume, complete with a matching diamond block trick-or-treat basket!
For Halloween last year Jakob wanted to be a Minecraft Enderman. For reference, these are the tall, spindly black figures who appear out of nowhere to steal your blocks. They’re neutral mobs who can teleport and will only attack when provoked by looking them in the eyes (which, to be honest, is kind of hard to avoid, seeing as how they’re the most vivid part of the things!).
In the game Enderman can’t actually pick up diamond blocks, but that’s what Jakob wanted anyways. To be an Enderman carrying a diamond block.
I was fresh off my “Skylanders Sprocket wrench pulling double-duty as secret purse” achievement so I thought if he’s gonna be schlepping a box around anyways… why not make it useful and turn it into his trick-or-treat basket? So that’s what I did. 🙂
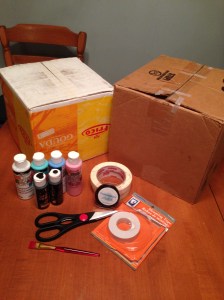
The first thing to do was assemble all materials. In total the two parts of the costume required the following:
2 boxes (one large enough to fit over the wearer’s head, & a second box to be the treat basket)
Everything but the boxes and scissors came from my local dollar store, making this not only an easy costume to make, but a really inexpensive one too.
ENDERMAN HEAD
Top row:
Assemble all materials
Cut off the flaps on the side of the box you want for the opening. Tape down all other flaps securely, cover all seams and use tape to cover the cut edges at the bottom.
Measure out your grid on all 5 remaining sides of the box.
Middle row:
Cut out the eye holes.
Cover the cut edges of the eye holes with masking tape, then paint the Enderman’s eyes with two different shades of purple.
Paint the rest of the Enderman’s head. I followed a actual chart pattern using shades of charcoal and black but you can just as easily paint the whole rest of the head solid black.
Bottom row:
Optional: tape a piece of sheer black fabric over the eye holes so they don’t show from the outside but can still be seen through on the inside
Enjoy your new Enderman head!
Wear with black sweatpants, a black sweatshirt, and black stretchy gloves. Add a diamond block trick-or-treat basket for a complete Halloween costume!
(optional- seal the paint with spray sealant, more on that below)
DIAMOND BLOCK TRICK-OR-TREAT BASKET
Top row:
Assemble all materials
Cut off the flaps on the side of the box you want for the opening. Tape down all other flaps securely, cover all seams on the outside and cover the cut edges at the bottom.
Mix aqua and white together to get a few different light aqua shades.
Middle row:
Following an in-game image of a diamond block, paint one side in shades of aqua, making one lower corner darker for shading. Repeat on the other 4 sides.
Add a border to all 5 sides using the aqua paint at its full strength.
Paint the inside of the box black.
If you prefer a more accurate version, I have compiled this tutorial into a downloadable PDF (linked at the bottom of the post) which includes full-color screen-accurate charts for both the Enderman and the 16×16 grid of the diamond block, including the hex codes for each color so you can color-match accurately.
Bottom row:
Make 2 holes in 2 opposing sides. Knot ribbon through the holes to act as handles.
Enjoy your diamond block trick-or-treat basket!
Add to the Enderman head for a complete Halloween costume.
One optional step that I did but is not obligatory at all is to spray the painted sides with a sealant. I didn’t know what the weather would be like on Halloween and didn’t want to worry about rain causing the paint to run.
*Update in 2020: the heads are still going strong! The boys outgrew them of course, but we keep them as nerdy shelf displays and they look exactly the same as they did back when I made them.
And that’s it! The longest part in making these costume pieces is waiting for the paint to dry. 🙂
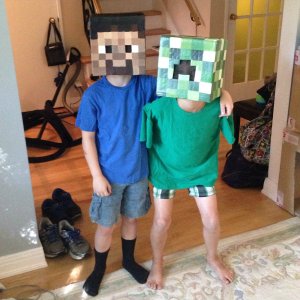
(PS: Looking for the big guy’s little buddies? Check out my tutorial for Minecraft Steve and Creeper heads here!)
I hope this post shows you how easy and fast it can be to make your own Minecraft Steve and Creeper heads!
You can adapt the tutorial to make any Minecraft mob, and I’ve got an assortment compiled for you here.
As mentioned above, if you’d like an easy-to-print-and-save PDF version of this tutorial, I have made it available on Etsy here. The 12-page PDF includes full instructions with additional details, clear photographs, as well as game-accurate full-color numbered charts for all 5 sides of both the Enderman’s head and the diamond block, along with their hex codes for perfect color matching.
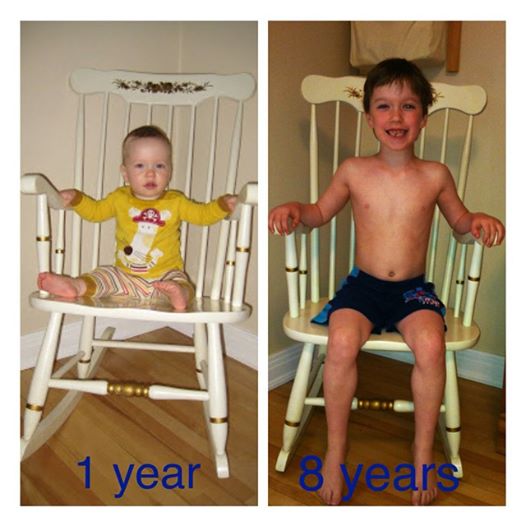
I know. I don’t know where the time went. I’ve been blogging since before he was born, and now he’s 8 and such a good kid. Of course he wants a Minecraft-themed party too, but, um, I haven’t begun to do anything for it yet, so instead I’ll finish showing you what I’d done for Henri’s Minecraft party, back in January.
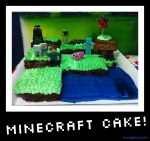
To be honest, it’s not my favorite-looking cake. I’m a lot prouder of the loot bags and the toppers than I am of how the cake turned out. But- and here’s the important part- HE loved it. (And it was delicious).
I started out by baking 2 9×11 chocolate cakes. My kids prefer vanilla but going for the ‘dirt’ look I knew it would be easier on me to have a chocolate base in case the chocolate icing didn’t fully cover everything. I also filled an 8×8 greased dish with blue Jell-O prepared as Jigglers, and set that to chill.
When I sat down to work on it I didn’t have a plan. I knew I’d baked enough cake to stack layers, similar to the grass in the forest biomes. (Yes, I play LOL). I knew I had enough chocolate icing to slap it all together. I knew I had a finite amount of “water cubes”, so I started with that.
I turned the Jell-O out onto a mat and squared the edges, then cut it into 2″ sections. Then, after leveling the cakes, I used toothpicks to divide the cakes into 2″ sections as well. Then I began to cut. I held my platter over the cake to figure out how much to cut off to make it fit along at least 2 sides, and then cut away enough of the ‘front’ to fit the water ‘cubes’. Then I cut the upper layers, holding and testing until I had something that had as little waste as possible while still looking as ‘unboring’ as I could manage. (Technical term).
I stuck the upper layers down with icing then dirty iced the whole thing before sticking it in the fridge a few minutes to set up. Then I gave all the sides a thicker coating of chocolate icing. The ‘grass’ was piped with a star tip and not-completely-mixed vanilla icing and green icing gels, so there’s a slight variation in the color. I was hoping that the shading, along with the star tip, would help it look ‘pixellated’ like the game. I also piped some areas, leaving others blank, so as I ran low on icing and mixed in more, the colors would be different even within those areas. (Best seen in the overhead view, above).
I placed the Jell-O in only AFTER the cake had chilled for a few hours. I was afraid one would leech water out of the other and that I’d end up with a gooey, dissolving mess. Then, at the party, I stuck the figures on just before serving, including tucking Mr. Squid under a few water cubes.
Even though I wasn’t as crazy about it, the kids loved it, the birthday boy loved it, and there were enough fondant figures so everyone who wanted one got one to eat. (Apologies to their parents for any resulting sugar-rush).The great thing about Minecraft is that it’s SUPPOSED to look boxy – it’s all squares! So whether it’s by shaping a cake, cutting rice krispy treats into cubes, or cutting brownie squares and topping them with green-tinted shredded coconut, there are a ton of ways you can make an easily-recognizable Minecraft cake.
I wasn’t sure what I was going to do for the cake itself, but I knew I wanted to have a bunch of Minecraft mobs scattered about. I didn’t feel like having to prepare enough fondant in the assorted colors, nor did I really want to start sculpting, so I turned to my current favorite technique- hand-painted toppers.
I’ve used this on a number of cakes, which I’ll link to once I post them. With one exception, Nick’s Star Wars cookies, I always painted with thinned-down color gels, and had great results… (especially the Jake & the Neverland Pirates figures) but there were some flaws. The painted pieces too much longer to dry, making it more difficult to do finishing touches, the “paint” was often very wet, which could cause the fondant base to soften and/or get slimy, and sometimes the piece would crack as it dried (like in the Charlie & Lola cake).
For some reason I switched techniques when making Sean’s last Goalie cake, I tossed in some icing sugar to give my white coloring some opaqueness, and then I recalled painting with icing on the Star Wars cookies. It was a duh moment, and I’ve stuck with that ever since. It’s easier (for me), faster (for me), and it dries quicker, so I can add eyes or other details MUCH faster. Plus, because icing is thicker than water, I can play with layers and build up dimensions, if I want, similar to decorating cookies with royal icing.
My first step is to cut out the topper shapes from fondant (or if you’re painting on cookies, bake them and let them cool until there is no heat left inside, I’d wait overnight if possible). You can use cookie cutters or freehand it, I am not above tracing. I’d printed out the mobs (it stands for mobiles for those of you who don’t play… all the moving characters in the game) I wanted to use and scaled them all to the rough sizes I wanted.
I rolled out some scrap teal fondant left over from Jakob’s 2nd Adventure Time cake, the B-MO & Gunter cakes. The thickness of the fondant depends on the intended use of the piece. In my case I needed something thick enough to stand up, and also be thicker than a toothpick. For something that will be laying flat on a cake you can go thinner, and if it was meant to be a plaque that would stand upright or lean at a diagonal I’d go thicker, so there would be a solid base.
Lay the paper templates out on the fondant and cut it up into manageable sizes, then use a knife or your preferred cutter to trace around the templates. In the pic above you can see I’ve almost finished cutting out Diamond Steve. Keep your fondant scraps and store them properly for next time.
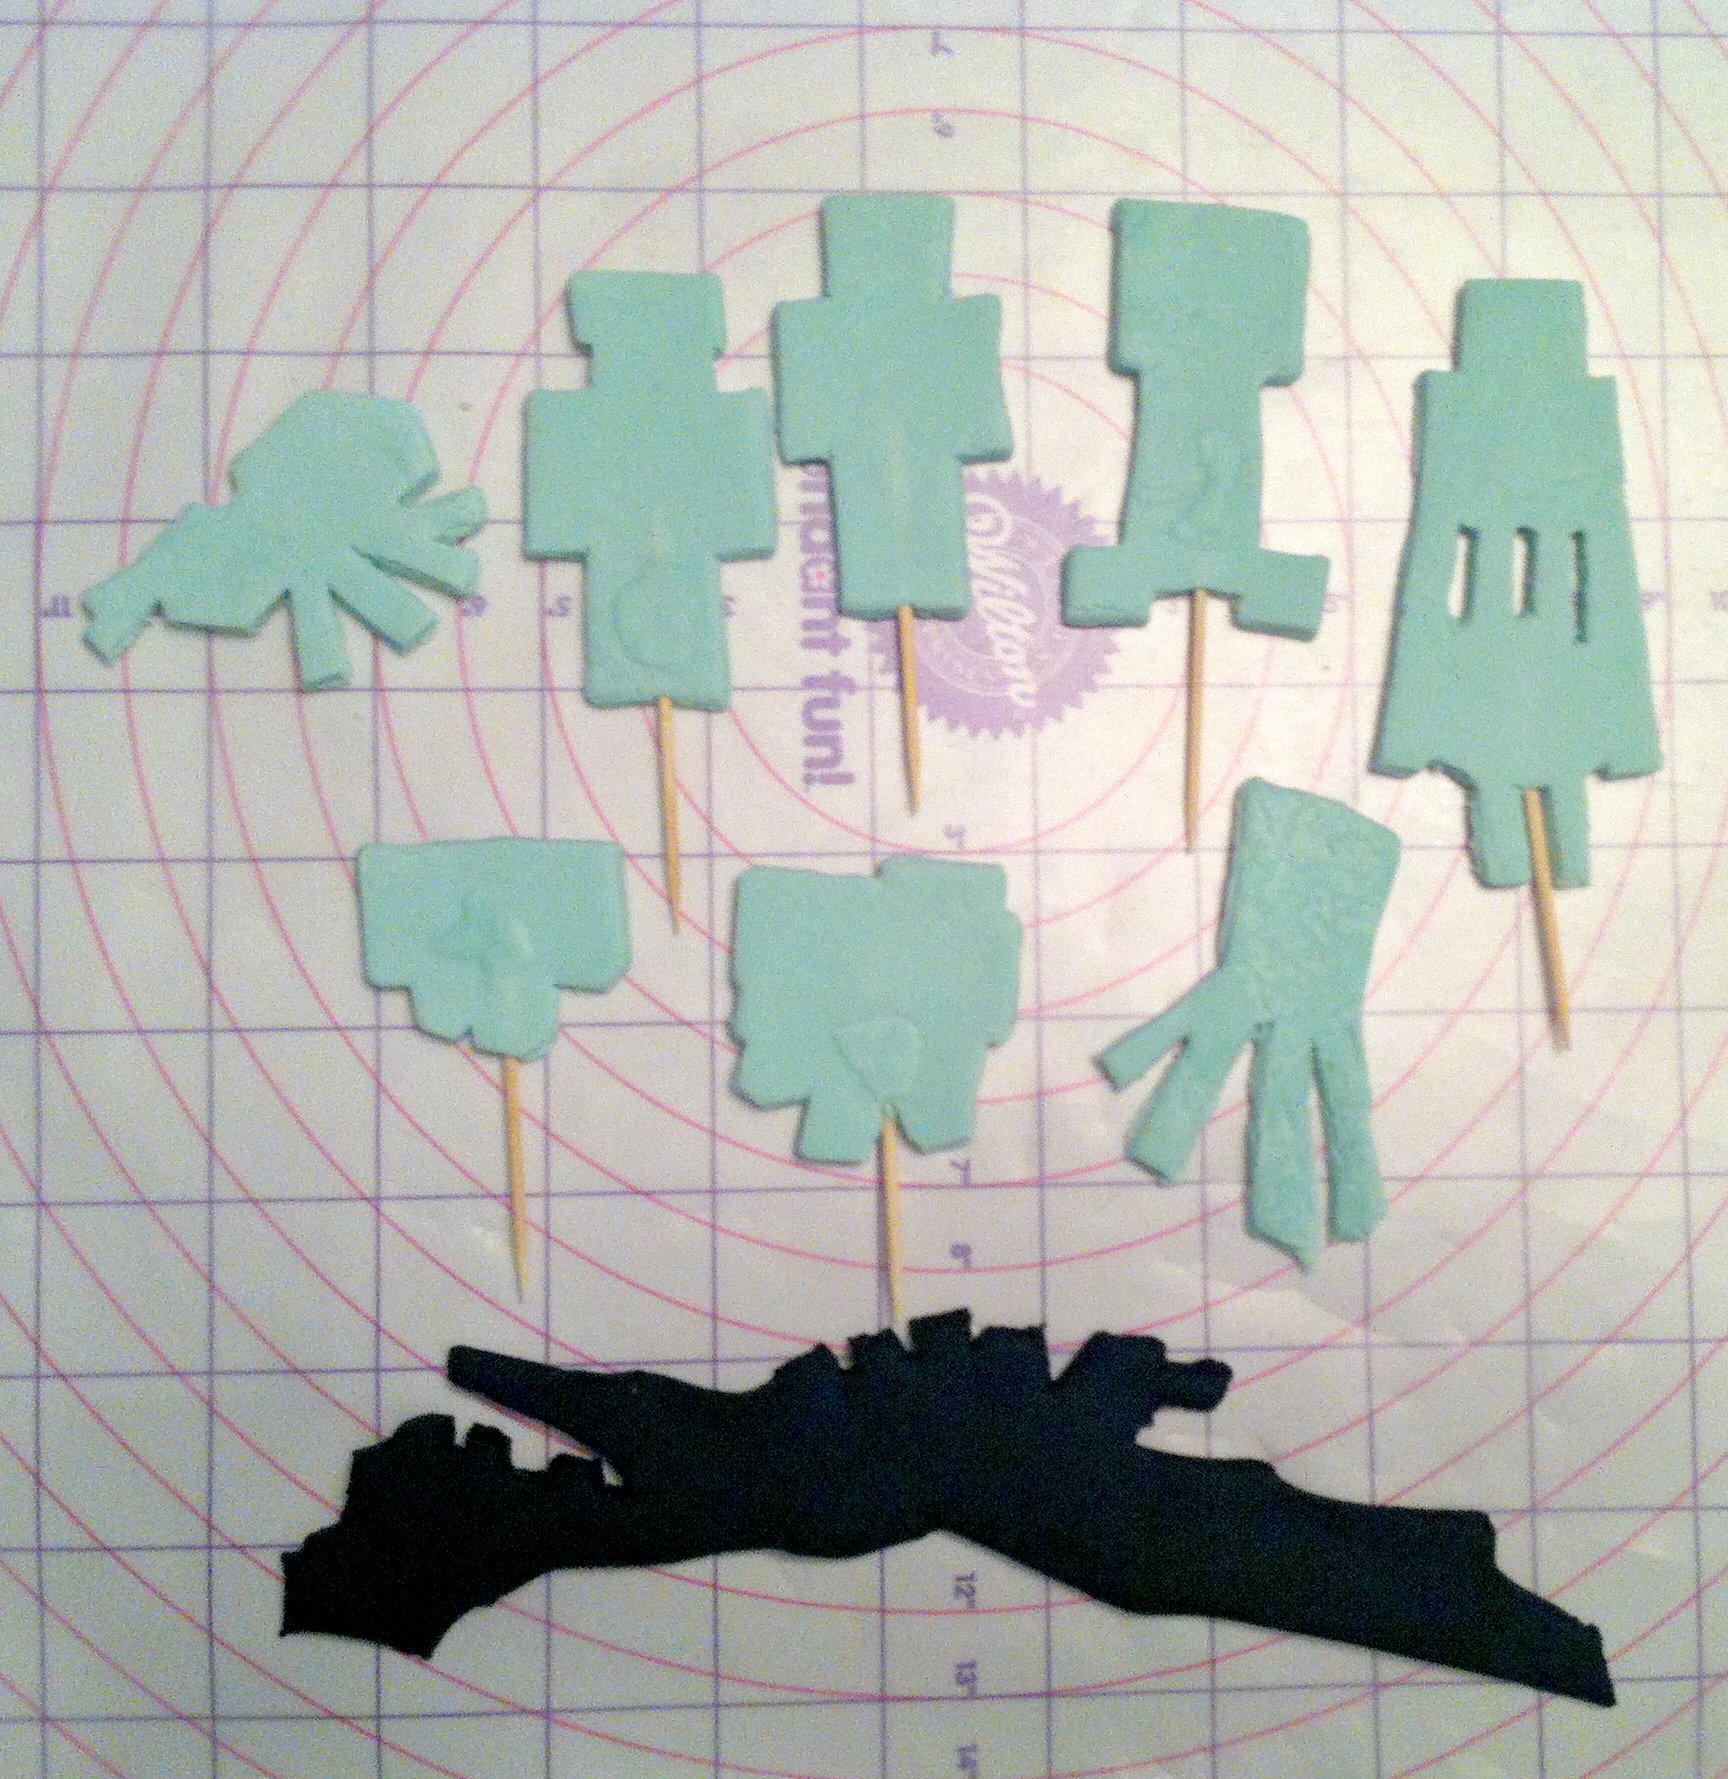
Here are all the mobs cut out. I slid a toothpick into most of them while the fondant was still soft, and reinforced where necessary with more fondant. I wasn’t worried about the smaller fondant blobs showing because I knew I’d be painting with icing, which is thick, but if you’re painting with straight color gels you’d rather have a flat surface.
The next step is to let the pieces dry. I mean really dry. At least a day. Two is better. The longer you can wait, the more in-advance you can get them cut and set them aside, the better, because fondant will wilt and melt when it gets wet, and there is a lot of moisture in the icing. Also, larger pieces will take longer to dry through than smaller ones. The Jake & the Neverland Pirates gang were dry enough to paint after 2 days left exposed to the air. I hadn’t given myself enough time with the Charlie & Lola toppers, they were so big and still flexible after 2 days. Or maybe my house was more humid at the time. Either way, they ended up spending 24 hours in a bed of icing sugar to draw out as much moisture as I could get.
Once the pieces are firm, not floppy, they’re ready to paint.
I didn’t take any in-progress painting shots. You can use whatever you like as a palette as long as it’s food-safe and not used for any non-food purpose. (I also keep my cake stuff away from peanut and nut products because I make 3 nut-free cakes every year). I mostly paint with toothpicks but I have some food-only paint brushes I’ll use from time to time, and I use repurposed apple sauce cups for extra water and icing sugar. There are a bunch of tricks I use, like using a medicine dropper to add water to thin the icing if necessary vs a spoon, so I have more control over how much I add, and using those sewing pins (in the tracing pic) to help mark out any details on the fondant cut-outs, in addition to “drawing” on them before I paint.
These are the non-hostiles- a sheep, Diamond Steve, regular Steve and a pig. I chose some of my kids’ favorite characters, leaving out only the Mooshroom because I knew I already had plenty to cover the cake. Plus if I’d kept going they also wanted an ocelot, and a dog, and a bat, and a spider jockey, and zombies, and…
I didn’t plan too far ahead on each piece, though I do try to work in a way that makes sense. Whenever possible I work backwards in color, to minimize icing waste. For example, I didn’t want to have to re-mix black, so planned to work with it last, and do any details if necessary then, at the end. I started with the Steves, and mixed up their skin color (though now they look like Zombie Steves), then added a touch more brown and used the same icing for the sheep’s face and the lighter areas on his hooves. A touch more brown and it was used for the darker areas of the hooves and Steve’s hair.
The same blue used for Steve was also used for the squid’s face, then darkened for his body, and eventually darkened further for the black.
Just like when painting with real paints, when I mix colors I don’t always blend it all in, so if I’m adding more pink to do some shading on the pig, I only mix it into half of the icing, so I still have some light pink to play with.
The hostile mobs- the Ender Dragon, a spider, a creeper, an Enderman and a squid (who probably isn’t technically ‘hostile’). I don’t know why the Enderman’s eyes don’t look purple, I think the light washed it out ‘cus in person they did. The splotches on the spider were made by mixing in some white while the black was still wet, and most of the details on the Ender Dragon were dry-brushed for shading, since I didn’t have to actually paint him black to start.
The final touch was to make a wooden sign and then the gang was all done, ready to set aside somewhere safe to dry (and avoid being eaten) until the party.