It’s World Creativity and Innovation Day so today’s post is a round-up of previous posts that I feel incorporated some outside-of-the-box thinking!
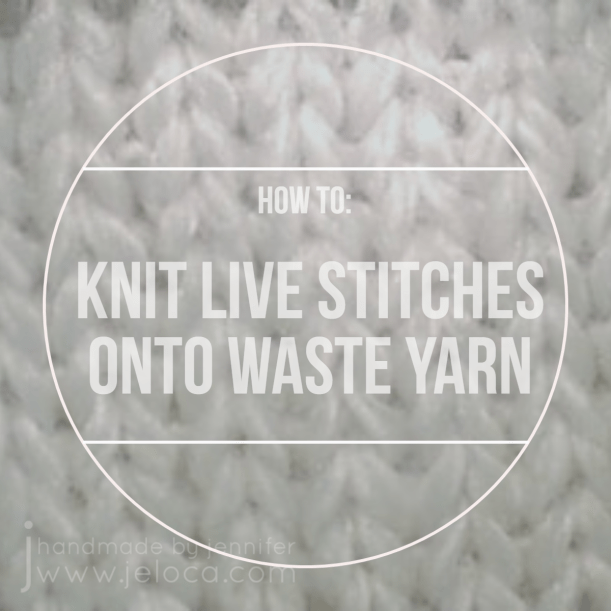
Ever need to transfer live stitches to waste yarn but can’t find your tapestry needle? No problem! Here’s an easy way to “knit” the live stitches over so you can keep working on your project.
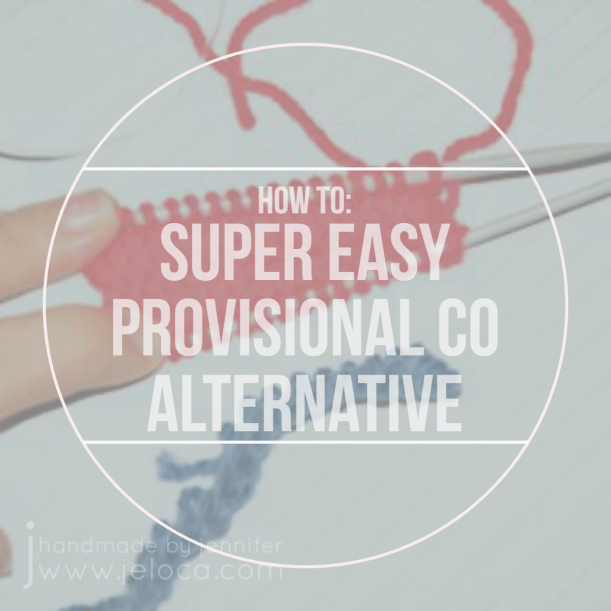
If you find standard provisional cast-ons too difficult, here’s a super easy way to get your knitting started. No extra tools required!
Here’s a neat trick for making thin vines/ropes for use in decorating your cakes or cupcakes. They’re flexible, stretchable, and edible!
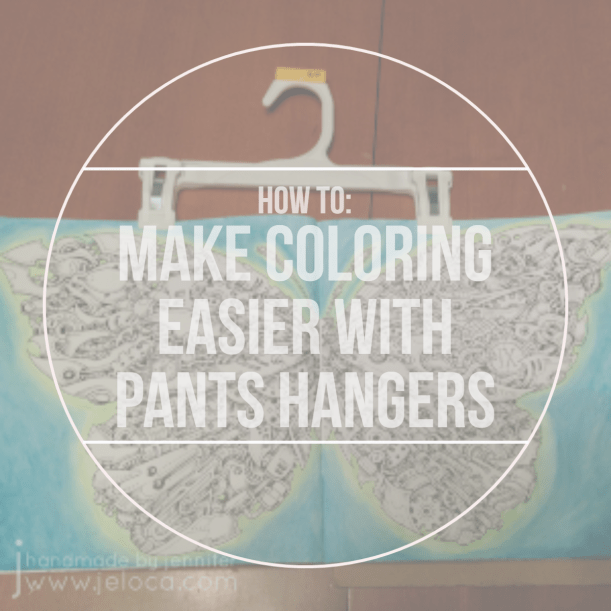
Here’s a hands-free way to hold your coloring books open!
Not getting the look you want with colored pencils in your adult coloring books? Here’s a great way to add more tooth to the paper.
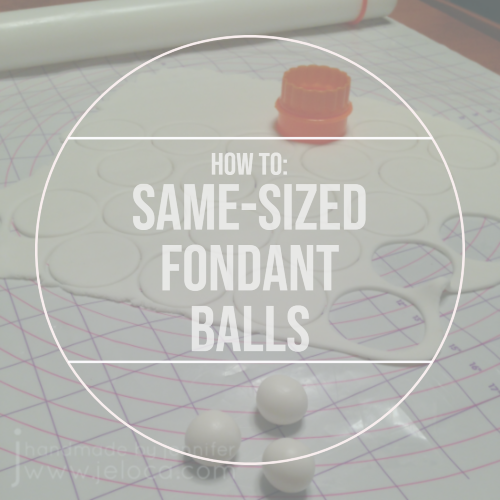
Are your fondant balls/pearls coming out all different sizes? Here’s a super easy hack to get identical ones, every time!
Here’s a simple way to give a plain toy new life and make it work with your LEGO pieces.
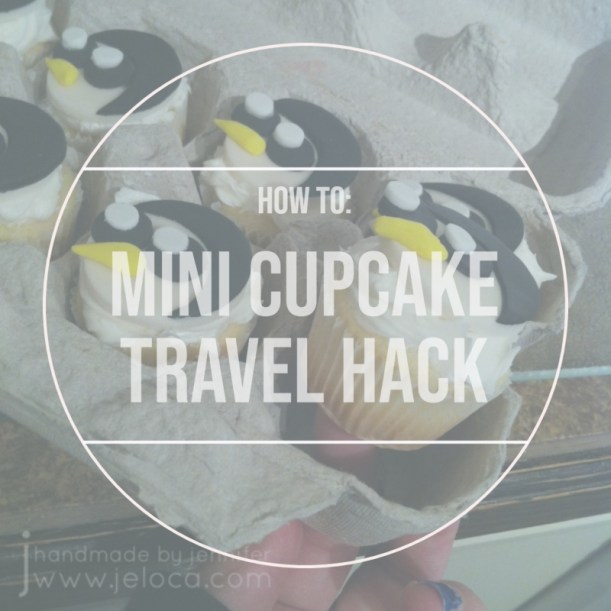
Finally, for when you want to provide homemade, individual snacks, here’s a free & easy way to transport mini cupcakes by repurposing something you’ve probably already got on hand.
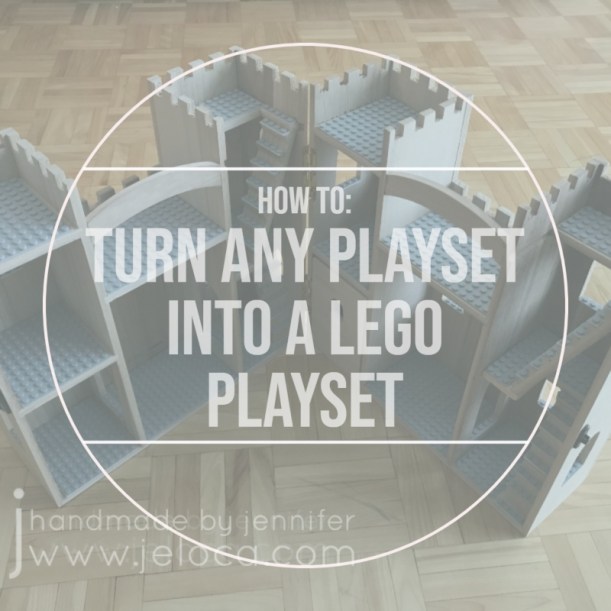
It’s International LEGO Day today, so to celebrate here’s a really easy DIY you can do to turn any dollhouse/playset with flat surfaces into a LEGO playset!
That’s right – with just a few simple household tools we’re going to turn this:
into this:
What you’ll need:
dollhouse/playset with flat surfaces
I used this unfinished ArtMinds Wood Castle Dollhouse from Michael’s, (US / Can)
damp sponge or paper towels (to wipe off sanding dust)
For this project I used this ArtMinds Wood Castle (linked above).
Jakob had received this castle as a Hanukkah gift from my parents and I wanted to surprise him by turning it into a LEGO playset since he never really played with action figures but was completely obsessed with LEGO.
If working with an unfinished product like this castle, you’ll want to sand it before you begin. Some of the edges are unfinished or rough and could cause splinters. The wood is soft, though, so it’s easy work to bring it outside and give the exposed edges and surfaces a quick sanding. This will also help make sure your surfaces are flat.
If using something like a plastic play house, you will want to sand any of the surfaces where you plan to attach LEGO plates to help ensure they stick well.
After sanding, wipe all surfaces with a damp sponge or paper towel. You want to remove the fine sanding dust so it doesn’t interfere with your glue later.
We’ll be using a craft knife to score the LEGO baseplate and LEGO bricks to give us a good edge to cut and snap from.
In my case, every surface in the castle had the same depth, so I wanted to start by cutting my baseplate into strips that were the proper depth. Then later I could cut them into individual pieces for each section.
Set the corner of your baseplate into the corner of one of your sections and use a separate LEGO brick to mark the edge line. We don’t want to cut the studs in half so if necessary err for pieces that are slightly too short instead of ones that would stick out beyond the edge of your playset.
Once you know your depth, use additional LEGO bricks to continue the line all the way from edge to edge. Do not use flat bricks for this as the thickness of the standard bricks will help keep your blade from slipping. Be sure to press the bricks securely as any gaps where they’re not properly seated onto the plate could allow your blade to catch.
NOTE: use a cutting mat or cut on a protective surface. I use my table as a craft table so I cut directly on it. Don’t be like me!
Run the blade of your craft knife down the edge of bricks once or twice, then snap your baseplate away from the cut edge. If you use enough pressure when scoring it should snap cleanly.
If the baseplate doesn’t snap clean off, you can slide your craft knife down the cut edge and the two pieces will separate easily.
Here’s a video for those who find it easier to see the process:
As you can see, with proper pressure the piece will snap cleanly off with a neat, straight edge.
Now that you have strips that are the proper depth, use the same brick-marking method to mark off the width for each section you want to cover. Do each section one-at-a-time.
Here’s the first baseplate flooring cut to size and inserted in place.
NOTE: They are not glued into place. I merely like to place them where they’ll go to help me keep track of what I have left to do, and to make it easy to know where they will go later.
Repeat this process until you have cut baseplates for every surface you’d like to cover. I did all floor surfaces, as well as the stairs. After this image was taken I also cut pieces for the windowsills and doorframes.
When all your pieces are cut, lightly roughen the backs of each with your sandpaper. You want to remove the plastic’s shine and roughen up the surface to help the glue better adhere. At this point you can plug in your glue gun so it can start warming up. I like to keep my glue gun on a silicone mat or scrap tin foil to protect my surface from glue drips.
Apply glue to the back of each piece and hold in place for a moment, pressing firmly. Once all the sections were glued I set it aside overnight so the glue could harden fully.
That’s all it takes! One baseplate was enough to cover all the surfaces shown plus have some extra left over.
The studs on the floors and stairs allow your Minifigs to be posed nearly anywhere, and the ones on the windowsills are really cute to put flowers and plants. Plus you can build off the plates, creating LEGO furniture for your playset.
I couldn’t resist staging a few characters for Jakob to find when he got home from school.
The “renovation” was a big hit, and while it only took a bit of time over one evening to do, it has held up since 2018 and is still going strong. I hope you enjoy this DIY and that it gives you inspiration on how to convert existing toys that might not be getting much love into ones that will be played with for many more years.
Happy International LEGO Day!
This post may contain affiliate links. This means I might make a small commission on purchases made through the links, at no cost to you.
Back in January 2019 (!) I posted 19 projects I was determined to complete in 2019. Spoiler alert – I failed – but I have made significant progress on about half of the projects on the list. Inspired by the recent Masters of the Universe and Suicide Squad remakes, here’s the current progress on my trio of 80s cartoon girls.
What I said: I’ve never shown these before, except for the odd glimpse in the background of Instagram pics. I started this trio of plastic canvas portraits when I moved in August 2017. While I love how they look in black and white (and blue), I designed them to be in full color and I’d love to see them complete.
What I did: Quite a bit of progress!
I’d never shown them on the blog prior to that post, so here’s a look back at how they got to where they are now.
I’d moved in 2017 and was really excited to be able to fill my space with all the crafty, nerdy little things that make me who I am.
Every shelf and table has some item that references my varied interests, and I’ve even used some previous projects as home décor – see the Minecraft heads from my tutorials peeping from above the kids’ desk, along with an as-yet-unshown secret project hidden among the books – so I was really excited to fill a blank wall space in my dining room with a handmade project.
First I purchased three of the largest plastic canvas sheets I could find. When looking for inspiration for what to stitch on them I really didn’t need to look very far. There are Archie comics in nearly every room in my house, thanks to my kids enjoying them as much as I do. In addition to the coloring book from my last post, I’ve drawn Betty on the blog here before, and Henri had drawn Archie a few years back. (He was even an Archie comics character for Hallowe’en last year, and I’ll be sharing that project here in October.) So clearly, Betty Cooper would be one of my cartoon trio.
Initially I drafted up Betty, Archie and Veronica, and planned out a triptych of the three of them, but the more I thought about it the more I realized it was Betty specifically that I like, and that I didn’t care if I saw Archie and Veronica daily, so I scrapped them and looked around for more inspo. As soon as I had the freedom to look beyond Riverdale I knew Harley Quinn HAD to be one of them. I’ve adored her for decades, and she’s featured in assorted places around my house, including in two different spots on this one shelving unit:
Finally, it wasn’t hard to decide on Teela as my third girl. I grew up watching He-Man and playing with the toy sets along with my younger brothers. I don’t know if it’s that she’s a strong, independant woman or if it was because she often wore a cobra headpiece and had a snake staff, and I’ve always adored snakes… but either way she had to be the one to complete my cartoon trio. I’ve shared Teela and a portion of my 80s toy collection on the blog before, and they’ve now found a home in a cabinet along with other childhood relics:
The hard part done, the next step was to create charts for each character. Instead of doing it the easy way and importing reference images into a stitch software, I decided to go the hard route and chart them myself in Excel. I found reference images for each character, adjusted the Excel cells to be square and marked off an area with the same stitch count as my total canvas size. From there it was just a matter of redrawing each girl, pixel-art style, and tweaking the design until they looked right. I’d originally planned to use continental stitch to save time, but quickly realized the angles would be skewed and that cross-stitch would be best, using one stitch for every pixel/cell in my chart.
I ordered a bunch of yarn from Knit Pics, then got started.
Here you can see the initial stages. I didn’t want to have to refer to the charts throughout the entire stitching process so decided to start with the black outlines first, so I could then later fill them in, coloring-book-style. Plus I didn’t know how long they would take to complete into full color and wanted to be able to hang them on the wall in the meantime. Considering I started these in 2017 and I’m typing this post in 2021, I’m glad I had that foresight!!
After finishing most of Betty I moved on to chart HQ next. I bet you’re wondering why I left Betty mostly done instead of finishing the rest of her border? Took me a moment to remember too lol but it’s because I left myself things to work on that didn’t require concentration, so when I had more time I would work on HQ and follow my charts, and when I had the kids with me or was watching something that required more focus I could work on Betty’s border that didn’t require much thought or any chart reference. Basically it was the cross-stitch equivalent of having knitting or crochet projects of varying difficulty levels.
Once the outlining was all done I worked on each of their eyes, as I thought it would look better on the wall, and truthfully HQ was a bit creepy without them. Then, while I still had the blue out, I added Betty’s shirt. Her top was red in my reference image but blue is my favorite color so I swapped it out, plus I liked having a color that was in each of the 3 images, to help tie them together. The middle pic above is the one posted on the blog back in 2019, and where they sat for basically most of the last 3 years. At some point I filled in their mouths and got started on Betty’s skin, and that’s where I’d stopped and moved on to other projects.
Eventually I started working on them again. I’d always had it in mind to work on equal parts of each, so as they hung on the wall they’d look similar in completion. First Betty had the slow progress on her face and neck…
…and then this past summer Teela got the same treatment, using stash yarn so she wouldn’t have the exact same skin tone as Betty’s.
Technically I should have done Harley’s face next, for them to all match, but these sheets are large and get folded up against my body or resting under my arm as I work. Since Harley’s face is white, and clearly a focal point of the image, I decided to hold it off for last so it wouldn’t get dirty or faded, and work on her costume instead.
At that point I was on a roll! The new Netflix Masters of the Universe had just come out, and it was kinda cool to start working on Teela’s tiara while watching the premiere. In fact, I got so into it that I kept watching until I found I’d binged the whole first season!
Spoiler-free take: ignore the men complaining about the show. It’s awesome to see the old gang again, even Stinkor! (Man I can still remember the smell of that toy!) I love the focus on Teela and magic vs tech. Made me think about Skylanders and my girl Sprocket – guess I’m always drawn to my tech girls! Also, as a big Buffy fan, with Sarah Michelle Gellar as the voice of Teela, it’s fantastic to hear Buffy kicking butt again. ♥
This is where the girls are now. I’ll be working on HQ’s white bib and pompom next, to complete her outfit, and that will put me into the home stretch with only 2 sections left on each girl. At the end I’ll have to do one run of border around each one, as the edges are currently unfinished, and then finally attach rings for hanging them properly, as I’m currently holding them to the wall with thumbtacks.
I know it’s not conventional wall art for an adult woman, but I love them.
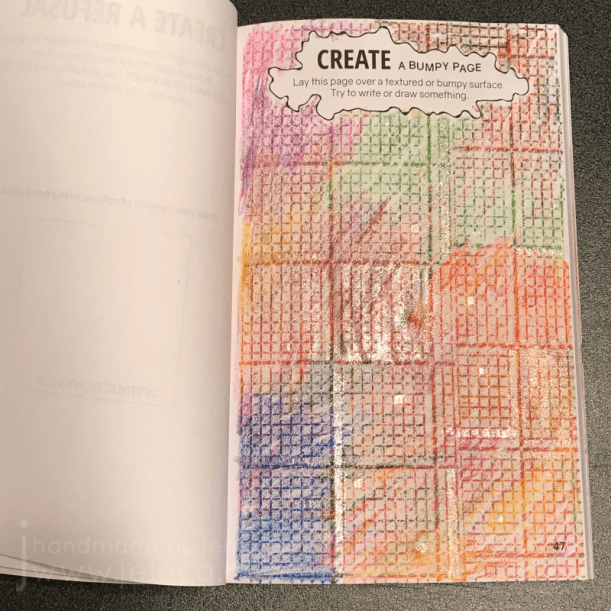
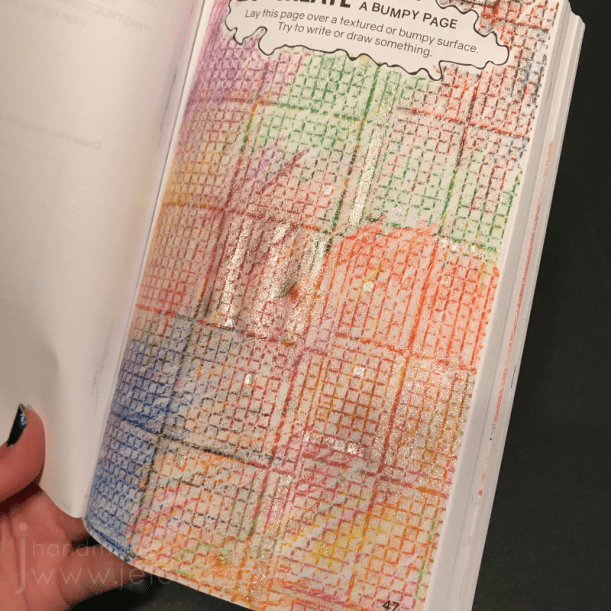
There’s been a lot going on behind the scenes, but all I have to currently show for it is this month’s Create This Book Challenge, yet again coming in just under the wire.
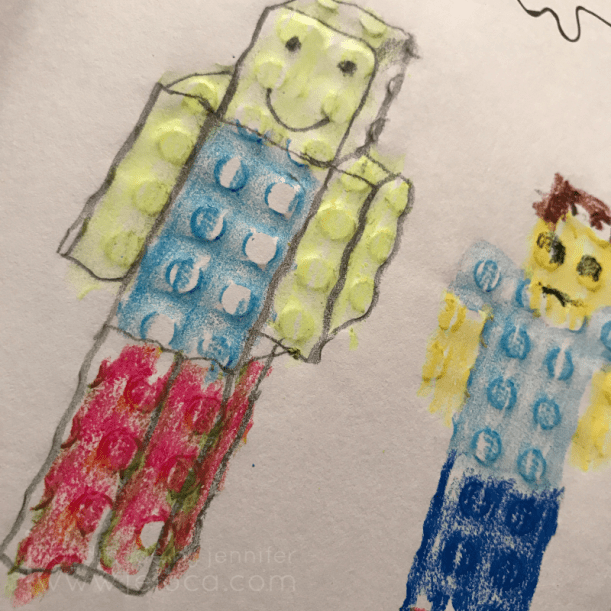
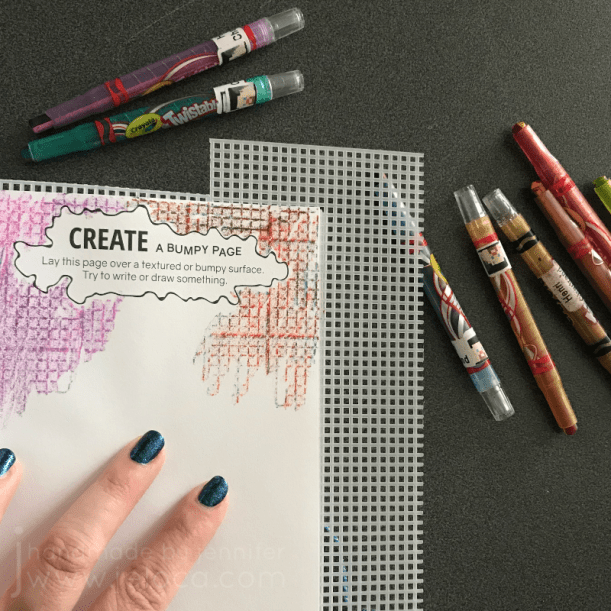
Every month in 2020 my 11-year-old son Henri and I will be completing a challenge from Moriah Elizabeth‘s Create This Book (vol 1). For January he choose the “create an empty setting” on page 163, for February it was the “food” page on page 208, March was the “something different” challenge on page 207, April was the “folds” page on page 23, (links to all previous posts in this series below), and for May he picked the “bumpy” page on page 47 (of which I completely forgot to take a “before” blank picture).
We both wound up completing the page with similar themes of fun and playfulness. In Henri’s case it meant mixing his two current obsessions – LEGO and Minecraft. He used a LEGO plate for the texture and then drew two LEGO minifigs, one regular and one in a Minecraft-style.
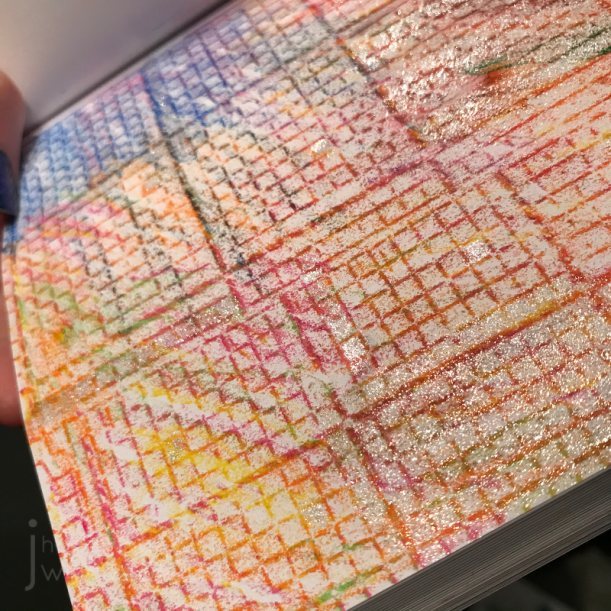
This close-up really shows the texture in the page. I thought using a LEGO plate was a great idea!
I’ve been planning a bunch of plastic canvas projects and decided to use some scrap strips as my texture base. While the page does say to “try to write or draw something” I’ve been working on detailed items lately and was really craving the opportunity to color and not really think. I decided to relax and have fun with this page and simply rub the texture of my own current obsession.
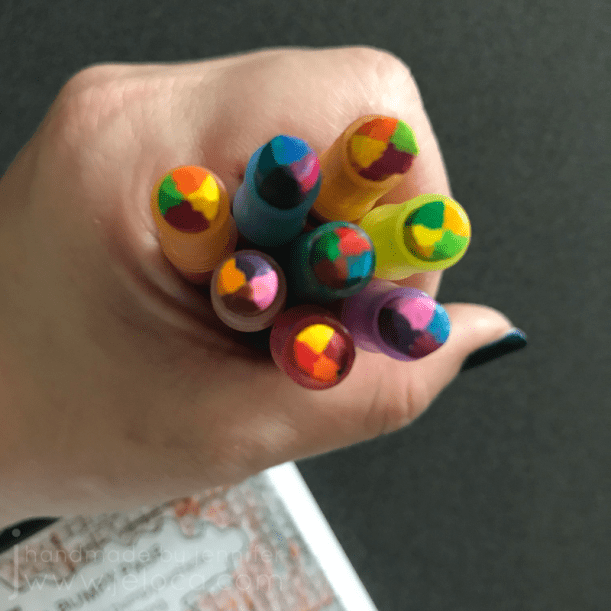
Once that idea took hold, there was no alternative but to grab some crayons and really let my inner kid come out to scribble-scrabble. I dove into the crayon bag and came out with these Crayola Fun Effects Mini Twistables – multicolor twist-up no-sharpen crayons .
This wasn’t a page that took long, nor does it look like anything special beyond a riot of irregular color… but it was FUN. For the first time in a few months I didn’t have to think about what I was doing or plan the next few steps. I just sat and scribbled and watched the bright colors mix and blend and honestly? It felt really good.
A few days later I watching one of Moriah’s current videos within which she responds to a question about saving art supplies to combat the feeling of wasting them by using them up, and was reminded of these glitter pens I own. The white one is gold glitter in a clear base by Wink of Stella, and the black one is silver glitter in a clear base by Spectrum Noir, and while I love them (and ADORE glitter) I just… never use them. I never consider a project “worthy” or “appropriate”.
So I glitter-bombed my bumpy page.
I always forget how pressure-sensitive these glitter brushes can be, so accidentally saturated that middle block with the silver. That whole square was covered with silver glitter, the one to its lower right was covered with gold, and then I randomly did a few stripes and individual squares of each color around the page.
I was trying to limit how moisture-warped the page got so rather than let it dry naturally I broke out my heat tool and quickly dried the page. (Amazon seems out of the identical model but this one looks the same and is inexpensive).
Unfortunately because this is regular paper it did stay warped even once tried, but it didn’t tear through so I’m not mad about it. (Possibly the wax from the crayons protected the paper from actually ripping, though, so be cautious using very watery media in this book.)
Here’s the final page. Nothing polished, nothing professional or fancy. I didn’t even follow the instructions.
It’s chaotic and crazy and loud and sparkly, but it makes me smile. 🙂
It’s a sparkly rainbow, how could it not? 😀
Complete list of 2020 Create This Book Challenge pages: