Jakob turned 16 (!!) this week, so I thought it was high time to share another one of his past birthday cakes.
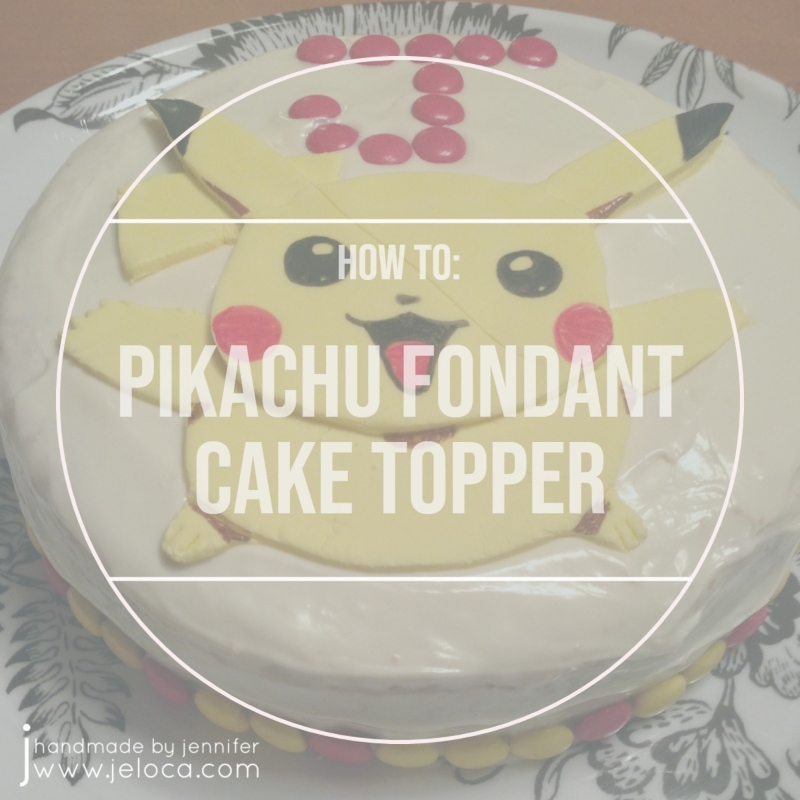
Made for his 9th birthday, this Pikachu fondant cake topper is a quick and easy DIY that you can copy on your own cakes, cupcakes or cookies.
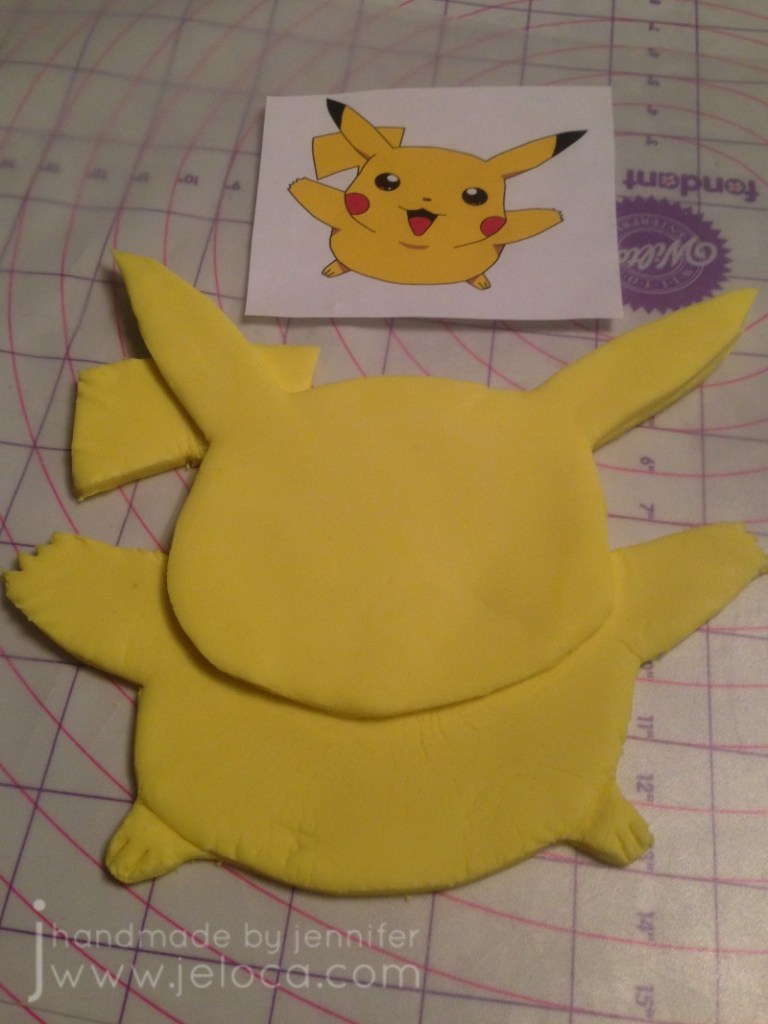
As always when making a topper for a known character I like to start with a template. After measuring my cake pan I resize an image of the character to fit and then print it out. For cartoon characters like Pikachu you can search for coloring pages to find black and white outline-based images.
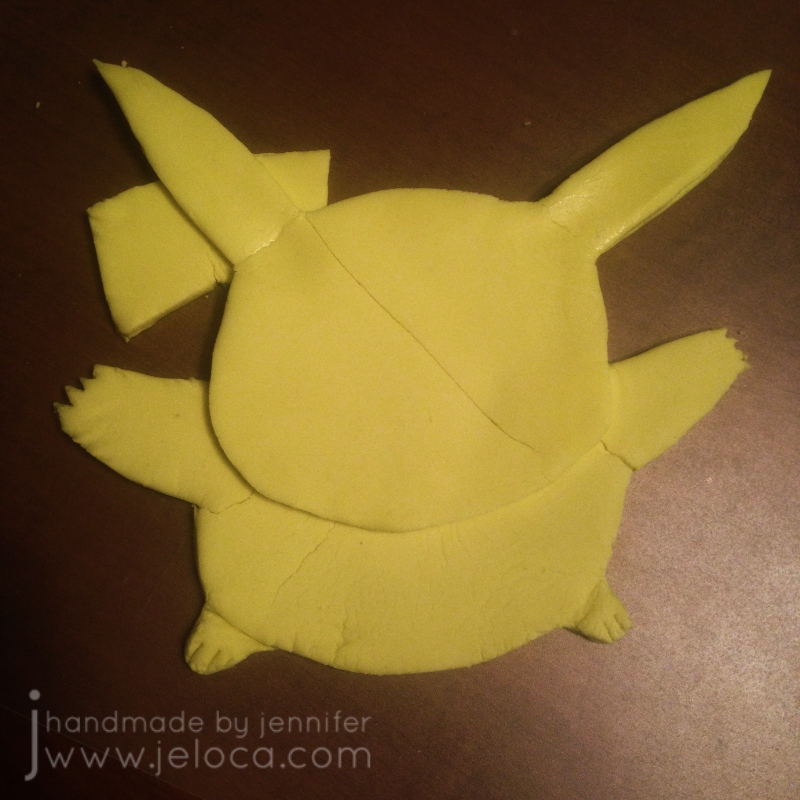
For this cake I tinted some white fondant with yellow Americolor gel colors to get Pikachu’s signature yellow shade. I rolled it out on a silicon measuring mat using a fondant roller with the medium levels as I wanted to make sure I had enough fondant for a two-layer figure. I usually use the thickest level for fondant toppers and I would suggest that you prep enough fondant so you can do the same – as you’ve probably noticed above my topper was a little thin and wound up cracking.
I started by cutting out the base layer of the full image by tracing the entire template with a fondant cutter.
Then I cut out Pikachu’s head alone so I could layer the pieces similar to a 3D paper decoupage technique.
Carefully stack the head cut out on top of the fondant base using a little bit of water to secure it in place.
I always like to prepare my toppers in advance so they can dry out for a few days before I begin coloring/painting on them. As mentioned above I’d made Pikachu a bit too thin and he wound up cracking across his face and left arm.
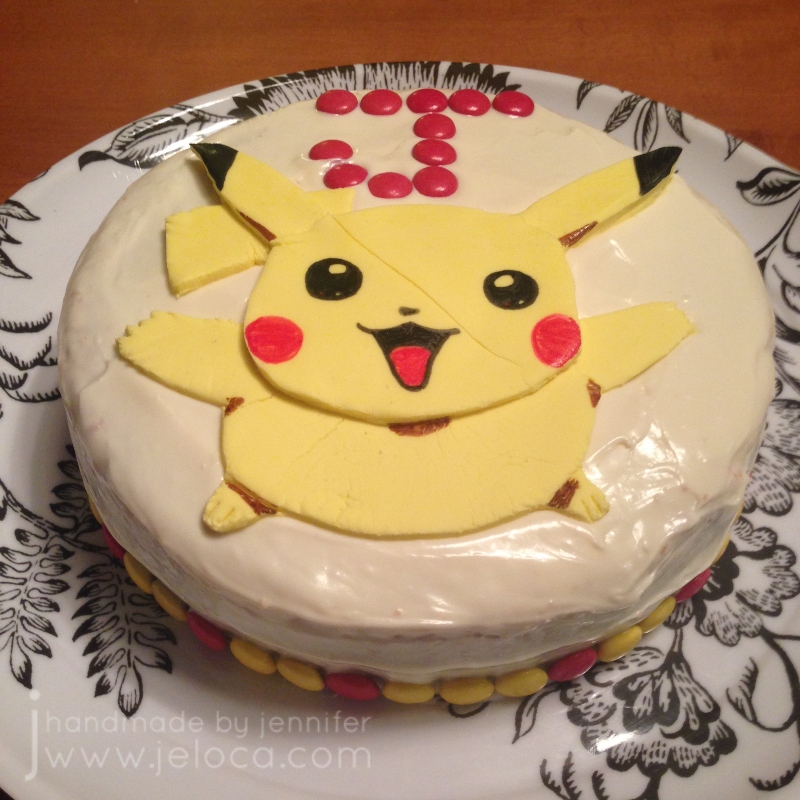
I used edible ink markers to draw on Pikachu’s face and details. I’m glad I had a reference image as I was about to color the tip of his tail black. Have you heard of that Mandela effect? It totally got me!
While the fondant was drying I baked a vanilla cake and prepped it as per my “how to bake a cake and prep it for decorating” post. To finish things off I decorated the base with yellow and red Smarties to match the colors of the topper.
This was a really quick and easy DIY that you can use to make your own Pikachu treats!
This post may contain affiliate links. This means I might make a small commission on purchases made through the links, at no cost to you.
Another year means another roundup of costume-related projects and tutorials! With almost 3 weeks left until Halloween you’ll still have plenty of time to make any of the projects below.
Halloween is in two weeks, so you know what that means- time to start scrambling for (not quite) last-minute costume ideas! To help out, here are some costume-related projects from my archives that are short enough to get done before the 31st. 🙂
All month Henri has been telling me he planned to wear his Creeper costume for Halloween this year. He’s brought it up many times and even pulled the head out of the dress-up bin in our den to try it on and be sure it still fit. And then this past Friday his class went to circus school for the day and he came home like this:
and then told me he wanted to be Pikachu for Halloween.
This guy:
Um. Okay. We had nothing at home I could use to make a physical costume, but I knew we’d be going to Walmart the next day so I told him if we found a set of face paint, I’d buy it and would paint his face like Pikachu.
Saturday we were at Walmart and found some inexpensive face paint, but then he started complaining that he didn’t have Pikachu’s ears. I thought about it a little and told him we’d be going to the dollar store next; if he found a headband that fit him I’d buy some yellow felt and make him some ears. He found a girl’s one with a plastic bow attached, but it was yellow and fit him, and they had a pack of felt with yellow in it so we brought it home and I set it aside.
Yesterday I was at my parents’ house for dinner and Henri made a comment about being excited to wear his Pikachu costume to school the next day and I realized – oh crap, Halloween is tomorrow!
Ahem. Forgive me, my brain has been a little foggy lately.
We got the kids home and to bed and then I sat down and made Henri’s costume. It was quick, and it was easy, and it used either dollar store supplies or things you may already have on hand, so if you’re stuck for a last-minute costume, here’s how you can whip this up in plenty of time to go trick or treating tonight. Grab a friend who’s dressed like a Pokemon Trainer and you can be your very own live Pokemon Go team. 🙂
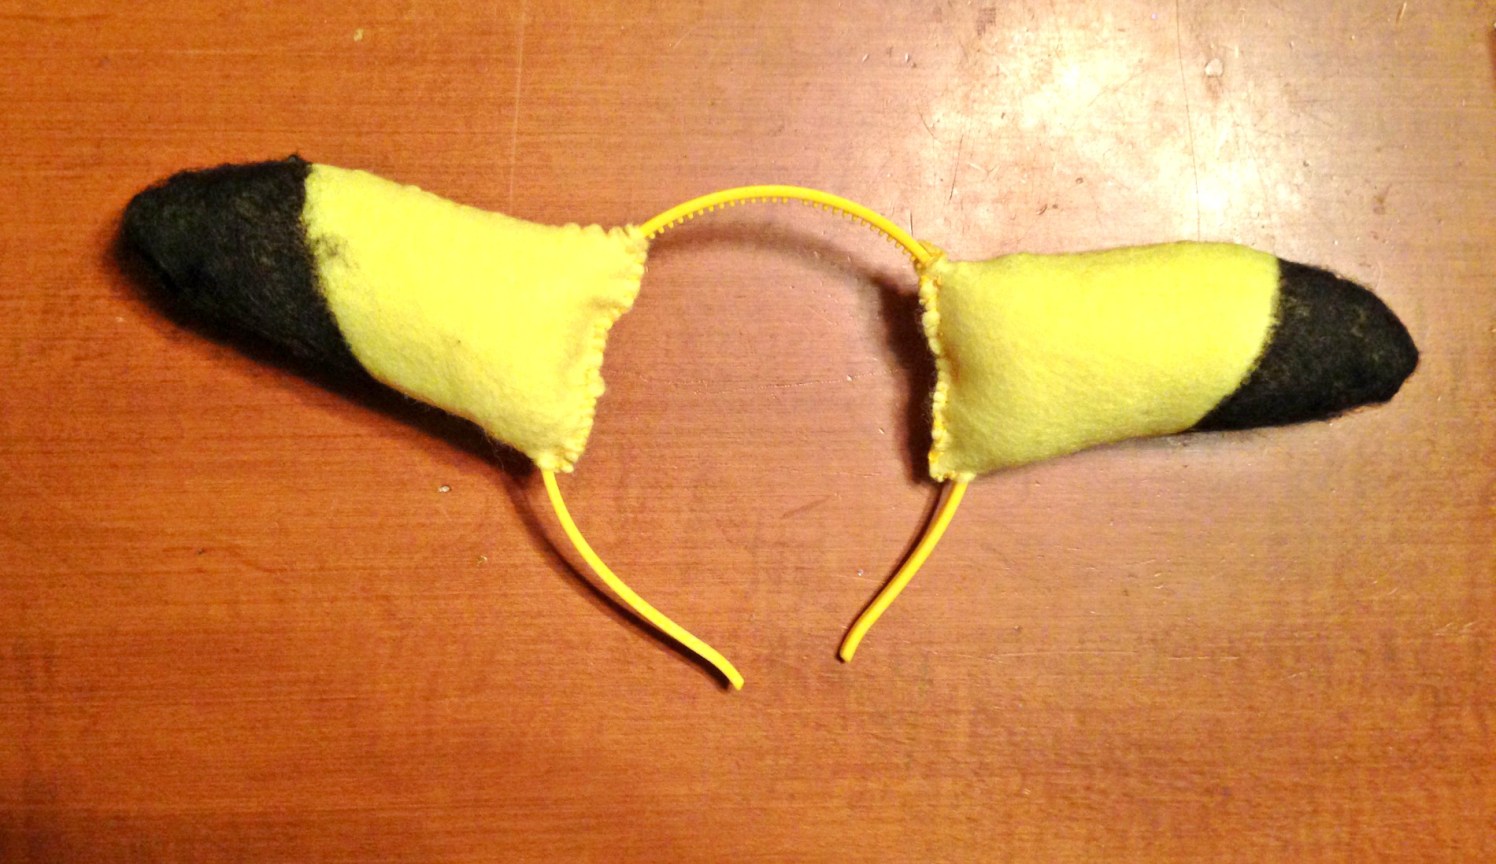
The first thing I did was carefully cut off the plastic flower on the head band, then I put it on Henri’s head and marked off where the ears should sit. As it happens we have a large Pikachu doll that was the right size to trace for the ear shape, but you can just freehand it.
After the ear shape was drawn, I drew a second line about a quarter inch outside it, for a seam allowance. Then I cut out the shape through all 4 layers of yellow felt.
The next step is to sew the ears together. I used yellow thread and a simple running stitch since the ears wouldn’t really be under any tension. I left the open end edges unsewn for about a quarter inch so I had enough fabric open to gather over the heandband. If you don’t want to sew, you could also glue the sides shut, but if you do make sure to put the ear side that you drew on on the inside to hide the pen markings.
Next I colored the ear tips with a black sharpie. The mess you see on the right is the transfer of ink from one side when I flipped it over to color the other side. I’m showing you this so you can be prepared and cover your work surface.
Once the tips were colored I stuffed each ear with some loose batting then sewed them over the sides of the headband where I’d previously marked. I used a blanket stitch to close the open edge but you can use any stitch you like, or glue them shut as well.
Here are the finished ears. They look silly off but are kind of cute on.
(Yes I had to try them).
While I was working on the ears I kept glancing over at the tail on our stuffed Pikachu and realized it wouldn’t take that much more effort to make one too, and surprise Henri.
To start I took some cardboard from our recycling bin and sandwiched it between two sheets of white cardstock with a regular glue stick. To make sure it dried well I placed it flat on the table and set some heavy books on it. Once the ears were done the cardboard had fully dried and I was able to trace Pikachu’s tail onto it.
Then I cut out the tail. I brainstormed a few different ways to attach it to Henri. I don’t like the idea of sending a 7yo to school with a safety pin on his butt, so I came up with a belt method. To make it work I carefully pried back about an inch of the tail section and folded the cardstock on each side outwards.
I used my Spectrum Noir markers to color the yellow of the tail and then colored the lower edge with a black Sharpie, completely overlooking the fact that it’s supposed to be brown, because I was working in dim lighting. D’oh. You can use any permanent markers, and do the proper colors. 🙂
To make the belt section, I first cut two holes into each side flap. I then threaded three strands of yellow yarn through each side, made a knot to secure them near the top, and then braided them into belts which I could then slide through the belt loops on his jeans and tie at the front. I made them longer than needed because I didn’t have his waist with me to try them on, and had planned to cut the excess this morning but we ended up just tucking the ends into his jeans.
And there you have it! Add in some yellow face paint, bright red cheek circles and a black triangular nose and poof-
You’ve got one happy Pikachu.
Have a happy and safe Halloween!
—-
Looking for more Halloween costume ideas? Check out here.
This post may contain affiliate links. This means I might make a small commission on purchases made through the links, at no cost to you.