It’s World Creativity and Innovation Day so today’s post is a round-up of previous posts that I feel incorporated some outside-of-the-box thinking!
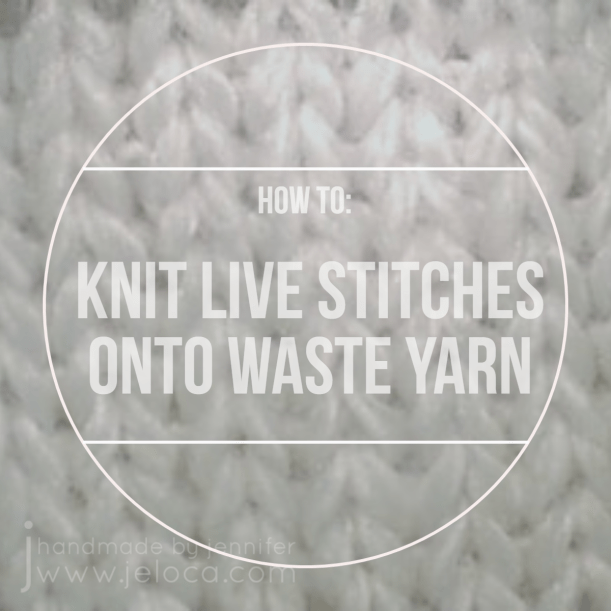
Ever need to transfer live stitches to waste yarn but can’t find your tapestry needle? No problem! Here’s an easy way to “knit” the live stitches over so you can keep working on your project.
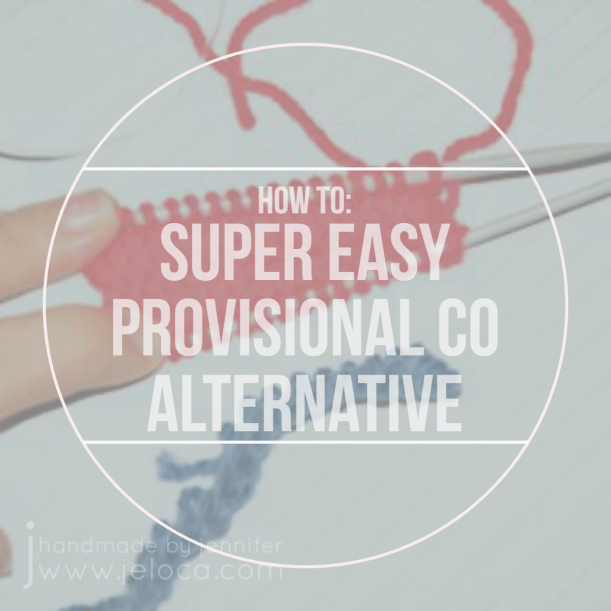
If you find standard provisional cast-ons too difficult, here’s a super easy way to get your knitting started. No extra tools required!
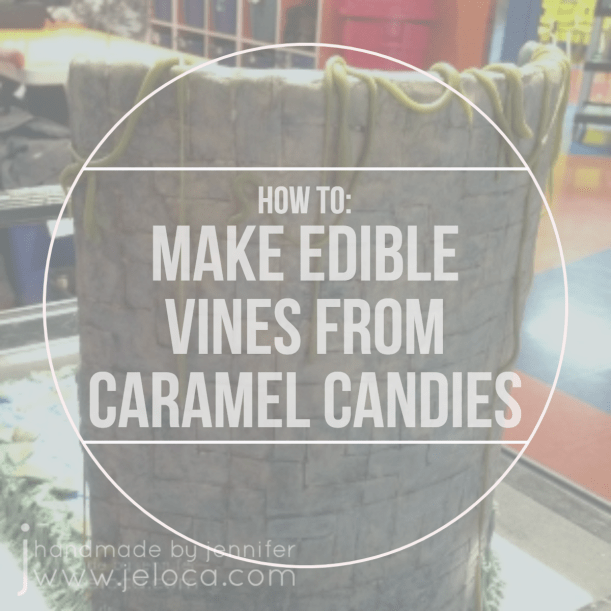
Here’s a neat trick for making thin vines/ropes for use in decorating your cakes or cupcakes. They’re flexible, stretchable, and edible!
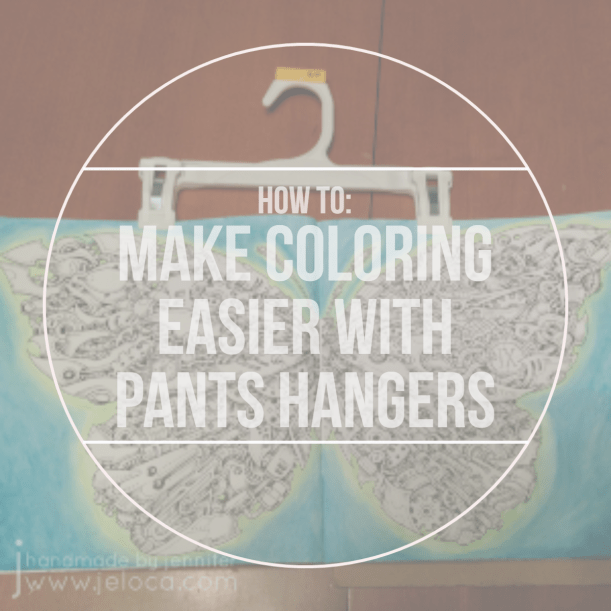
Here’s a hands-free way to hold your coloring books open!
Not getting the look you want with colored pencils in your adult coloring books? Here’s a great way to add more tooth to the paper.
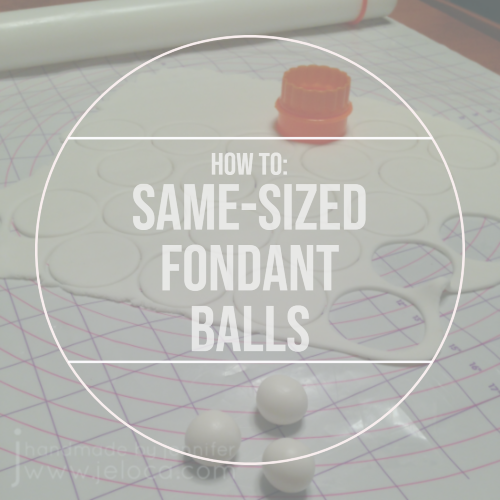
Are your fondant balls/pearls coming out all different sizes? Here’s a super easy hack to get identical ones, every time!
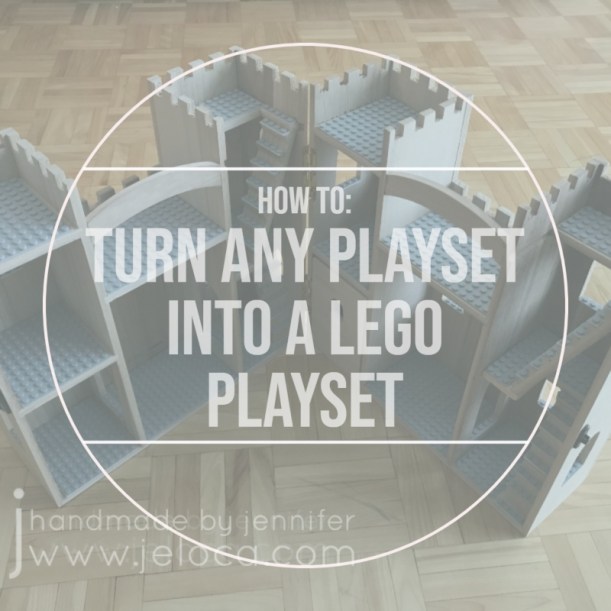
Here’s a simple way to give a plain toy new life and make it work with your LEGO pieces.
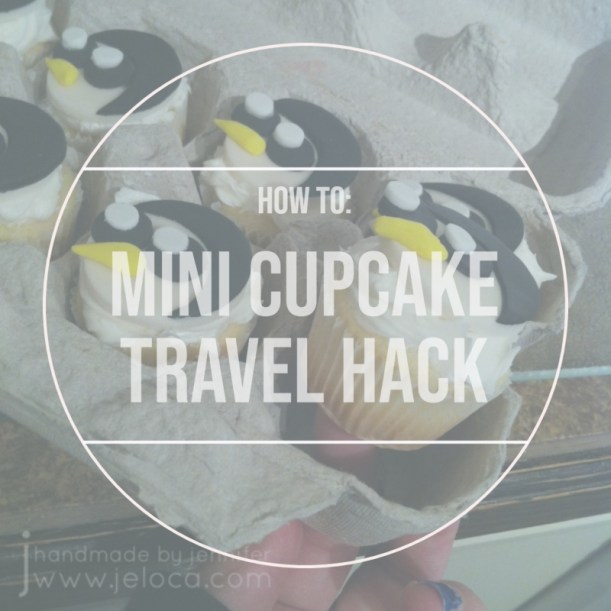
Finally, for when you want to provide homemade, individual snacks, here’s a free & easy way to transport mini cupcakes by repurposing something you’ve probably already got on hand.
Today, December 15, is one of the many days recognized as “National Cupcake Day”. We’re also halfway to the holidays! In case you’re planning on bringing a little home-baking to your celebrations, here’s a quick and easy little tip to help you out.
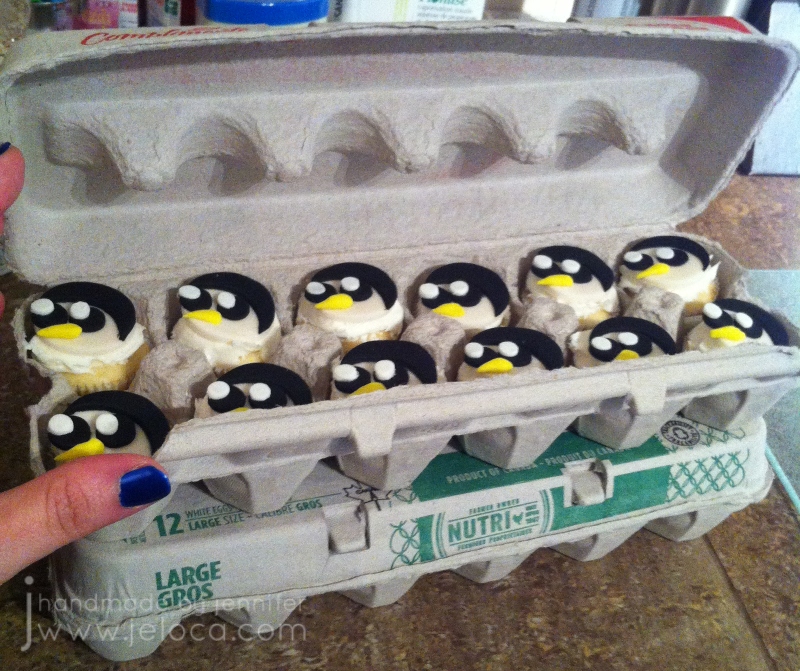
Picture it. You’ve baked a dozen (or more) mini cupcakes. They’re all iced and decorated and smelling delicious. But you don’t have a cupcake carrier and your largest Tupperware is already in use! What do you do?
Voila!
I know what you’re thinking. “If this is about cupcakes, why are you showing me egg cartons?”
Ahhh because those aren’t eggs inside!
Surprise!
Ok ok, so I know what you’re thinking now. “Sure, it’s an easy way to get them to wherever I’m going, but how am I going to get them out afterwards? Won’t I squish the cupcakes? If I tug on the fondant toppers won’t they just pop off the icing? And what if I only have icing on top? I can’t very well grab THAT, now can I?”
Ahh don’t worry, I’ve got you covered! It’s as easy as…
…1…
…2…
…3
Poke!
Of course it does take a quick moment of prep, so let’s rewind.
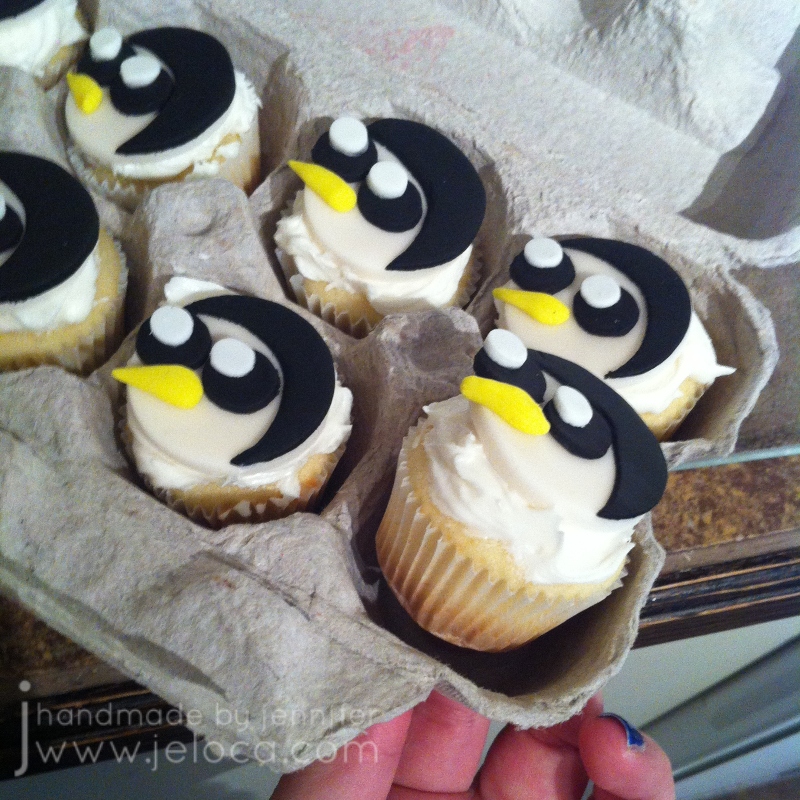
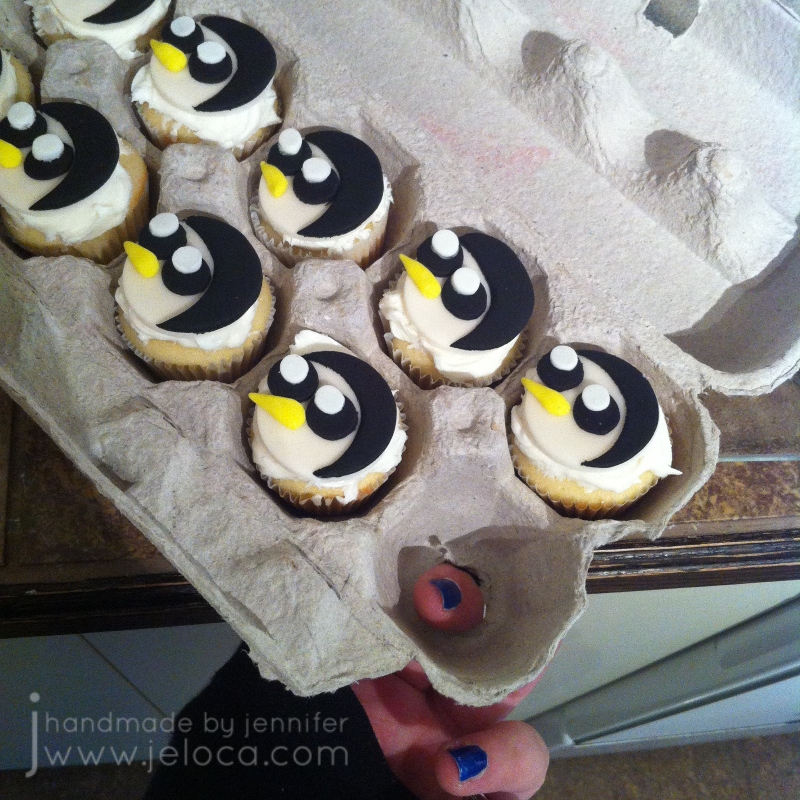
First, make your toppers. These were for Jakob’s 7th birthday, when he was super into Adventure Time. His birthday cakes 2 years in a row were AT-themed, and these cupcakes were a little extra treat to surprise his class at school (back when we were able to do that).
As always when making most toppers (Pitfall cake, Charlie and Lola cake, Minecraft cake, etc) I recommend making them a few days in advance. Not only will this allow the fondant to harden, making placement easier, but it will also help prevent the fondant from absorbing moisture from the icing (or water/fondant glue) and disintegrate on you.
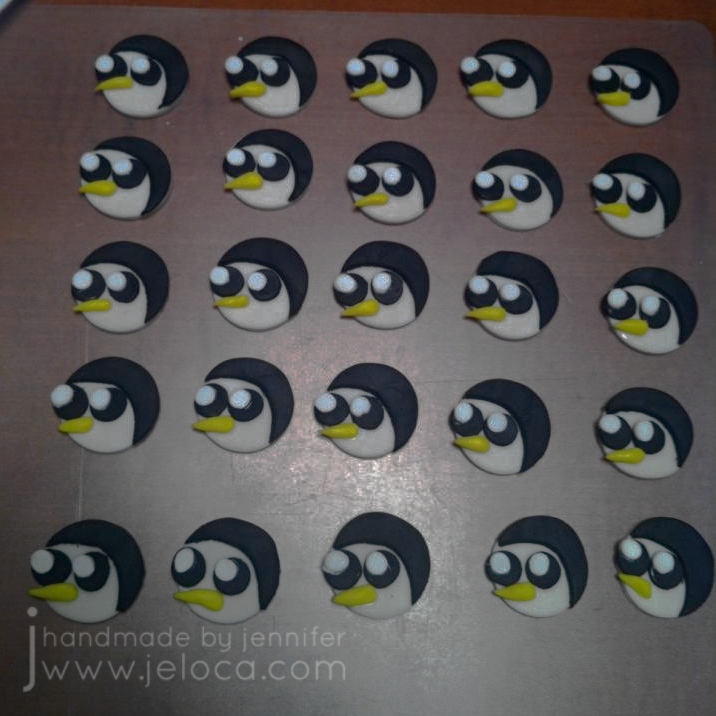
The Gunter toppers are pretty simple to make. Roll out some white fondant and use a circle cutter in your desired size for his face. I went with a cutter the size of the top of my mini cupcakes. I like to use a fondant roller with levelers but you can eyeball it. Roll your white fondant scraps a bit thinner and use your smallest cutter for the eye shine. For my size cupcakes I used a large smoothie straw for the eyes so a regular straw was perfect for the white shiny dots. Set the white circles aside and roll out some black fondant. Use the same cutter as for the head to cut one black circle for each face, and then shift it down a bit and cut away most of it to create a crescent moon-type shape. Use water or fondant glue to attach the black crescent to the white face, and then use the remaining black to cut out his eyes. Attach the eyes to the face and then the eye shine to the eyes. Finally get some yellow fondant (or tint the scraps of your white) and use your fingers to pinch off tiny pieces and roll them into mini cones for his beak. The cutters do the bulk of the work for you and assembly is pretty fast, making this a really simple design.
For reference, here’s Gunter in the show:
Next, bake your cupcakes. I didn’t take progress pics of this part but it was a basic vanilla cake recipe and a swirl of store-bought icing.
Bonus tip: empty your icing tub into a bowl and whip it up a bit with a hand or stand mixer. Not only will it be a lovely consistency for piping lush swirls but the air added to the icing will increase the volume, getting you more mileage out of what you’ve got.
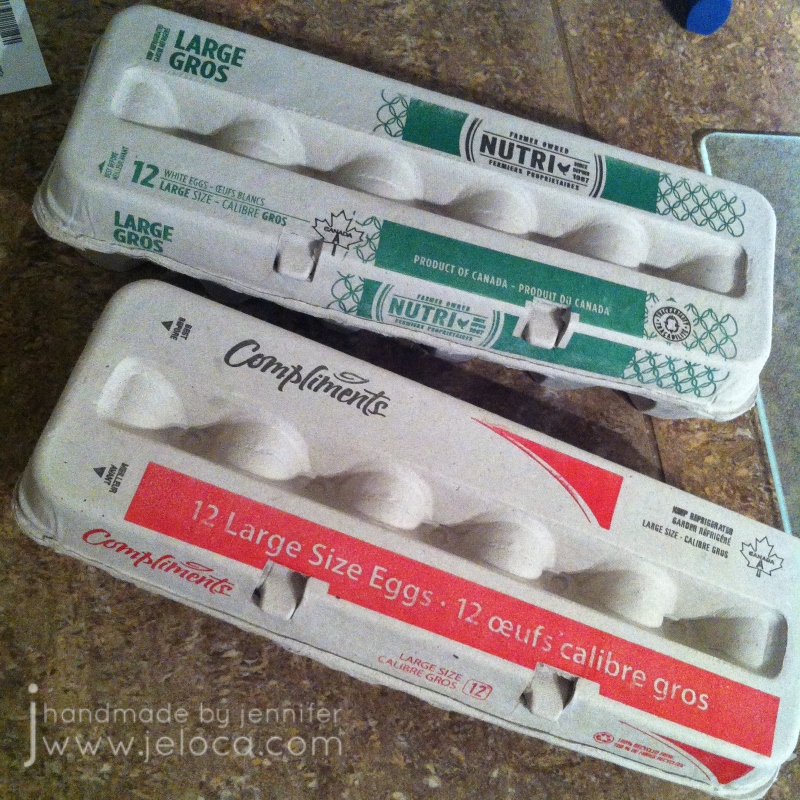
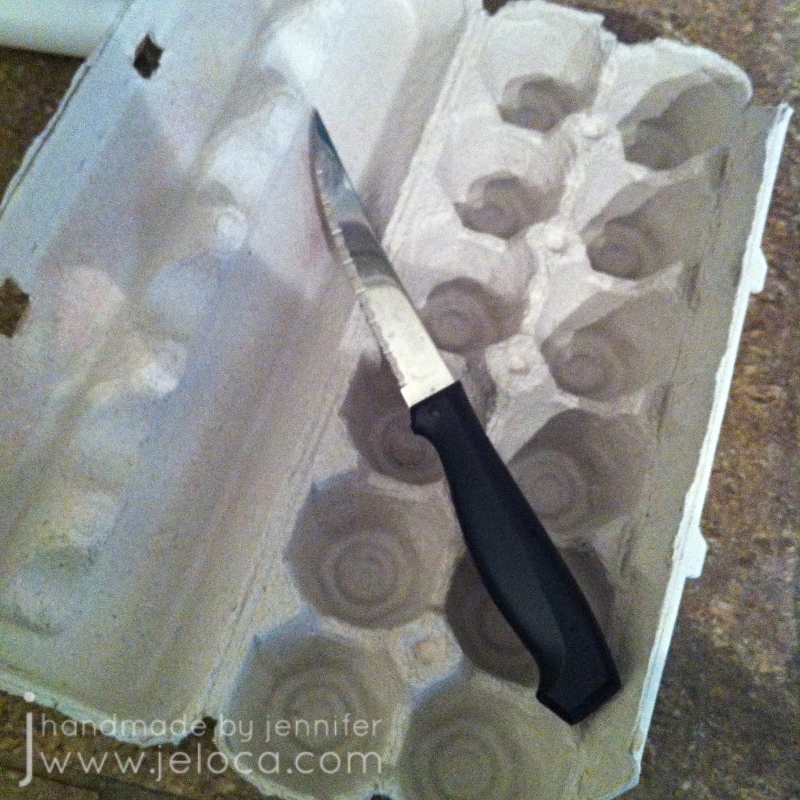
While your cupcakes are cooling you can prepare their carriers. Each egg carton will hold 1 dozen cupcakes (obv) and you’ll need something sharp for cutting out the bottoms. I found a knife/blade worked much better than scissors for this.
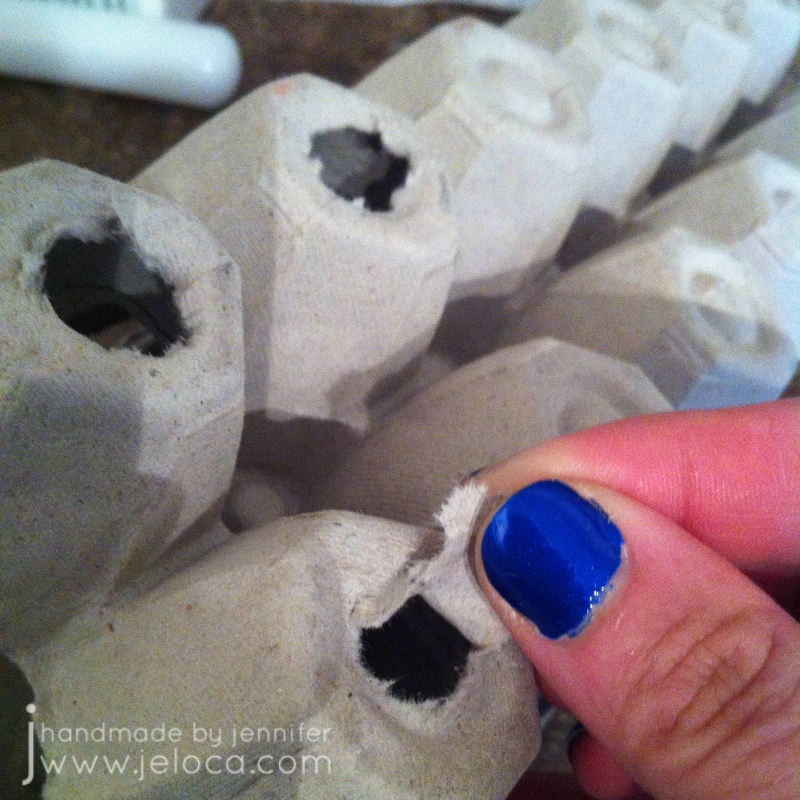
The easiest method was to cut around the carton’s own indent. Imagine the circle was a square and insert the knife straight down into 3 of the 4 “sides” of the circle. Then you can tear off the little flap this creates.
Give a little wiggle to push the cut edges to the inside. This will make it more comfortable for you later, and the raised little bits will also give the cupcake a bit of a shelf so it doesn’t fall too tightly into the hole and get stuck.
And that’s all it takes! Super easy, using something you’ve probably already got on-hand.
This post may contain affiliate links. This means I might make a small commission on purchases made through the links, at no cost to you.