As we count down towards Halloween I’m going to share a few more quick and easy projects that can improve an existing costume or be a brand new one. Today’s post is the former.
A few years ago the boys got Ninja Halloween costumes from Walmart. They weren’t fans of the faux weapons that came with the outfits so we went to Spirit Halloween and picked up a sword for each of them.
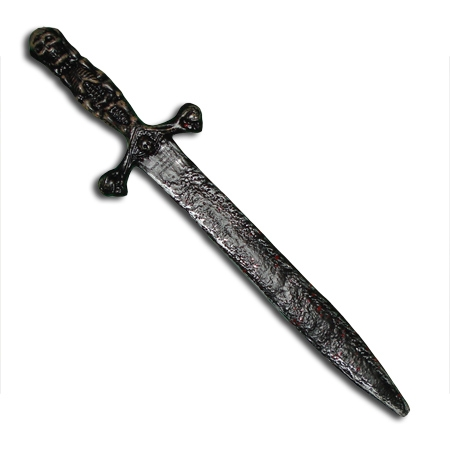
They both chose this one with a skeleton hilt. It probably belongs to a pirate, but they loved it, though they weren’t fans of the mixed color scheme. Henri wanted an all gold sword to match his Gold Ninja, and Jakob wanted an all silver look. I was quick to agree because differentiating between whose was whose would make my life as a parent easier.
Besides… how could I say “no” to these faces?*
The instructions are so easy I didn’t even take action photos! Using your gold and silver craft paint of choice, dab on paint over the raised areas. Leaving the grooves black will keep the depth and shadows. You can use a paintbrush, Q-Tip, even your finger, to dab on the paint. Wipe off any excess with a paper towel.
In this image I’ve repainted the bronzed skeleton silver to match the blade. I used DecoArt Crafter’s Acrylic from my local dollar store in Spun Gold and Silver Morning, but you can use any metallics that match your props. This gold and this silver are good options by the same brand.
You can see what a big difference it makes when comparing it to the original hilt! Luckily my silver matched the blade exactly but if it didn’t you could easily mix in some white or black to adjust the shade.
The second step was to do the same for Henri’s sword. Instead of a darker bronze like the hilt he wanted gold to match his costume. I brushed it on with a paint brush then quickly pounced on a crumpled paper towel to remove some of the paint and make sure the texture still showed through.
The last step for each was to fill in the skeletons’ eyes so they looked like gemstones. I used glitter nail polish for this but you can use anything sparkly you have on hand- glitter glue, nail polish, craft glue and loose glitter… even a tightly-packed glitter eyeshadow would work! Once dry, seal the eyes with clear nail polish or a protectant like Mod Podge. You can seal the rest of the sword if you like, with the same Mod Podge or a spray sealer, if you’re worried about the elements or long-term wear.
And that’s it! A few paint dabs to transform store-bought plastic swords into custom swords for my little Ninjas. So easy to do, and easy to adapt for any prop to add the color or wear you like. A touch of orange and green can add rust stains and oxidation, while dabbing on a few spots of red can imply the sword has seen more than the inside of a sheath.
You can find this year’s Halloween costume/prop/tip roundup here.
*Aside- it astounds me how much they’ve changed since 2017 when that pic was taken! This is the same duo in August 2021
This post may contain affiliate links. This means I might make a small commission on purchases made through the links, at no cost to you.
Halloween is in two weeks, so you know what that means- time to start scrambling for (not quite) last-minute costume ideas! To help out, here are some costume-related projects from my archives that are short enough to get done before the 31st. 🙂
When my boys were little, they wanted to be pirates. Henri especially – it was either a Viking or a pirate, depending on the day. Inspired by Jake & the Neverland Pirates they drew treasure maps with large scrawled Xs and hid their toys and told me it was their secret booty.
I wanted to give them some real toys to play with, but all the pirate-themed sets I could find weren’t safe for my rambunctious 3-year-old. I needed something childproof, and ideally inexpensive. Finally, after catching him trying to use his sippy cup as a spyglass just like the Backyardigans had on one of their pirate-themed adventures, I had an idea. One trip to the dollar store and some recycling-bin scrounging later, these fast, easy, and inexpensive toys were born.
I used items found locally, but the links above would work just as well 🙂
First up – the binoculars. (Btw…yes I know pirates didn’t use binoculars. But I couldn’t be certain my kids would use the spyglass as such, and not a makeshift sword, so I wanted to give them another sight-related option. Feel free to leave this one out, or use it for a different play idea. Perhaps an adventurer, bird-watcher or a fun game of I-spy?) For the binoculars you will need 2 clean toilet paper rolls, one cube from a dollar store packet of wooden craft shapes (about the size of a sugar cube), and a roll of electrical tape. At my dollar store this tape comes in a set of 4 colors all packaged together. You can use Washi or other decorative tapes on the outside, but I would not use them for the support structure. If you want to use them, apply them at the end, for decoration.
Step one is to cover the tubes in tape. I had done these first, and only later realized I should have covered the exposed edges FIRST, THEN wrapped the sides. When I get to the spyglass you’ll see I fixed that. If you want to be smarter than me, fold little pieces of tape over the exposed edges first. Be careful to not place the inside edge deeper than the width of the tape itself so you can cover it later. I have enough tubes for 3 sets shown because my neighbor’s young son was also really into pirates and I wanted to surprise him with a set of his own.
Step two is to cover 4 of the sides of the cube in tape. Place the tape on one edge of the cube and just keep wrapping around the other 3 sides until you reach the beginning again. You’ll be left with 2 exposed edges that are opposite of each other. Don’t worry about covering them, as they will be against the tube rolls and won’t show.
Step three is to connect the rolls to the cube. Place it a bit in from one edge so it looks like the bridge on a pair of binoculars. Be sure to place the raw, exposed edge against the tape so the covered sides are what is shown. Secure well with more tape.
This is what it looks like when you have three rolls done. I’d run out of tape, and had to go buy more to get more blue… d’oh.
This is when I covered the edges and realized I should have done it first. Oh well. If you’re like me, and goofed, place short strips around the exposed edges. This is for aesthetics as well as durability – no open edges means it’s less likely the toy will tear or fray after some hard toddler use. Be sure to not place the inside edge deeper than the width of the tape itself (see: left roll). Once you’ve covered the edge completely, cut a length of tape to fit on the INSIDE of the roll, and place it around, as close to the edge as possible, to cover and secure all the short edges (see: right roll).
Then you can use another length to go around the outside, covering those short pieces too. (This step is unnecessary if you covered the edges first).
Here’s a completed pair of binoculars. The new blue tape I’d bought was darker than the original, so it gave a nice finished look, almost like adjustable lenses. Even though they’re ‘only’ toilet paper rolls, the rubbery tape gives them a surprising amount of durability. Don’t get them wet, however, as the inside paper is still exposed.
Next I made the spyglasses out of paper towel rolls (though you can cut down wrapping paper tubes too). As you can see, for these I was smart enough to cover the ends FIRST, THEN wrapped the tubes. It’s easier to see on the white than the blue, but when you wrap, ease the tape slightly sideways so you can move along the tube/roll. Because the tapes are rubbery, they’ll stretch to where you want them to go, instead of tearing.
Finish covering the tubes by wrapping a piece of tape around the inside of the open edges to cover the short pieces. Because you did them first here, you won’t have to add more tape on the outside.
(This picture makes me laugh because it’s such a typical scene in my house – the dining room table covered with mom’s crafty projects, the kids’ placemats and a bag from the latest dollar store run for supplies. *chuckles* Plus seeing the boys’ bibs reminds me just how long ago I’d made these. Those are their “I ❤ Dic Ann’s” bibs. *grins*)
Once the spyglasses have been covered with tape, use glitter glue (from the dollar store) to paint on whatever decorative touches you’d like. I went with gold grip handles on mine. Set them aside to dry overnight, using drinking glasses or other supports to avoid messing up the wet glue.
For the treasure chests you’ll need some kind of chest-like container. I was lucky that my dollar store had these little wooden chests, but you can use any container or box you have on-hand, even an old Tupperware. I bought strips of glitter gem tape to decorate mine, but you can use sticker letters, nail gems, paint, or anything you like. (Oooh they would look INCREDIBLE painted to look like real, aged chests!)
Finally, you’ll need some pirate booty. I got these acrylic diamonds from my dollar store, as well as the strands of ‘Mardi Gras’ beads. I would have loved to include gold coins, but couldn’t find any on that visit. This set I found on Amazon has both gems and gold coins together, and would have been a great addition.
Decorate the chests. My kids picked their favorite colors of these jewel strips and I cut them to fit along the top edges, but you can do whatever you like to the outside of the chests.
To secure the booty inside, we’ll be using a high-tack craft glue. If you have older kids you can omit this step and leave the treasures removable, but since two of my recipients were 3 years old and some of the jeweled edges were sharp or choking hazards, I elected to make my treasures permanent. Plus this would ensure there was always booty ready to be discovered. Place a thick layer of glue in the bottom of the case, a little more than you think you’ll need because the wood absorbs some. Begin placing your chains and jewels down into the glue so that they look like they were piled in haphazardly. Use more glue as needed to secure any loose bits. Feel around to make sure any sharp edges are embedded in the glue vs sticking out. Every now and then hold up or shake the box to see if any bits move or shift, and keep adding glue into every nook and cranny. I went crazy on the glue because I know my toddler will find any loose edge to play with. Don’t worry about the white glue showing as it will dry clear. Finally, once you think your treasures are secure, set it aside to dry at least overnight. I dried mine overnight then held it upside down and shook it around, then added more glue to any of the bits that moved. One of the chests was going to be a gift for a toddler and I didn’t want to worry about any accidents on account of it.
Here’s how my collection turned out. They made fun play accessories for around the house and costume day at school, and were surprisingly long-lasting. The boys didn’t manage to get the gems and beads out of the boxes for at least a year and a half, and the chests, the spyglasses and even the binoculars are all still intact in our dress-up bin all these years later.
If you make any of these I hope they give your toddler/child just as much fun as my kids had with them. 🙂
This post may contain affiliate links. This means I might make a small commission on purchases made through the links, at no cost to you.