2 Comments

Crafty Compilation – w/e 01/07/17

2017.  Wow.  I can’t believe I started this blog roughly 13 years ago, nor that some of you have been around since the very beginning.  Whether you’re one of my original few hundred subscribers or one of the couple thousand who discovered my site when looking for my most popular Halloween DIY, hi there, happy holidays, and happy New Year!  I’ve got a lot planned for this little blog over the upcoming year, so if you’re an old friend- thanks for sticking around… and if you’re new- I hope you’ll pull up a chair and stay a while.

Some of you may note that I’ve slowly made changes to the type of content that I post.  I’ve never been a mono-crafty person, and the blog will always adapt to whatever creative pursuits I’m into at the time, whether they’re knitting or crochet, cosplay or cakes.  Coloring books are going to have more of a showing on the blog, as will as a variety of crafts beyond the yarn-based ones.  For the last two years I’ve taken step-by-step photos of all the projects that I’ve made with the intent to focus more on sharing helpful DIYs, tutorials and tips going forwards, instead of merely showing off whatever I’ve made.  I’m going to have more reviews coming up, both sponsored and non, and while there might be affiliate links popping up at the end of some posts, I can promise you that my reviews will always be strictly my honest, unbiased thoughts.

Another feature I’m going to add is a weekly roundup, to both keep track of and hold accountable to the projects I’ve got ongoing.  Not everything needs to wait for a finished reveal, and sometimes quick projects or small pastimes get lost in the shuffle of the day-to-day.  To that end – this is my first Crafty Compilation.  I plan to post these on Sundays and to cover the previous week’s goings-on, but this first one is being posted on Thursday because life LOL.  Amazing how, even when one is off work in post-op recovery, when it comes to crafting, there still isn’t enough time!  This first CC will cover some stuff worked on over the holidays, as well as last week.


Knitting

  • Gift knitting

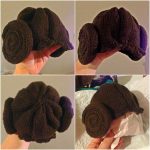
Over the holidays I knit a special baby hat.  One of Yannick’s closest friends had a baby girl just before the holidays, and when he showed me the gifts he planned to bring for the friend and his other young daughter, I told him I knew just the thing to make for the new arrival.  The little girl’s dad has similar geeky tastes as we do, and I thought this pattern would be perfect.

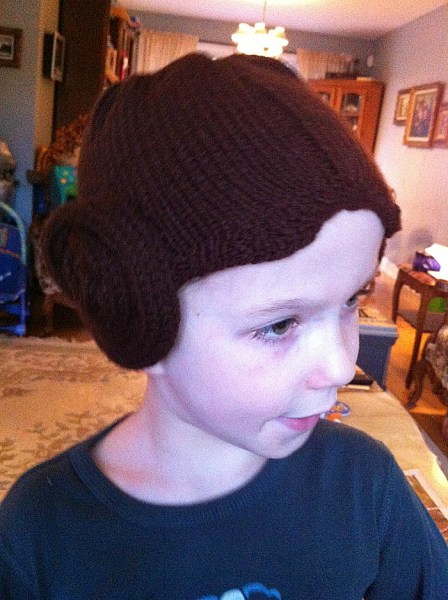
I’ve knit it once before, back in 2013, as part of a Hallowe’en costume for a baby girl aptly named Leia. This was a pic of Jakob trying it on for me at the time:

jakob-in-leia-hat

and this is a pic of the little sweetheart in her full costume.  Cutest Leia I’ve ever seen!leia-in-princess-leia-hat

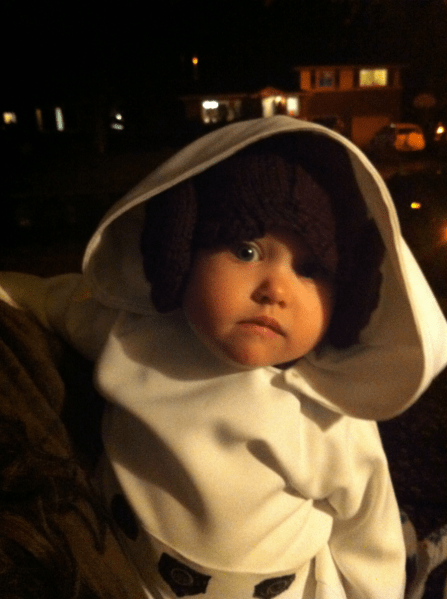
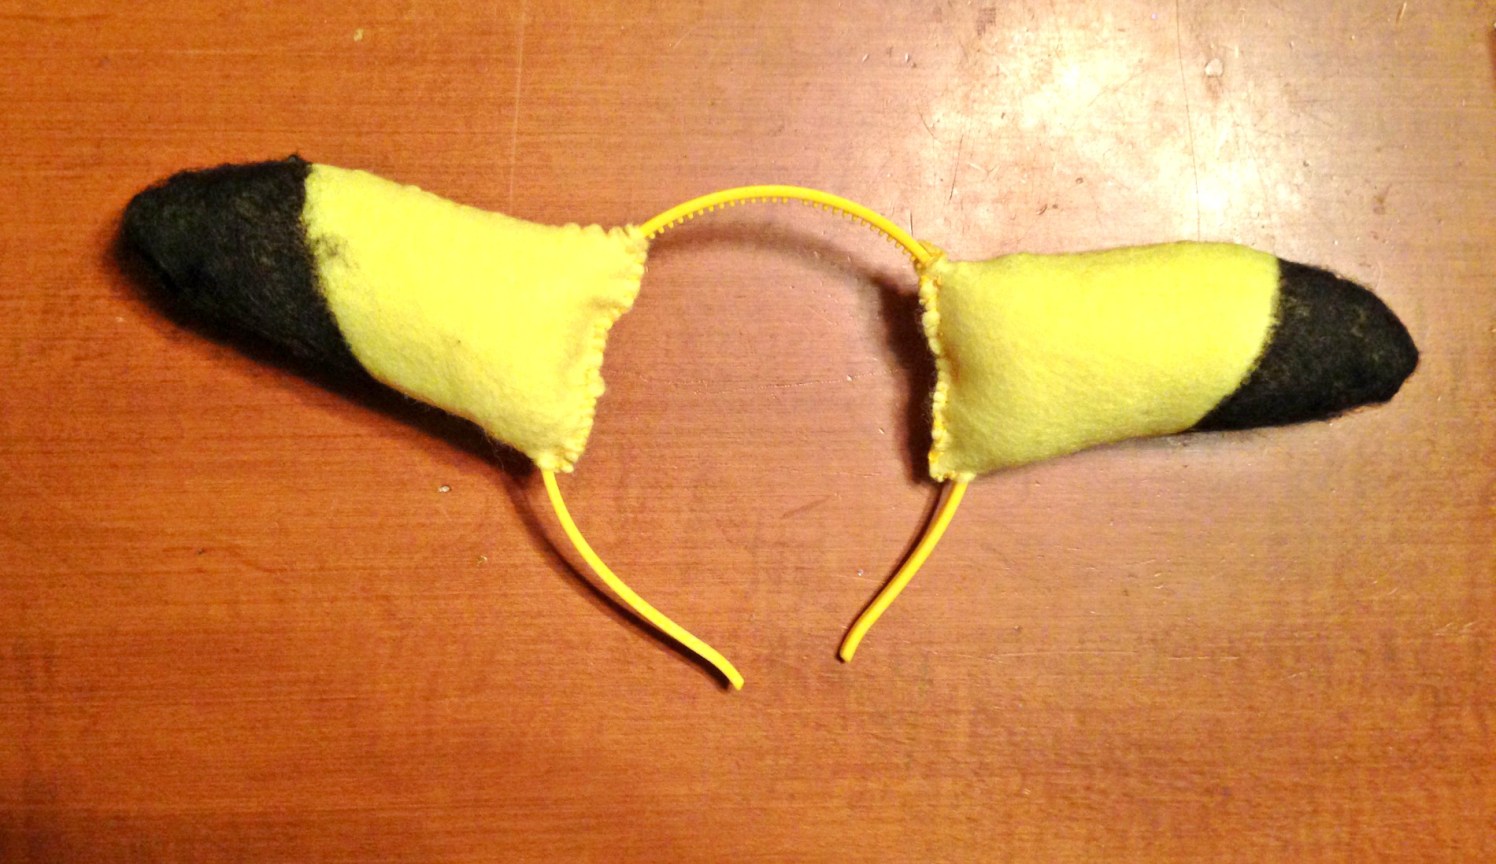
The pattern is very well written and it’s a pretty quick knit, even with all the icord.  The hat and the ear puffs each took a night’s worth of knitting to work up, then the assembly took barely an episode of Elementary.

leia hat collage.jpg

Forgive the bad pics, it’s hard to take hat pics without an appropriately-sized head! 🙂 I’m really pleased with how the hat came out, even though I’d knit it before and expected it to look the same.  One thing I love about this pattern vs others out there is how it incorporates ‘bangs’ and the center part (not clearly visible in these photos but seen better in the one of Leia wearing it above).

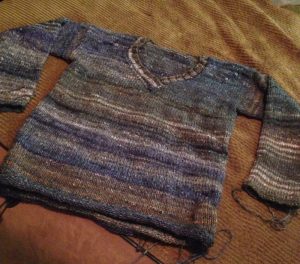
  • Drops v-neck sweater

I also completely frogged a sweater I’d been working on.  Back in September I’d started a garter-stitch oversized sweater with a lovely gray yarn from my stash.  I’d thought it would be perfect ‘no-look’ movie or tv knitting but after measuring a sweater I own that had the fit I wanted, I realized that what I was making wouldn’t have the proper shape.  Plus I’d been having a nagging feeling that the garter stitch was eating up too much of my limited yarn.  So I frogged it one evening last week and began this pattern instead.  I’m pretty sure I’ll have enough yarn, and if not I’ll work the neckband and/or cuffs in something contrasting.

photo-2017-01-09-11-02-39-pm

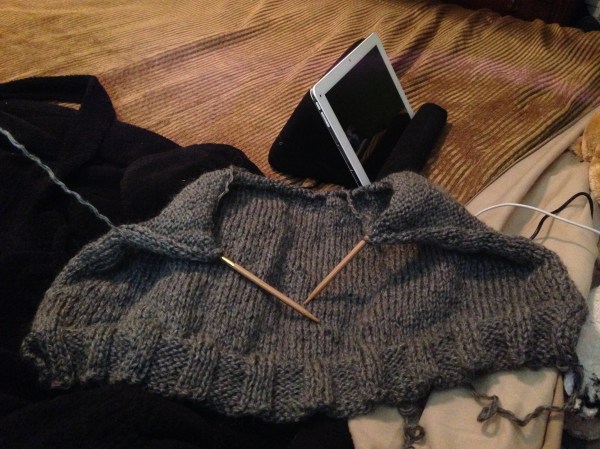
So far I’m at about 32cm of the 34cm I need to be at before splitting for the low v-neck.

Coloring

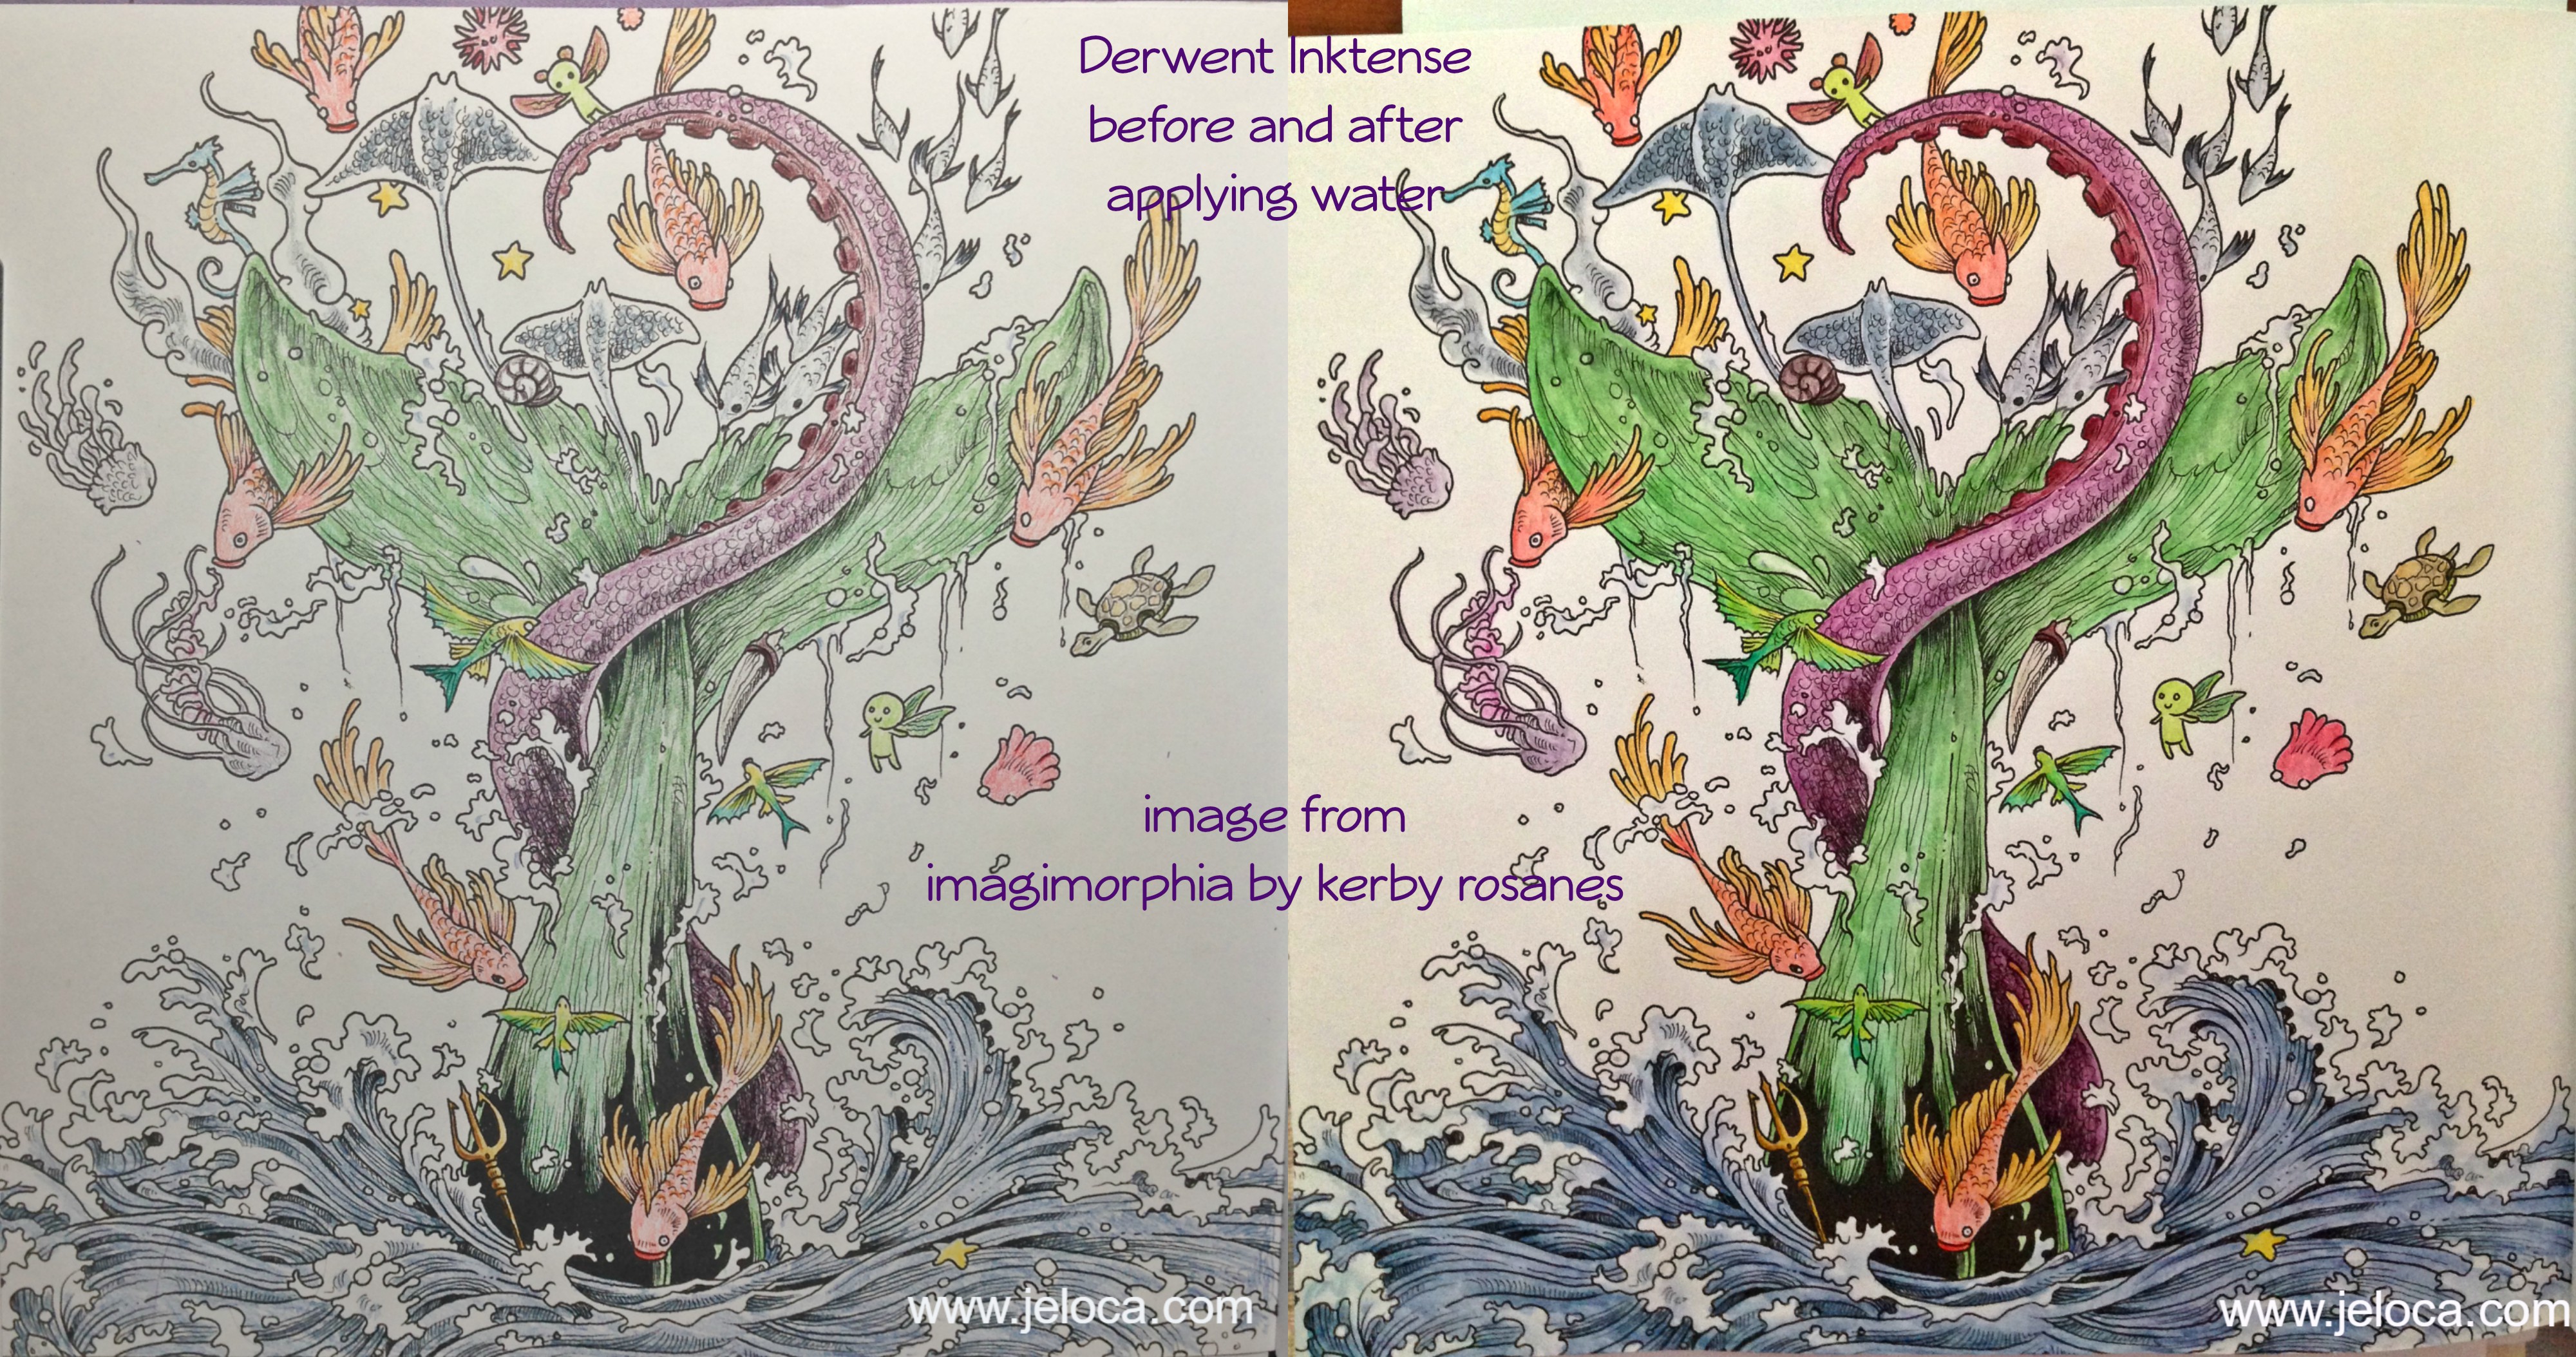
  • Doodle Fusion ‘Christmas Tree’

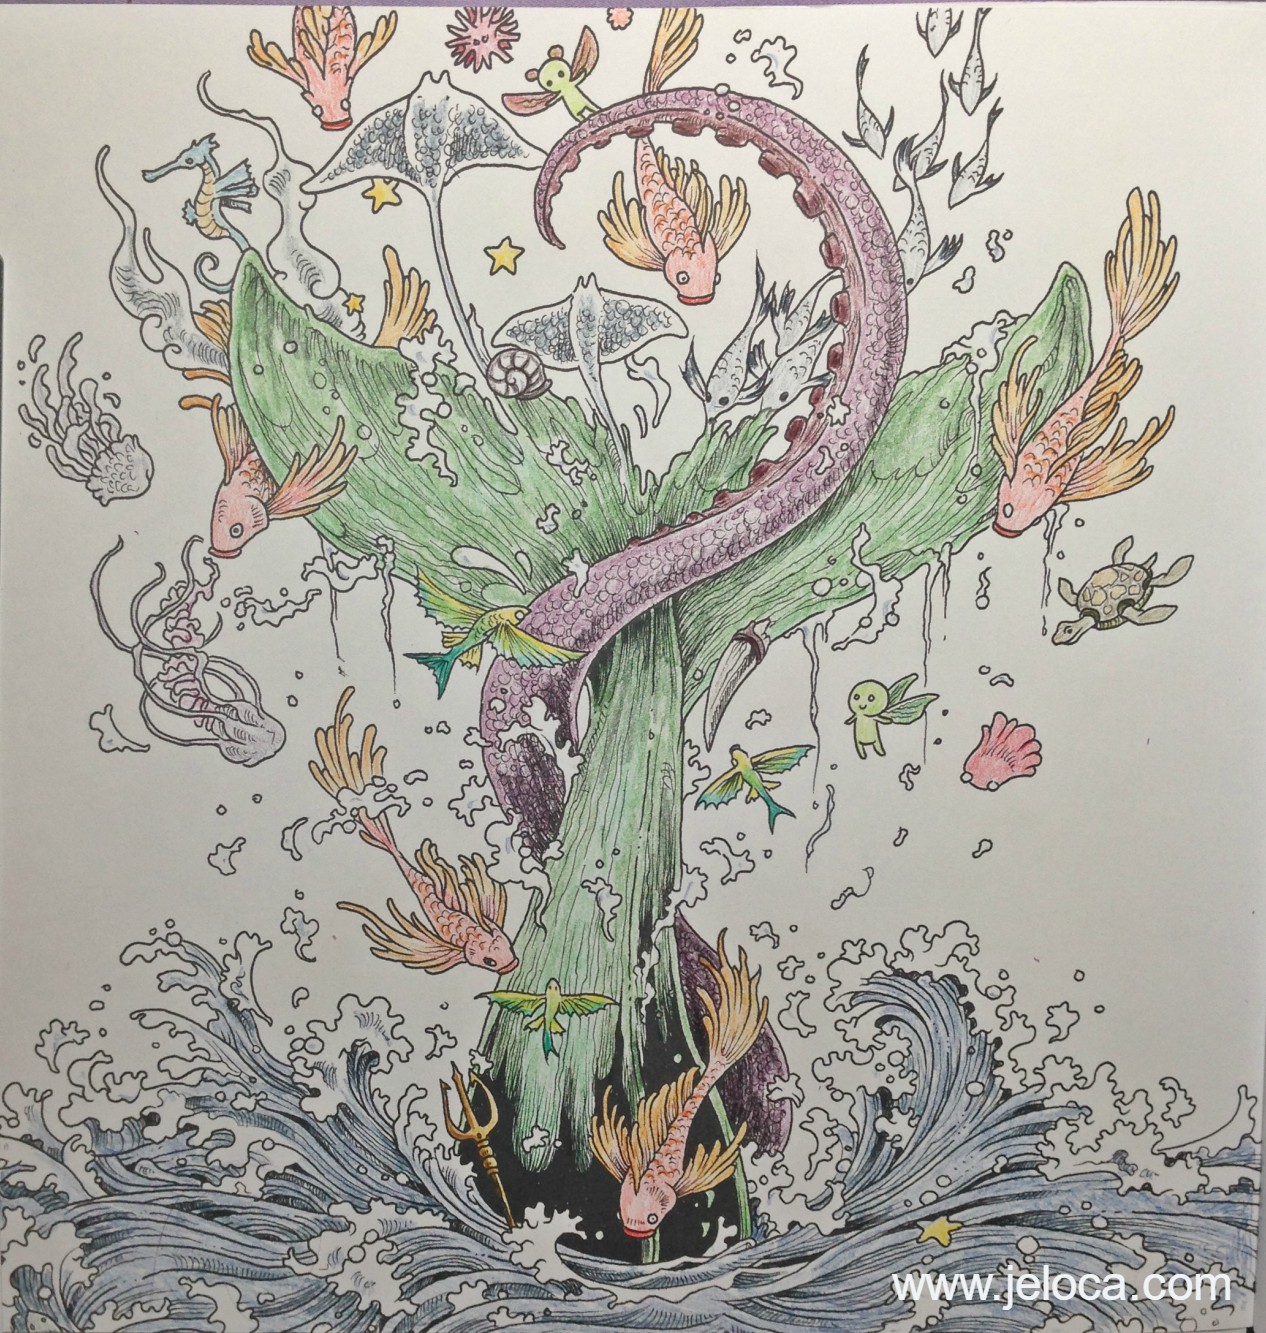
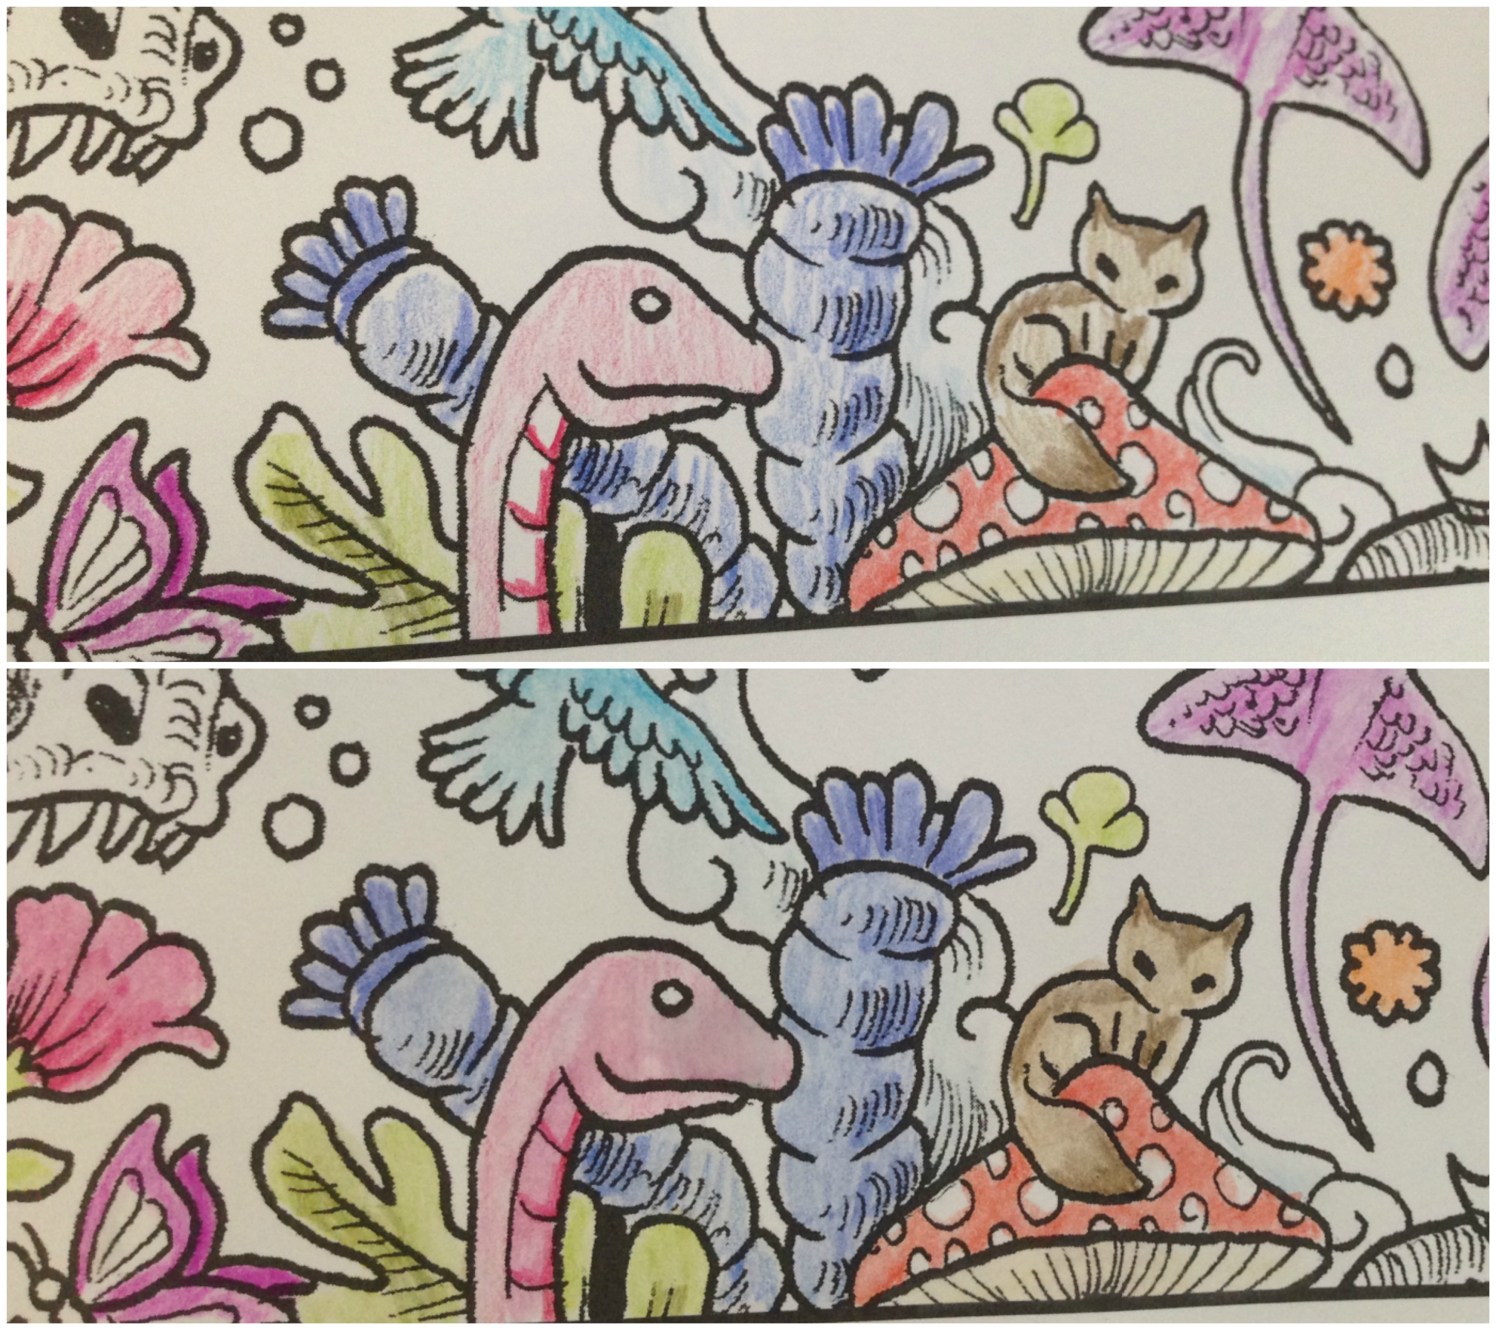
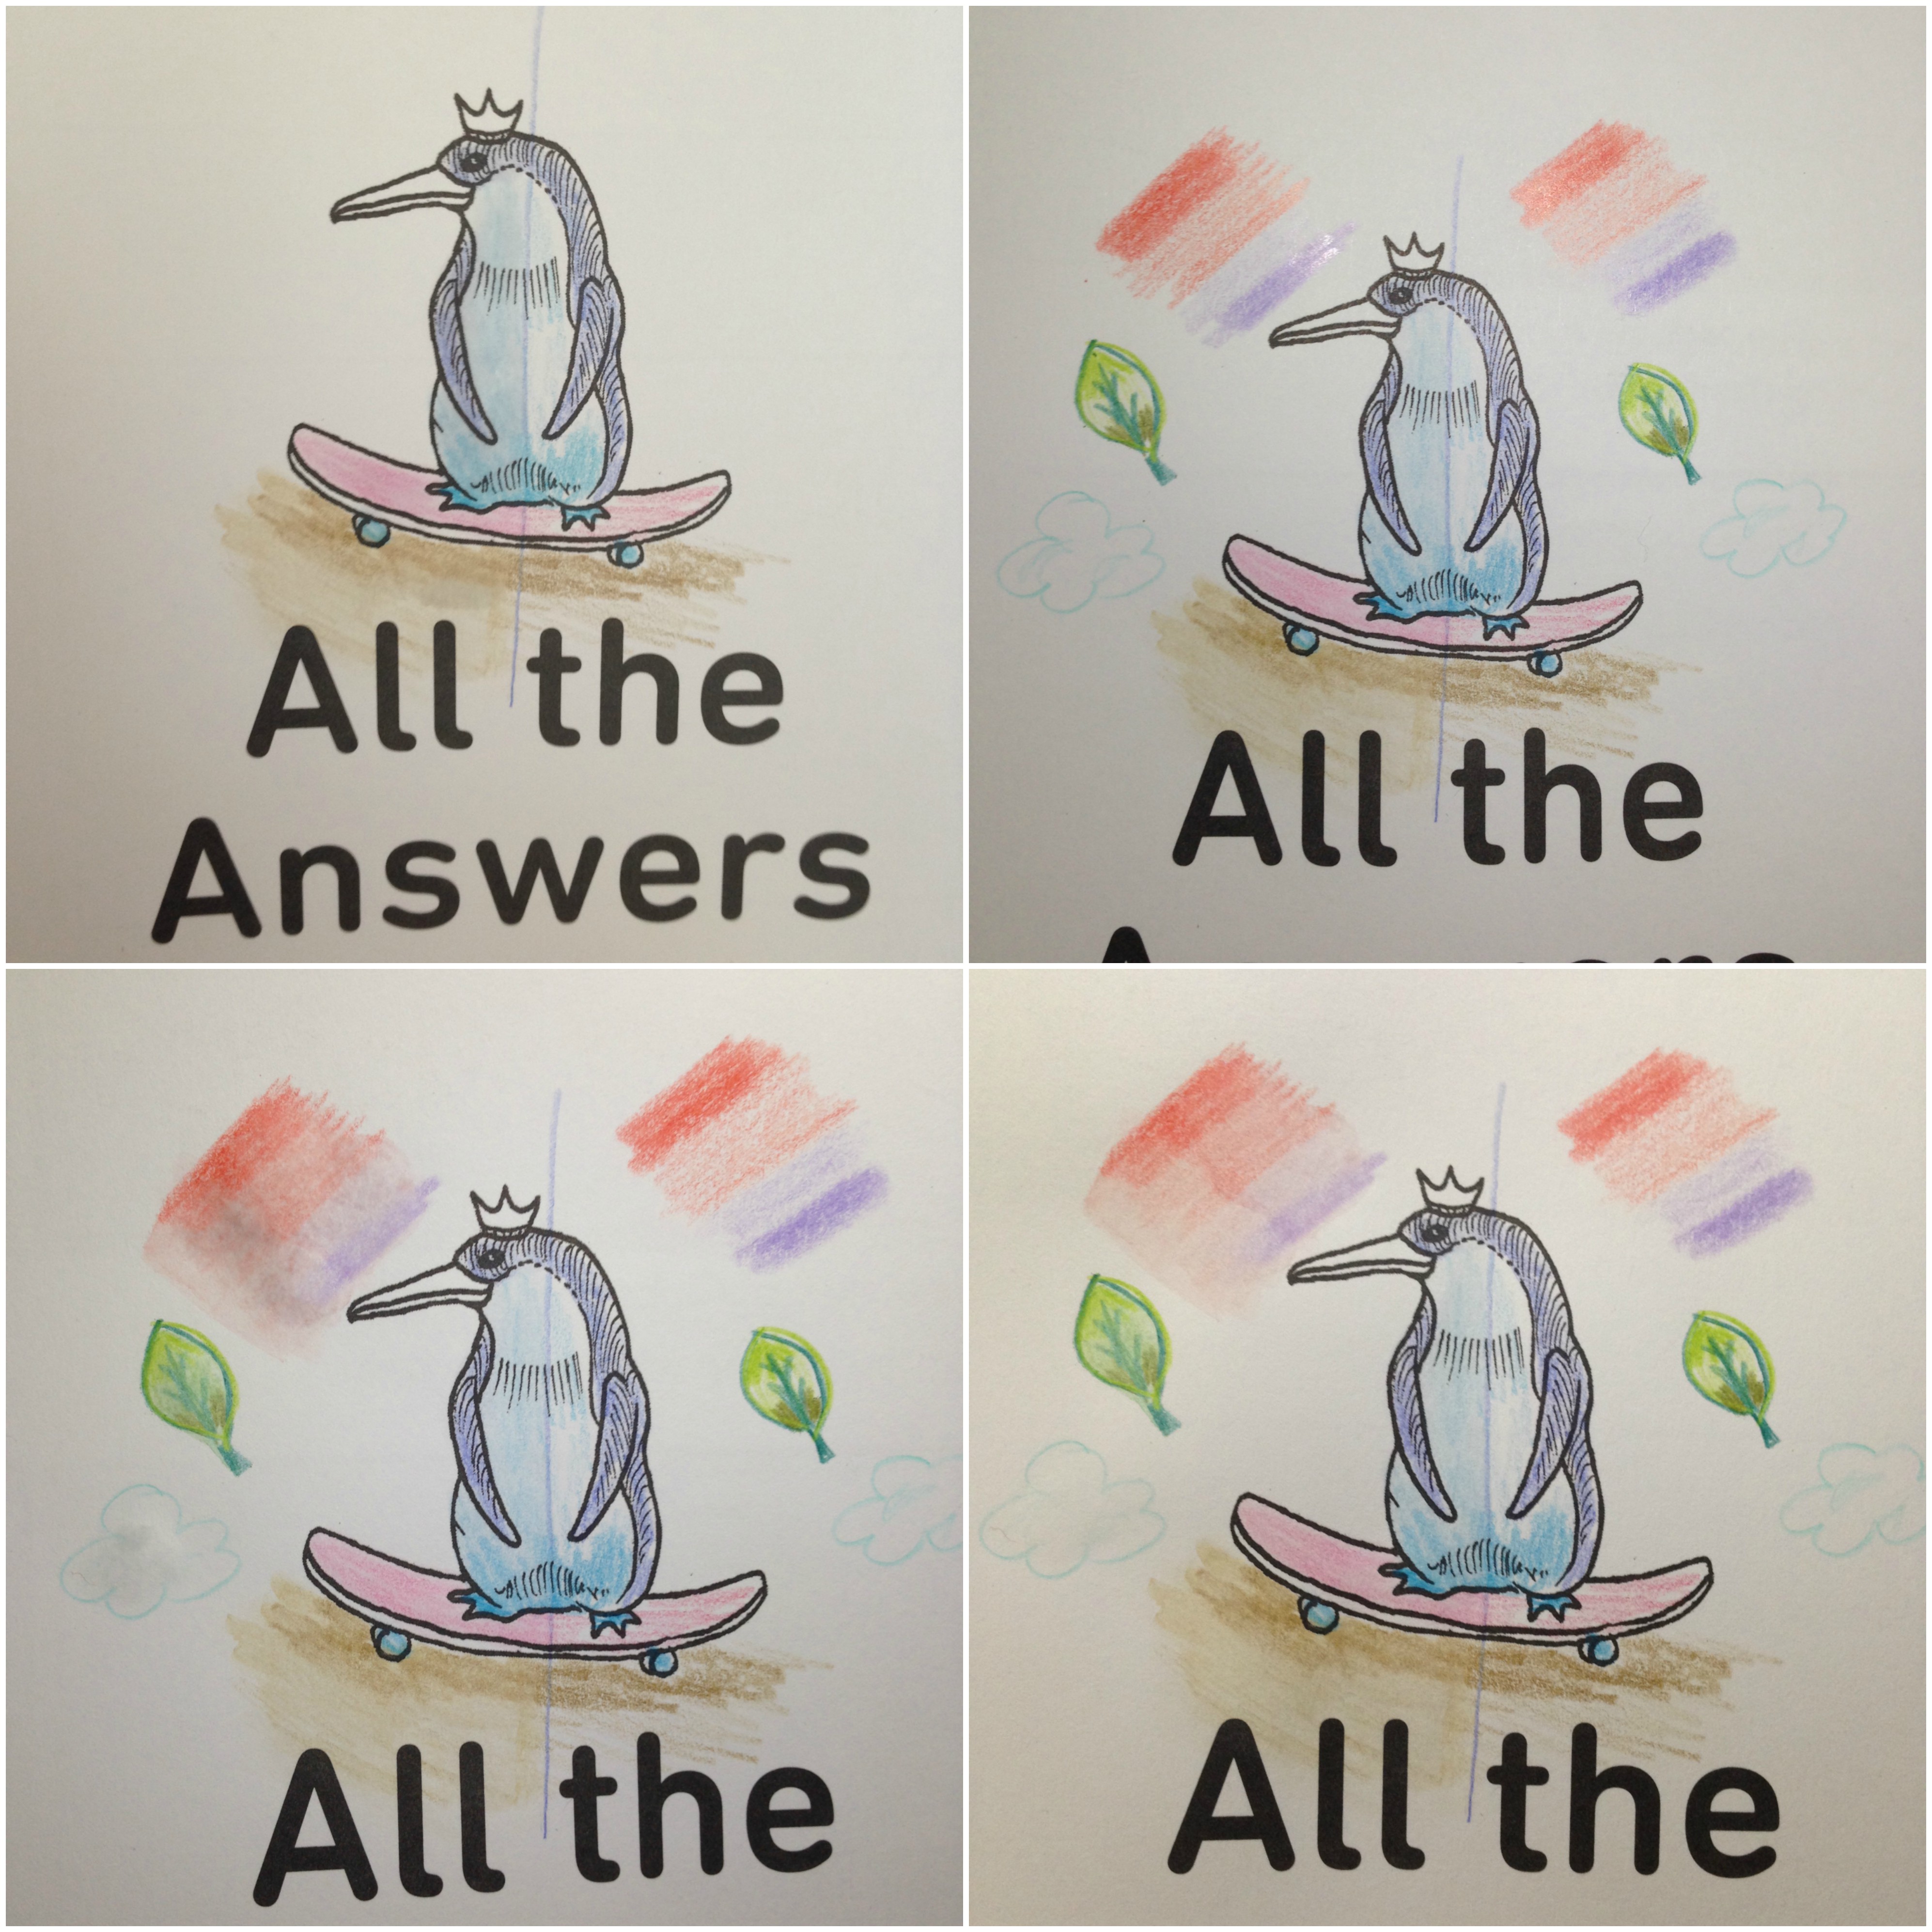
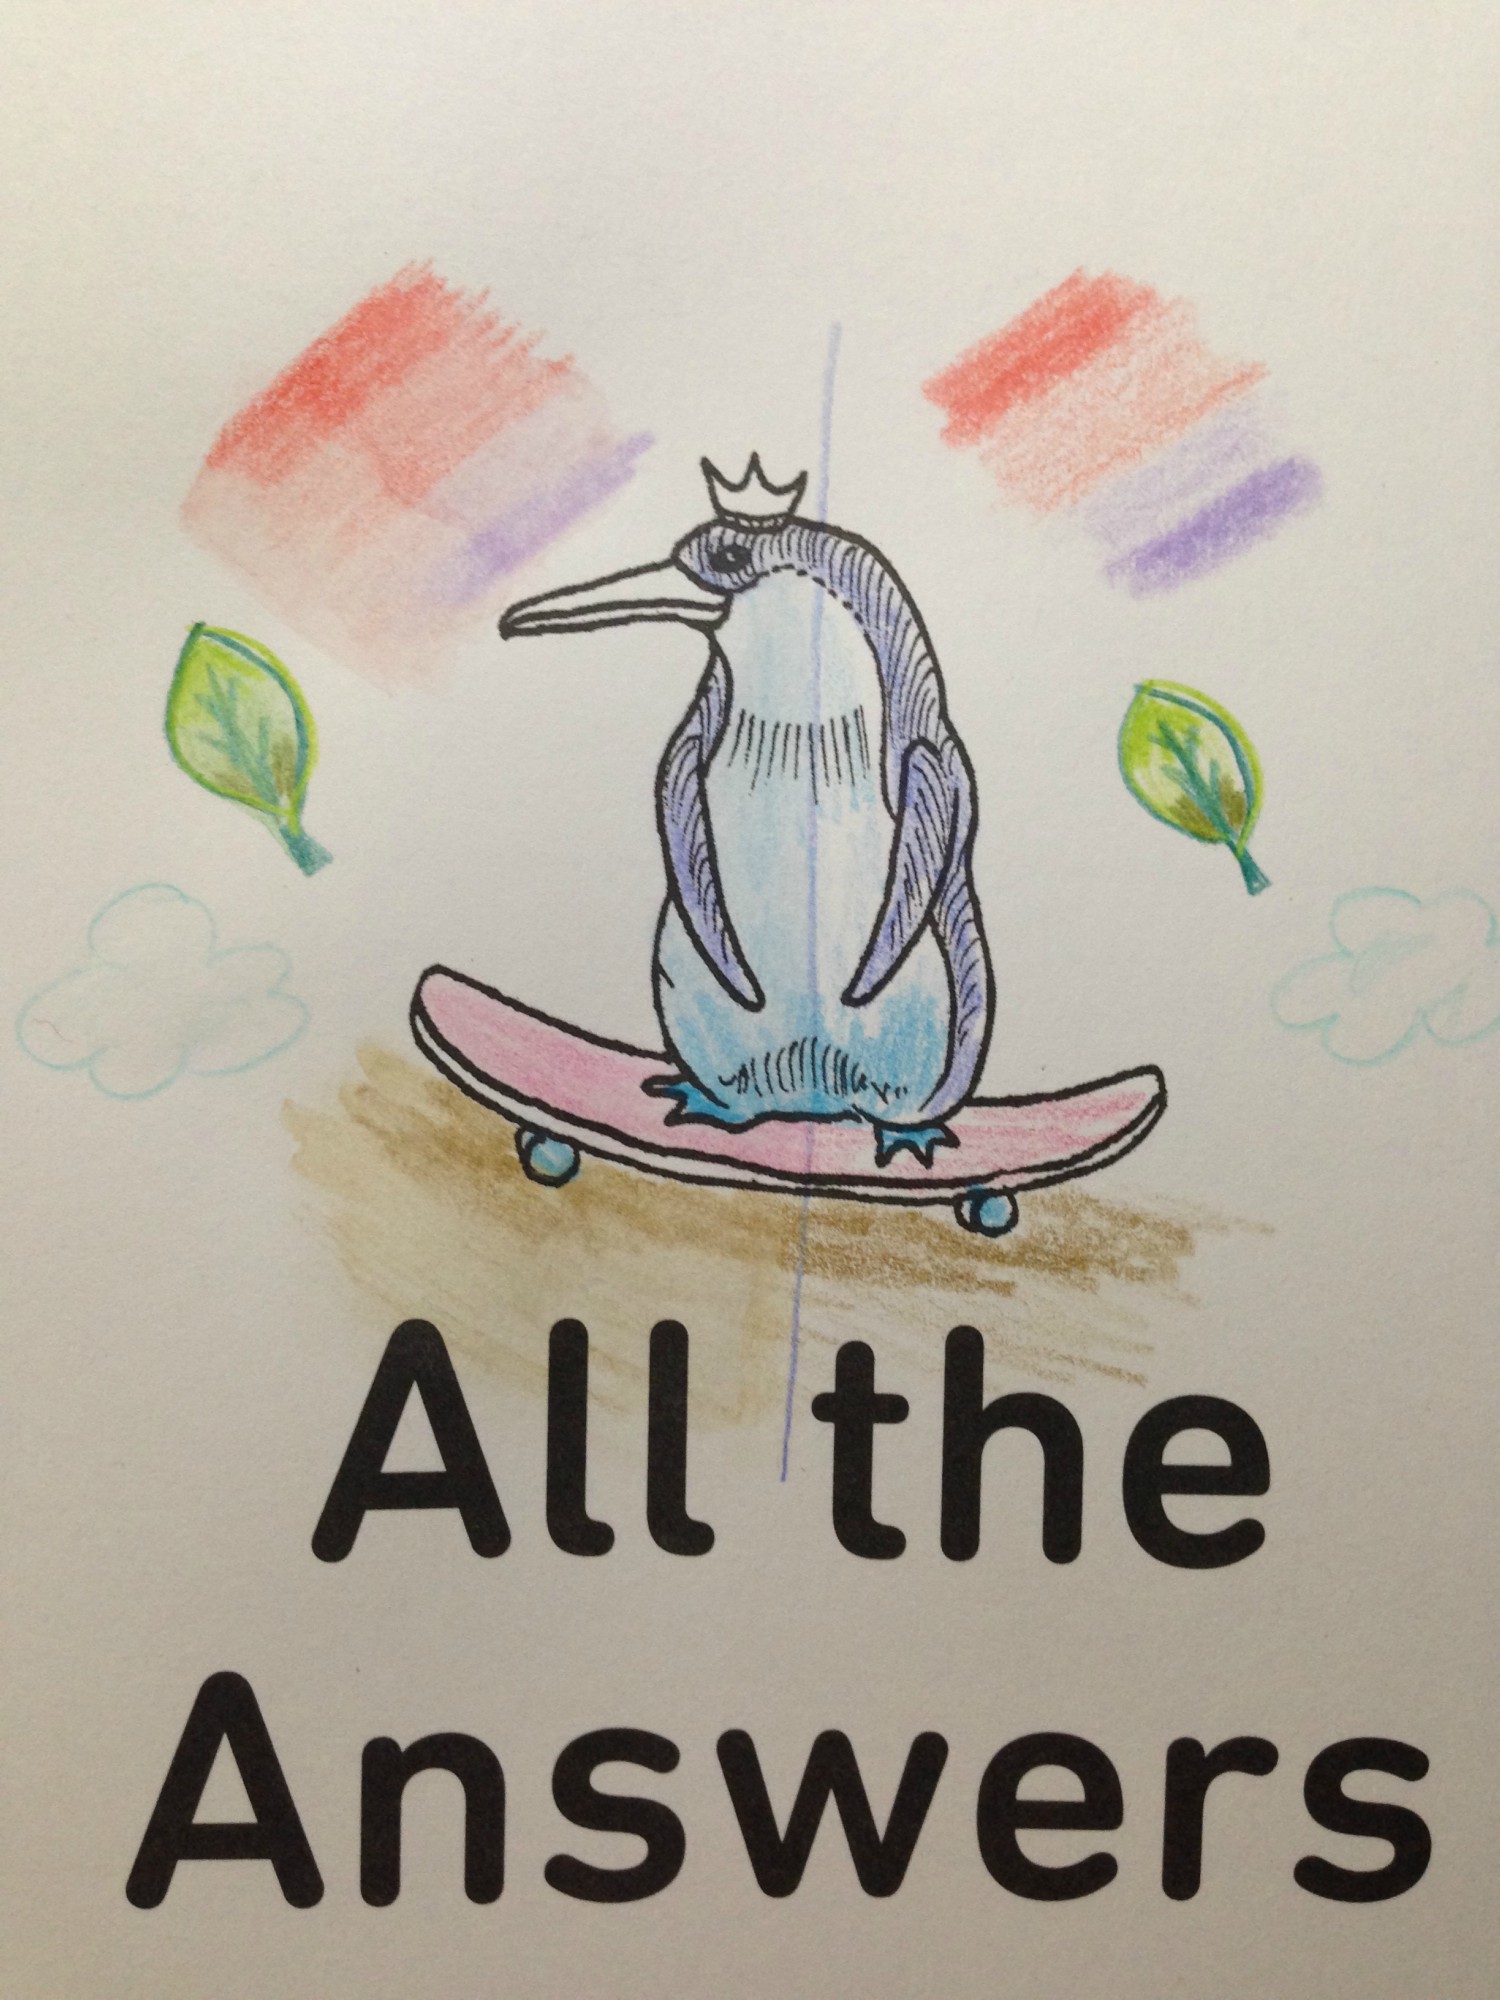
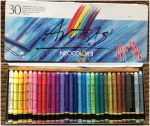
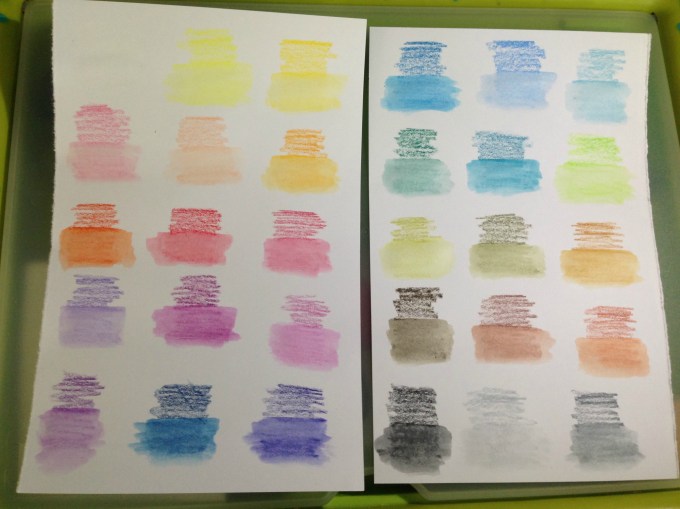
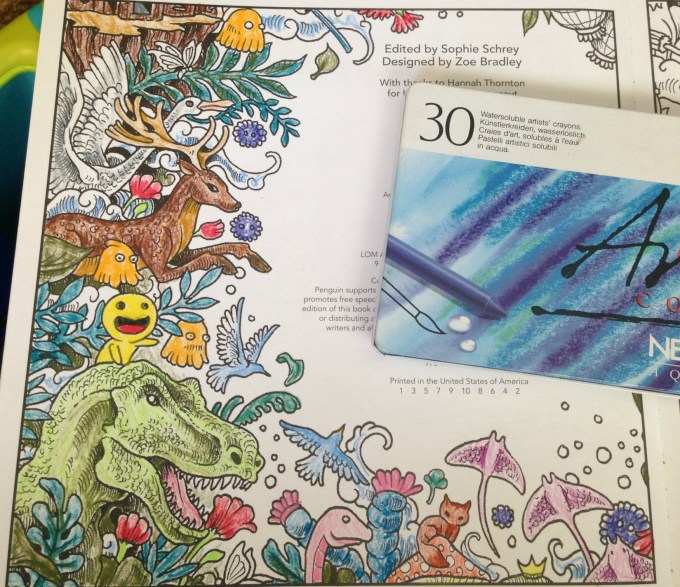
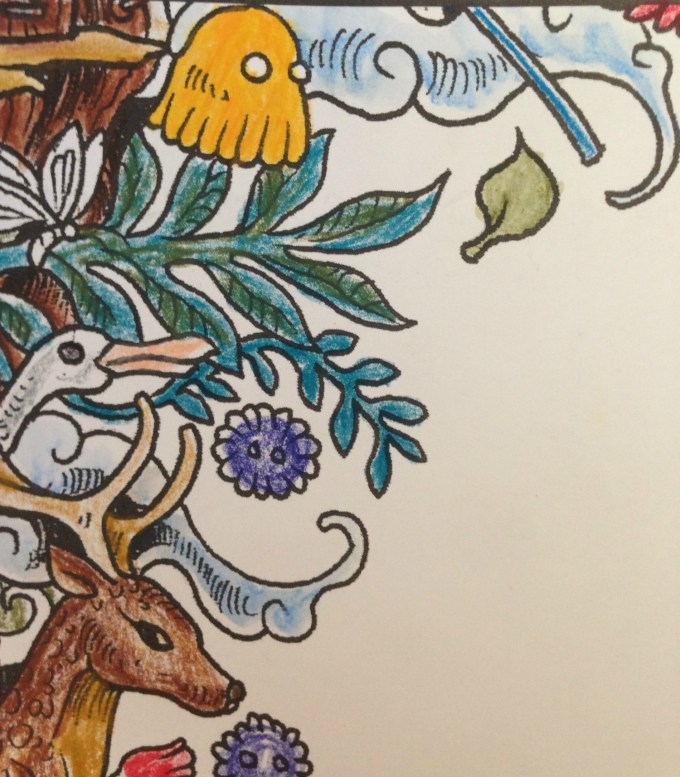
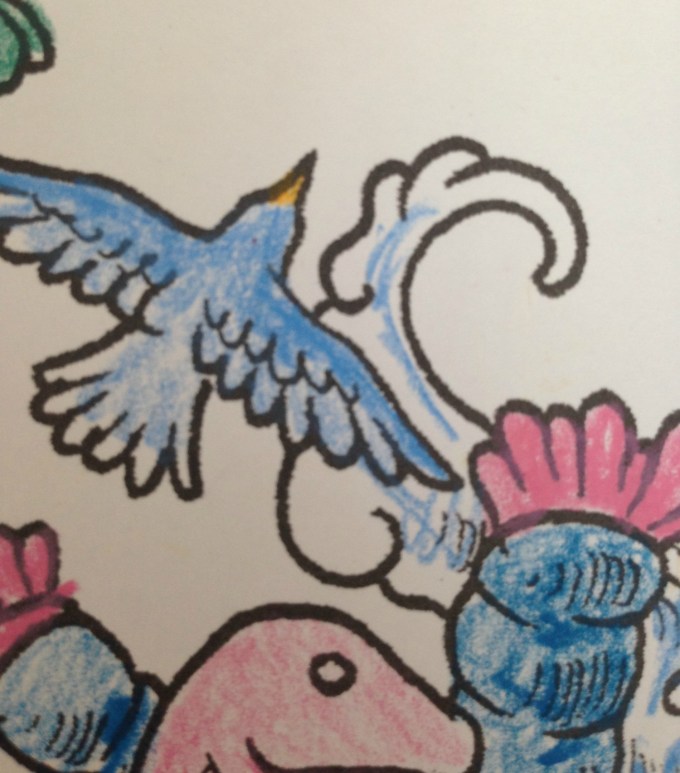
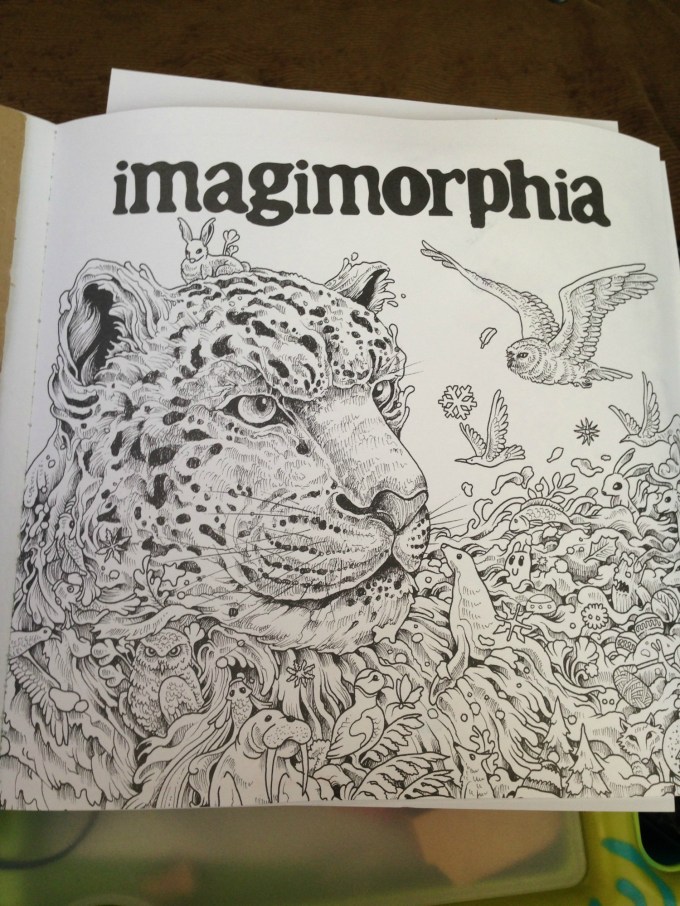
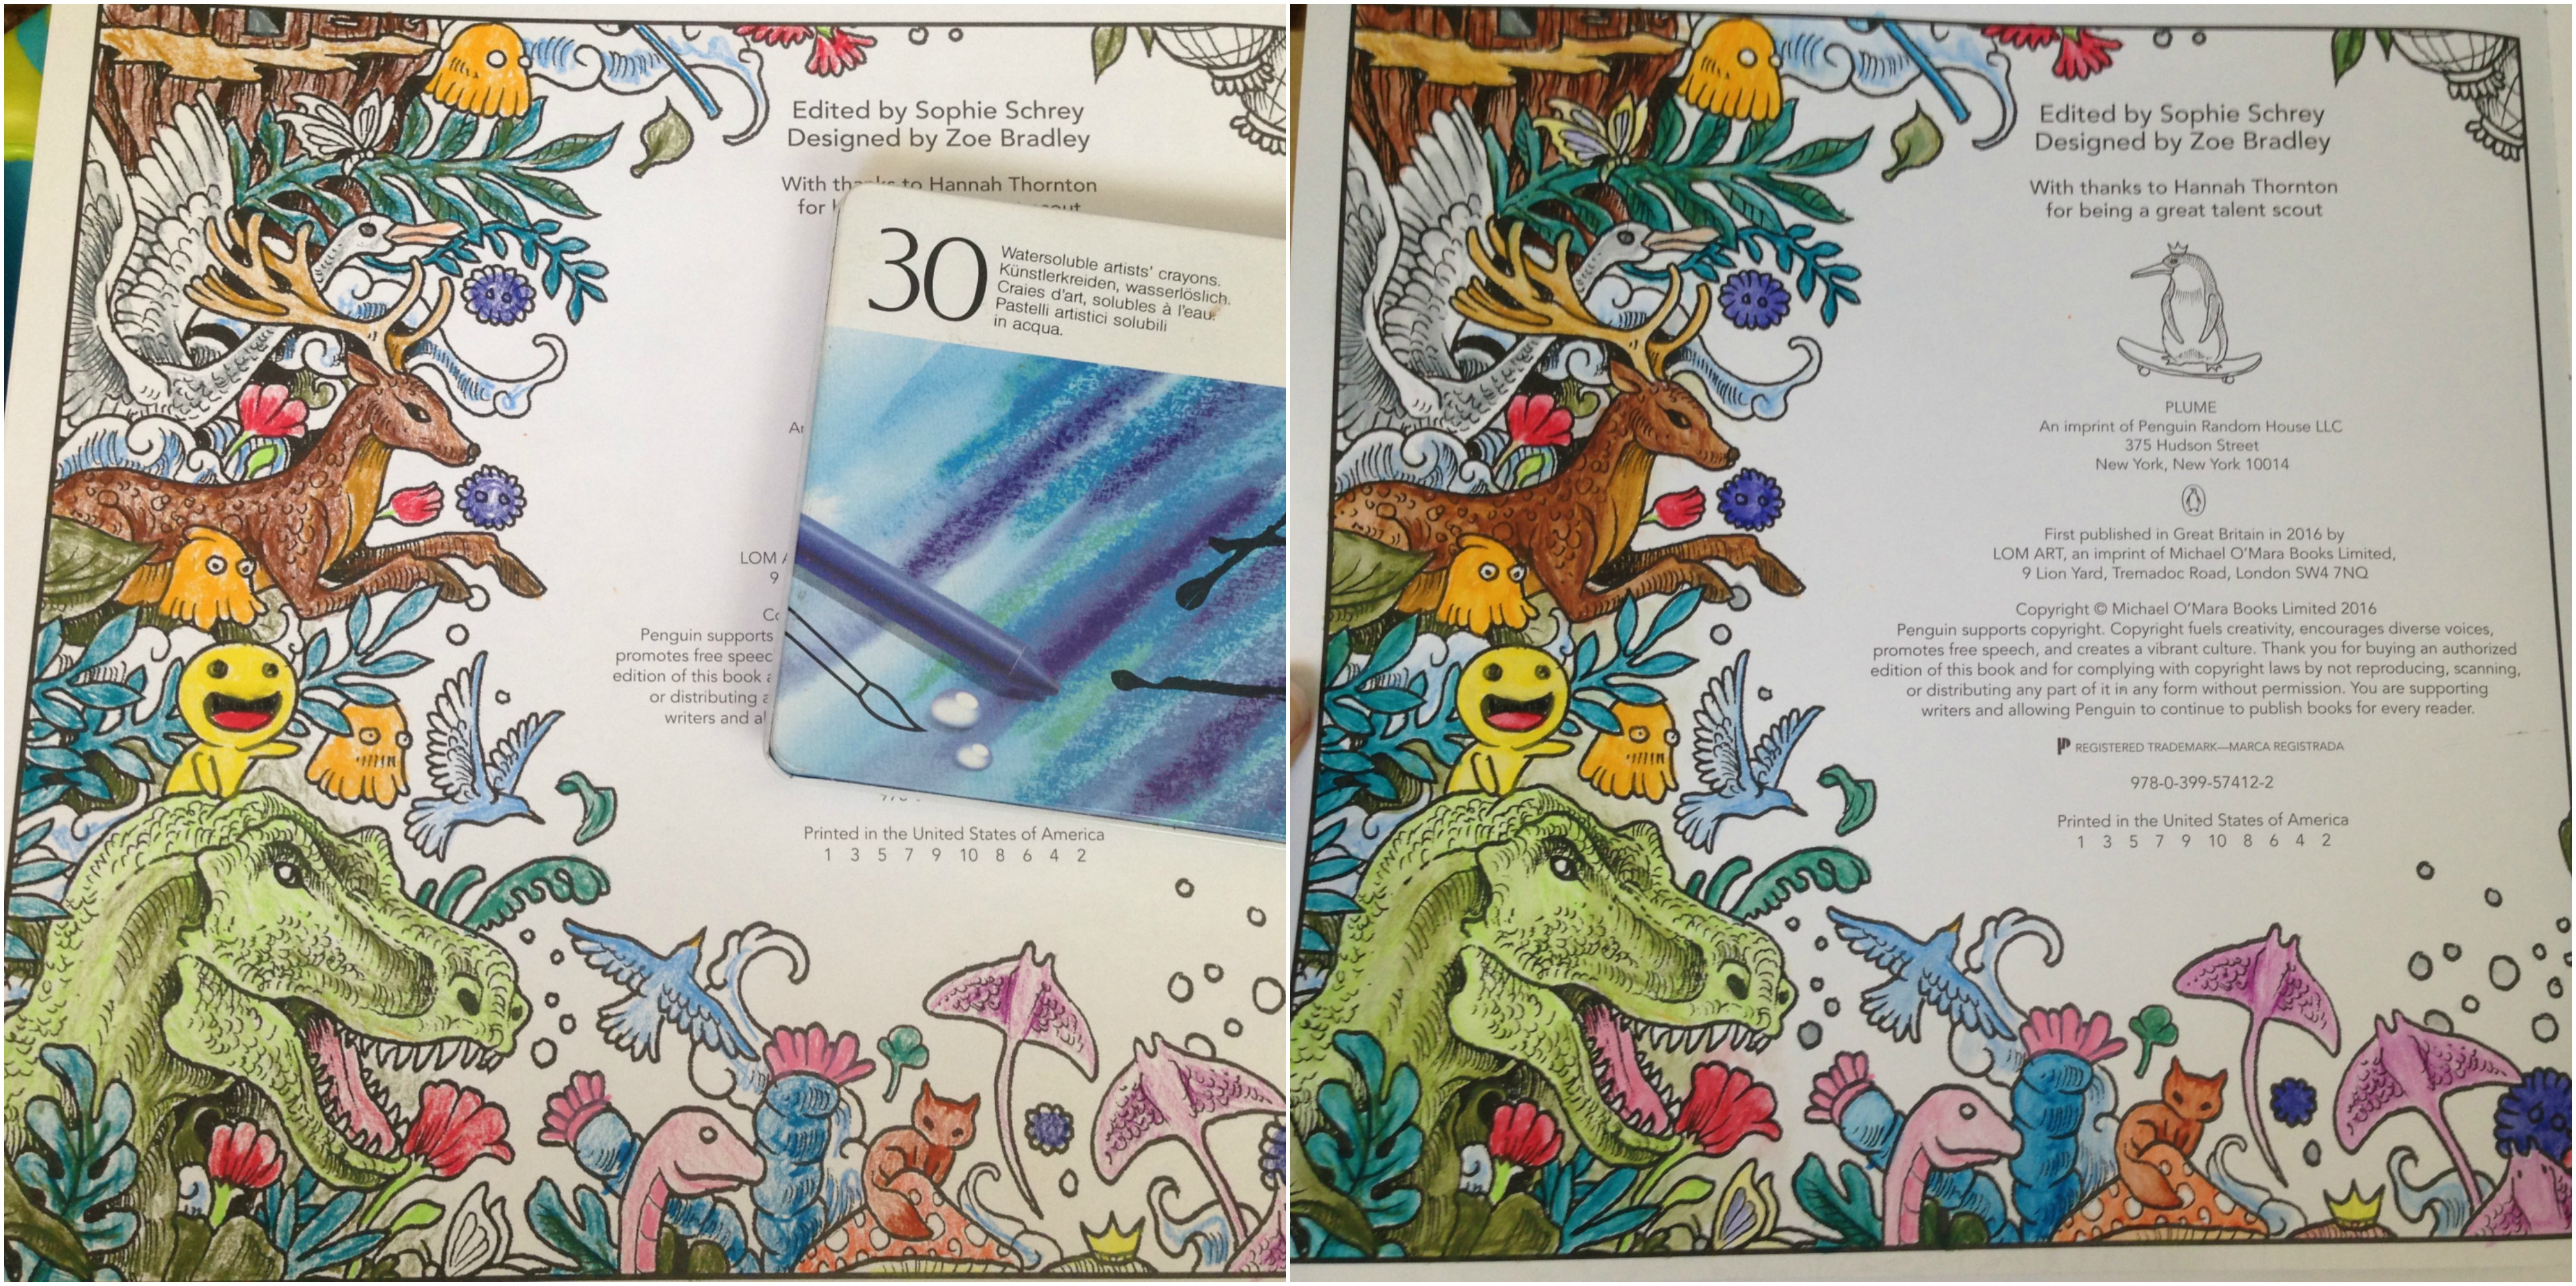
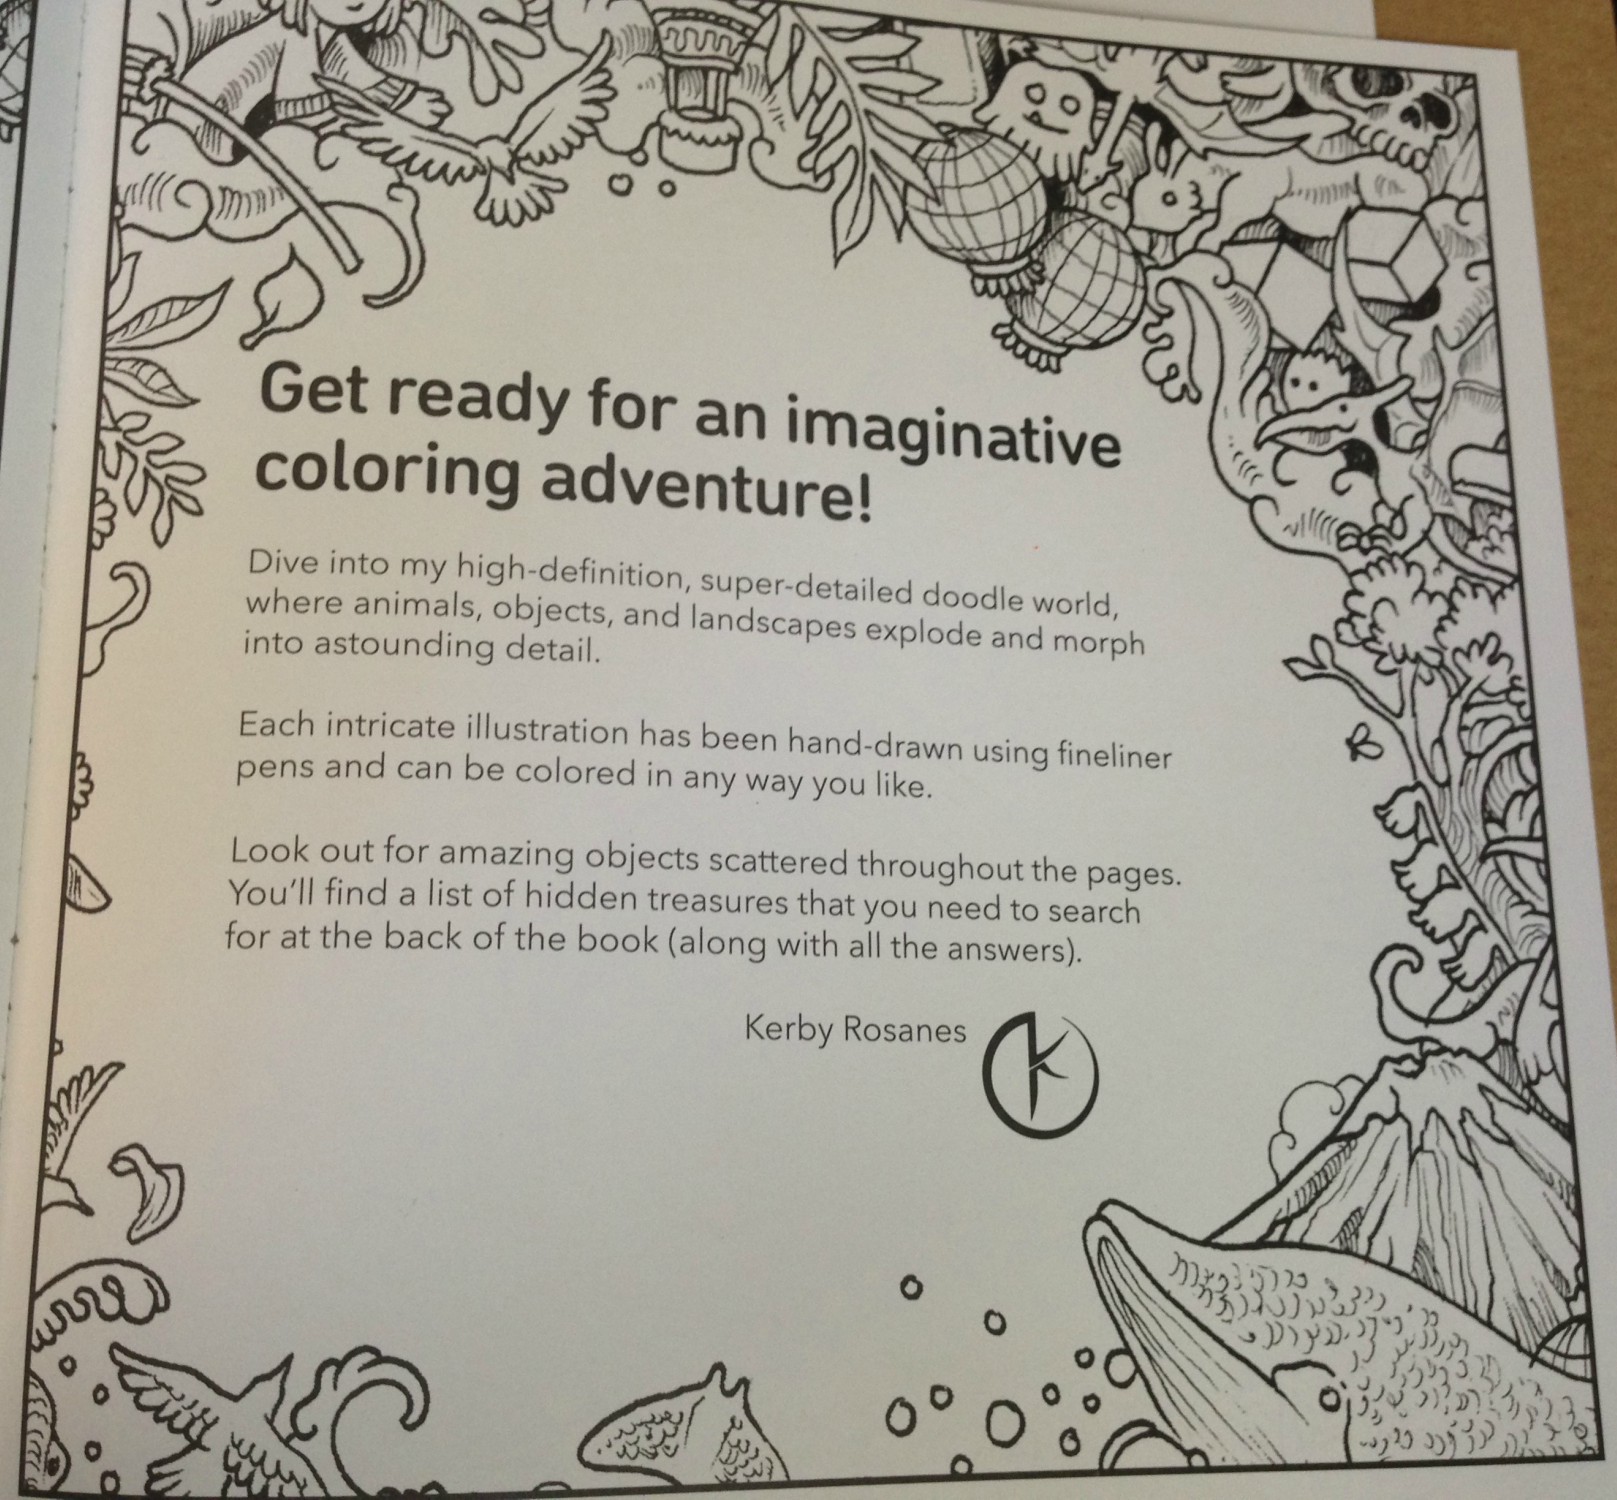
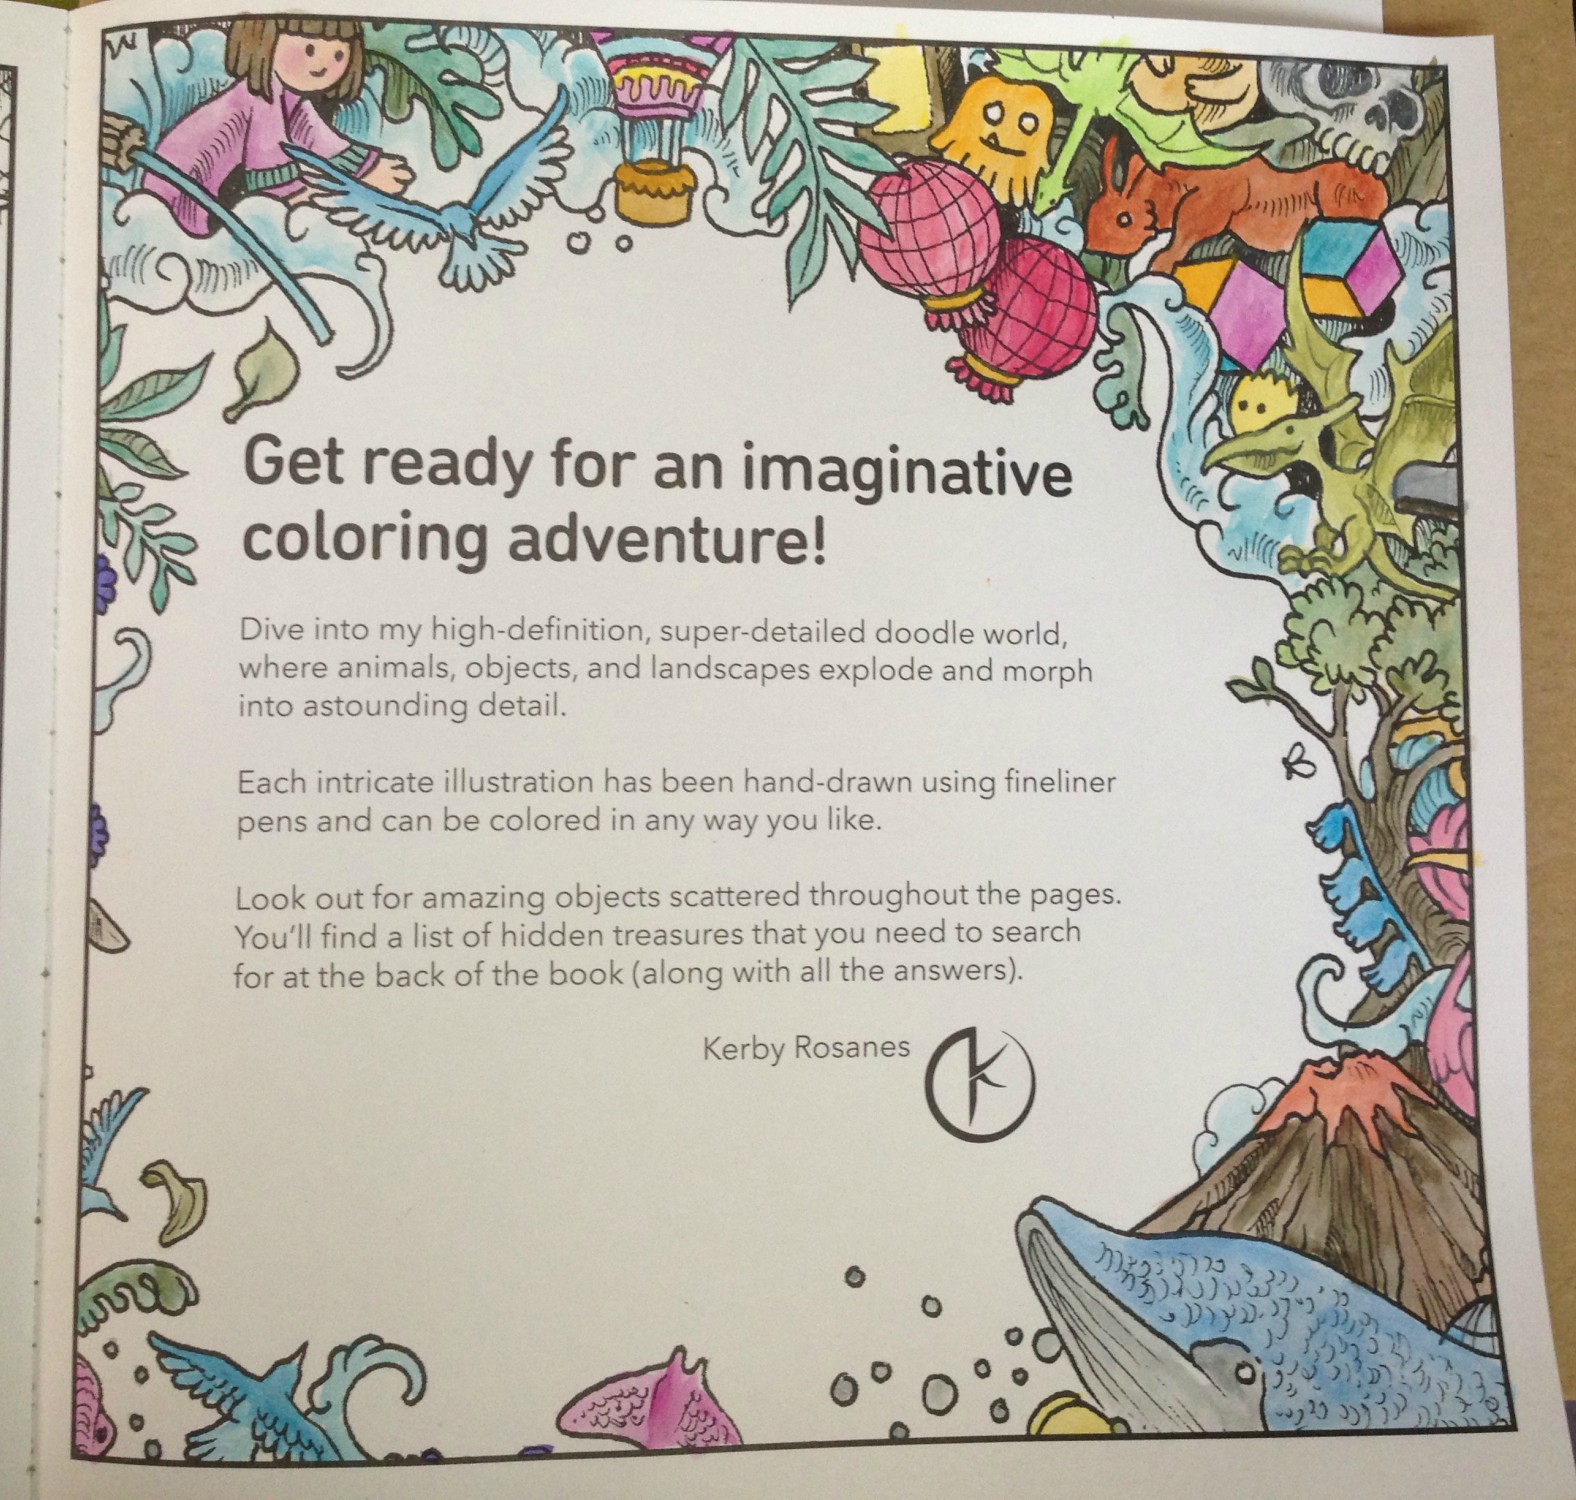
A few weeks ago I’d taken a page from Dede Willingham and done color washes across a bunch of my coloring book pages.  From what I’ve seen she primarily uses acrylic paints, but I mixed it up a bit, using not only paint, but also my Neocolors (seen previously here, in imagimorphia) and my Inktense (last seen here, also in imagimorphia).  This particular page, from Zifflin’s Doodle Fusion, seems to deliberately invoke a Christmas tree, so that’s how I decided to approach it.  I colored over the whole image with the Inktense in shades of green.  The first pic is immediately after wetting the pencils, and the second is the next day, after the page had dried.

doodle fusion christmas tree 00.jpg

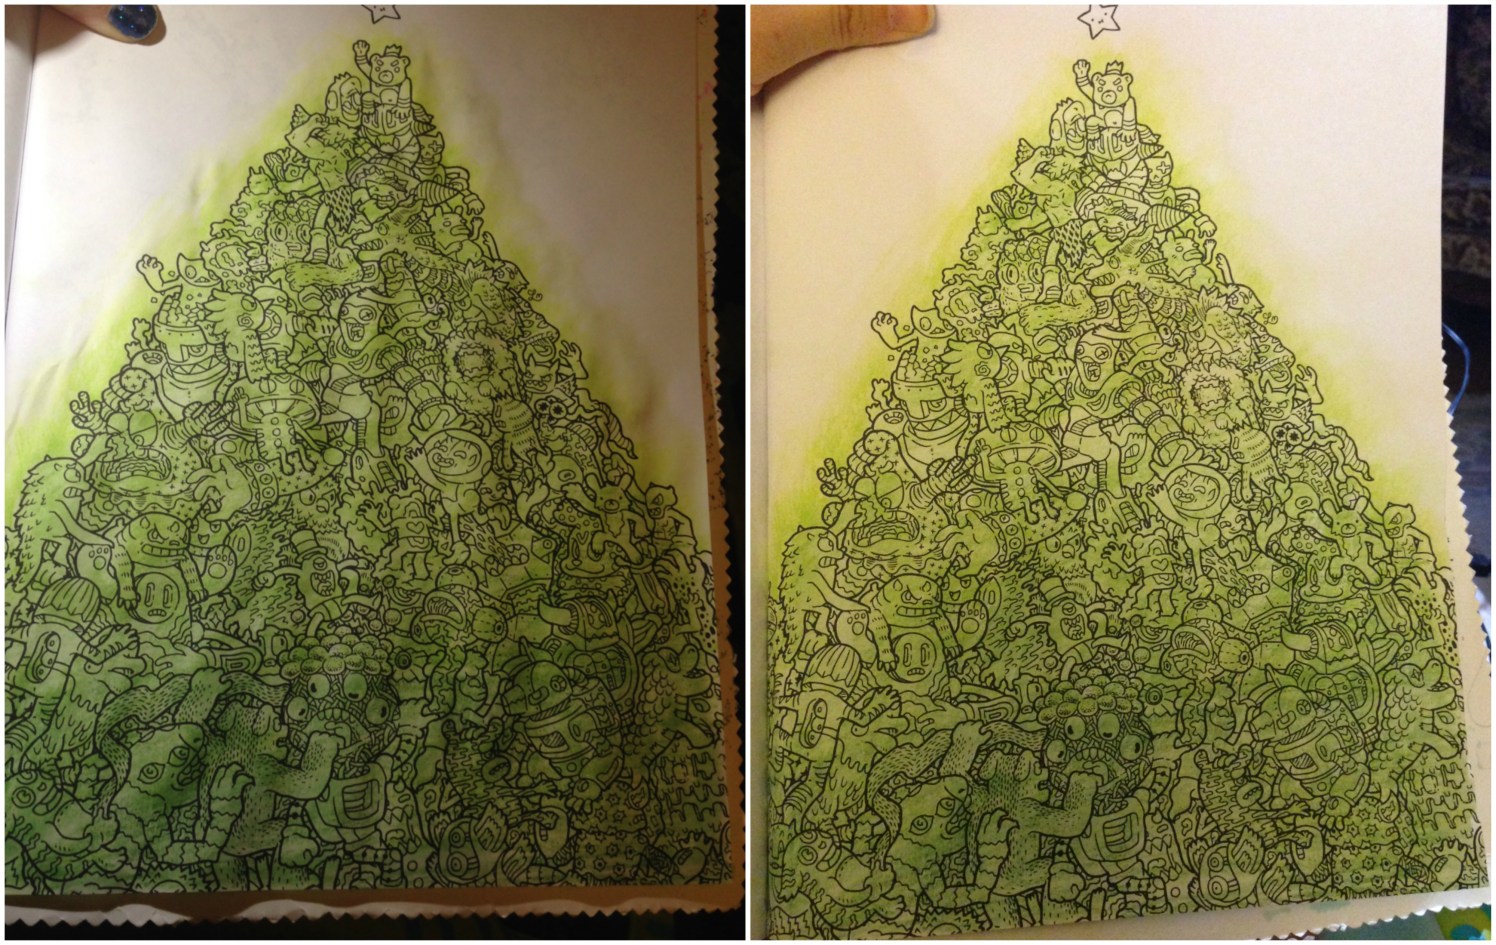
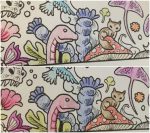
My plan is to color the characters in colored pencil over the Inktense, keeping them muted and dark, but to color all the eyes and anything round-ish in bright gel pens, so they’d (hopefully) look like bright ornaments on the tree.  If you squinted at it.  Maybe.

doodle-fusion-christmas-tree-01

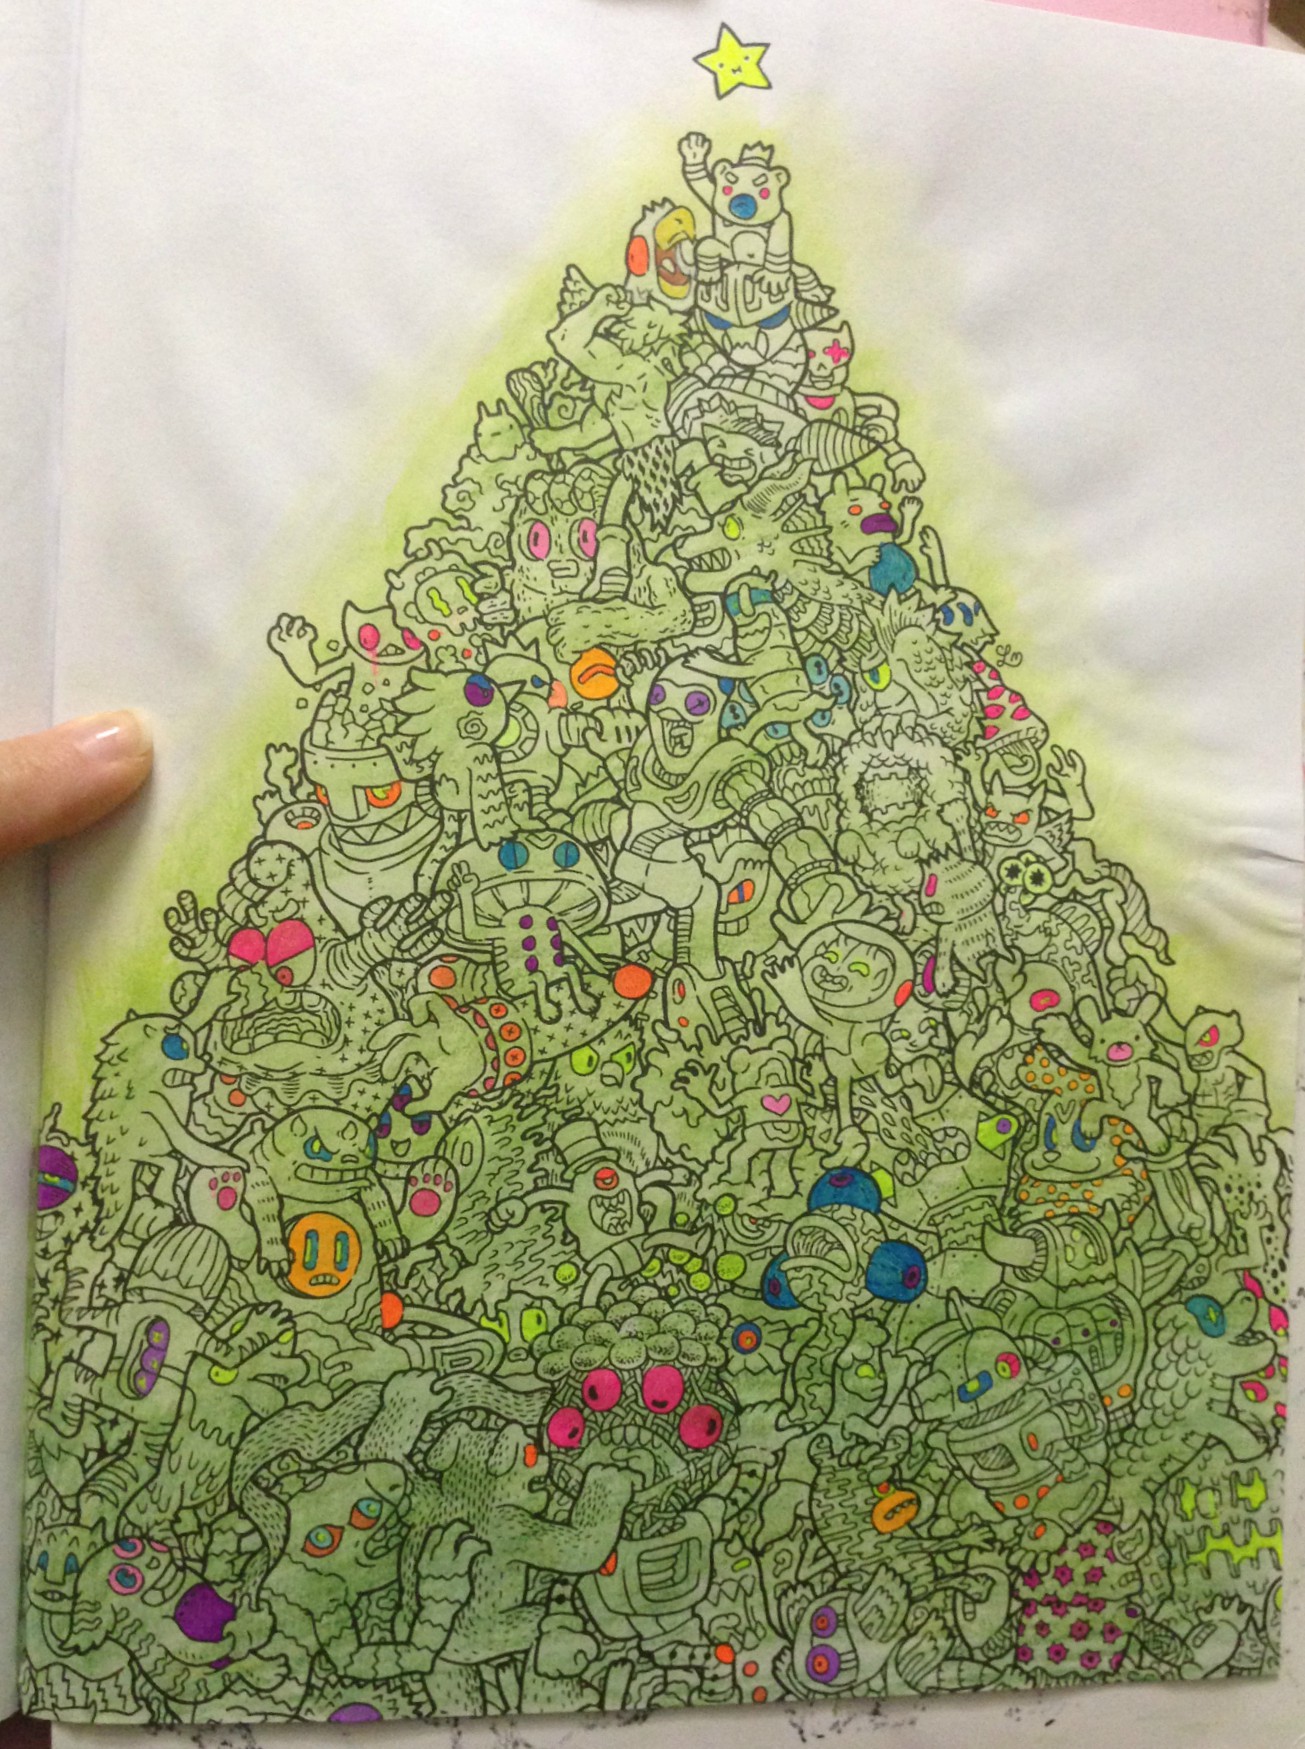
This was after my first pass with the gel pens.  I think I got all the areas I’d wanted, but I’m sure as I work on the figures I’ll find more.  I’m looking forwards to coloring the characters now in dark tones to really make the gel pen pop.

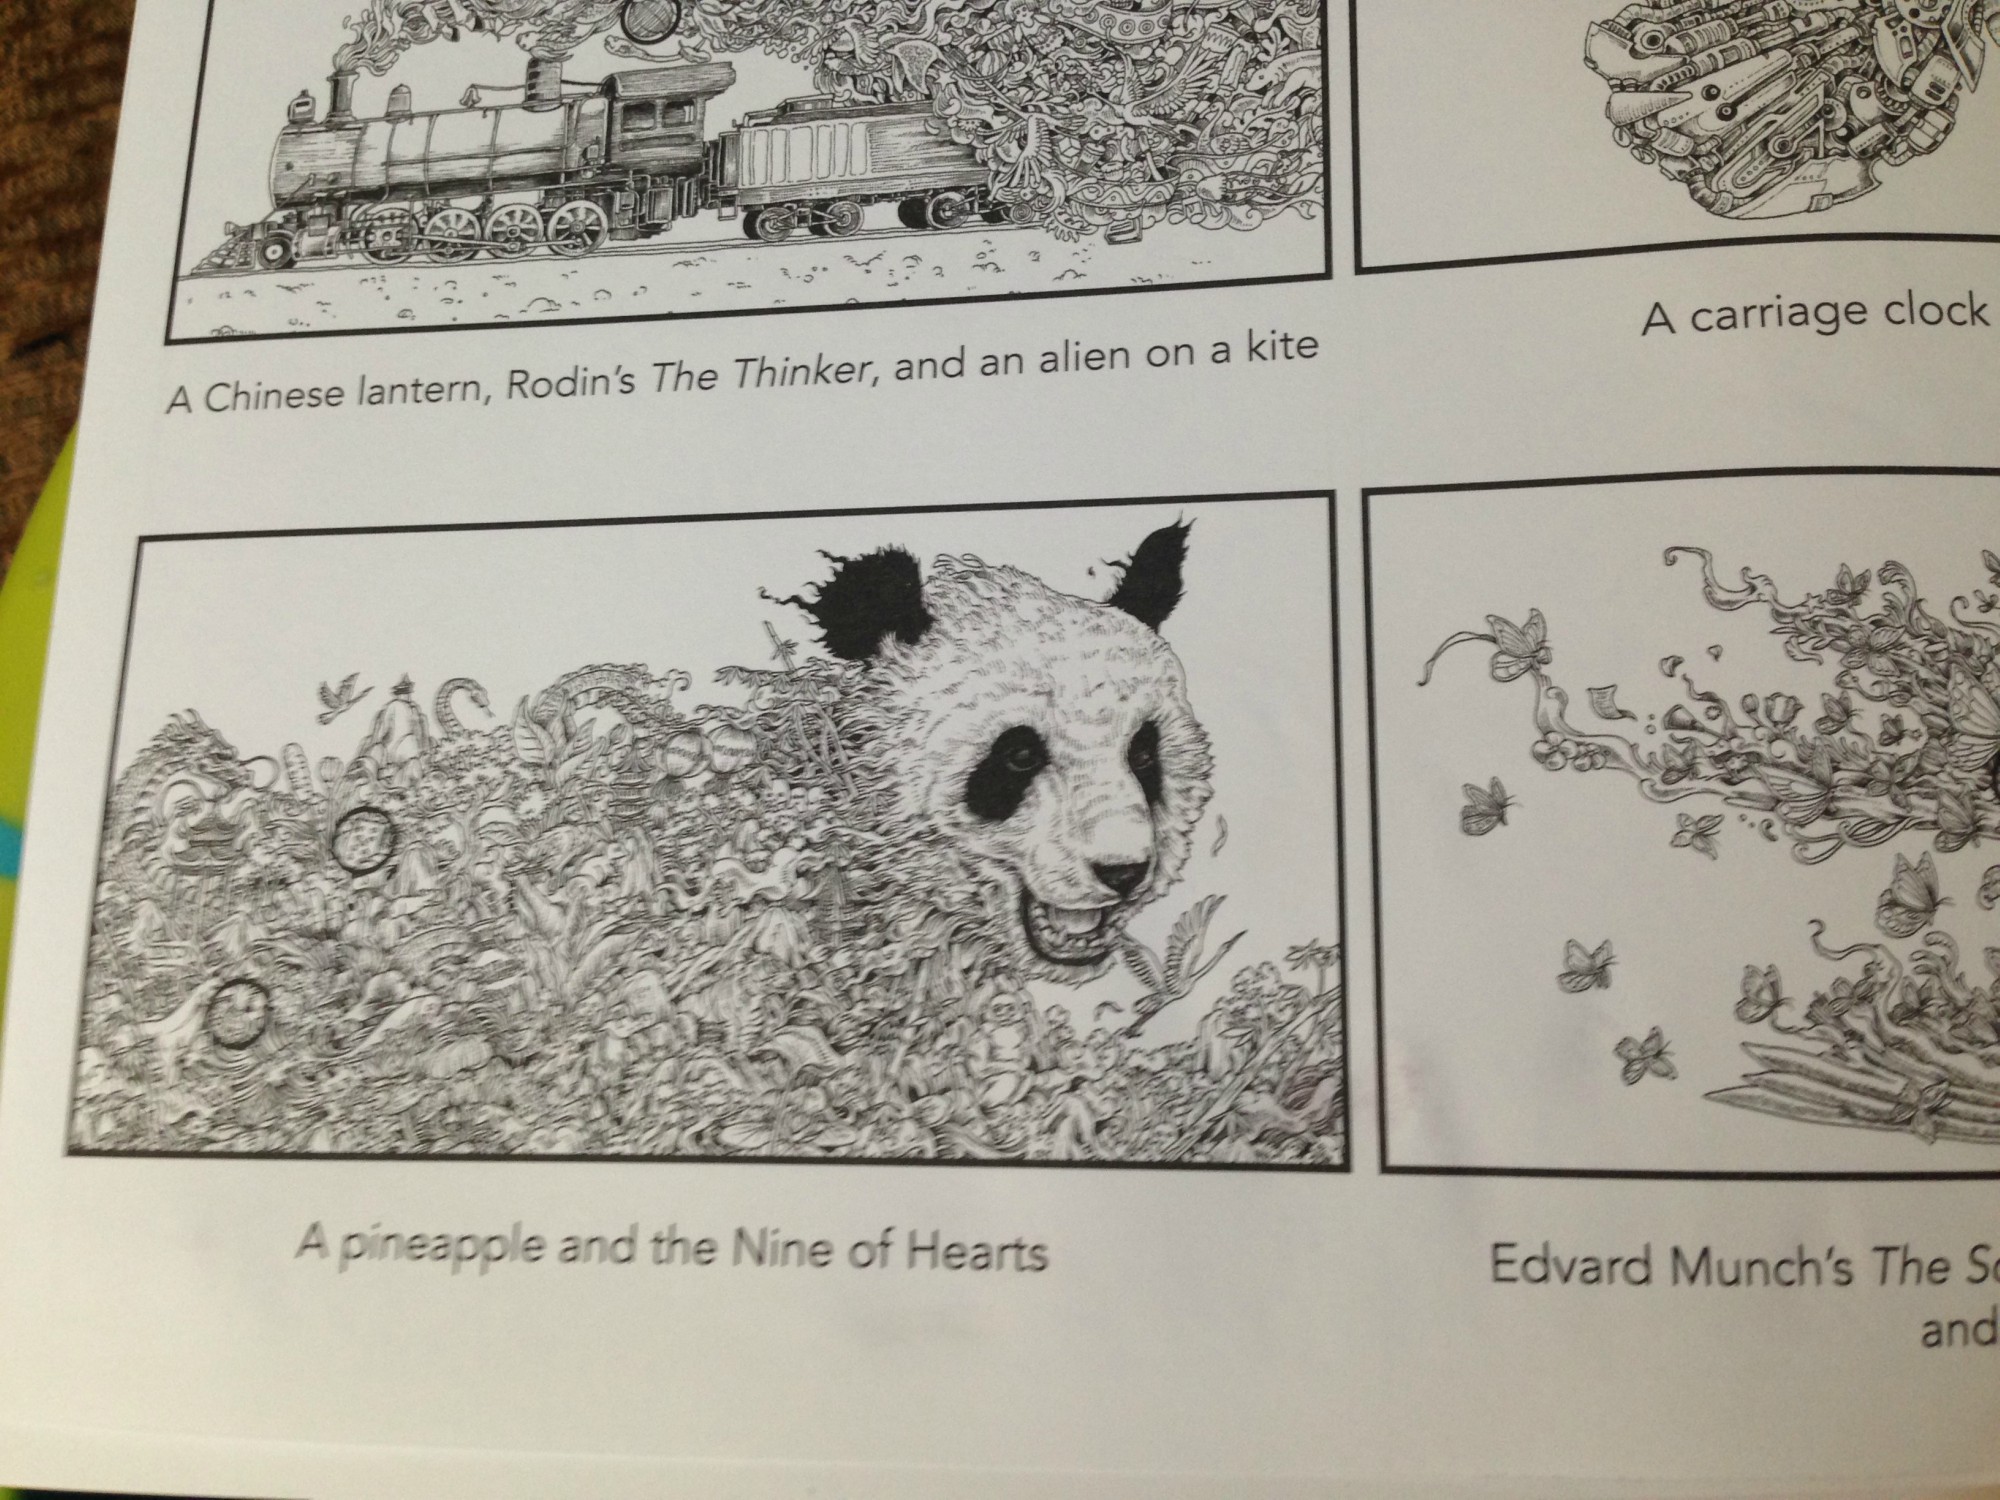
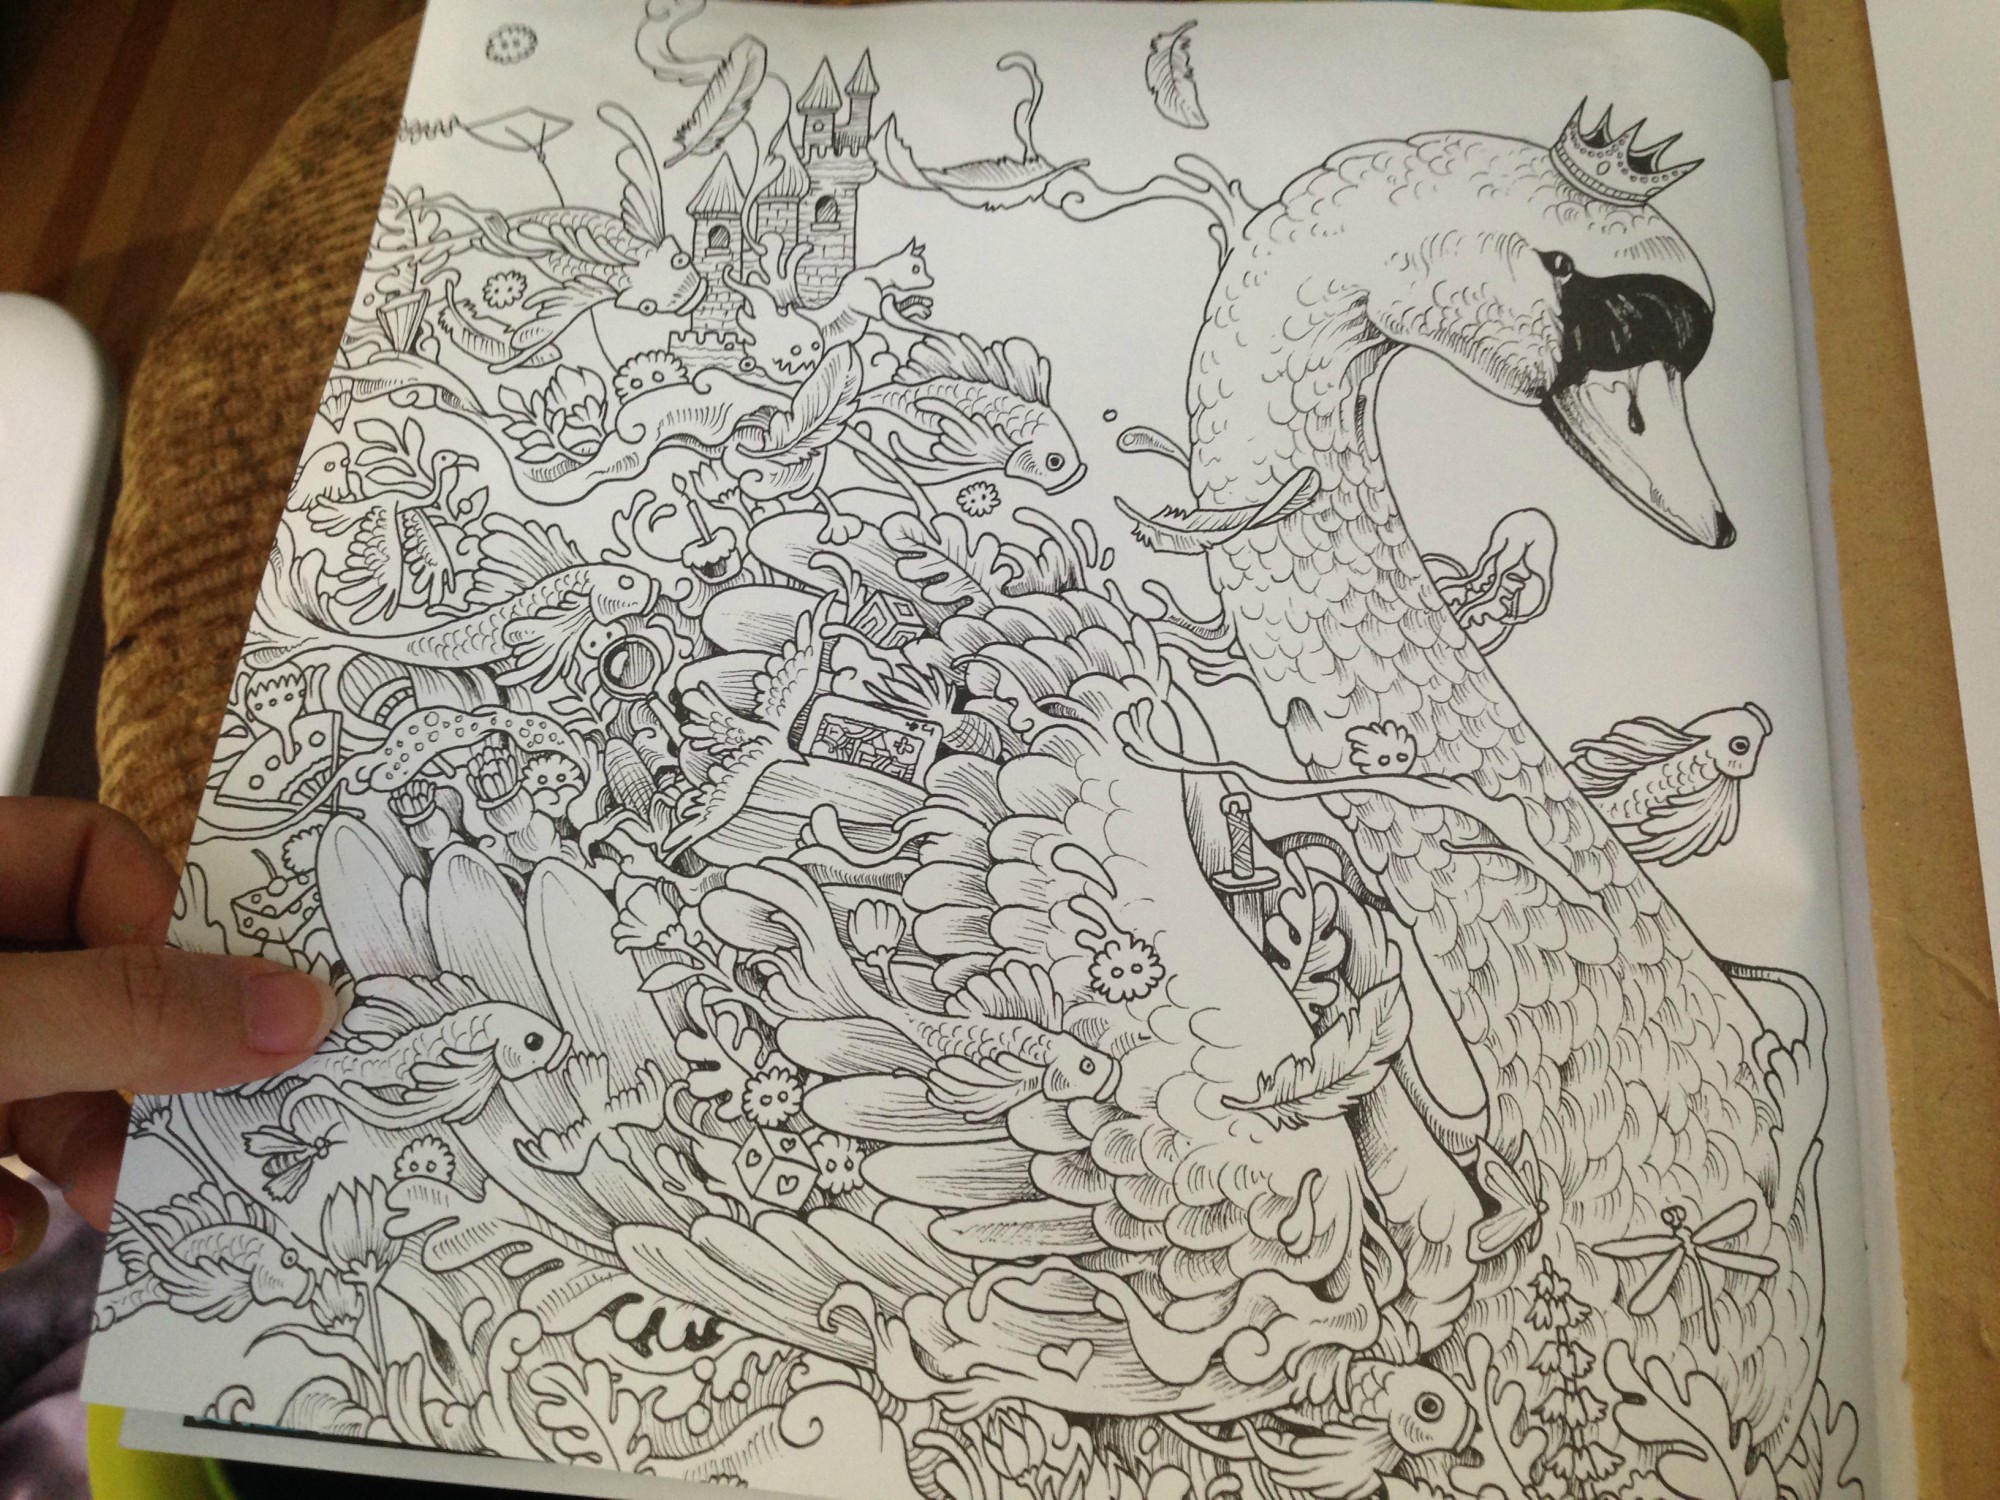
PS- this book is crazy, and I love it.  I’ll be showing a lot more of it in future posts.

I finally finished a page I started coloring back in November in the Disney Villains coloring book Yannick had bought for me, but as this post is getting long I’ll save them for another.  That’s another excellent coloring book that I’ve been working in quite a bit.

UPDATE: those pages are posted here.  🙂

Other Crafts

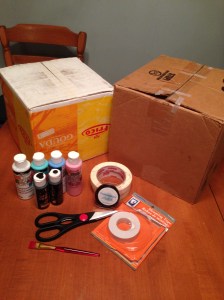
  • While the boys were off school for Christmas break I tried to keep them occupied with more than just Minecraft, Little Big Planet, or their new Skylanders Imaginators. Every few days we had ‘technology-free’ time during which we’d color, or do pencil puzzle books, and during one of those afternoons I taught them how to make their own stuffies.  However I took a TON of photos and so I’ll share the step-by-steps of their work in another post

Alright, that’s it for this round-up!

 
This post may contain affiliate links. This means I might make a small commission on purchases made through the links, at no cost to you.


4 Comments

FREE PATTERN: Perfect Lay-Flat Knitted Diagonal Garter Washcloth

Update: see end of post for information about a downloadable pattern pdf

With my upcoming surgery looming in the near future, I decided to make the most of my time and get a head start on this year’s holiday teacher gifts.  I still make the Christmas and Hanukkah gifts for my kids’ teachers, lunch ladies and daycare workers, and, not knowing how much I’d be up for a long bout of down-to-the-wire crafting post-op (since I somehow always end up working til 4am the night before the last day of school), I was smart and started early.

I decided to make dish/washcloths again.  It’s been a few years since the junior campus staff got regular square washcloths, and I haven’t made them for anyone on senior side yet, so I wasn’t worried about being too repetitive.  I dug some favorite Bernat Handicrafter Cotton from my stash and pulled up the most basic, well known, standard dishcloth pattern Ravelry had to offer – a plain old, diagonal-knit garter washcloth.

Plenty of yarn, plenty of time, and a well-worn pattern.  This, I thought, would be a breeze.  I was even optimistic enough to think I’d have the Xmas gifts ready before November!

Heh.

My troubles started early on.  After completing the first washcloth, actually.  I had finished it and set it down flat on the table and noticed the lower edge immediately curl upwards.  I smoothed it flat but it quickly rolled inwards again.  It wasn’t terribly noticeable, and – let’s face it – this is a dishcloth.  If used properly it would end up scrunched and rolled and pulled and would sag and ease out of shape quickly.  But I was annoyed at how it looked and poked around at it a bit trying to figure out why the top half was fine but the lower half curled in.  The top half, by contrast, lay beautifully flat. I couldn’t figure out what I’d done wrong.

Finally I realized it wasn’t my fault – there was an inherent flaw with the pattern. It was the kind where you increase into the second stitch of every row.  That type of increase pulls imperceptibly on the outer stitch, eating up the slack between the first two stitches.  When this is done at intervals one would hardly notice, but when it is done at the beginning of every row the result was edges that curled inwards.  This didn’t occur on the top half of the diamond because that was the decrease half and I wasn’t using any of the previous row’s slack at all.

I could smooth it flat and I could have blocked it but come on… blocking washcloths?  No thanks.  I’d rather figure out how to knit it without the flaw.

The main thing was to figure out what increase to use.  Any increase which went into the prior row, including a standard ‘make 1’, would cause the same inward tugging.  Yarn-over increase patterns didn’t have that problem, but I didn’t want eyelets dotting the sides of my washcloth.  I wanted these cloths to look less dainty, more ‘rugged’, if that makes sense.  I decided to work YO increases but to close them on the subsequent rows by knitting them through the back loop.

Once I was tinkering with the pattern I also added a plain row at the max width point before transitioning into the decreases. Diagonal patterns always seem to have you go from wide to narrow without any plain row in between and I find that the extra row tugs less on those points of the diamond.  The result is a lovely garter washcloth which has wonderful drape and lays flat beautifully, and is now my go-to knit washcloth or dishcloth.

photo2016-10-28113107amedit

I’ve knit 9 of them so far… sadly not anywhere near how many I need, but enough to know I’m really happy with how it works out, and I added it to Ravelry tonight.

The yardage listed is for a dishcloth knit to 41 sts, which results (at my tension) in a 9” x 9” square. You can easily make them larger or smaller. If desired before binding off you can create a strip to fold over and sew down for a hanging loop by either knitting about 4” of garter on those 3 sts or knitting them into a 4” long 3-st i-cord.

This pattern would work equally well for baby blankets or throws, continuing to increase until whatever max diagonal is desired before working the plain row and then beginning the decreases.

photo-2016-10-28-11-32-05-am

Directions

  • CO 3 sts 
  • row 1- k across 
  • row 2- k1, yo, k to end 
  • inc row– k1, yo, k to previous row’s yo and knit it tbl (to close the hole), k1 
  • Repeat inc row until diagonal of cloth is at desired widest point (I stopped at 41 sts)
  • Next row- k to previous row’s yo and knit it tbl (to close the hole), k1 
  • dec row– k1, k2tog, k to end of row 
  • Repeat dec row until cloth is back down to its original number of sts 
  • BO remaining sts & weave in the loose ends

Update!

This pattern is on Ravelry here.

This pattern is provided for free above, but if you’d prefer an easy-to-print version, I have made it available here for a very small fee. The PDF includes the full instructions, an easy to read layout and full color images.

*Updated January 2020

This post may contain affiliate links. This means I might make a small commission on purchases made through the links, at no cost to you.


Leave a comment

frogged!

Remember when this was a knitting blog?  *grins* Well this post is about crochet LOL

Last night I found out just how many geek & gaming videos one can watch while ripping out an entire sweater.

Earlier in the day I’d somehow found myself browsing granny square-related patterns on Ravelry yesterday, and stumbled across this pattern.image

It’s the 171-35 Harvest Love Pullover by DROPS and it’s free on Ravelry.  I think it’s got the potential to either look hideous or adorable on me, and hoping for the latter, I opened a new tab to check out my stash database and see if I had anything that might work.  One yarn that came up was my Noro Silk Garden, because I’d never marked it as fully used in the v-neck sweater I’d knit last January.

image


This one.  I’ve also never finished weaving in the ends for this sweater, because I’ve never been satisfied with how it fit or looked on me.  I tried it on again last night and decided it was not going to ever be something I’d wear, and that Silk Garden is too gorgeous to leave relegated to a discarded FO box.  So, I decided to frog it.

The process should have been easy enough: undo the bind-off on the neckline and rip that back, undo the bind-off on each sleeve and rip those back, then pull out the seam thread from each side, then undo the 3-needle bind-off from each shoulder and then frog the front and back pieces from neckline down to the hem.  And it was… easy.

It was also a huge pain in the butt.  I’d been so smart in my knitting that to avoid pooling I’d alternated balls of yarn every 2 rows.  This now meant that every 2 rows I had to untwist the balls I was re-winding around each other.  It wasn’t so bad on the body pieces because I could let them flip around to help me out, but the sleeves were still attached to the heavy body and had to be manually twisted after every short 2-row tugging bit.

It was long.  How long?  It took 2 Day[9] shows (I caught up on the latest episodes of Day Off, and Mostly Walking) and 6 from Geek & Sundry (checked out some tips on finding anime and watched Damion Poitier snuggle puppies) to go from adult sweater to a bunch of balls.

image

So I guess now I’ve… got balls?  Heh.  I’ve also got a crochet chart to type out into rows I can tick off on a spreadsheet, and then I can get started on what will hopefully be the last project with which I attempt to use my lovely Silk Garden.


1 Comment

Derwent Inktense ‘before-and-after’ in Kerby Rosanes’ imagimorphia

I haven’t talked about it much but I’m going to be having surgery in about a week.  I’ve actually been off work since mid-August, and this unexpected time at home has given me a lot of time to knit and color, and while I’ve been revisiting old supplies I’ve also been lucky enough to get some new ones.

My watercolor research back in August led me to discover Derwent Inktense and I went on a really long review and YouTube binge, learning everything I could about those amazing ink-pigmented colored pencils.  When my birthday rolled around in September I basically only asked for art supplies, and my parents were wonderful enough to oblige.

01_whale_imagimorphia_gifts

Topping my list was the Inktense set.  I really enjoy the metallic watercolor pencils and the Spectrum Noir Sparkle set is just yummy for anyone who likes glitter (um.  yes.  me!  I like glitter!), but in this post I’m focusing on the Inktense which I’ve been using primarily with the waterbrushes I got with them.  I really love this waterbrush set because of the sizes, the tiny #1 tip is perfect for the small areas in coloring books while the larger sizes make doing washes of color or wetting larger areas a breeze.  They’re super easy to fill and I haven’t had a single leak, and I’ve been using them on a regular basis since September.

Now then, on to the Inktense!  I got the full set of 72 colors but they do come in smaller tins, and the pencils are available open-stock so you can definitely get a smaller set and then add to it as you go.

So what are Inktense pencils?  According to their site, “Derwent Inktense pencils are our best watercolour pencil ever! You can use them dry but mix them with water and WOW! the colour turns into vibrant ink.  Once it’s dry the colour is fixed and you can work over the top of it, and, because it permanent it’s great for using on fabric such as silk and cotton!”  They refer to them as ‘watercolors’ but they’re not, not really.  They’re ink pigments in colored pencil format.  You can use them as pencils and they’re nice, on the darker end of color ranges, but it’s when you add water that they transform completely.  And because they’re ink once they’re dry they’re permanent.

What does this mean for coloring and how does this compare to a watercolor pencil?  Let’s say you wanted to color a pink sphere, and you wanted to block in the rounded shading first, then go over it with a wash of pink, leaving a highlight area.  With watercolors the paint reactivates any time it gets wet.  So even if you let the gray shading dry, once you washed pink over top the gray would bleed out and muddy the pink and if you’re not careful you can make a real mess of your work.  Inktense are permanent when dry so you can block in your shadows, wet the pencil strokes and fill your darker areas, and then once that’s dry you can go over it with even the lightest shades and the gray won’t budge.  This is a horrible way of explaining that you can go overtop of previous layers without affecting them.

Of course the first thing I did when I got my set was to swatch out the colors so I could see what I’d be working with.

derwent_inktense_swatches_before_water_watermarked

Above are the pencils when dry.  The appear quite dark, and there are a lot of greens and browns for those who enjoy coloring books such as Secret Garden and other floral-heavy books.  The pencils apply well and it’s very easy to get a lot of color down.  Each pencils is marked with it’s color number and name, making it very easy to identify which one I’ve used…which is helpful because the colors on the ends of the barrels aren’t quite identical to the actual color of the pencil itself.

Okay, so they’re really nice when dry.  The real magic, however, happens when they are activated.

derwent_inktense_swatches_after_water_watermarked

This image barely shows the bright vibrancy of these colors in real life.  The pigments activate instantly with water, and I could have used the lightest of strokes and still had the same color payout as I got here.  I was blown away by my swatches and as soon as I’d added them to my swatch book I had to get started on a coloring page.

I’ve been watching a lot of YouTube coloring tutorials featuring Inktense pencils (PetaDede, Lindsay and Lisa are four of my favorites) and I know that the pencils are typically used in wet-as-you-go manner, coloring a section and then activating it, and so on.  However, making the swatches was so satisfying in a “wait til the end” surprise payoff, that I just had to try coloring an image that way: coloring the whole thing, and then activating the ink at the end to see the before and after.

01_whale_imagimorphia_pre_coloring

After testing the paper in the back of the book to make sure it would be safe to use (no bleed-through) I chose this image from Kerby Rosanes’ imagimorphia.

02_whale_imagimorphia_mid_coloring

I’ve been having a lot of tummy time (lol) and this is how I’d set myself up in bed.  A clipboard helped keep the book open as well as gave me a flat, hard surface to work on.  I had a sheet of card stock underneath this page to protect the ones beneath, and I had my swatch book open in front of me so I could accurately choose my colors.  My laptop was off to the right playing episode after episode of Welcome to Nightvale (soooooo weird and awesome) and the tin of colors was on my left within easy reach.  Finally, my flip-top Ott-Light was balanced on the bed casting accurate light over the picture for me, since lighting in my house is crappy at best.03_whale_imagimorphia_inktense_before_wet

This is my completed painting before activating the Inktense inks.  I colored pretty lightly, wanting to see how the pigments did on their own before adding any shading or depth.  (PS yes I know that’s supposed to be a whale and whales aren’t green LOL) Coloring with these pencils is like a dream.  They apply color beautifully even to paper that doesn’t have a lot of tooth.  It is really easy to apply just a hint of color without any pressure on the pencil, which is a good thing because it means you won’t have to waste a lot of the pencil just to get a good color payout.  In fact, these colors are so vibrant and juicy when activated that if anything, it’s almost too easy to add TOO MUCH color.

(For example, my son Jakob is addicted to these pencils too and is coloring an image in one of his books.  I was showing him how subtle applications of color give pastel-pale results and he tried it out for himself.  His three light strokes of Payne’s Gray, applying barely any pressure, provided enough color when activated to light wash a bunny butt around 3″ in diameter.)

04_whale_imagimorphia_inktense_wet_sample

I took this image right when I’d started activating the inks.  I went slowly, enjoying watching the colors blossom into vibrant paint.  (Seriously, it’s addictive).  I activated each like section at a time, brushing off any excess pigment onto a paper towel to keep the tip of my water brush clean.  In this image you can begin to see the difference between the activated (water-applied) and pencil-only sections.  The orange and yellow fish on the right is still pencil, while there has been water applied to the one on the left.  The little fairy creatures have been wetted on both sides.  What really shows off some of the color payout, however, is the school of fish that crosses the tentacle.  You can see how little color I’d applied, versus how much blooms from the watered inks.

05_whale_imagimorphia_inktense_after_wet

And here is the completed painting.  I didn’t use very many colors, but even still the brightness and depth these inks have is amazing.  This picture is so much brighter and deeper in real life, showing subtle shading and contouring just from the way the ink moved like paint.  It dries faster than watercolor so you do have to go in sections and work quickly if you want to activate a larger area without dry lines showing, but there’s still a decent amount of time to move the paint around before it dries, allowing for things like the softer blues in the water froth being ink I’d swiped from the water sections.

I’ve very quickly developed an Inktense addiction, as have my kids, who have been getting to use Mommy’s special art supplies now that they’re a little older.  They don’t replace watercolors if that’s the type of medium you want, rather they’re a medium of their own, and are absolutely gorgeous to use.

06_whale_imagimorphia_inktense_before_and_after

 
This post may contain affiliate links. This means I might make a small commission on purchases made through the links, at no cost to you.


1 Comment

Can Marco Raffiné colored pencils be used as watercolors?

Can Marco Raffiné colored pencils be used as watercolors?

Yes.

No.

Maybe?

When I was playing around with my Caran D’Ache Neocolor II watercolor crayons I had my Raffinés next to me, as I’d just been working on the Egypt picture in the same imagimorphia coloring book.  I’d done a lot of research on them before purchasing, and one thing that had come up in people’s comments were how some of them had been able to use them as watercolors, though not everyone had that luck.  The Raffinés are oil-based colored pencils, not wax-based like Crayola and Prismacolor and most others, so they do color and shade and grip the tooth of the paper in a different way, but were they really so different that they could dissolve in water enough to be used as paint?

Let’s find out.

This is the page in the back of the book right before the hidden objects are pointed out.  I colored a bit of it with the pencils then used the same small brush and water pot as I used for the Neocolor IIs.

marco raffine 01

Here’s a before-and-after closeup of the lower section of the page.marco raffine 02

The top image is the dry coloring, and the lower image is after I’d applied water.  At first I was happily startled to see that it did appear to work!  I had to double check the ‘before’ pic on my phone to be sure, but seeing them side by side it’s hard to deny that there’s a clear difference between the two.  The light pencil strokes in the worm (?) have blended outwards, as well as in the pink flower on the left and the green leaf in the background.  The orange puff ball looks exactly like a watercolor had painted it, and even the browns in the fox (?) and mushroom are more evened and fluid.

marco raffine 02 back

I immediately checked the back of the page even though I wasn’t really concerned with bleed-through, but sure-enough there was none.

So if I think it sort of worked, why am I hesitant to say that outright?  Because while the colors did wetten and spread, once dried the strokes were still visible and retained the soft look of the oil-based pencils.  It’s hard to explain but it sort of looks like I’d done a light wash of watercolors over or under the pencils, as they’re both visible.

Since it was hard to compare the ‘after’ with the small image on my phone, I decided to do a definitive comparison test in the book itself.

The first image below (top left) is my initial coloring of the royal penguin on a skateboard.  I drew a line down the center to keep the division clear and then colored both sides with the Raffinés.  Then I wetted the left side only.  Did the pigment become a wash of color? Yes… there is a visible difference in the two sides, with the left side looking more even and ‘full’.  But I still wanted to see a bit more.

In the top right image I added a few more test things to try out.  On both sides I put a light shading of red and blue to see if it would be possible to blend them once wet, and I also drew a quick leaf and colored it with some light and dark shades to see if I could get blending on that.  Basically I was trying to mimic effects one would be trying to achieve in a coloring book or drawing.  marco raffine 03

The bottom right image is right after I wetted the left side.  I did my best to blend the red and blue together, as well as the colors in the leaf.  Those items are still wet, but the penguin is already begun to dry and look a little different from when wet – a touch less blended and spread, and a bit more colored-pencil-y (if that makes any sense at all).

Finally the bottom right image is after everything had dried, for a full comparison.  I’ve included a solo pic of that image here, so it can be viewed larger:

marco raffine 04

So.  Do we really have “All the Answers”?  Did the blue and red blend?  Not really.  There was a bit of pigment bleed spreading the colors to one another, but no real blending of the two to become purple.  What they did do, was soften alongside each other.  In fact, that seems to be what all the colors did.  The pigments spread slightly, giving a bit more color to the background of the pencil strokes and softening the overall look of the colored image.  In real life the coloring looks very dry, almost pastel-y, and the pencil strokes are visible over the softened backgrounds.

I think the final answer is that they DO spread somewhat with water, but not completely nor efficiently to claim they would be an inexpensive comparable to true watercolor pencils.  What they DO do, is soften the pencil look.  I think they would be great used with stamps for cardmaking, where one can lightly shade the image then soften the pencil colors.  In knitting there’s a term called ‘fulling‘, where the yarn is plumped up and thickened while still retaining some stitch integrity (unlike complete felting), and that’s how I feel about adding water to these pencils; when wettened the color plumps and fills its space while still retaining the original lines and strokes.

TLDR: Do they watercolor?  No.  Does applying water slightly bleed and soften the colored pencils for a unique, almost delicate look?  Yes.

 
This post may contain affiliate links. This means I might make a small commission on purchases made through the links, at no cost to you.


3 Comments

Playing with Caran D’Ache Neocolor II watercolor crayons in Kerby Rosanes’ imagimorphia

I’d been researching watercolor pencils a little while ago, and while reading review sites I came across a few mentions of the Caran D’Ache Neocolor II watercolor crayons.  They looked interesting and were lauded for their bright, vibrant colors and creamy texture, so I made a note to look up more reviews.  In the meantime, I remembered that at some point during my creative history I’d owned a set of, what my memory told me, were kid’s-quality twist-up watercolor pencils.  I could picture the set, and knew there was only one place in my home-office they could be, so one morning I went downstairs and took a look.

I found the twist-up colored pencils right away… and was disappointed to see they were just that- colored pencils.  Nothing water-soluble about them.  It was frustrating to have been mistaken but I figured I’d just continue my research… and then I peeked through the rest of the drawer just to see what other drawing supplies I’d collected over the years and had forgotten about.

neocolor 01

What a discovery!  I think I squee’d out loud when I saw the white edge of the tin under an old pencil case of charcoal and blending stumps.  Not only had I forgotten I owned these but clearly I’d barely ever used them when I got them, because they were all still full-sized and touching the sponge strip running the top of the case.

Immediately I brought them upstairs to try out.  I’d been stuck in bed, resting my legs due to a really bad bout of sciatica, so I put together a little portable watercolor kit that I could use in bed without making a huge mess: a tiny tupperware of water, a fine-tipped paintbrush, and a folded handtowel for blotting and cleaning my brush, all contained within another small tupperware that I could close up and store with my craft supplies.neocolor 11

I made pages for them to add to my swatch book.  I didn’t want to use water in that pad itself because the paper is so thin, so I folded a sheet of cardstock in half and tore it into two papers that each fit on my swatch book’s pages.  I scribbled a little bit of each color onto the paper and then activated each with a tiny bit of water.  These colors are so rich and the crayons dissolve so easily that a SUPER tiny amount of water is all that is needed.neocolor 12

After the swatches dried I labeled them with the color names from the Caran D’Ache site and then used a glue stick to affix them into the swatch book.  Now- onto the coloring!

My first test was the inside cover page of Kerby Rosanes’ imagimorphia, which I have been loving lately.  I colored the page pretty quickly, not bothering to fully fill in all areas (like the cut area of the tree, for example) because I knew once wetted, the color would spread.  I did some minimal color mixing and shading on the leaves, deer and dino, all using the crayons as crayons to color.  Sadly they’re old enough that they became fragile, and two colors broke in half as I worked.  They’re still usable, but I was disappointed.  More evidence of their age is the (removable) white bloom on some of the darker colors, as well as how the lightest brown dried out to the point of looking like a Flake chocolate bar inside its wrapper.  😦

neocolor 02

The crayons applied color wonderfully but, as to be expected of crayons, they didn’t have points sharp enough to work into the fine areas of the image.  I was able to use the edges of the points to get into fine spots like the rays’ tails and such, but I didn’t bother trying to color the butterflies, knowing I’d just make a mess.  In some areas, like the pom-pom-looking little dudes, I only colored the center, planning to move the color outwards later, once I activated the paint.neocolor 03

The very first spot I activated were the clouds in this image.  I set a sheet of cardstock behind the page to protect it from any bleed-through or water damage, but it really took such a tiny amount of water that I doubted there would be any actual problems on the reverse-side pages.

neocolor 04

You can see in this enlargement of the lower edge what the clouds looked like before the water was applied, as well as the rough, uneven coloring job I did.  I’d cringe, except it was deliberate.  After seeing how vibrant the colors were and how much they spread, I didn’t want to waste any of the crayon filling in any more densely.

neocolor 05

This is the final result.  I can’t get over the difference, and how smooth and rich the colors turned out!  I did manage to achieve some subtle shading and depth to the colors, and if I’d wanted to color over-top and re-wet I’m sure I could get even more effects.  The largest difference for me is in the tree, the deer and the dino, but I’m charmed by all of it.neocolor 05 back

I was super-pleased (but not surprised) to see that there was NO bleed-through on the other side of the page.  This means I can use these crayons throughout the book without worry, which makes me really happy.neocolor 06

Here’s a side-by-side to really compare the before and after images.  Besides blending out the patchy scribbles, the colors (which were pretty vibrant before) didn’t fade out and some became even brighter.  They blended beautifully and dried really quickly, but not too fast that I couldn’t move around soft watercolor washes.neocolor 07

For the facing page (above) I decided to try using the crayons in a different fashion, as if they were individual little sticks of paint.

neocolor 08

I wetted the brush, blotted most of the water off, and then dabbed it against the tip of the crayon, picking up some color, which I then applied to the image as paint, just as if I’d picked the color up from a palette.  You can see some of the peach on the tip of my brush, as well as on the face and hands of the little girl I’d just painted.

neocolor 10

This is the finished image after painting.  In contrast to the side where I colored first, I think this side has a softer, almost dreamier application.  However it is slower to keep re-dabbing the brush to the crayon, and it makes mixing colors more difficult as the paint dries much faster when using this method.  I greatly recommend it for areas where you need more control or a finer application than you’d get with the stubby crayon.

This method also made me realize that my broken crayons were not a loss, nor was my flakey, dried-out tan.  I can put a small piece of the color in one of my palette wells and activate it to use as paint, meaning that no part of these (expensive!) crayons will ever be wasted.  🙂

neocolor 10 back

Here’s the back, showing again that there was no bleed-through or ghosting.

I’m really glad I found these crayons in my stash, and I can’t wait to play around with them more in this and other books.  The colors are incredible and they activate so easily and beautifully, I really recommend them.  Mine have broken and dried out, but they are also over 15 years old (!!!) and still work as well as if they were brand new.  I would wholeheartedly recommend these.

 
This post may contain affiliate links. This means I might make a small commission on purchases made through the links, at no cost to you.


1 Comment

Last-Minute DIY Pikachu Costume

All month Henri has been telling me he planned to wear his Creeper costume for Halloween this year.  He’s brought it up many times and even pulled the head out of the dress-up bin in our den to try it on and be sure it still fit.  And then this past Friday his class went to circus school for the day and he came home like this:

photo-2016-10-28-2-50-04-pm

and then told me he wanted to be Pikachu for Halloween.

This guy:

pikachu

Um.  Okay.  We had nothing at home I could use to make a physical costume, but I knew we’d be going to Walmart the next day so I told him if we found a set of face paint, I’d buy it and would paint his face like Pikachu.

Saturday we were at Walmart and found some inexpensive face paint, but then he started complaining that he didn’t have Pikachu’s ears.  I thought about it a little and told him we’d be going to the dollar store next; if he found a headband that fit him I’d buy some yellow felt and make him some ears.  He found a girl’s one with a plastic bow attached, but it was yellow and fit him, and they had a pack of felt with yellow in it so we brought it home and I set it aside.

Yesterday I was at my parents’ house for dinner and Henri made a comment about being excited to wear his Pikachu costume to school the next day and I realized – oh crap, Halloween is tomorrow!

Ahem.  Forgive me, my brain has been a little foggy lately.

We got the kids home and to bed and then I sat down and made Henri’s costume.  It was quick, and it was easy, and it used either dollar store supplies or things you may already have on hand, so if you’re stuck for a last-minute costume, here’s how you can whip  this up in plenty of time to go trick or treating tonight.  Grab a friend who’s dressed like a Pokemon Trainer and you can be your very own live Pokemon Go team.  🙂

Here’s what you’ll need:

post-pikachu-diy-costume-title

The first thing I did was carefully cut off the plastic flower on the head band, then I put it on Henri’s head and marked off where the ears should sit.  As it happens we have a large Pikachu doll that was the right size to trace for the ear shape, but you can just freehand it.

post-pikachu-diy-costume-01

After the ear shape was drawn, I drew a second line about a quarter inch outside it, for a seam allowance.  Then I cut out the shape through all 4 layers of yellow felt.

post-pikachu-diy-costume-02

The next step is to sew the ears together.  I used yellow thread and a simple running stitch since the ears wouldn’t really be under any tension.  I left the open end edges unsewn for about a quarter inch so I had enough fabric open to gather over the heandband.  If you don’t want to sew, you could also glue the sides shut, but if you do make sure to put the ear side that you drew on on the inside to hide the pen markings.

Next I colored the ear tips with a black sharpie.  The mess you see on the right is the transfer of ink from one side when I flipped it over to color the other side.  I’m showing you this so you can be prepared and cover your work surface.

post-pikachu-diy-costume-03

Once the tips were colored I stuffed each ear with some loose batting then sewed them over the sides of the headband where I’d previously marked.  I used a blanket stitch to close the open edge but you can use any stitch you like, or glue them shut as well.

post-pikachu-diy-costume-04

Here are the finished ears.  They look silly off but are kind of cute on.

photo-2016-10-30-9-59-10-pm

(Yes I had to try them).

While I was working on the ears I kept glancing over at the tail on our stuffed Pikachu and realized it wouldn’t take that much more effort to make one too, and surprise Henri.

To start I took some cardboard from our recycling bin and sandwiched it between two sheets of white cardstock with a regular glue stick.  To make sure it dried well I placed it flat on the table and set some heavy books on it.  Once the ears were done the cardboard had fully dried and I was able to trace Pikachu’s tail onto it.

post-pikachu-diy-costume-05

Then I cut out the tail.  I brainstormed a few different ways to attach it to Henri.  I don’t like the idea of sending a 7yo to school with a safety pin on his butt, so I came up with a belt method.  To make it work I carefully pried back about an inch of the tail section and folded the cardstock on each side outwards.

I used my Spectrum Noir markers to color the yellow of the tail and then colored the lower edge with a black Sharpie, completely overlooking the fact that it’s supposed to be brown, because I was working in dim lighting.  D’oh.  You can use any permanent markers, and do the proper colors.  🙂

post-pikachu-diy-costume-06

To make the belt section, I first cut two holes into each side flap.  I then threaded three strands of yellow yarn through each side, made a knot to secure them near the top, and then braided them into belts which I could then slide through the belt loops on his jeans and tie at the front.  I made them longer than needed because I didn’t have his waist with me to try them on, and had planned to cut the excess this morning but we ended up just tucking the ends into his jeans.

post-pikachu-diy-costume-07

And there you have it!  Add in some yellow face paint, bright red cheek circles and a black triangular nose and poof-

post-pikachu-diy-costume-08

You’ve got one happy Pikachu.

Have a happy and safe Halloween!

henri-pikachu-collage-site

—-

Looking for more Halloween costume ideas?  Check out here.

This post may contain affiliate links. This means I might make a small commission on purchases made through the links, at no cost to you.


2 Comments

DIY Pirate Accessories From Dollar Store Items

When my boys were little, they wanted to be pirates.  Henri especially – it was either a Viking or a pirate, depending on the day.  Inspired by Jake & the Neverland Pirates they drew treasure maps with large scrawled Xs and hid their toys and told me it was their secret booty.

I wanted to give them some real toys to play with, but all the pirate-themed sets I could find weren’t safe for my rambunctious 3-year-old.  I needed something childproof, and ideally inexpensive.  Finally, after catching him trying to use his sippy cup as a spyglass just like the Backyardigans had on one of their pirate-themed adventures, I had an idea.  One trip to the dollar store and some recycling-bin scrounging later, these fast, easy, and inexpensive toys were born.

dollar-store-pirate-accessories-01

You’ll need:

I used items found locally, but the links above would work just as well 🙂

First up – the binoculars.  (Btw…yes I know pirates didn’t use binoculars.  But I couldn’t be certain my kids would use the spyglass as such, and not a makeshift sword, so I wanted to give them another sight-related option.  Feel free to leave this one out, or use it for a different play idea.  Perhaps an adventurer, bird-watcher or a fun game of I-spy?) For the binoculars you will need 2 clean toilet paper rolls, one cube from a dollar store packet of wooden craft shapes (about the size of a sugar cube), and a roll of electrical tape.  At my dollar store this tape comes in a set of 4 colors all packaged together.  You can use Washi or other decorative tapes on the outside, but I would not use them for the support structure.  If you want to use them, apply them at the end, for decoration.

img_5647

Step one is to cover the tubes in tape.  I had done these first, and only later realized I should have covered the exposed edges FIRST, THEN wrapped the sides.  When I get to the spyglass you’ll see I fixed that.  If you want to be smarter than me, fold little pieces of tape over the exposed edges first.  Be careful to not place the inside edge deeper than the width of the tape itself so you can cover it later.  I have enough tubes for 3 sets shown because my neighbor’s young son was also really into pirates and I wanted to surprise him with a set of his own.

img_5648

Step two is to cover 4 of the sides of the cube in tape.  Place the tape on one edge of the cube and just keep wrapping around the other 3 sides until you reach the beginning again. You’ll be left with 2 exposed edges that are opposite of each other.  Don’t worry about covering them, as they will be against the tube rolls and won’t show.

img_5649

Step three is to connect the rolls to the cube.  Place it a bit in from one edge so it looks like the bridge on a pair of binoculars.  Be sure to place the raw, exposed edge against the tape so the covered sides are what is shown.  Secure well with more tape.

img_5651

This is what it looks like when you have three rolls done.  I’d run out of tape, and had to go buy more to get more blue… d’oh.

img_5652

This is when I covered the edges and realized I should have done it first.  Oh well.  If you’re like me, and goofed, place short strips around the exposed edges.  This is for aesthetics as well as durability – no open edges means it’s less likely the toy will tear or fray after some hard toddler use.  Be sure to not place the inside edge deeper than the width of the tape itself (see: left roll).  Once you’ve covered the edge completely, cut a length of tape to fit on the INSIDE of the roll, and place it around, as close to the edge as possible, to cover and secure all the short edges (see: right roll).

img_5653

Then you can use another length to go around the outside, covering those short pieces too.  (This step is unnecessary if you covered the edges first).

img_5654

Here’s a completed pair of binoculars.  The new blue tape I’d bought was darker than the original, so it gave a nice finished look, almost like adjustable lenses.  Even though they’re ‘only’ toilet paper rolls, the rubbery tape gives them a surprising amount of durability.  Don’t get them wet, however, as the inside paper is still exposed.

img_5657

Next I made the spyglasses out of paper towel rolls (though you can cut down wrapping paper tubes too).  As you can see, for these I was smart enough to cover the ends FIRST, THEN wrapped the tubes.  It’s easier to see on the white than the blue, but when you wrap, ease the tape slightly sideways so you can move along the tube/roll.  Because the tapes are rubbery, they’ll stretch to where you want them to go, instead of tearing.

Finish covering the tubes by wrapping a piece of tape around the inside of the open edges to cover the short pieces.  Because you did them first here, you won’t have to add more tape on the outside.

img_5659

(This picture makes me laugh because it’s such a typical scene in my house – the dining room table covered with mom’s crafty projects, the kids’ placemats and a bag from the latest dollar store run for supplies.  *chuckles*  Plus seeing the boys’ bibs reminds me just how long ago I’d made these.  Those are their “I ❤ Dic Ann’s” bibs.  *grins*)

Once the spyglasses have been covered with tape, use glitter glue (from the dollar store) to paint on whatever decorative touches you’d like.  I went with gold grip handles on mine.  Set them aside to dry overnight, using drinking glasses or other supports to avoid messing up the wet glue.

dollar-store-pirate-accessories-02

For the treasure chests you’ll need some kind of chest-like container.  I was lucky that my dollar store had these little wooden chests, but you can use any container or box you have on-hand, even an old Tupperware.  I bought strips of glitter gem tape to decorate mine, but you can use sticker letters, nail gems, paint, or anything you like.  (Oooh they would look INCREDIBLE painted to look like real, aged chests!)

img_5661

Finally, you’ll need some pirate booty.  I got these acrylic diamonds from my dollar store, as well as the strands of ‘Mardi Gras’ beads.  I would have loved to include gold coins, but couldn’t find any on that visit.  This set I found on Amazon has both gems and gold coins together, and would have been a great addition.

img_5666

Decorate the chests.  My kids picked their favorite colors of these jewel strips and I cut them to fit along the top edges, but you can do whatever you like to the outside of the chests.

img_5663

To secure the booty inside, we’ll be using a high-tack craft glue.  If you have older kids you can omit this step and leave the treasures removable, but since two of my recipients were 3 years old and some of the jeweled edges were sharp or choking hazards, I elected to make my treasures permanent.  Plus this would ensure there was always booty ready to be discovered.  Place a thick layer of glue in the bottom of the case, a little more than you think you’ll need because the wood absorbs some.  Begin placing your chains and jewels down into the glue so that they look like they were piled in haphazardly.  Use more glue as needed to secure any loose bits.  Feel around to make sure any sharp edges are embedded in the glue vs sticking out.  Every now and then hold up or shake the box to see if any bits move or shift, and keep adding glue into every nook and cranny.  I went crazy on the glue because I know my toddler will find any loose edge to play with.  Don’t worry about the white glue showing as it will dry clear.  Finally, once you think your treasures are secure, set it aside to dry at least overnight.  I dried mine overnight then held it upside down and shook it around, then added more glue to any of the bits that moved.  One of the chests was going to be a gift for a toddler and I didn’t want to worry about any accidents on account of it.

img_5669

Here’s how my collection turned out.  They made fun play accessories for around the house and costume day at school, and were surprisingly long-lasting.  The boys didn’t manage to get the gems and beads out of the boxes for at least a year and a half, and the chests, the spyglasses and even the binoculars are all still intact in our dress-up bin all these years later.

If you make any of these I hope they give your toddler/child just as much fun as my kids had with them.  🙂

copy-of-img_5703

This post may contain affiliate links. This means I might make a small commission on purchases made through the links, at no cost to you.


5 Comments

How to make a Minecraft Enderman head (with bonus diamond block trick-or-treat basket)

Update: This tutorial is now also available as a downloadable PDF here. More details at bottom of this post.

Some of you may, like me, be suddenly realizing there are only ten days left until Halloween.  No stress – there’s still plenty of time to make a Minecraft Enderman costume, complete with a matching diamond block trick-or-treat basket!

enderman-costume

For Halloween last year Jakob wanted to be a Minecraft Enderman.  For reference, these are the tall, spindly black figures who appear out of nowhere to steal your blocks.  They’re neutral mobs who can teleport and will only attack when provoked by looking them in the eyes (which, to be honest, is kind of hard to avoid, seeing as how they’re the most vivid part of the things!).

minecraft-enderman
minecraft-diamond-block

In the game Enderman can’t actually pick up diamond blocks, but that’s what Jakob wanted anyways.  To be an Enderman carrying a diamond block.

photo-2015-10-25-8-10-14-pm

I was fresh off my “Skylanders Sprocket wrench pulling double-duty as secret purse” achievement so I thought if he’s gonna be schlepping a box around anyways… why not make it useful and turn it into his trick-or-treat basket?  So that’s what I did.  🙂

The first thing to do was assemble all materials.  In total the two parts of the costume required the following:

  • 2 boxes (one large enough to fit over the wearer’s head, & a second box to be the treat basket)
  • craft paint in the appropriate colors
  • masking tape
  • ribbon
  • double-sided tape
  • scissors
  • craft knife
  • paint brushes
  • something to use as a palette (I used a styrofoam plate)
  • gauzy black fabric (optional, and I cut mine from a dollar store scarf)
  • spray sealant (optional)
enderman-head

Everything but the boxes and scissors came from my local dollar store, making this not only an easy costume to make, but a really inexpensive one too.

ENDERMAN HEAD

Top row:

  1. Assemble all materials
  2. Cut off the flaps on the side of the box you want for the opening.  Tape down all other flaps securely, cover all seams and use tape to cover the cut edges at the bottom.
  3. Measure out your grid on all 5 remaining sides of the box.

Middle row:

  1. Cut out the eye holes.
  2. Cover the cut edges of the eye holes with masking tape, then paint the Enderman’s eyes with two different shades of purple.
  3. Paint the rest of the Enderman’s head.  I followed a actual chart pattern using shades of charcoal and black but you can just as easily paint the whole rest of the head solid black.

Bottom row:

  1. Optional: tape a piece of sheer black fabric over the eye holes so they don’t show from the outside but can still be seen through on the inside
  2. Enjoy your new Enderman head!
  3. Wear with black sweatpants, a black sweatshirt, and black stretchy gloves.  Add a diamond block trick-or-treat basket for a complete Halloween costume!
  4. (optional- seal the paint with spray sealant, more on that below)
enderman-facets
diamond-block

DIAMOND BLOCK TRICK-OR-TREAT BASKET

Top row:

  1. Assemble all materials
  2. Cut off the flaps on the side of the box you want for the opening.  Tape down all other flaps securely, cover all seams on the outside and cover the cut edges at the bottom.
  3. Mix aqua and white together to get a few different light aqua shades.

Middle row:

  1. Following an in-game image of a diamond block, paint one side in shades of aqua, making one lower corner darker for shading.  Repeat on the other 4 sides.
  2. Add a border to all 5 sides using the aqua paint at its full strength.
  3. Paint the inside of the box black.

If you prefer a more accurate version, I have compiled this tutorial into a downloadable PDF (linked at the bottom of the post) which includes full-color screen-accurate charts for both the Enderman and the 16×16 grid of the diamond block, including the hex codes for each color so you can color-match accurately.

Bottom row:

  1. Make 2 holes in 2 opposing sides.  Knot ribbon through the holes to act as handles.
  2. Enjoy your diamond block trick-or-treat basket!
  3. Add to the Enderman head for a complete Halloween costume.
photo-2015-10-31-2-00-41-pm

One optional step that I did but is not obligatory at all is to spray the painted sides with a sealant.  I didn’t know what the weather would be like on Halloween and didn’t want to worry about rain causing the paint to run.

*Update in 2020: the heads are still going strong! The boys outgrew them of course, but we keep them as nerdy shelf displays and they look exactly the same as they did back when I made them.

photo-2015-10-31-2-06-17-pm

And that’s it!  The longest part in making these costume pieces is waiting for the paint to dry.  🙂

(PS: Looking for the big guy’s little buddies?  Check out my tutorial for Minecraft Steve and Creeper heads here!)

minecraft heads wip 12

I hope this post shows you how easy and fast it can be to make your own Minecraft Steve and Creeper heads!

You can adapt the tutorial to make any Minecraft mob, and I’ve got an assortment compiled for you here.

As mentioned above, if you’d like an easy-to-print-and-save PDF version of this tutorial, I have made it available on Etsy here. The 12-page PDF includes full instructions with additional details, clear photographs, as well as game-accurate full-color numbered charts for all 5 sides of both the Enderman’s head and the diamond block, along with their hex codes for perfect color matching.

————-

More Minecraft-themed fun:

How to make a Minecraft Steve and Creeper Heads

How to make Minecraft Lootbags

How to make Minecraft Mob fondant cake/cupcake toppers

How to make a Minecraft cake

Throwing a Minecraft birthday party

Minecraft Zombie Charts

Minecraft Jack-O’-Lantern Charts

This post may contain affiliate links. This means I might make a small commission on purchases made through the links, at no cost to you.


1 Comment

Halloween help

My phone has been pinging quite a bit lately, notifying me that people have been saving my pins.  While I think that’s awesome, and am flattered, I was also confused because I couldn’t think of what I’d posted that would be so popular at the moment.  And then I remembered – it’s almost Halloween!  Sure enough, it was my Minecraft-related pins getting all the love, the Creeper/Steve head tutorial especially.

So for anyone who found my blog via those pins, or anyone else who’s interested, here are some quick links to my (few) Halloween/costume-related tutorials.  I do have more coming up this month, so be sure to come back and see.

For those with some boxes and paint lying around: here’s how to make Minecraft Steve & Creeper heads.

For those who need an easy addition to their Gryffindor robes, here’s a quick free scarf pattern.

For those with a young’un eager to train a dragon, here’s how to make a viking vest.

And finally, for those with a lot of knitting time on their hands, here’s how to make a child’s first superhero costume, as well as a look at how I used that same pattern to turn Jakob into Superman for his first Halloween.

I hope you enjoy the links!  For my fellow Minecraft-loving folks, I’ve got a matching Enderman tutorial coming up, complete with his very own diamond block.  Stay tuned!