8 Comments

DIY Checkerboard Minecraft Creeper Cake (NO Special Pan!)

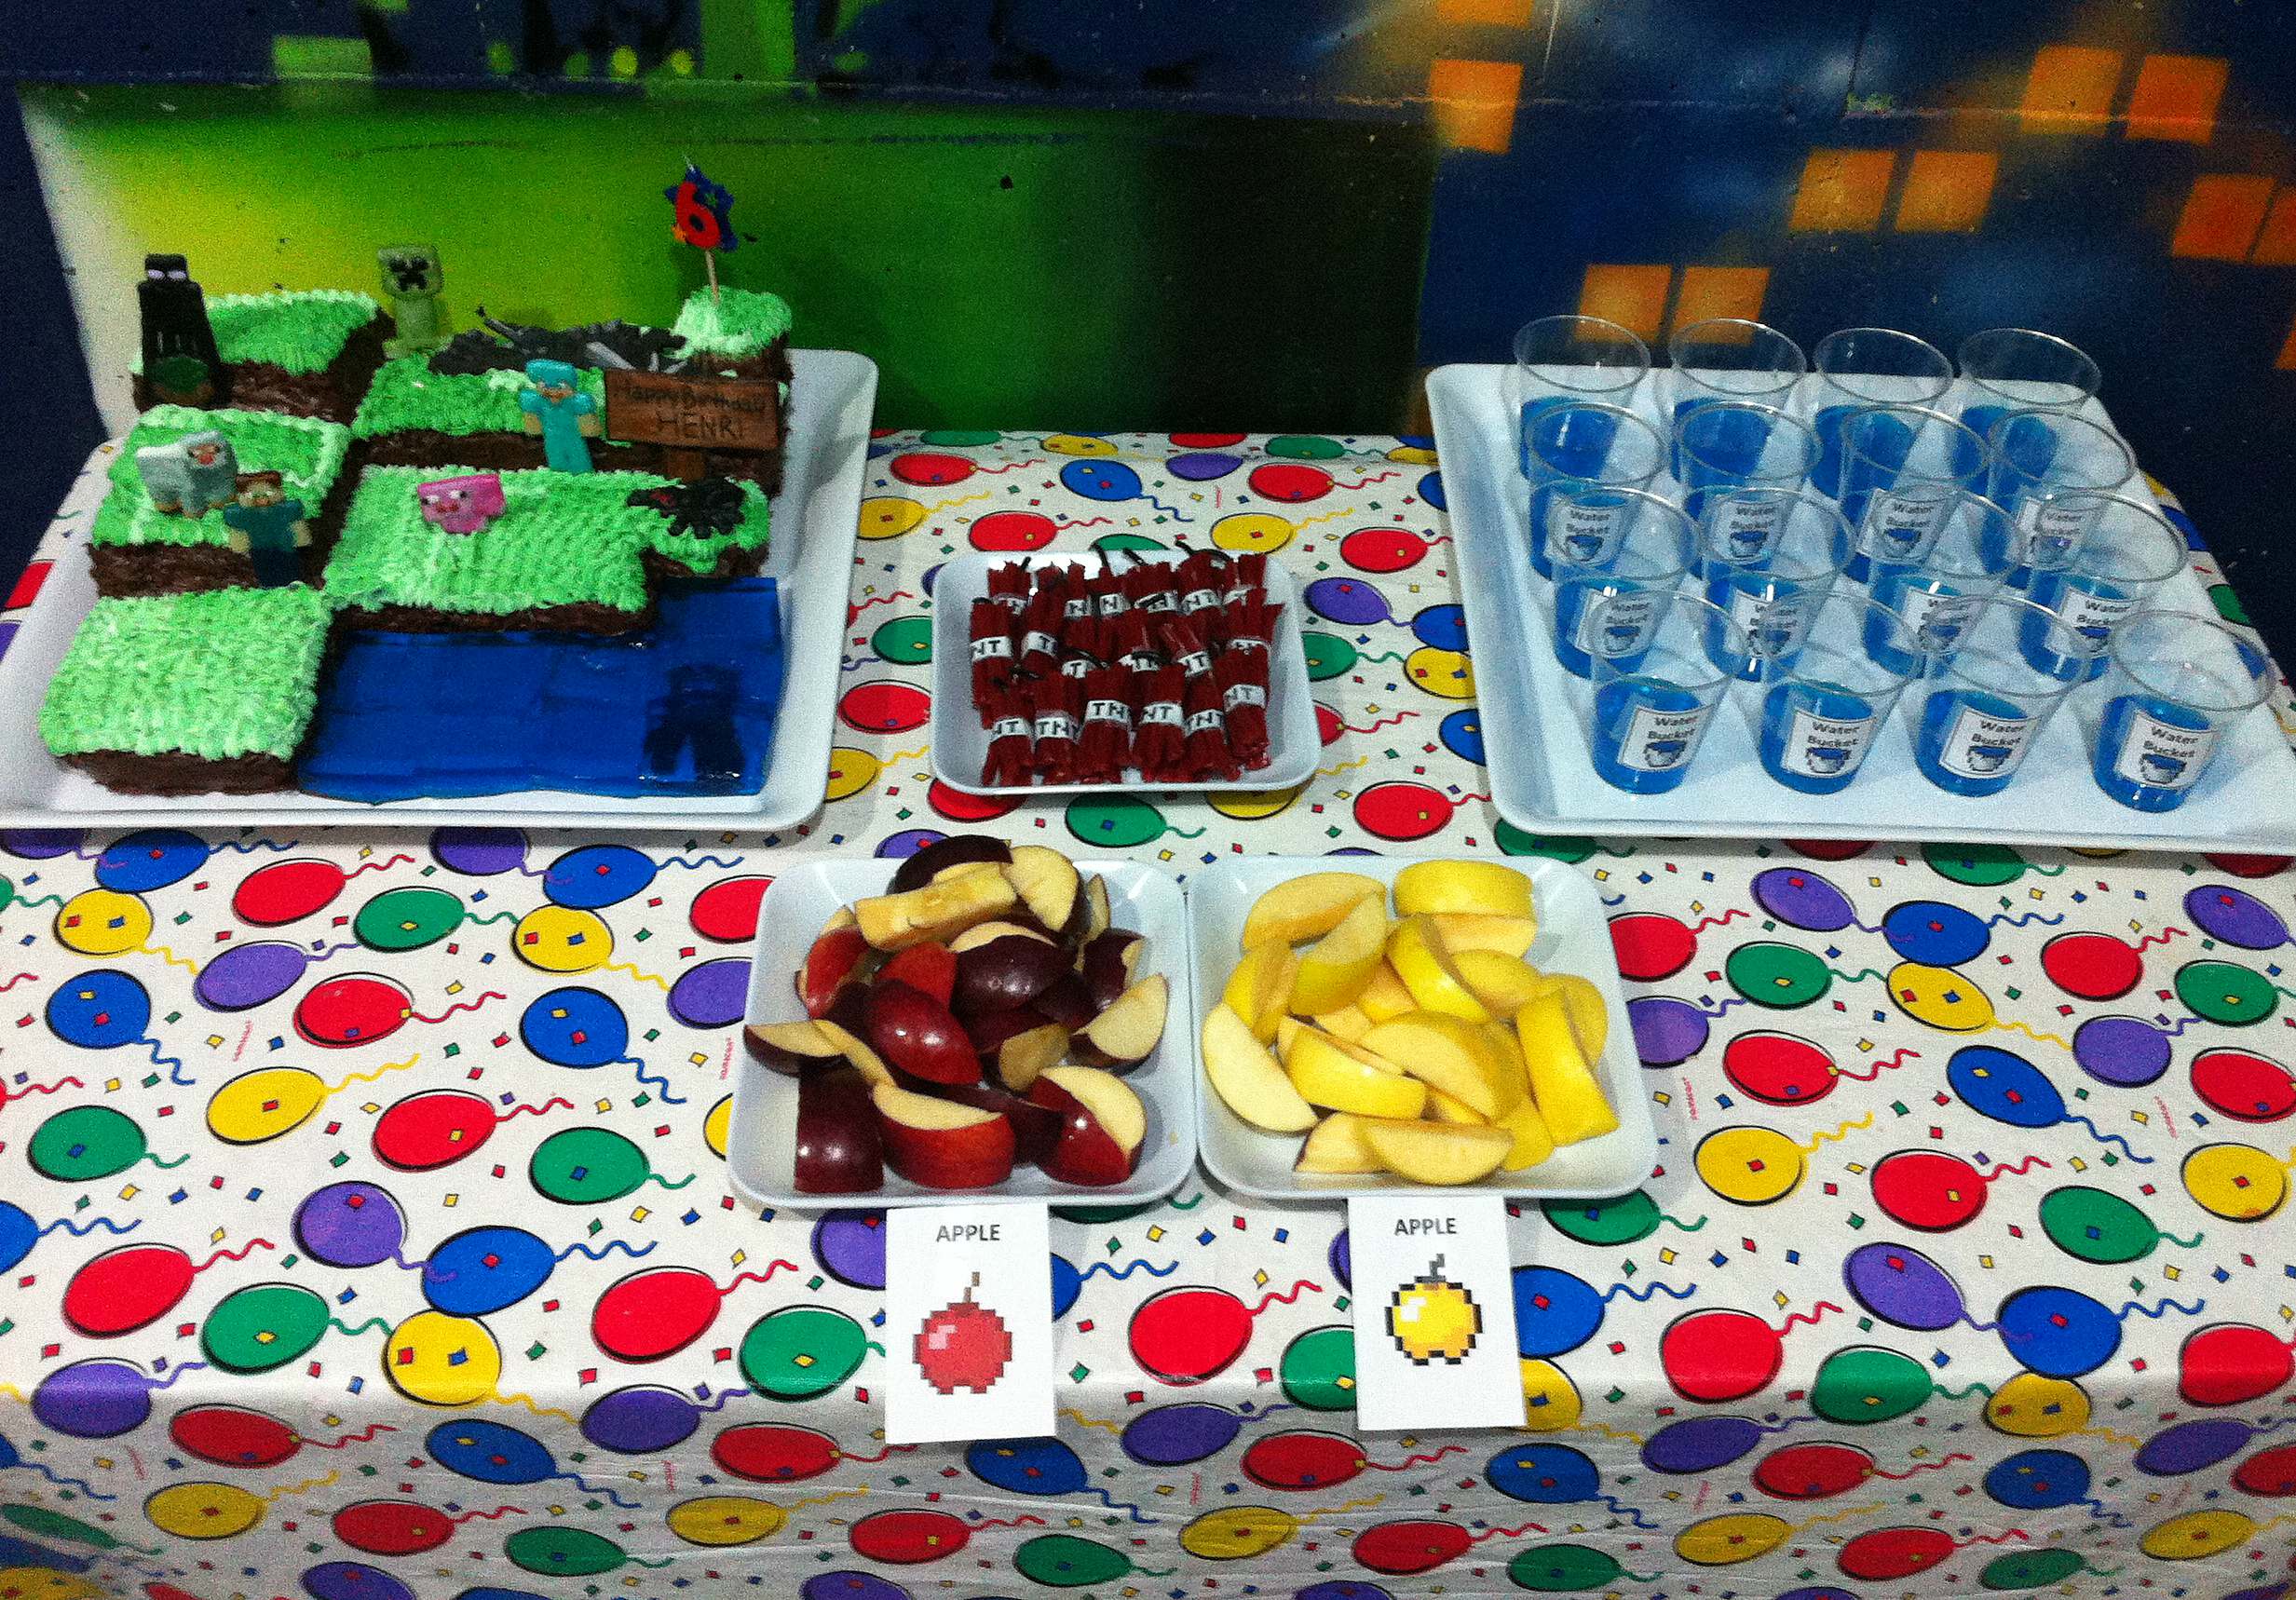
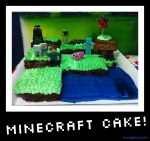
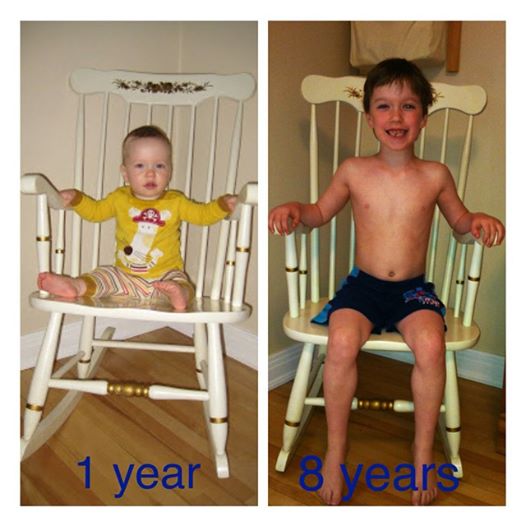
Jakob turned 8 in 2015 and if it wasn’t clear from Henri’s Minecraft party, Minecraft lootbags and Minecraft grass biome cake that same year, 2015 brought in the reign of one particular video game in our household. (They even had DIY Minecraft Halloween costumes that year!)

Jakob was obsessed, in particular, with the Creeper. This unassuming green dude looks real cute until he shows up and blows up.

I decided to take inspiration for the inside of the cake from the Creeper’s multitude of green shades, and to theme the outside on the tshirts the boys would be wearing to the party, with the following image:

While I own a round checkerboard pan kit, I don’t have anything similar for square cakes so I had to get creative. I ended up coming up with a way to get the checkerboard look without requiring ANY special tools, and you can do it too if you follow the steps below.

Step 1 is to bake 4 cake layers, each tinted a different shade of green I used 8″ square cake pans and tinted my batter with gel coloring to get 4 different shades.

These are the colors I went with. You can choose to use more colors and more layers if you like – to copy the actual Creeper would require 8 layers for an 8×8 grid. If you want to match the colors exactly I provide the hex codes for all 8 colors in my Minecraft Steve & Creeper DIY costume head tutorial.

I only own 2 8″ square pans so I baked my cakes 2 at a time.

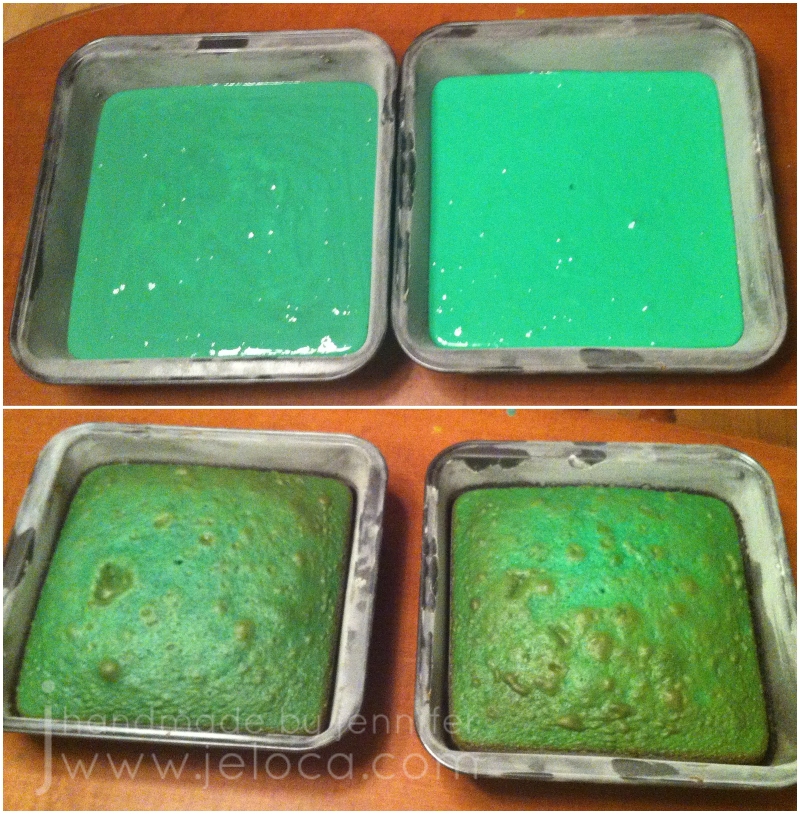
The cakes will turn golden on top as they bake so my icing swatches came in handy to remember which cakes were which later on.

Unfortunately I don’t have pics of the next steps but they’re very simple to follow-

  • Trim the golden top and sides off each cake
  • Cut each cake into even strips. Be sure to cut each cake into an identical number of strips. If you look at the cut section of my cake below, you can see I cut mine into 7 strips.
  • Place a bit of icing on your serving tray (to anchor the bottom pieces) and place 7 strips of assorted colors side by side to form the first layer. (Replace “7” with the number of strips you have in your cake). Once your color placement is to your liking, add a thin layer of icing between the sides of each strip to secure them to each other
  • Add a thin layer of icing across the entire top surface of layer 1
  • Repeat the last 2 steps 3 more times to add layers 2, 3 and 4. This will have used up all your cake strips
  • TIP: when cut vertically from the end, the cake will have a gridded/pixel look. You can use the same technique to create any pixel art desired
  • The key thing is to remember which direction your strips run. When you cut the cake you will want to cut horizontally ACROSS all the colors, to get the checkerboard look. If you cut horizontally WITH the strips, your cake will look like long rectangles of color.

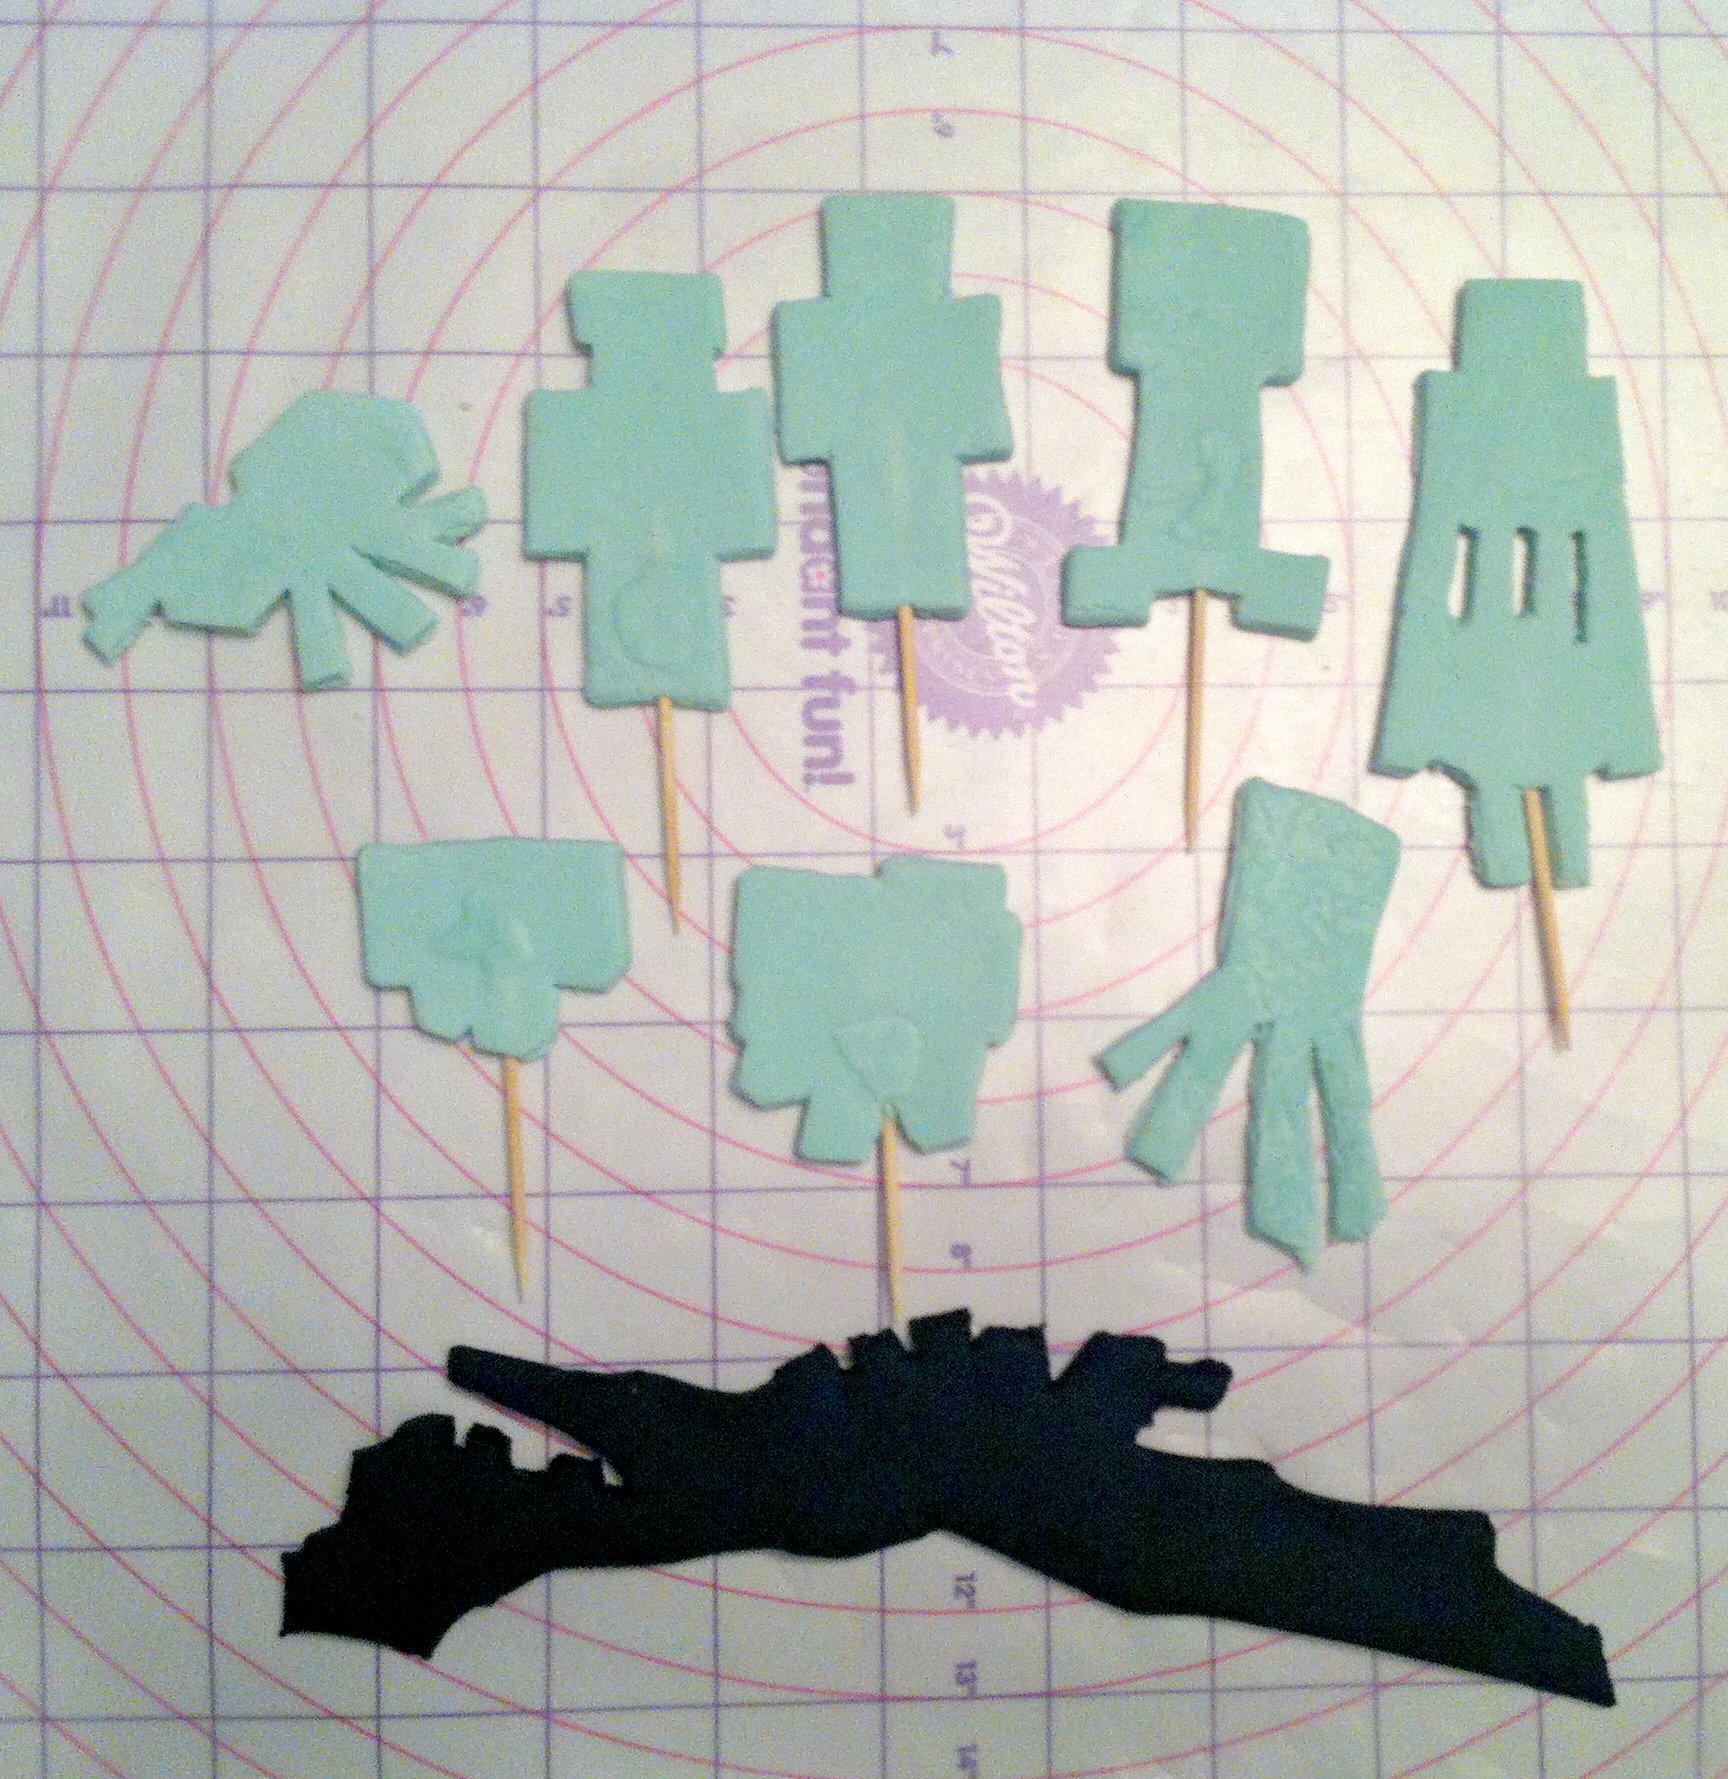
To finish the cake simply ice and decorate the outside as desired. I covered mine with solid green icing and a fondant Creeper face, then added fondant lettering to match the boys’ shirts and Jakob’s name and age.

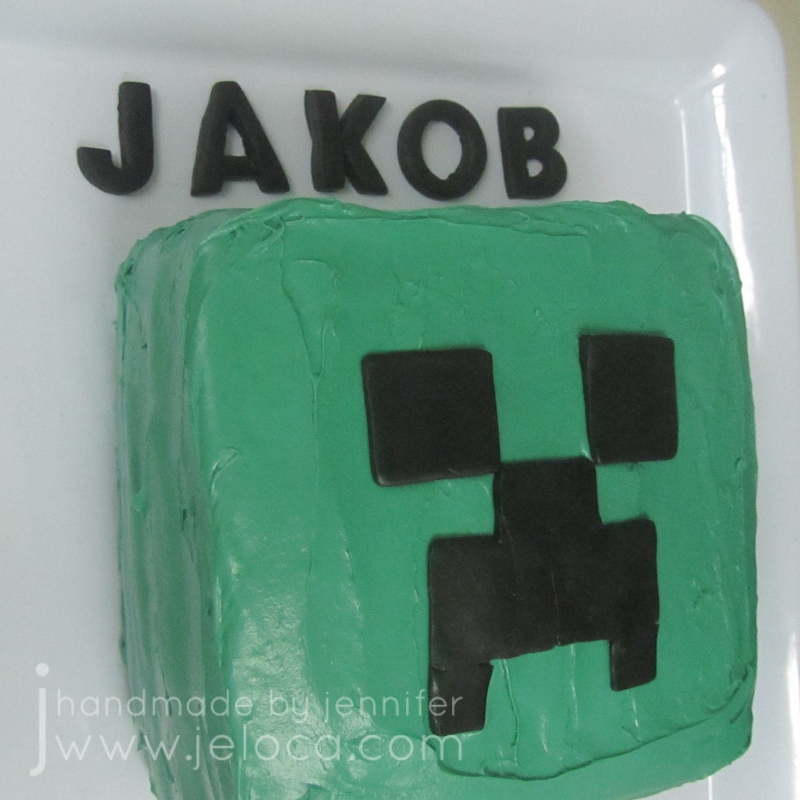
I used the placement of the face as my reminder which way to cut the cake later.

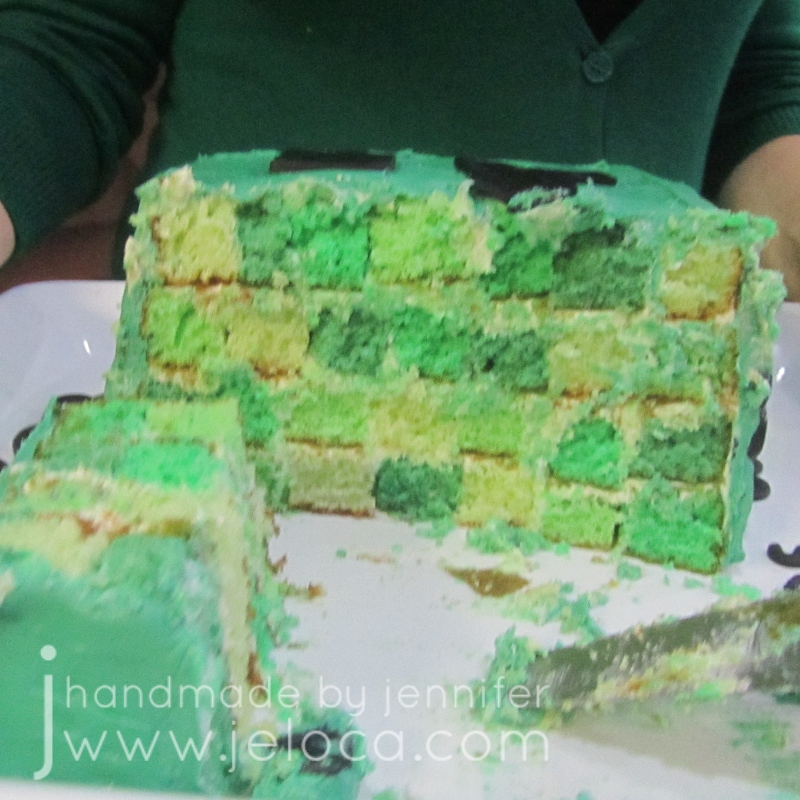
As you can see from the cross-section, the inside worked out perfectly! It looks just like the Creeper and Jakob was thrilled.

Jakob’s other birthday cakes

This post may contain affiliate links. This means I might make a small commission on purchases made through the links, at no cost to you.


6 Comments

Throwing A Minecraft Birthday Party

First came the Minecraft lootbags, then the Minecraft fondant toppers, and then the Minecraft cake.  Now’s where it all came together – the final Minecraft birthday party.mc party collage

Once again, this was Henri’s 6th birthday party, from back in January.  Jakob just had his own Minecraft party but I didn’t change much except for the cake, and that will get its own post shortly.

There are a lot of ways you can incorporate Minecraft ‘foods’ into your own party.  A quick look through Google images or Pinterest will show idea after idea, I pulled some of them out and added my own to get what worked for the small group of kids we had.  If you’re having a larger party, or its for a gaggle of teens, you can really go all out with some creative food arrangements.  I’ve seen everything from pretzel-grid trap doors to a soda maker doubling as a brewing station!

mc party dinnerI didn’t go quite so elaborate.  Only 10 kids, a few lingering adults, and I knew the children would be rushing through the food to get back to playing video games (we were at an arcade).  The place provided pizza, so I added a quick veggie side dish to the table.

mc party dinner carrot

Clear enough?  🙂

mc party dessert

I had a little more fun preparing the dessert table…mc party dessert 02

Regular and Golden Apples…mc party water buckets 01

…Water Buckets… (blue raspberry Jell-O… would have been cuter in plastic shot glasses if I’d thought about buying some in time)…mc party tnt

…and TNT  (red licorice bundles with black licorice whip wicks).

Combine these with the Minecraft lootbags the kids got when they left, and it made for a party they could all dig.  (Get it?)  😉

Can I just say that I love the dollar store square dishes and platters?  Love them.

mc party cake closeupHenri really enjoyed his 6th birthday party, and I had a lot of fun putting everything together for it.

You can download and print the images below to make your own Minecraft party.  I copy/pasted a bunch onto an Excel spreadsheet so I could fit as many to a page as I needed.  The TNT strips were sized at 3″ tall by 5″ wide (the block of 10 strips), the water bucket graphic is 1.75″ wide by 2″ high, and the apples and carrots were 2.25″ by 3″.tnt 3inby5in water bucket 2inby175inred apple 3inby225in golden apple 3inby225in carrot 3inby225in

———————–

More Minecraft fun:

How to make Minecraft Steve and Creeper heads


11 Comments

How to Make a Minecraft Cake

From the lootbags to the toppers, next up in the Minecraft-themed birthday party is the yummiest part… the cake!minecraft cake

Jakob turned 8 over the weekend.jk8

I know.  I don’t know where the time went.  I’ve been blogging since before he was born, and now he’s 8 and such a good kid.  Of course he wants a Minecraft-themed party too, but, um, I haven’t begun to do anything for it yet, so instead I’ll finish showing you what I’d done for Henri’s Minecraft party, back in January.

mc cake front

To be honest, it’s not my favorite-looking cake.  I’m a lot prouder of the loot bags and the toppers than I am of how the cake turned out.  But- and here’s the important part- HE loved it.  (And it was delicious).

I started out by baking 2 9×11 chocolate cakes.  My kids prefer vanilla but going for the ‘dirt’ look I knew it would be easier on me to have a chocolate base in case the chocolate icing didn’t fully cover everything.  I also filled an 8×8 greased dish with blue Jell-O prepared as Jigglers, and set that to chill.

When I sat down to work on it I didn’t have a plan.  I knew I’d baked enough cake to stack layers, similar to the grass in the forest biomes.  (Yes, I play LOL).  I knew I had enough chocolate icing to slap it all together.  I knew I had a finite amount of “water cubes”, so I started with that.

mc cake back

I turned the Jell-O out onto a mat and squared the edges, then cut it into 2″ sections.  Then, after leveling the cakes, I used toothpicks to divide the cakes into 2″ sections as well.  Then I began to cut.  I held my platter over the cake to figure out how much to cut off to make it fit along at least 2 sides, and then cut away enough of the ‘front’ to fit the water ‘cubes’.  Then I cut the upper layers, holding and testing until I had something that had as little waste as possible while still looking as ‘unboring’ as I could manage.  (Technical term).

I stuck the upper layers down with icing then dirty iced the whole thing before sticking it in the fridge a few minutes to set up.  Then I gave all the sides a thicker coating of chocolate icing.  The ‘grass’ was piped with a star tip and not-completely-mixed vanilla icing and green icing gels, so there’s a slight variation in the color.  I was hoping that the shading, along with the star tip, would help it look ‘pixellated’ like the game.  I also piped some areas, leaving others blank, so as I ran low on icing and mixed in more, the colors would be different even within those areas.  (Best seen in the overhead view, above).

mc cake good

I placed the Jell-O in only AFTER the cake had chilled for a few hours.  I was afraid one would leech water out of the other and that I’d end up with a gooey, dissolving mess.  Then, at the party, I stuck the figures on just before serving, including tucking Mr. Squid under a few water cubes.

Even though I wasn’t as crazy about it, the kids loved it, the birthday boy loved it, and there were enough fondant figures so everyone who wanted one got one to eat.  (Apologies to their parents for any resulting sugar-rush).mc cake 01The great thing about Minecraft is that it’s SUPPOSED to look boxy – it’s all squares!  So whether it’s by shaping a cake, cutting rice krispy treats into cubes, or cutting brownie squares and topping them with green-tinted shredded coconut, there are a ton of ways you can make an easily-recognizable Minecraft cake.

Up next- putting it all together for the party!

——————————

Henri’s other birthday treats

——————————

More Minecraft fun:

How to make Minecraft lootbags

How to make Minecraft Steve and Creeper heads

How to make a Minecraft Enderman head (with bonus diamond block)

DIY Checkerboard Minecraft Creeper Cake


10 Comments

How to Make Minecraft Cake/Cupcake Toppers

So last post I showed you the Minecraft lootbags (inventory chests).  Today I’ll show you how I made the toppers for the Minecraft birthday cake.

How to make Minecraft cake cupcake toppers

I wasn’t sure what I was going to do for the cake itself, but I knew I wanted to have a bunch of Minecraft mobs scattered about.  I didn’t feel like having to prepare enough fondant in the assorted colors, nor did I really want to start sculpting, so I turned to my current favorite technique- hand-painted toppers.

I’ve used this on a number of cakes, which I’ll link to once I post them.  With one exception, Nick’s Star Wars cookies, I always painted with thinned-down color gels, and had great results… (especially the Jake & the Neverland Pirates figures) but there were some flaws.  The painted pieces too much longer to dry, making it more difficult to do finishing touches, the “paint” was often very wet, which could cause the fondant base to soften and/or get slimy, and sometimes the piece would crack as it dried (like in the Charlie & Lola cake).

For some reason I switched techniques when making Sean’s last Goalie cake, I tossed in some icing sugar to give my white coloring some opaqueness, and then I recalled painting with icing on the Star Wars cookies.  It was a duh moment, and I’ve stuck with that ever since.  It’s easier (for me), faster (for me), and it dries quicker, so I can add eyes or other details MUCH faster.  Plus, because icing is thicker than water, I can play with layers and build up dimensions, if I want, similar to decorating cookies with royal icing.

My first step is to cut out the topper shapes from fondant (or if you’re painting on cookies, bake them and let them cool until there is no heat left inside, I’d wait overnight if possible).  You can use cookie cutters or freehand it, I am not above tracing.  I’d printed out the mobs (it stands for mobiles for those of you who don’t play… all the moving characters in the game) I wanted to use and scaled them all to the rough sizes I wanted.

I rolled out some scrap teal fondant left over from Jakob’s 2nd Adventure Time cake, the B-MO & Gunter cakes.  The thickness of the fondant depends on the intended use of the piece.  In my case I needed something thick enough to stand up, and also be thicker than a toothpick.  For something that will be laying flat on a cake you can go thinner, and if it was meant to be a plaque that would stand upright or lean at a diagonal I’d go thicker, so there would be a solid base.

mc top traceLay the paper templates out on the fondant and cut it up into manageable sizes, then use a knife or your preferred cutter to trace around the templates.  In the pic above you can see I’ve almost finished cutting out Diamond Steve.  Keep your fondant scraps and store them properly for next time.

mc top cut

Here are all the mobs cut out.  I slid a toothpick into most of them while the fondant was still soft, and reinforced where necessary with more fondant.  I wasn’t worried about the smaller fondant blobs showing because I knew I’d be painting with icing, which is thick, but if you’re painting with straight color gels you’d rather have a flat surface.

The next step is to let the pieces dry.  I mean really dry.  At least a day.  Two is better.  The longer you can wait, the more in-advance you can get them cut and set them aside, the better, because fondant will wilt and melt when it gets wet, and there is a lot of moisture in the icing.  Also, larger pieces will take longer to dry through than smaller ones.  The Jake & the Neverland Pirates gang were dry enough to paint after 2 days left exposed to the air.  I hadn’t given myself enough time with the Charlie & Lola toppers, they were so big and still flexible after 2 days.  Or maybe my house was more humid at the time.  Either way, they ended up spending 24 hours in a bed of icing sugar to draw out as much moisture as I could get.

Once the pieces are firm, not floppy, they’re ready to paint.

I didn’t take any in-progress painting shots.  You can use whatever you like as a palette as long as it’s food-safe and not used for any non-food purpose.  (I also keep my cake stuff away from peanut and nut products because I make 3 nut-free cakes every year).  I mostly paint with toothpicks but I have some food-only paint brushes I’ll use from time to time, and I use repurposed apple sauce cups for extra water and icing sugar.  There are a bunch of tricks I use, like using a medicine dropper to add water to thin the icing if necessary vs a spoon, so I have more control over how much I add, and using those sewing pins (in the tracing pic) to help mark out any details on the fondant cut-outs, in addition to “drawing” on them before I paint.

mc top nice mobs

These are the non-hostiles- a sheep, Diamond Steve, regular Steve and a pig.  I chose some of my kids’ favorite characters, leaving out only the Mooshroom because I knew I already had plenty to cover the cake.  Plus if I’d kept going they also wanted an ocelot, and a dog, and a bat, and a spider jockey, and zombies, and…

I didn’t plan too far ahead on each piece, though I do try to work in a way that makes sense.  Whenever possible I work backwards in color, to minimize icing waste.  For example, I didn’t want to have to re-mix black, so planned to work with it last, and do any details if necessary then, at the end.  I started with the Steves, and mixed up their skin color (though now they look like Zombie Steves), then added a touch more brown and used the same icing for the sheep’s face and the lighter areas on his hooves.  A touch more brown and it was used for the darker areas of the hooves and Steve’s hair.

The same blue used for Steve was also used for the squid’s face, then darkened for his body, and eventually darkened further for the black.

Just like when painting with real paints, when I mix colors I don’t always blend it all in, so if I’m adding more pink to do some shading on the pig, I only mix it into half of the icing, so I still have some light pink to play with.

mc top hostile mobsThe hostile mobs- the Ender Dragon, a spider, a creeper, an Enderman and a squid (who probably isn’t technically ‘hostile’).  I don’t know why the Enderman’s eyes don’t look purple, I think the light washed it out ‘cus in person they did.  The splotches on the spider were made by mixing in some white while the black was still wet, and most of the details on the Ender Dragon were dry-brushed for shading, since I didn’t have to actually paint him black to start.

mc top groupThe final touch was to make a wooden sign and then the gang was all done, ready to set aside somewhere safe to dry (and avoid being eaten) until the party.

For more from the party:

Minecraft Loot Bags

Minecraft Birthday Cake

Throwing a Minecraft Party

————————-

More Minecraft fun:

How to make Minecraft Steve and Creeper heads