

So last post I showed you the Minecraft lootbags (inventory chests). Today I’ll show you how I made the toppers for the Minecraft birthday cake.

I wasn’t sure what I was going to do for the cake itself, but I knew I wanted to have a bunch of Minecraft mobs scattered about. I didn’t feel like having to prepare enough fondant in the assorted colors, nor did I really want to start sculpting, so I turned to my current favorite technique- hand-painted toppers.
I’ve used this on a number of cakes, which I’ll link to once I post them. With one exception, Nick’s Star Wars cookies, I always painted with thinned-down color gels, and had great results… (especially the Jake & the Neverland Pirates figures) but there were some flaws. The painted pieces too much longer to dry, making it more difficult to do finishing touches, the “paint” was often very wet, which could cause the fondant base to soften and/or get slimy, and sometimes the piece would crack as it dried (like in the Charlie & Lola cake).
For some reason I switched techniques when making Sean’s last Goalie cake, I tossed in some icing sugar to give my white coloring some opaqueness, and then I recalled painting with icing on the Star Wars cookies. It was a duh moment, and I’ve stuck with that ever since. It’s easier (for me), faster (for me), and it dries quicker, so I can add eyes or other details MUCH faster. Plus, because icing is thicker than water, I can play with layers and build up dimensions, if I want, similar to decorating cookies with royal icing.
My first step is to cut out the topper shapes from fondant (or if you’re painting on cookies, bake them and let them cool until there is no heat left inside, I’d wait overnight if possible). You can use cookie cutters or freehand it, I am not above tracing. I’d printed out the mobs (it stands for mobiles for those of you who don’t play… all the moving characters in the game) I wanted to use and scaled them all to the rough sizes I wanted.
I rolled out some scrap teal fondant left over from Jakob’s 2nd Adventure Time cake, the B-MO & Gunter cakes. The thickness of the fondant depends on the intended use of the piece. In my case I needed something thick enough to stand up, and also be thicker than a toothpick. For something that will be laying flat on a cake you can go thinner, and if it was meant to be a plaque that would stand upright or lean at a diagonal I’d go thicker, so there would be a solid base.
 Lay the paper templates out on the fondant and cut it up into manageable sizes, then use a knife or your preferred cutter to trace around the templates. In the pic above you can see I’ve almost finished cutting out Diamond Steve. Keep your fondant scraps and store them properly for next time.
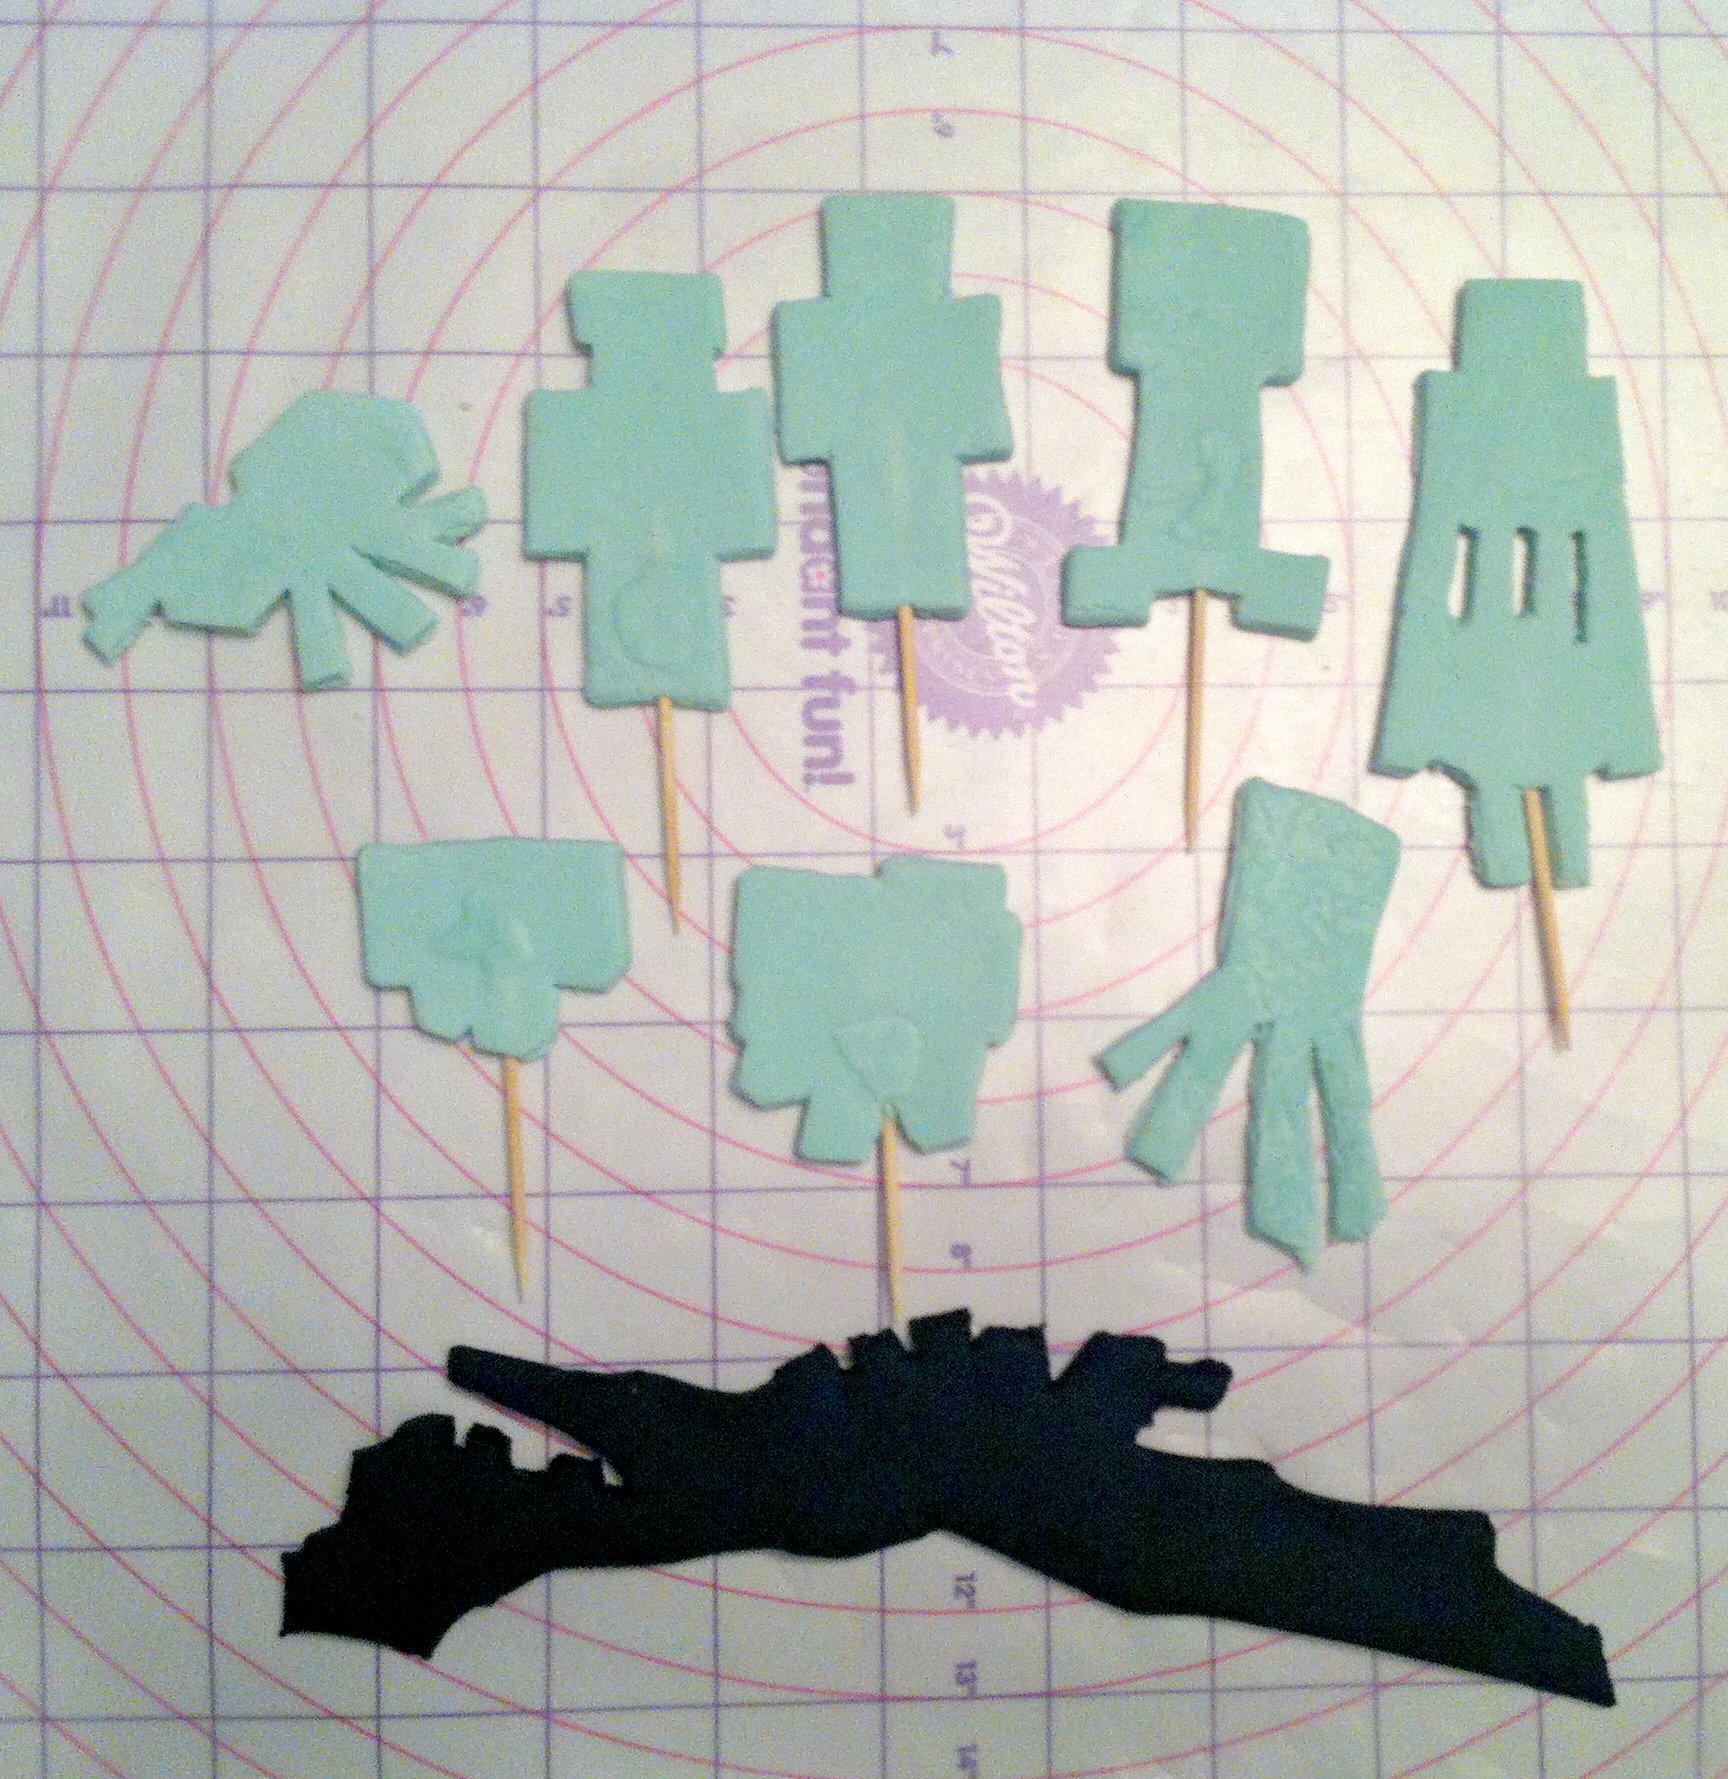
Here are all the mobs cut out. I slid a toothpick into most of them while the fondant was still soft, and reinforced where necessary with more fondant. I wasn’t worried about the smaller fondant blobs showing because I knew I’d be painting with icing, which is thick, but if you’re painting with straight color gels you’d rather have a flat surface.
The next step is to let the pieces dry. I mean really dry. At least a day. Two is better. The longer you can wait, the more in-advance you can get them cut and set them aside, the better, because fondant will wilt and melt when it gets wet, and there is a lot of moisture in the icing. Also, larger pieces will take longer to dry through than smaller ones. The Jake & the Neverland Pirates gang were dry enough to paint after 2 days left exposed to the air. I hadn’t given myself enough time with the Charlie & Lola toppers, they were so big and still flexible after 2 days. Or maybe my house was more humid at the time. Either way, they ended up spending 24 hours in a bed of icing sugar to draw out as much moisture as I could get.
Once the pieces are firm, not floppy, they’re ready to paint.
I didn’t take any in-progress painting shots. You can use whatever you like as a palette as long as it’s food-safe and not used for any non-food purpose. (I also keep my cake stuff away from peanut and nut products because I make 3 nut-free cakes every year). I mostly paint with toothpicks but I have some food-only paint brushes I’ll use from time to time, and I use repurposed apple sauce cups for extra water and icing sugar. There are a bunch of tricks I use, like using a medicine dropper to add water to thin the icing if necessary vs a spoon, so I have more control over how much I add, and using those sewing pins (in the tracing pic) to help mark out any details on the fondant cut-outs, in addition to “drawing” on them before I paint.

These are the non-hostiles- a sheep, Diamond Steve, regular Steve and a pig. I chose some of my kids’ favorite characters, leaving out only the Mooshroom because I knew I already had plenty to cover the cake. Plus if I’d kept going they also wanted an ocelot, and a dog, and a bat, and a spider jockey, and zombies, and…
I didn’t plan too far ahead on each piece, though I do try to work in a way that makes sense. Whenever possible I work backwards in color, to minimize icing waste. For example, I didn’t want to have to re-mix black, so planned to work with it last, and do any details if necessary then, at the end. I started with the Steves, and mixed up their skin color (though now they look like Zombie Steves), then added a touch more brown and used the same icing for the sheep’s face and the lighter areas on his hooves. A touch more brown and it was used for the darker areas of the hooves and Steve’s hair.
The same blue used for Steve was also used for the squid’s face, then darkened for his body, and eventually darkened further for the black.
Just like when painting with real paints, when I mix colors I don’t always blend it all in, so if I’m adding more pink to do some shading on the pig, I only mix it into half of the icing, so I still have some light pink to play with.
 The hostile mobs- the Ender Dragon, a spider, a creeper, an Enderman and a squid (who probably isn’t technically ‘hostile’). I don’t know why the Enderman’s eyes don’t look purple, I think the light washed it out ‘cus in person they did. The splotches on the spider were made by mixing in some white while the black was still wet, and most of the details on the Ender Dragon were dry-brushed for shading, since I didn’t have to actually paint him black to start.
 The final touch was to make a wooden sign and then the gang was all done, ready to set aside somewhere safe to dry (and avoid being eaten) until the party.
For more from the party:
————————-
More Minecraft fun:
How to make Minecraft Steve and Creeper heads


Pingback: How to Make Minecraft Lootbags |
Pingback: Jake & the Neverland Pirates cake |
Pingback: Charlie and Lola cake |
Pingback: How to Make a Minecraft Cake |
Pingback: Throwing A Minecraft Birthday Party |
Pingback: How to Make Minecraft Steve and Creeper Heads |
March 17, 2019 at 9:16 pm
Hi! Cool cake!! One question, what icing recipe did you use? I’d love to make my little one a Minecraft cake!
LikeLike
March 18, 2019 at 10:10 am
Hi Vicky! The cake was decorated with Betty Crocker frosting I tinted with Wilton and Americana gel colors. The fondant toppers were painted with “icing” made by putting 1-2 tbsp of icing sugar into a small bowl (like applesauce cup) and adding a few drops of water at a time until the “icing” was at a paint-like consistency. Then I tinted it with the same gel colors.
If you prefer to paint the toppers with just the gel dyes, I use vodka to dilute them. It evaporates fast and doesn’t melt the fondant into a sticky goop like water can.
LikeLike
Pingback: Mini Cupcake Transport Hack |
Pingback: How to make an Undertale Tem Shop Cake |