If you’ve been anywhere on the planet over the last few weeks you’ve seen the pink haze that’s spread down as Barbie movie fever ramped up. Just like most of the rest of the world, I saw movie last week, so figured it was the perfect time to share the first Barbie cake I’d ever made.*
Like always I start with a sketch.
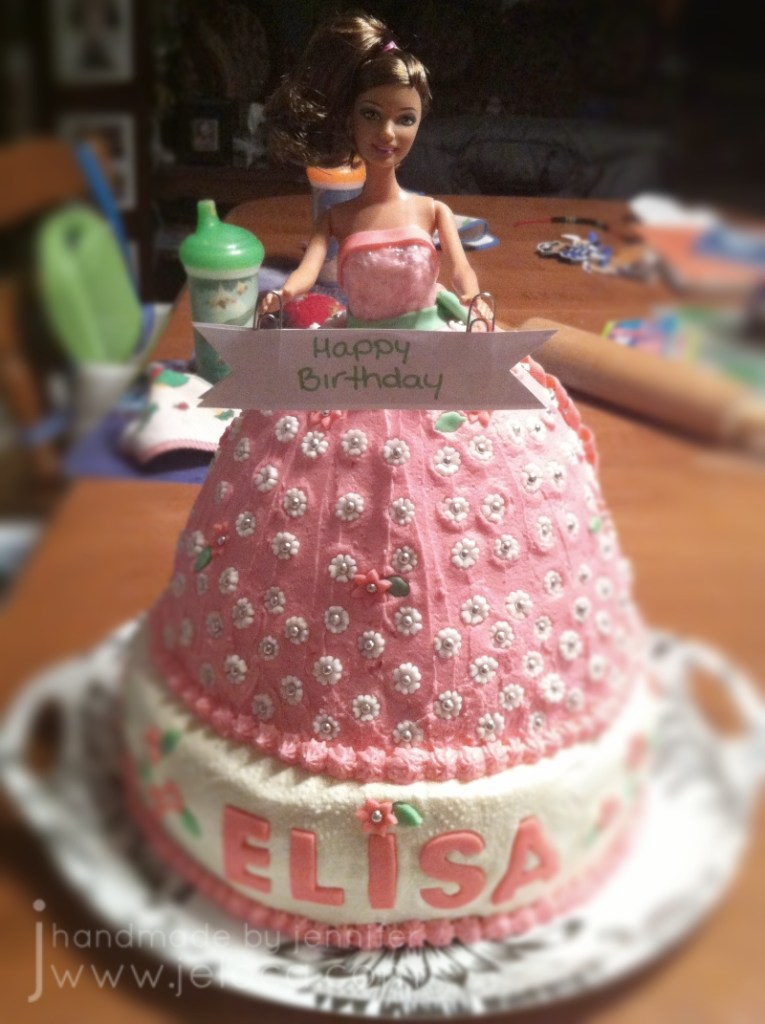
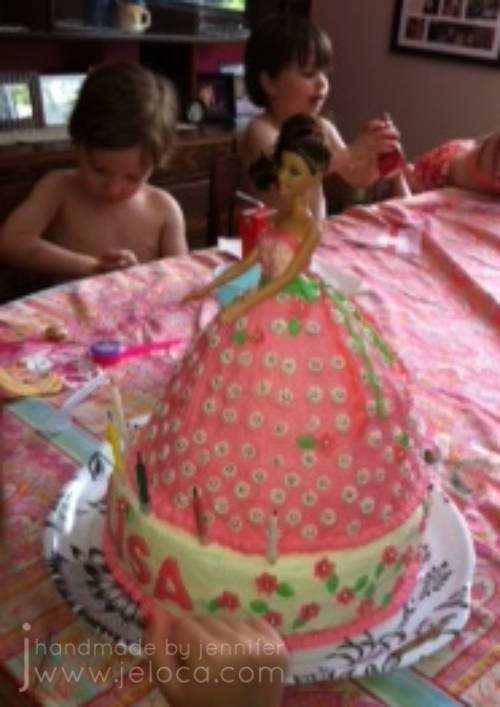
This cake was for Jakob’s daycare “girlfriend” Elisa, and was requested to be “pink and white”. Instead of using a doll pick designed for cake decorating I wanted to use a real Barbie that the birthday girl could keep later. As such I decided to go for a multi-tier cake to give enough height for the doll’s legs.
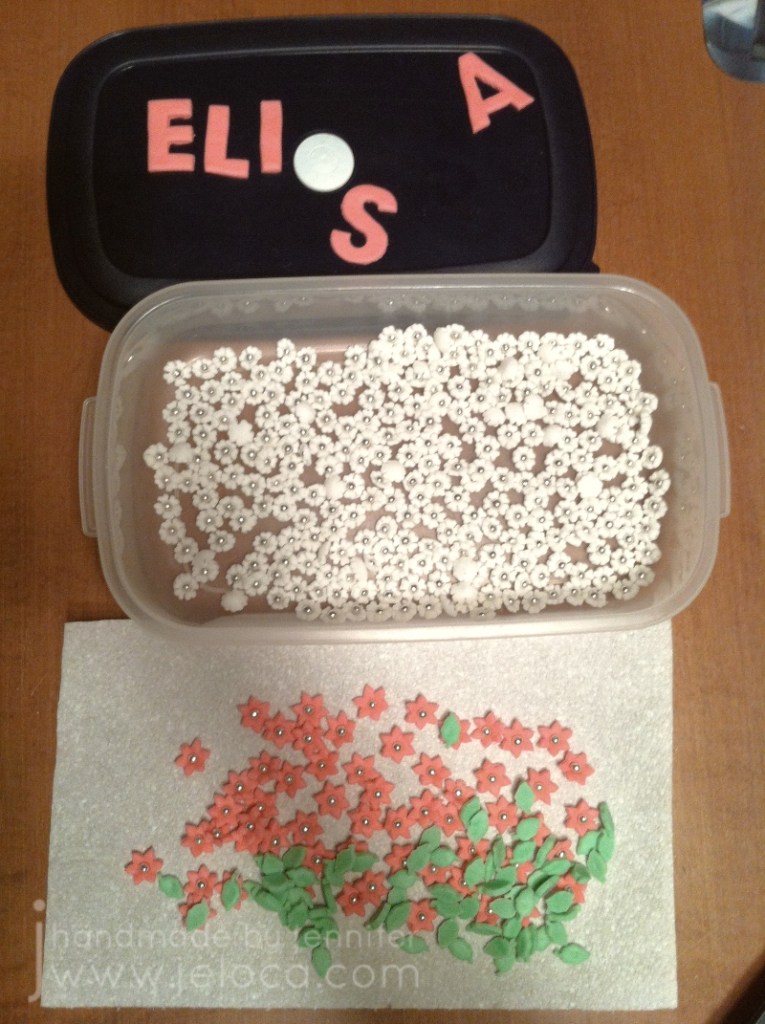
A few days before the party I used mini plunger-style fondant cutters to make a ton of flowers and leaves, popping a tiny silver dragée into the center of each flower before setting them aside to air dry. I also made the birthday girl’s name using alphabet cookie cutters.
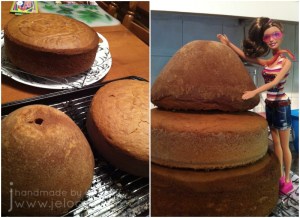
I’d used 3 cakes total – the top used Wilton’s doll cake pan, and then I added an 8″ and 10″ round.
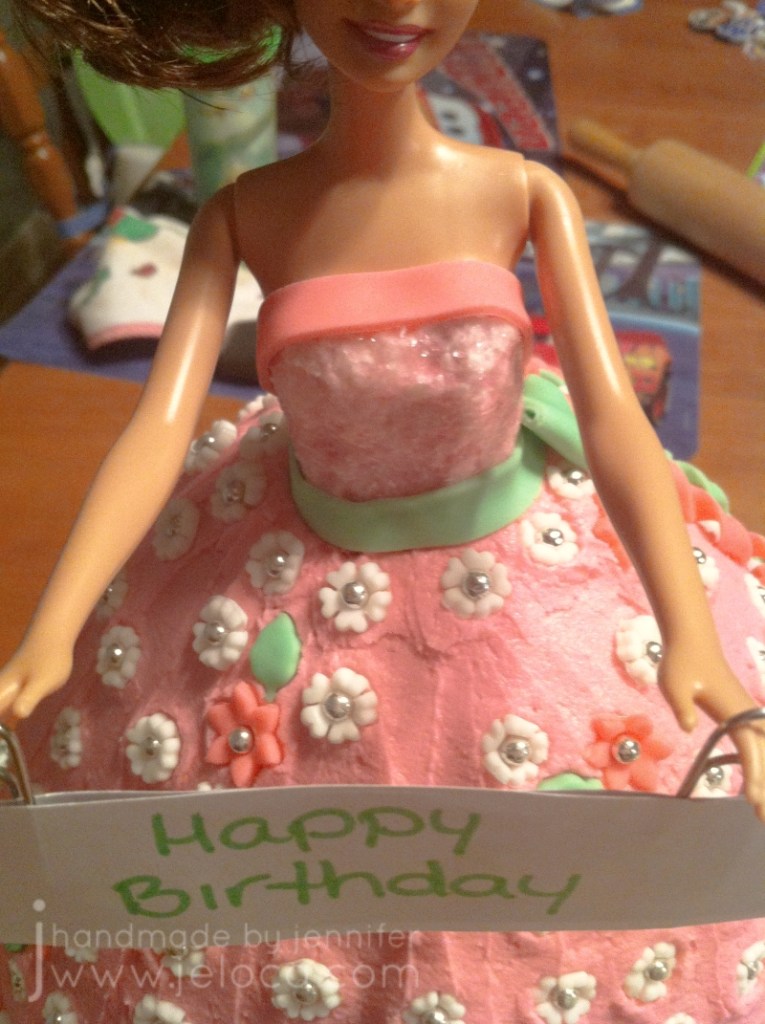
I’d chosen a Barbie with the birthday girl’s hair and eye color and packaged the clothing and accessories into a little gift box to keep them clean. I also wrapped the doll in saran wrap from her torso to toes to make sure she didn’t get stained by the icing.
I don’t have step-by-step images of the the decorating part but after filling and stacking the cakes I’d cut a slot for the doll’s legs and inserted her into the cake. I covered both tiers with icing and added final touches with the fondant flowers.
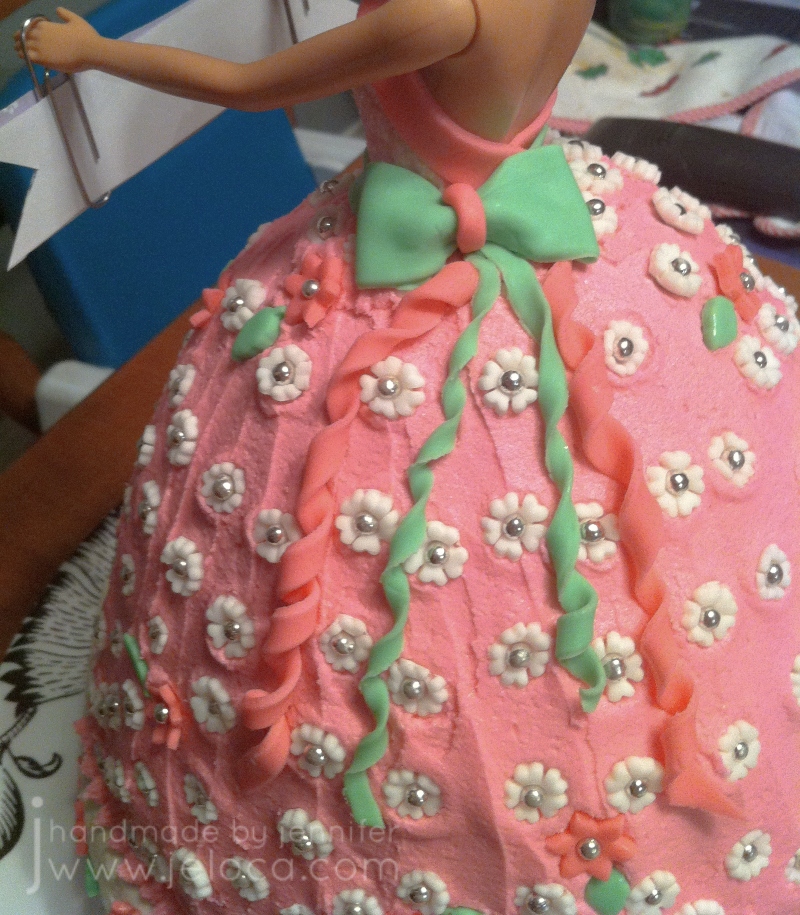
The bodice of the dress is fondant covered with pink edible sparkles, and topped with a fondant border and belt.
To enable Barbie to hold the birthday banner I sandwiched two paperclips between strips of paper.
The fondant bow and ribbons was added to give some visual interest to the back of the cake and to use up the extra bits of green and pink fondant.
The cake was a big hit with the birthday girl!
Bonus- here’s a pic of Jakob and Henri at the party. They were so little!!
*The second Barbie cake I’d made was my sister’s bridal shower cake.
If you want step-by-step tutorial on how that one was made, click here.
This post may contain affiliate links. This means I might make a small commission on purchases made through the links, at no cost to you.
Jakob turned 16 (!!) this week, so I thought it was high time to share another one of his past birthday cakes.
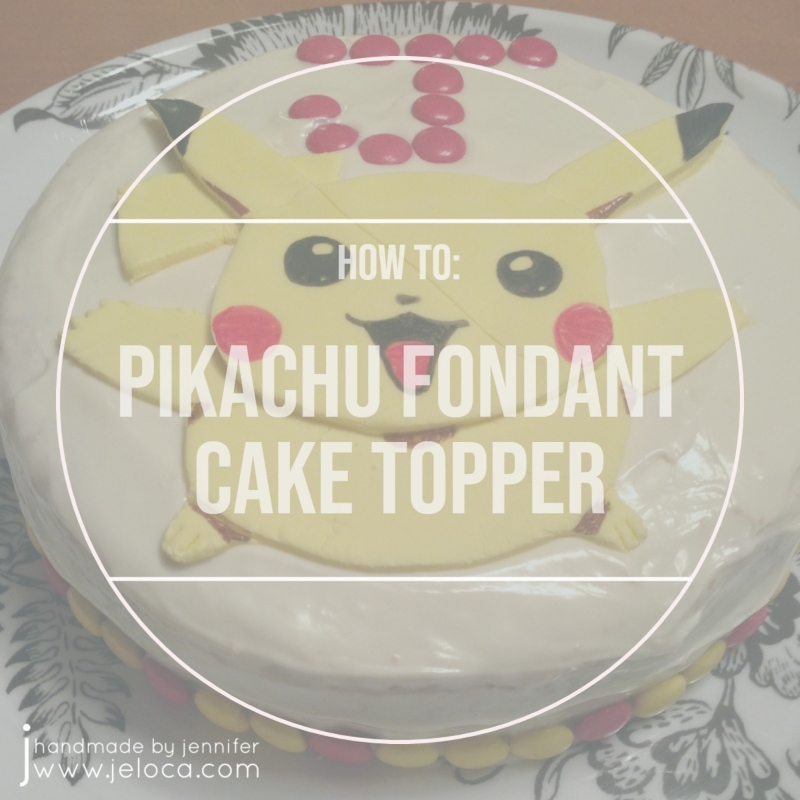
Made for his 9th birthday, this Pikachu fondant cake topper is a quick and easy DIY that you can copy on your own cakes, cupcakes or cookies.
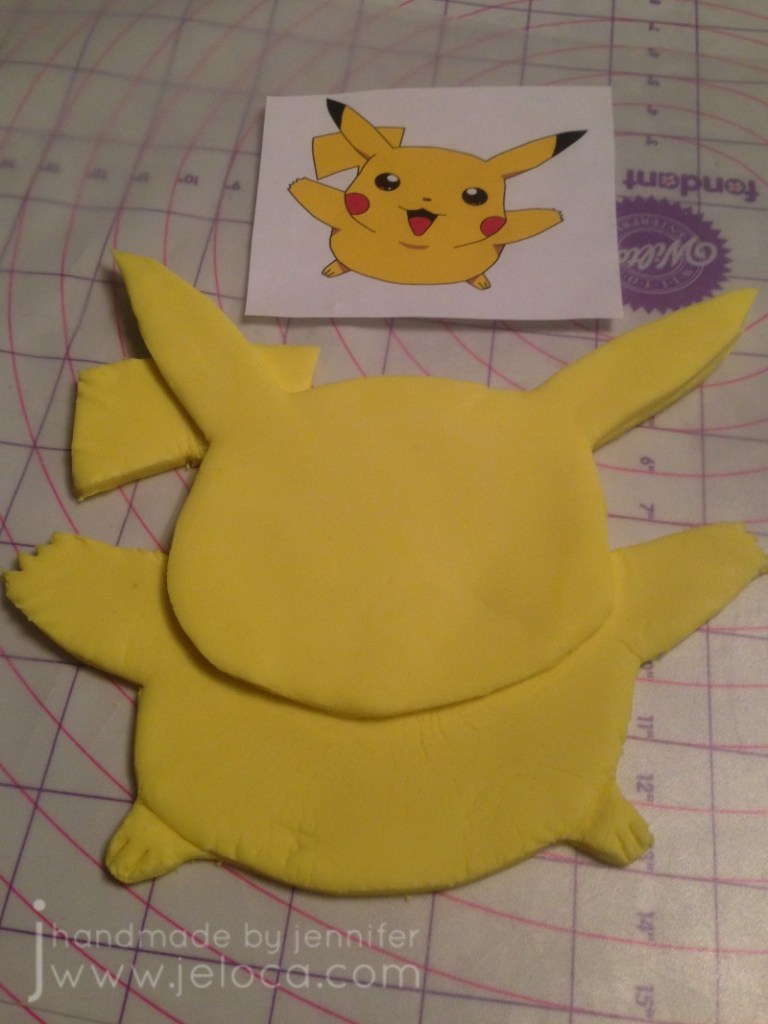
As always when making a topper for a known character I like to start with a template. After measuring my cake pan I resize an image of the character to fit and then print it out. For cartoon characters like Pikachu you can search for coloring pages to find black and white outline-based images.
For this cake I tinted some white fondant with yellow Americolor gel colors to get Pikachu’s signature yellow shade. I rolled it out on a silicon measuring mat using a fondant roller with the medium levels as I wanted to make sure I had enough fondant for a two-layer figure. I usually use the thickest level for fondant toppers and I would suggest that you prep enough fondant so you can do the same – as you’ve probably noticed above my topper was a little thin and wound up cracking.
I started by cutting out the base layer of the full image by tracing the entire template with a fondant cutter.
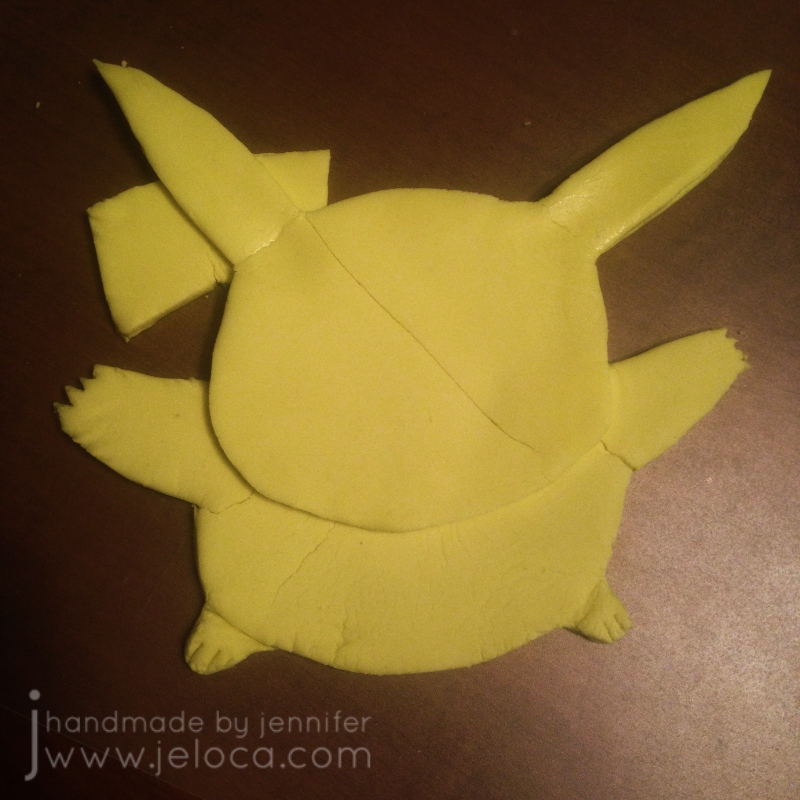
Then I cut out Pikachu’s head alone so I could layer the pieces similar to a 3D paper decoupage technique.
Carefully stack the head cut out on top of the fondant base using a little bit of water to secure it in place.
I always like to prepare my toppers in advance so they can dry out for a few days before I begin coloring/painting on them. As mentioned above I’d made Pikachu a bit too thin and he wound up cracking across his face and left arm.
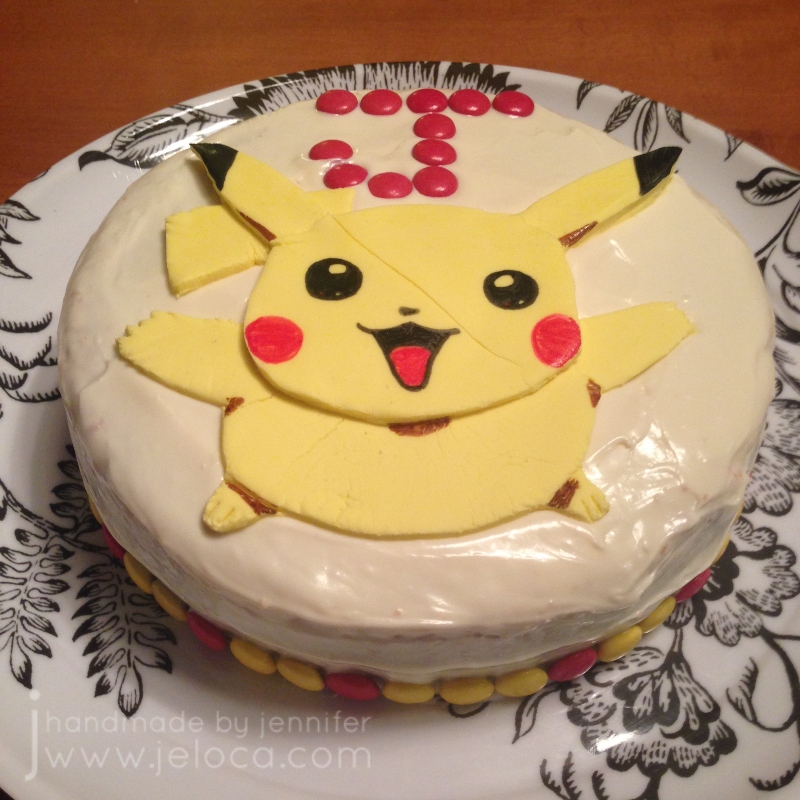
I used edible ink markers to draw on Pikachu’s face and details. I’m glad I had a reference image as I was about to color the tip of his tail black. Have you heard of that Mandela effect? It totally got me!
While the fondant was drying I baked a vanilla cake and prepped it as per my “how to bake a cake and prep it for decorating” post. To finish things off I decorated the base with yellow and red Smarties to match the colors of the topper.
This was a really quick and easy DIY that you can use to make your own Pikachu treats!
This post may contain affiliate links. This means I might make a small commission on purchases made through the links, at no cost to you.
Today’s post will walk you through step-by-step on how to make this cake featuring the Master Sword from The Legend of Zelda video game series.
I’m a huge Zelda fan and the love for the series has been passed down to Henri with a vengeance! In addition to dressing as Link on Halloween and poring over game art collections he plays all the games from Link’s Awakening on my old Gameboy Color straight through to Breath of the Wild on the Switch. It’s on the BotW Master Sword specifically that he requested I use as the theme for his 11th birthday cake.
This is the Master Sword:
And this is the sword in the game:
I decided to use this image as the inspiration for my cake. The sword itself would be sculpted out of fondant and I’d expand the stone base so there would be enough cake for his birthday guests.
The cake took a total of 3 days to make. On Day 1 I sculpted the sword so it could have time to dry out to lessen the chances of the fondant dissolving under paint application. On Day 2 I baked the cakes for the base and set them aside using the methods I outline in my How to Bake a Cake and Prepare it for Decorating post. On Day 3 I painted the sword and the base. Note: you can absolutely merge Days 1 and 2 into one evening if you’d like.
Keep the excess scrap as you’ll need it to sculpt the details.
As a long, skinny piece of fondant this size would be fragile I used a clean, splinter-free wooden dowel as a support, leaving enough at the base to secure it into the cake.
Then I used the excess fondant and began blocking in the sword’s details. As you saw in the finished cake it would remain flat so I only had to sculpt the front half.
I used the template for the basic shapes and then referred to a clear online image to get the details right.
At this point I set the sword aside to air-dry.
Here’s how it looked the next day.
Here it is alongside the template. It did grow a bit as I sculpted additively but I knew the slight size increase wouldn’t matter with the final cake.
Pleased with it, and deciding it didn’t need any adjustments, I let it continue to harden and baked the confetti cakes Henri had asked for.
On Day 3 it was time to assemble and decorate!
I had 2 8″ square cake layers to work with. To achieve the triangular base I cut the first layer into two triangles by removing the center strip, ensuring that one triangle was slightly shorter than the other. I repeated the process with the second cake making each subsequent triangle shorter than the previous one. This design does leave extra cake that you can eat or make into cake balls with any leftover icing.
Note: always check your transport method! In my case I couldn’t simply cut the first square diagonally to achieve my largest pieces as the resulting triangle would have been too high to fit into my cake carrier!
I used a bit of icing to “glue” the cake to the carry board and then began to stack the cakes horizontally, icing in between to keep the layers together.
Yes- that IS Betty Crocker icing in the background. And yup- this is totally a Betty Crocker Rainbow Chip box cake. There is zero reason why a box cake can’t be done up the same way scratch cakes can. Whether you’re short on time, find the mixes cheaper or easier, or if you’re simply baking for a bunch of 11yo boys who won’t know or care about the difference then by all means go for it! I do generally doctor my cakes so the cake mix winds up more as an ingredient vs the main staple, but that’s absolutely not necessary to get great-tasting, great-looking results.
Once stacked I protected the board surface with parchment paper strips and dirty iced the cake, then covered it with more white fondant. Then came the fun part- poking, scratching and dinging it with an assortment of knives and sculpting tools to give it the texture of an old weather-beaten rock.
I put some wax paper strips down to protect the board again and then painted the “rock” with custom icing gel colors. I have a large collection of Wilton gel pots and a kit of Americolor icing colors and I like them both equally as they fill in color shades I don’t have in the other. The gel pots of the Wilton kind are great for dipping in a toothpick for a really tiny amount, while the Americolor ones are in squeeze bottles that make adding precise drops really easy – perfect for when you need to replicate a color you’d already mixed up.
I used an assortment of browns and yellow thinned with vodka for the main color, adding darker touches for shadows and age. I also dry brushed green shades around the base and edge as if grass or moss had started to encroach similar to how I indicated forest-y age on the fondant bricks in the Pitfall: the Lost Expedition cake.
Bringing up another reference on my iPad, I used the same supplies to paint the sword, adding in a bit of silver luster dust for the metallic portion.
The luster dust mixes nicely with a bit of vodka to become a metallic “paint” that dries down well once the vodka evaporates.
I used gold pearl dust in a similar manner for the gold accents and completed the rest with blues and green gel colors.
The last bit of prep is to cut out a small bit of the fondant so the sword fits nicely into place and then the cake is done!
Here’s a closeup of the cake “rock”. I love how the texture came out!
My only regret is not having smoothed the underlying cake surface better, as you can see the ridges of where the fondant curves around the cake layers…but the kids sure didn’t mind. It was a huge hit for the birthday boy and his friends.
In my last post I shared my second Angry Birds cake, where Red was applied as a fondant topper (unlike the first one where the cake itself was carved and iced into his distinct shape). This style of fondant cake topper is one of my go-to methods of easy cake DIY. This demo is using Red as an example but you can use this method to create almost any basic character.
You’ll want to start by printing an image of your character to use as your template. I resize my image so it is scaled appropriately for my cake and then print it in grayscale to save on color ink. In this example I also included a mini version to use as a color reference.
Starting with my main color, which was red, I rolled out some white fondant I’d tinted with gel colors. The levels that come with my fondant rolling pin ensure that each piece will be the same thickness so in the final image every layer will have the same height and the silicon mat guarantees that the fondant won’t stick to my work surface. Tip: if you find your fondant mat slides around, dampen a few spots underneath with a bit of water and it will “stick” to your table or countertop. Make sure the piece you roll out is large enough for the area you want to cut out.
Lay your template directly onto the fondant. If your fondant is really sticky you can lightly grease the back of your paper with shortening but I always let my fondant rest for a few minutes to make it easier to cut, and so have never needed to do this. Trace the image by poking little dots at regular intervals right through the paper and into the fondant.
Note: you’ll need to take a moment and figure out if your finished piece will be flat or multilayered. For mine I decided that the face portion (eyebrows, eyes, and beak) and the red gem would be a raised layer, whereas the body, belly and crown would be the bottom layer. Finally, his pupils would be a third layer. You can see in the image above that I traced the red body right around the white belly, ignoring the beak. If you wanted to make only one layer you would have traced the red around the beak, eyes and brows.
You can use anything with a small, fine point for this step. I used the needle tool that came in my fondant/gum paste starter tool set but have also used sewing pins or the end of a clean paperclip.
Next, cut out your shape using the dotted line as a cutting guide. I used the knife blade that’s on the other side of my needle tool linked above, but you can use a regular kitchen knife.
Here you can see that the piece of fondant is exactly the same size as the template.
I like to transfer the fondant to a stiff transparent sheet before setting it aside. I’m a huge fan of flexible clear cutting boards like these and use them in almost every cake I make. They’re fantastic for toppers like these because you can lay your work in progress right over the template and repeatedly check that things are fitting as they should.
I repeated the same steps to cut the crown and beak out of yellow-tinted fondant, and then the eyes and belly out of white. The cut side edges of the fondant should be moist enough for it to stick together (like when insetting the crown, above) but if not you can lightly dampen them with a bit of water on a brush or cotton swab.
Repeat the process for all required pieces to make up your character. For King Red that meant the red body and gem, white belly and eyes, yellow crown and beak, black brows and pupils, and a maroon-ish inner beak area. I assembled each layer as I went, consistently checking that everything was aligning correctly by placing the clear board over my template.
Depending on your character you could be done at this point. To give mine a finished cartoon look and to fully match my sample image I used edible markers to outline the shapes and detail the crown.
My last step was to use leftover red fondant for the birthday boy’s name. I always make these toppers in advance and so was able to set them aside for a few days so they could air dry.
A great thing about using the pin technique (vs cutting up and tracing your template) is that the template is reusable. You can either re-dot in the same holes or simply press your paper onto the fondant and transfer the hole marks that are already there. Because I let my fondant set up slightly before piercing I had no transfer of fondant or tint onto my paper.
You now have a custom fondant topper ready to use for any decorative purpose! I like to prep a cake using my tutorial and then finish it with this style topper. You can also make mini versions for cupcakes using the same method.
This post may contain affiliate links. This means I might make a small commission on purchases made through the links, at no cost to you.
A few months ago I posted a version of an Angry Birds cake where Red was created by shaping the cake and using icing for the different colors. Yesterday was Rovio’s Bird Day so it’s a perfect time to share this alternate version where the character is created using fondant.
This is an easier method for those who aren’t comfortable cake sculpting. I also find fondant is more forgiving and easier in fixing mistakes than icing, though that’s a personal preference.
Step one is to make the cake topper out of fondant. I use fondant toppers on a lot of my cakes (ie: Elmo, CARS, Charlie & Lola, Neko Atsume, Super Smash Bros) because I love the flexibility of being able to prep the topper in advance so I’m not rushing the day before the cake is due.
This cake uses a template to make a cut fondant topper. You can find my full tutorial here.
Once the cake is ready all that’s left is to place the pre-made fondant pieces onto the cake.
I love how simple character-topped cakes can have a big impact by giving the birthday child exactly what they want without breaking the bank on supplies or causing unnecessary stress.
This award-winning horror movie came out in 2017 and featured a 90s-style game played by a gang of unassuming teens. Unlike Jumanji the consequences of playing this game are a LOT more gruesome and bloody. It also happened to be produced by one of my dear cousins, and he asked if I could make the cake for their wrap party.
This is the “Game of Death” gameboard as seen in the movie:
And this is my cake replica:
With Halloween just around the corner I thought it was the perfect time to share exactly how I made it!
The first step was to get a few good quality images of the prop that I could use for reference.
I was also asked if I could make a gluten-free option so there’d be something for those with intolerances. I was given a few reference images of the deaths and other props being used and when I saw that one character met an untimely end with a broken baseball bat I knew that would be something I could easily sculpt out of gluten-free puffed rice cereal.
While there were a lot of steps in making this cake it only took 3 days from start to finish. I’m going to break down everything but to avoid this being incredibly photo-heavy I’ve grouped the images of each step together.
The first step for all of my cakes is to sketch out an idea. Knowing I needed to transport the cake I went out and bought the largest cake board that would fit in a cake box I could find locally. That let me know what total dimensions I had to work with. That allowed me to size out my cake pans and figure out what would work best for the game cake. I then scaled a clear, top-down view of the game board to the appropriate size and traced it out so I could have an accurately-sized template.
I tried to do as much in advance as I could, as some of the parts would need time to dry or cool. The next task for day 1 was to make the gameboard’s window pane. I’d been asked to write a congratulatory message to the cast underneath, and while I could have simply written the image on a slab of fondant and set it in place I was determined to see if I could make the “glass” too. While browsing my local bulk store I noticed these clear candy mints and thought they’d be perfect!
I crushed the candies in a plastic bag using a meat mallet and then slowly melted the candy powder in the microwave until they reached a soft, pliable stage. Since I had a scale template I was able to test my cookie-cutters to find the right size and then trim off the excess with a kitchen knife. Once my “glass screen” was ready I set it aside to cool and harden.
Still on day 1 I rolled out some white fondant and made the center skull, all the minis, and the curved bits that line each player spot. I also cut out a base to put under the glass screen so I would have somewhere to write the message. Using a fondant roller and mat was really convenient as the roller has level guides so the pieces were all of equal thickness and the mat has measurements built right in.
I then made a large batch of gluten-free puffed rice treats and sculpted them into the two halves of a baseball bat, ensuring they would fit properly on my cake board. (Another benefit of having a scale template!).
The final thing I did on day 1 (not shown) was to bake the actual cake. I was given free reign on flavor and picked vanilla as it would work best with a special request I’d been asked – could I make the cake bleed when cut. I followed my usual methods and baked a bit of extra batter in a mini cake pan as I wanted to test the bleeding effect. I didn’t want to take a chance on the actual cake just in case it didn’t work so this little tester would be perfect.
Day 2 began with making edible fake blood. The best recipe I’ve found is to mix up chocolate syrup (like for chocolate milk) with clear corn syrup and a bit of red food coloring. Adjust the ratios until you get a consistency you like. In a subsequent cake I made a thicker version that is more realistic but for this cake I deliberately thinned it a touch so it would be able to be runny when cut.
I cut a well into my test cake’s bottom layer and iced it carefully so the “blood” wouldn’t soak into the cake itself. I then added the top layer and iced the whole thing and waited a few hours to be sure no red tint seeped through to the exterior. Then my kids helped me cut it and test if it worked:
It did! I was really excited knowing I could add additional wells into the real cake for an even more horrific effect.
I then painted the baseball bat treats with chocolate candy melts. Using a mug warmer was the perfect way to keep the candy warm long enough for me to get both pieces fully coated.
Then I wrapped each half with white fondant leaving the matching edges broken and torn to simulate where the wood would have splintered when the bat snapped in half. I used my fondant detail cutter to fray the edges further and add more realism, and then painted the fondant to look like wood. I’ve used this technique before and have a full tutorial on how to do it here.
With all the accessories and add-ons ready, day 3 was where it all came together!
I leveled my cake and torted it into 3 layers. These cake levelrs make it so easy to divide a cake into multiple levels evenly! The first layer was placed down on a round cake board and then iced, and the second layer was applied. I used a cupcake filler to cut a well in the center as well as add additional little surprise blood spots around the resulting ring. I was careful to not put them too close together so the cake would still have structural integrity, as I knew there would be a lot of fondant on top and I didn’t want it to collapse.
I also made sure to keep the cake bits from the corer as they’d come in handy in a minute.
I iced the middle layer, being careful to not disturb the cut edges too much while still evenly coating them in icing to provide a barrier between the blood fill and the cake itself. Then I carefully filled each well with the blood mixture leaving about a half-inch of space and then plugged the gaps with the cake pieces I’d saved. Finally, I iced the underside side of the remaining tier so when it was flipped onto the cake, the icing completely covered the plugs. This will prevent any of the blood from potentially bleeding into the upper tier.
Now that the cake was fully stacked I was able to use my scaled template to trim it to shape.
I then set the cake into place on the cake board, using a dollop of icing to “glue” it down. It was iced and then covered with gray fondant to match the game in the movie.
Then I used my template to cut out a slab of white fondant and used one of the fondant detail tools to trace each of the sections of the board, leaving imprints on the fondant that I could use as guides. I used edible food markers to color in each section, blending them with water when necessary to avoid too many streaks.
The topper was set into place and the edge trimmed with a border of white fondant. I “glued” each of the pre-made bits in place with a bit of water and then finally wrote the game’s logo on the front edge. (It went on all sides in the movie but I didn’t trust myself to write it evenly 8 times!)
The last step was to use a bit of watered-down fondant to “glue” the bats into place and then drizzle them with the fake blood mixture. I added in a few bits of fondant “gore” as an added touch. 😉
With that the Game of Death cake was complete! We delivered it to set on the final day and from the feedback I received it was a big hit!
(And it oozed “blood” perfectly when cut!)
This post may contain affiliate links. This means I might make a small commission on purchases made through the links, at no cost to you.
A few years ago I made a dessert for my friend Debbie’s surprise Hallowe’en-themed party. I was given the option to make cookies or a cake, so I chose both! This Paint Nite-inspired cake and cookie set is easy to make and looks way harder than it is!
You can start with a store-bought cake, or bake one yourself and prepare it for decorating with a layer of fondant to look like a tablecloth. I used white so the rest would stand out but you could use any color.
To make the easels you will need narrow rectangular cookies. You can bake your own or go the faster route and buy them! I used Cadbury Fingers but any log or stick-shaped cookie will do. You will need candy melts as the “glue” to hold the easel together so just be sure to match the candy melt color to your chosen cookies. Note- you don’t want to use regular chocolate for this as it will soften at room temperature and your easels will fall apart.
First make an A shape with a cookie going horizontally across two others for the easel’s ledge, and then after the candy melts set up use a 4th cookie as the vertical support leg. It’s easy to work this assembly-line style, being sure to leave enough time for the chocolate to set hard. I found that I only had to hold them in place for about a minute before they were able to stand on their own.
Of course any Paint Nite needs something to paint on! You can bake cookies yourself or use any rectangular cookie that has at least one flat side, like Biscoff, butter biscuits or shortbreads.
To make edible “paint” mix icing sugar with small amounts of water until you get a loose icing consistency. Paint Nite projects often have a gradient background with a silhouette design on top, so I used that style for my mini paintings. I chose Fall colors with pumpkin orange and white for a sunset and as this was a Hallowe’en party I added a black cat on a fence silhouette and full moon. This also worked well with the Paint Nite habit of using few colors in beginner paintings.
I painted the cookies much as you would at an actual Paint Nite – first painting the gradient background, then once dry adding the top layer.
The fun part was making each one just slightly different, while still being the same image – exactly how the results at a true Paint Nite would be. Everyone follows the same process and comes out with mostly the same image yet they’re all slightly unique to the individual artists.
I also used a few extra cookies to write a message for the birthday girl on her big day.
Of course, every Paint Nite requires supplies, so we need to add the solo cups-as-water cups, Styrofoam plate “palettes” and big orange brushes.
I made all the accessories out of scraps of fondant. For the solo cups simply layer a thin strip of white on top of the red before cutting out a strip to roll into a cup shape. The brushes are narrow rolls of fondant with the brush end dipped into the icing “paint”. The plates are small discs of white fondant smeared with dollops of leftover paint from painting the cookies. To make the “dirty” paint water I swirled a bit of each paint icing into clear piping gel.
Staging the table was super fun! Unlike a real Paint Nite where I try to be as neat as possible, here I got to be messy! I “glued” the fondant accessories in place with a small dab of water and then added drips and splatters of the paint to really sell the “end of the night of crafting” look.
I was so thrilled with how the final cake came out! It was one of the most fun cakes to make and allows for a ton of personalization. All the components can be homemade or store-bought which means this design can work with all budgets, and you can tailor the paintings to match any theme.
This post may contain affiliate links. This means I might make a small commission on purchases made through the links, at no cost to you.
Over the years I’ve made a couple Angry Birds-themed cakes. Two of them were for members of the same family, and even though they were made years apart I wanted them to each feel unique. For this first one I used minimal fondant and worked with an iced base.
Cakes like this are pretty easy to do, and while I don’t have full step-by-step pics I’ll outline the process.
The top layer also started as a 9″x13″ cake which was cut into the shape needed. As for most of my shaped cakes I started with a paper template scaled to the proper size on my computer.
The template serves two purposes. First I used it to trace out fondant pieces for the eyes, brows and beak. As I didn’t want to cut into the template I used a straight pin (that I keep for food use only) to pierce the shapes’ outlines into rolled fondant. The resulted dotted line is easy to cut out with a knife or fondant cutter and the individual pieces can be attached to each other with a bit of water or fondant glue. The eyebrows and pupils were cut from pre-tinted black fondant, the beak was cut from white fondant tinted yellow with icing gels, and the eyes were cut from white fondant later outlined with a black food marker. Before putting away my fondant supplies I also cut out the birthday boy’s name from red-tinted fondant with alphabet-shaped cookie cutters.
Then I used the same paper template on top of the cooled cake and cut around it to cut the cake itself to the proper shape. (You can do these steps in the reverse order but sometimes cake will stick to the underside of the paper and that can discolor your fondant. Another option is to trace the cake shape onto wax paper or parchment paper which won’t stick as easily)
The second cake was then iced with red and white icing to match Red’s proportions and finally the fondant topper was added.
The fondant pieces give the cake a polished look while requiring minimal shaping or sculpting ability, making this a great way for beginners to try out fondant for the first time.
This post may contain affiliate links. This means I might make a small commission on purchases made through the links, at no cost to you.
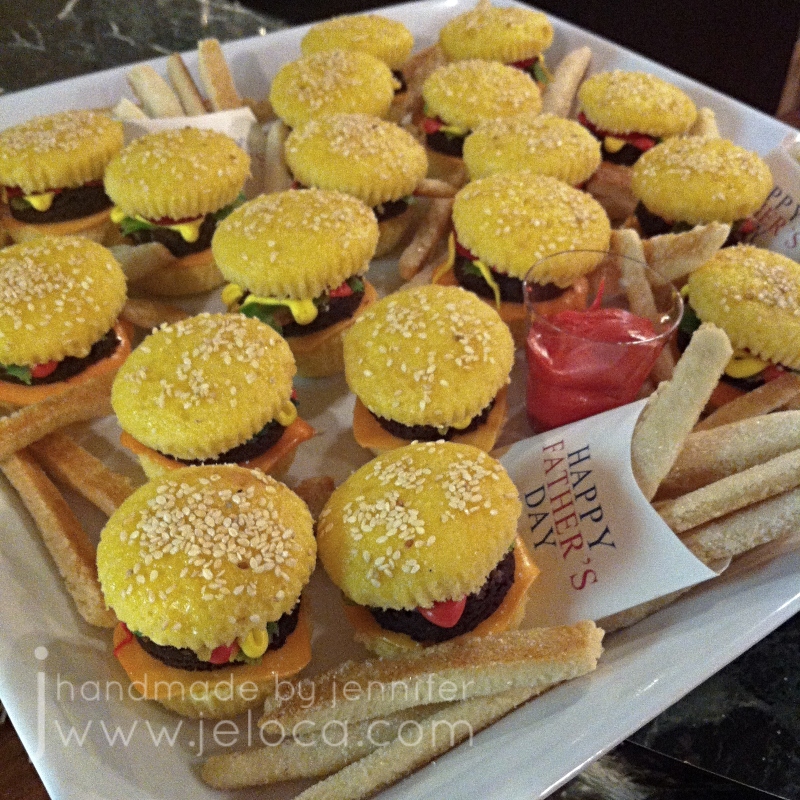
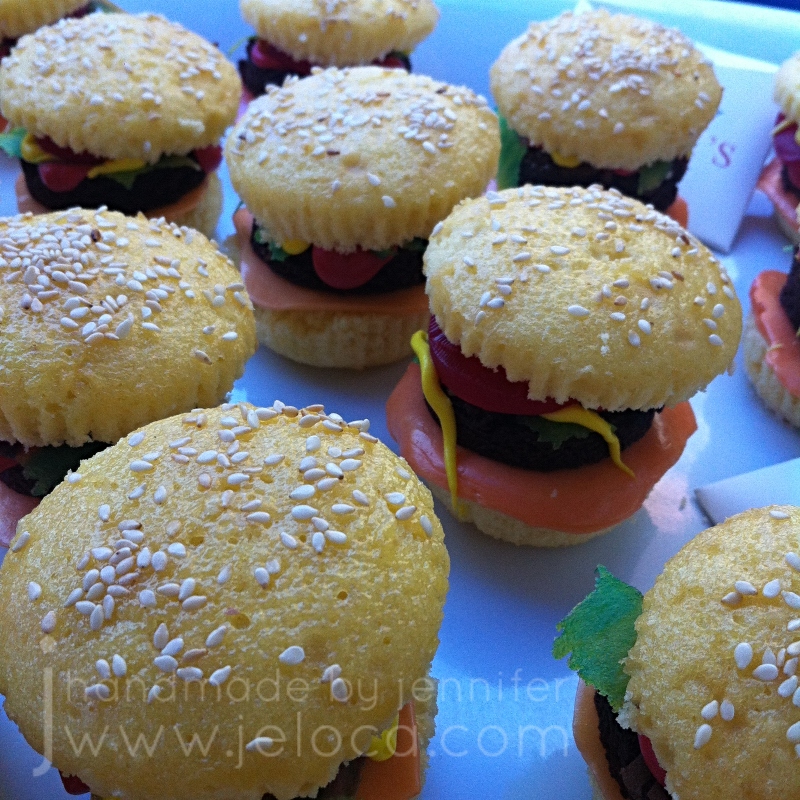
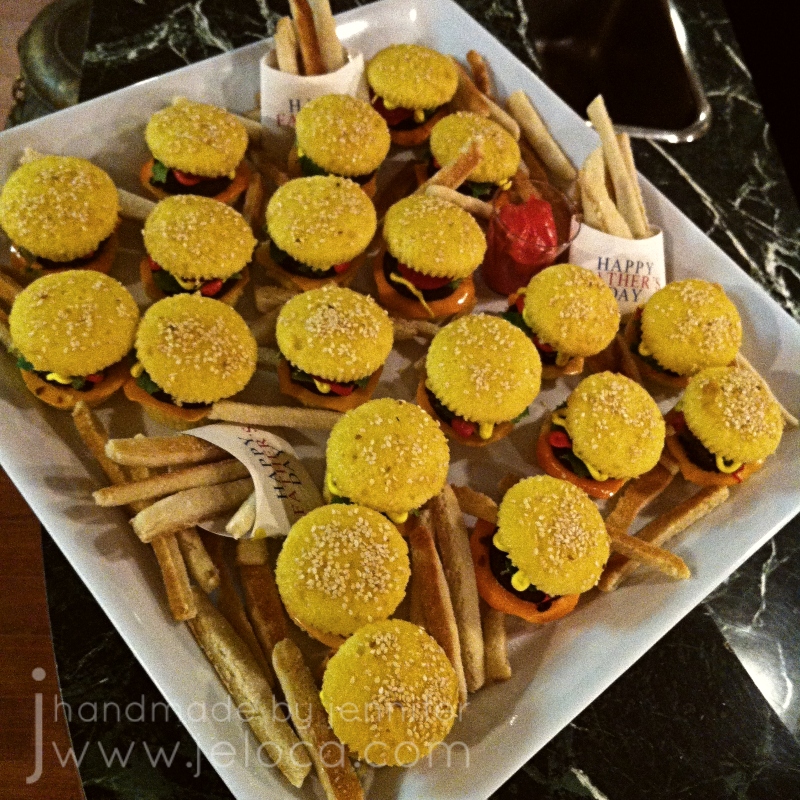
In today’s post I’m going to show you the super easy steps to make these yummy cake/brownie mini “sliders” that you can pair with sugar cookie “fries” for this adorable tromp l’oeuil dessert platter. While they’re a fun surprise for any occasion they work especially well for Father’s Day which happens to be tomorrow. Since they can be made with all store-bought supplies they can be whipped up last minute meaning you still have time to make them yourself!
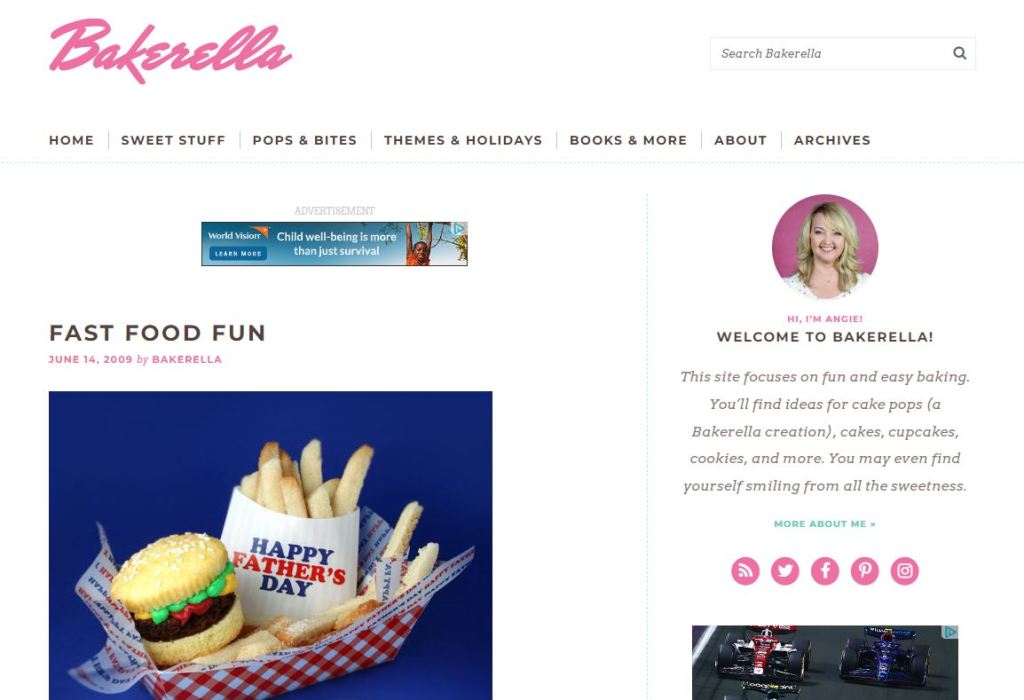
These sweet treats have been around the internet for a LONG time, so this is by no means my idea. I actually got the idea from Bakerella’s blog back in 2009 and made my version pictured here for Father’s Day for my dad in 2014.
Angie’s original post is linked above, and she reissued it here with updated templates for other holidays and occasions including birthdays, Canada Day and the 4th of July.
Foodstuffs you will need:
vanilla cupcakes – “buns”
brownies – “burgers”
sesame seeds
sugar cookie mix – “fries”
Toppings: (all optional as desired)
icing – “ketchup” & “mustard”
granulated sugar – “salt”
orange starburst (or other taffy-type candy) – “cheese slices”
red gummy candy – “tomato slices”
green gummy candy – “pickle slices”
green candy tape/roll up – “lettuce”
Other candies to make any other desired burger toppings
optional: condiment cups for “ketchup” and “mustard” dipping
I forgot to take pics of the fries-making process, but you can find the full instructions at the Bakerella blog post. Basically you bake vanilla or sugar cookies (I used Betty Crocker Sugar Cookie mix) and bake the cookies as wide rectangles which you slice into “french fry” strips once baked and then toss in or sprinkle with granulated sugar to simulate salt crystals.
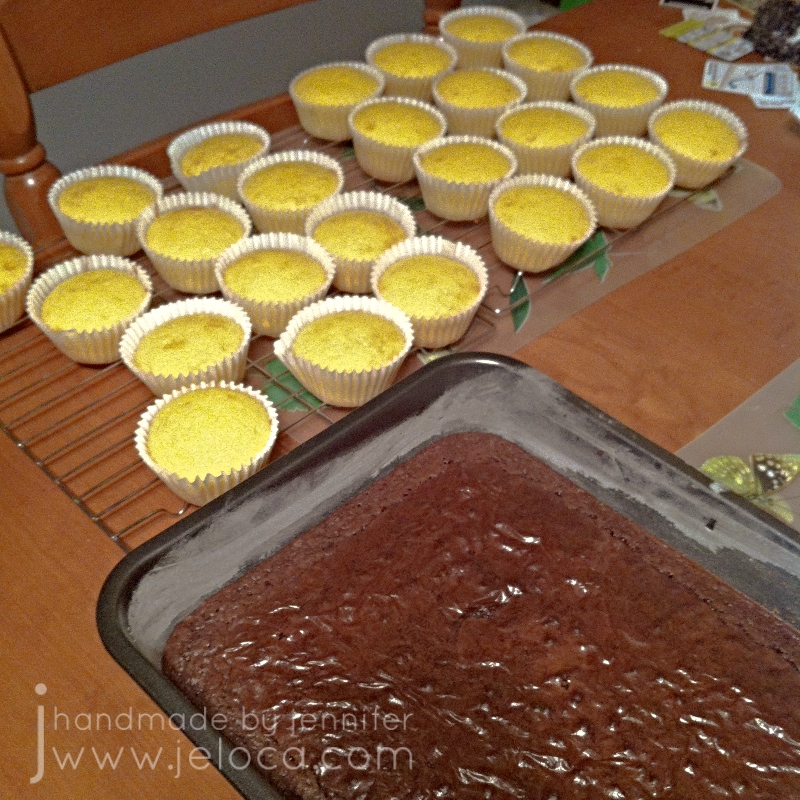
Most versions of the faux sliders start with vanilla cupcakes for the buns and brownies for the burgers.
I baked mine using store-bought box mix but you can go an even easier route and purchase ready-made plain cupcakes and brownies to skip this baking step completely. Slice all cupcakes in half horizontally and then use a cookie cutter that best matches the bun diameter to cut burger “patties” from the brownies.
For the burger toppings I’d basically wandered the aisles at my local bulk store looking for candies that could pull double-duty as other foods.
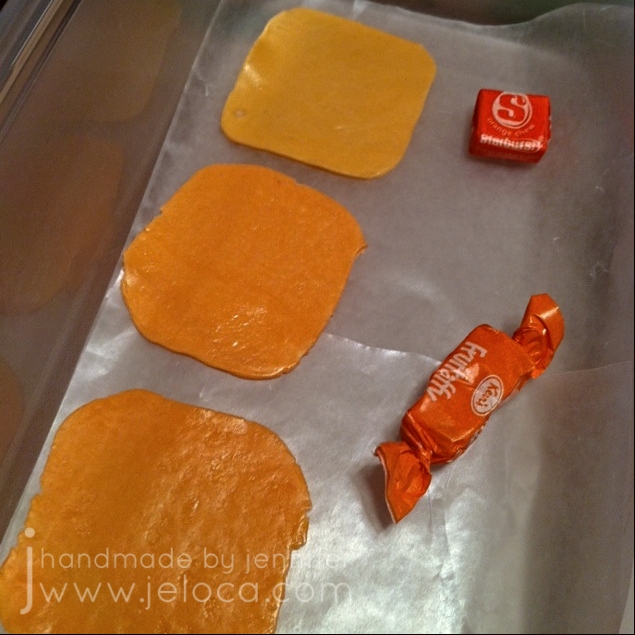
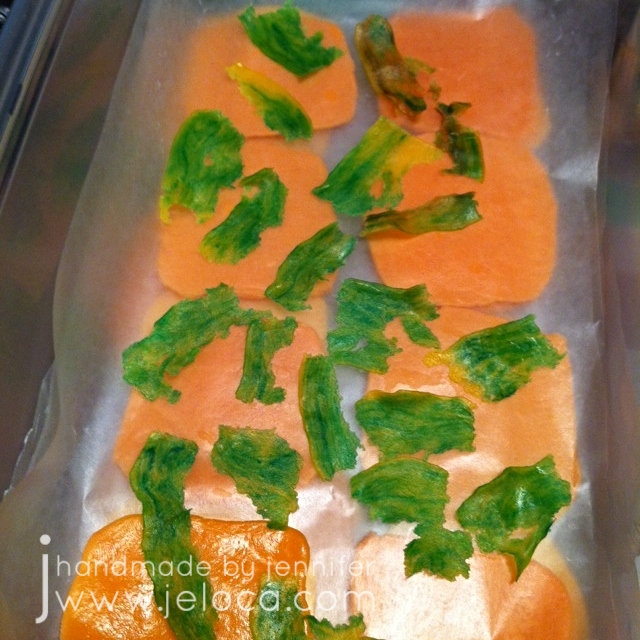
I tested out a few orange taffy-type candies for the cheese slice and in the end went with orange Starburst. Laffy Taffy, Airheads or any other orange taffy that can be rolled flat would also work well. I found it easiest to squish the candy flat and then roll it out between two sheets of parchment paper. You can also use wax paper if necessary, as I did here for storing the candies and keeping the layers from sticking together.
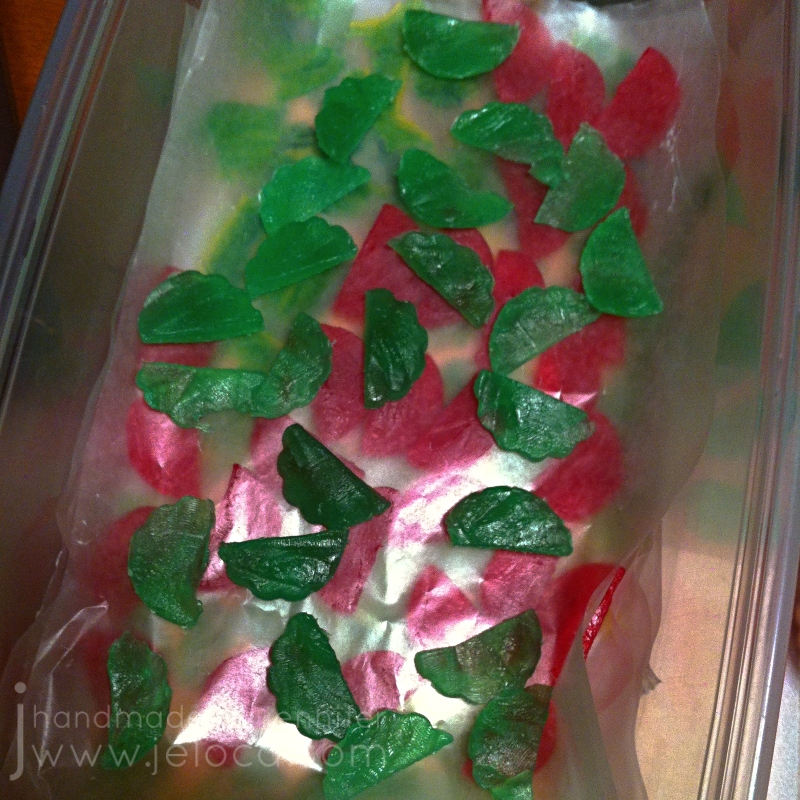
I used the green portion from rainbow Fruit by the Foot to simulate lettuce by tearing it into jagged strips. If you can find an all-green version that would be even better, though my kids didn’t mind eating the other colors that were left over after I harvested all the green bits!
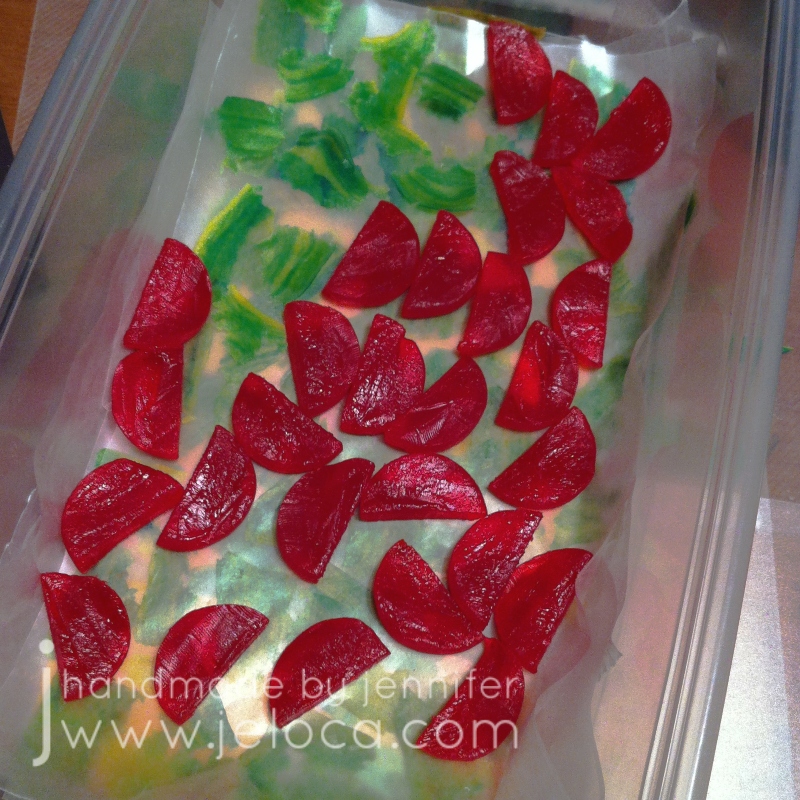
I used red gummy disks for tomato slices, first cutting them in half widthwise to get thinner discs, then I cut those in half again as a full circle of red candy would be a bit much with all the other candy.
My store didn’t have plain green gummy rounds to use for pickle slices, so I cut up some mint-leaf shaped ones instead.
Once you have all your toppings ready, tint some icing red and yellow to simulate ketchup and mustard, and then assemble your burgers as desired.
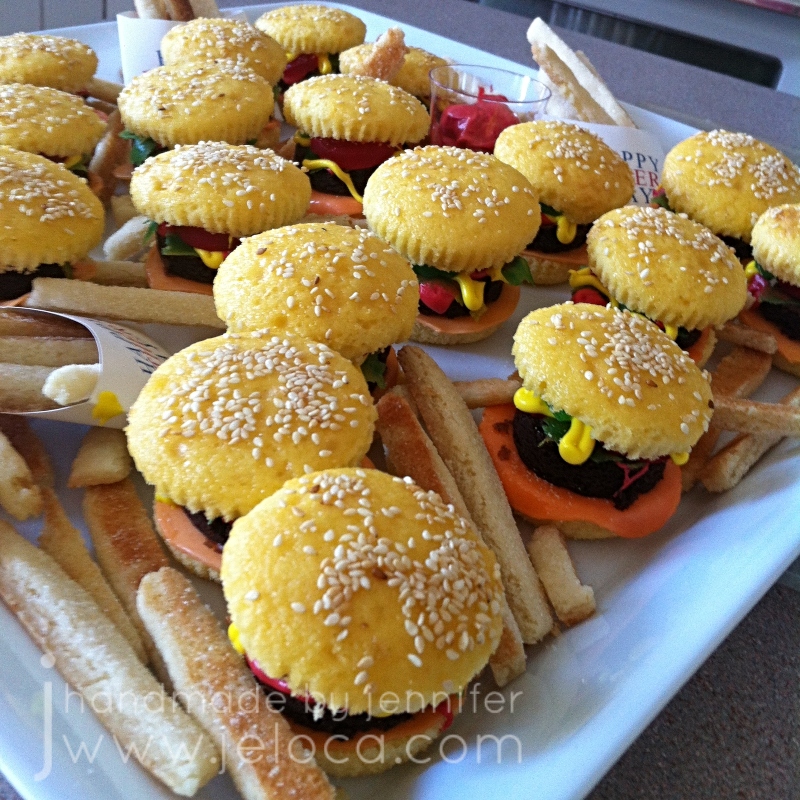
Mine had a slice of “cheese” on the lower “bun”, then the patty, and then tomatos, pickles and lettuce, all arranged to slightly overlap the sides so they’d be visible.
A drizzle of “ketchup” and “mustard” was the last step before placing the top half of the “bun” on top.
To really finish the look brush the tops of the cupcakes with a bit of water and then sprinkle on some sesame seeds.
Arrange them on a platter and sprinkle the faux fries around. If desired you can add condiment cups or little puddles of “ketchup” and “mustard” for dipping the fries into. These were as much fun to eat as they were to make and all these years later Henri still keeps asking me to make them again, which is the real testament to how much of a hit these were!
This post may contain affiliate links. This means I might make a small commission on purchases made through the links, at no cost to you.
As mentioned in my last Adventure Time cake post, Jakob’s obsession with the show covered both his 6th and 7th birthdays. For this year he had both Gunter cupcakes for school AND Gunter & BMO cakes for his birthday party.
Both cakes started with doctored box mix and store-bought icing that I adjusted even further by mixing in crushed Oreo cookies to either the cake batter or the icing.
The Gunter cake was Oreo cake with plain vanilla icing, and the BMO cake was plain white cake with Oreo icing.
To make Gunter I carved the cake to give it a rounded top and then covered it with black fondant (the only color I sometimes buy pre-tinted). All the other colors used started as white fondant which was then tinted with gel colors.
I then layered on a white piece for the face/body, a faux-parchment birthday message, black wings and black and white eyes, with a yellow beak.
It was a similar process to make BMO. I started with a thicker, rectangular cake and covered it with a pale teal layer of fondant.
Small bits of blue, green, yellow, black and an even paler teal were used for the details, and then I rolled snakes of the body color to create BMO’s arms and legs.
I decorated the base cover of each cake separately then transferred them to the serving tray before applying the finishing details.