12 Comments

How To: The Legend of Zelda Master Sword Cake

Today’s post will walk you through step-by-step on how to make this cake featuring the Master Sword from The Legend of Zelda video game series.

I’m a huge Zelda fan and the love for the series has been passed down to Henri with a vengeance! In addition to dressing as Link on Halloween and poring over game art collections he plays all the games from Link’s Awakening on my old Gameboy Color straight through to Breath of the Wild on the Switch. It’s on the BotW Master Sword specifically that he requested I use as the theme for his 11th birthday cake.

This is the Master Sword:

And this is the sword in the game:

I decided to use this image as the inspiration for my cake. The sword itself would be sculpted out of fondant and I’d expand the stone base so there would be enough cake for his birthday guests.

The cake took a total of 3 days to make. On Day 1 I sculpted the sword so it could have time to dry out to lessen the chances of the fondant dissolving under paint application. On Day 2 I baked the cakes for the base and set them aside using the methods I outline in my How to Bake a Cake and Prepare it for Decorating post. On Day 3 I painted the sword and the base. Note: you can absolutely merge Days 1 and 2 into one evening if you’d like.

As I’ve shared before, I like to start my fondant pieces with a template sized to the proper scale. I rolled out some white fondant using the thickest level gauge on my fondant roller to have a sturdy base for the sword, and then began cutting around my template with my fondant cutter.

Keep the excess scrap as you’ll need it to sculpt the details.

As a long, skinny piece of fondant this size would be fragile I used a clean, splinter-free wooden dowel as a support, leaving enough at the base to secure it into the cake.

Then I used the excess fondant and began blocking in the sword’s details. As you saw in the finished cake it would remain flat so I only had to sculpt the front half.

I used the template for the basic shapes and then referred to a clear online image to get the details right.

At this point I set the sword aside to air-dry.

Here’s how it looked the next day.

Here it is alongside the template. It did grow a bit as I sculpted additively but I knew the slight size increase wouldn’t matter with the final cake.

Pleased with it, and deciding it didn’t need any adjustments, I let it continue to harden and baked the confetti cakes Henri had asked for.

On Day 3 it was time to assemble and decorate!

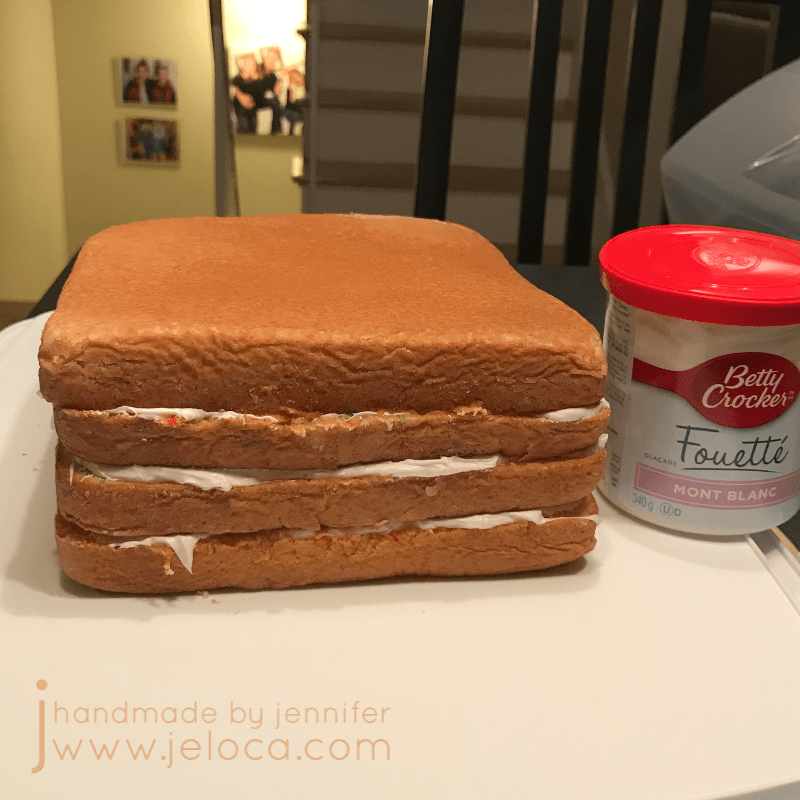
I had 2 8″ square cake layers to work with. To achieve the triangular base I cut the first layer into two triangles by removing the center strip, ensuring that one triangle was slightly shorter than the other. I repeated the process with the second cake making each subsequent triangle shorter than the previous one. This design does leave extra cake that you can eat or make into cake balls with any leftover icing.

Note: always check your transport method! In my case I couldn’t simply cut the first square diagonally to achieve my largest pieces as the resulting triangle would have been too high to fit into my cake carrier!

I used a bit of icing to “glue” the cake to the carry board and then began to stack the cakes horizontally, icing in between to keep the layers together.

Yes- that IS Betty Crocker icing in the background. And yup- this is totally a Betty Crocker Rainbow Chip box cake. There is zero reason why a box cake can’t be done up the same way scratch cakes can. Whether you’re short on time, find the mixes cheaper or easier, or if you’re simply baking for a bunch of 11yo boys who won’t know or care about the difference then by all means go for it! I do generally doctor my cakes so the cake mix winds up more as an ingredient vs the main staple, but that’s absolutely not necessary to get great-tasting, great-looking results.

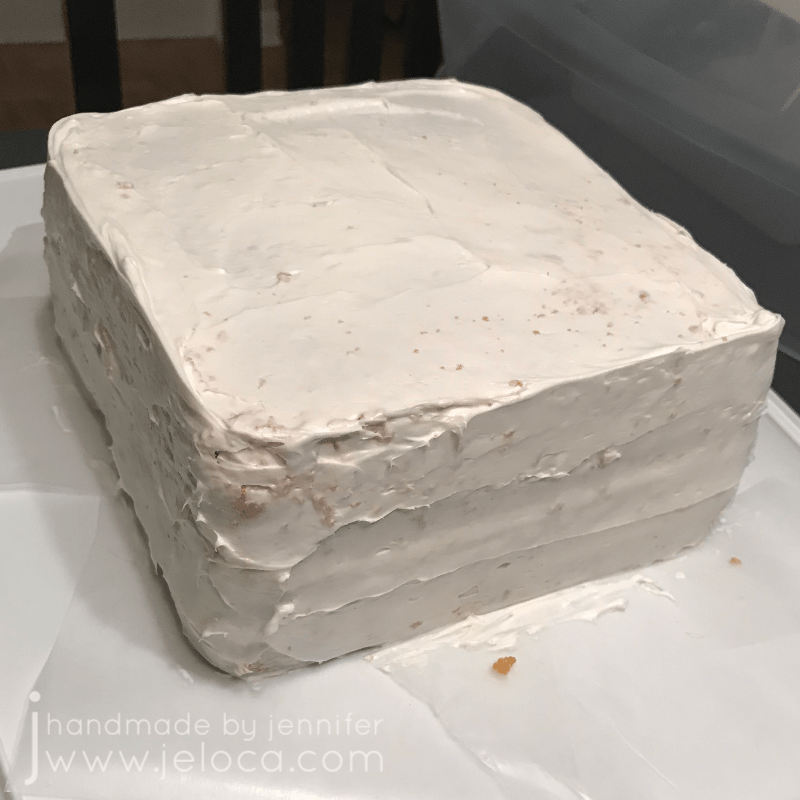
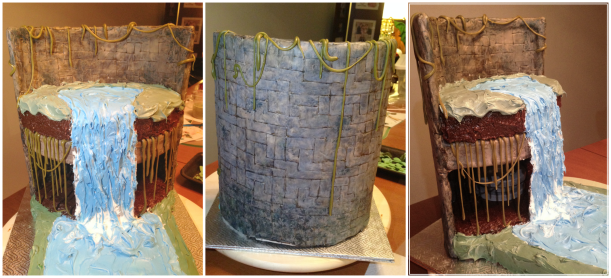
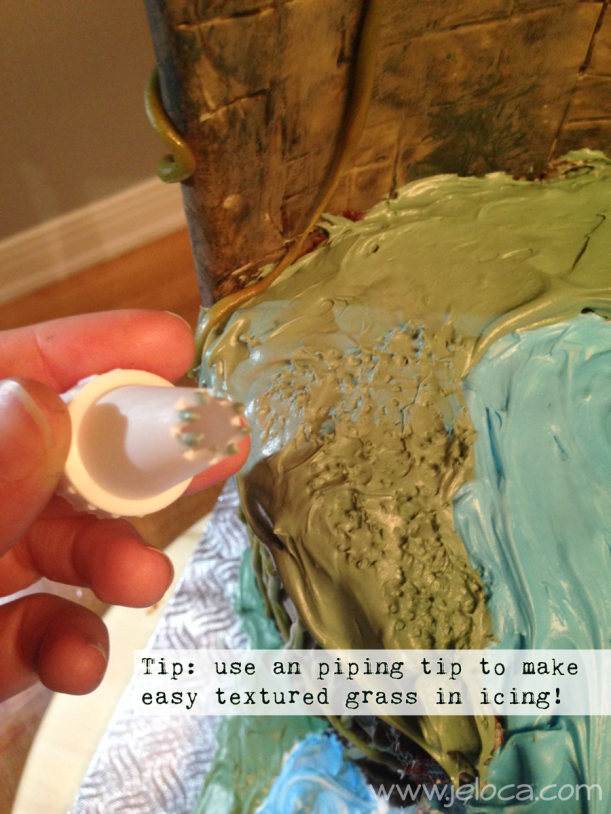
Once stacked I protected the board surface with parchment paper strips and dirty iced the cake, then covered it with more white fondant. Then came the fun part- poking, scratching and dinging it with an assortment of knives and sculpting tools to give it the texture of an old weather-beaten rock.

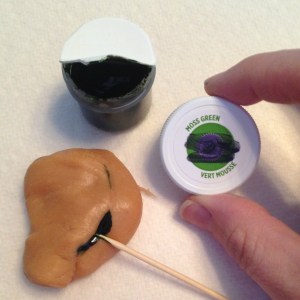
I put some wax paper strips down to protect the board again and then painted the “rock” with custom icing gel colors. I have a large collection of Wilton gel pots and a kit of Americolor icing colors and I like them both equally as they fill in color shades I don’t have in the other. The gel pots of the Wilton kind are great for dipping in a toothpick for a really tiny amount, while the Americolor ones are in squeeze bottles that make adding precise drops really easy – perfect for when you need to replicate a color you’d already mixed up.

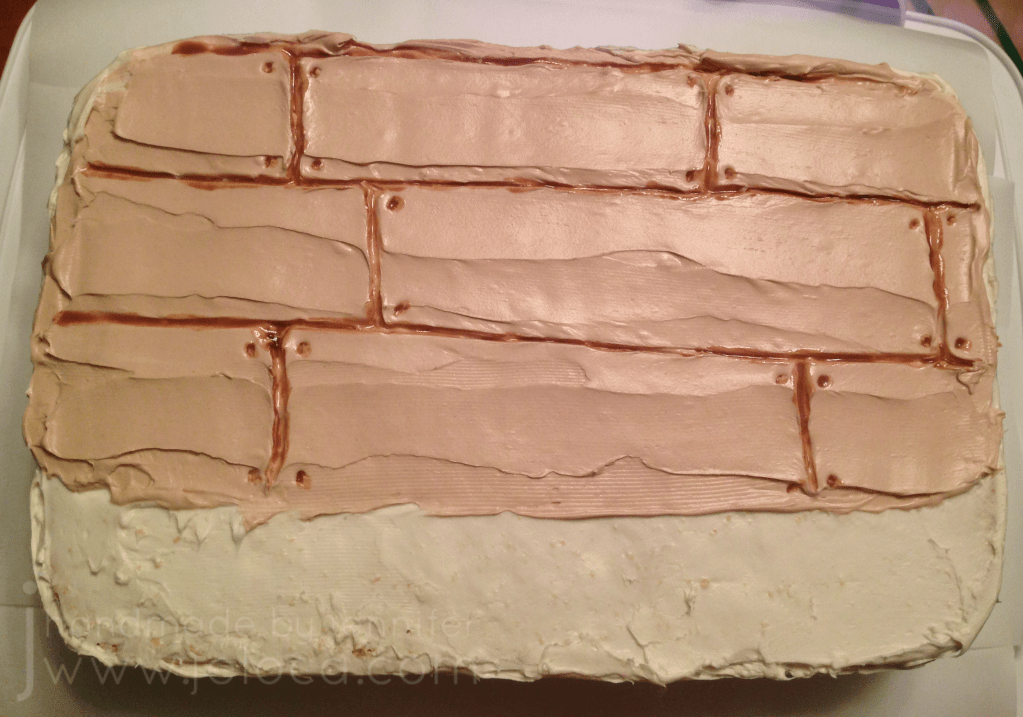
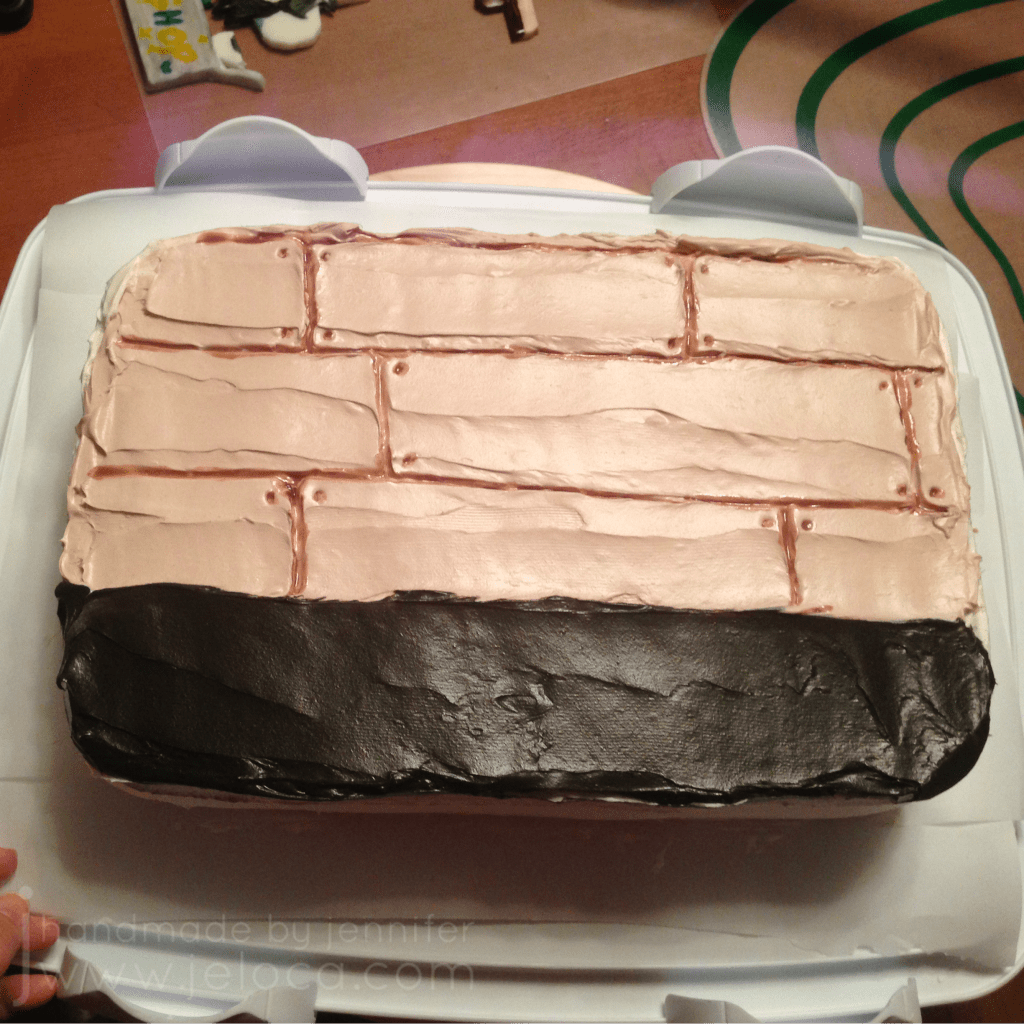
I used an assortment of browns and yellow thinned with vodka for the main color, adding darker touches for shadows and age. I also dry brushed green shades around the base and edge as if grass or moss had started to encroach similar to how I indicated forest-y age on the fondant bricks in the Pitfall: the Lost Expedition cake.

Bringing up another reference on my iPad, I used the same supplies to paint the sword, adding in a bit of silver luster dust for the metallic portion.

The luster dust mixes nicely with a bit of vodka to become a metallic “paint” that dries down well once the vodka evaporates.

I used gold pearl dust in a similar manner for the gold accents and completed the rest with blues and green gel colors.

The last bit of prep is to cut out a small bit of the fondant so the sword fits nicely into place and then the cake is done!

Here’s a closeup of the cake “rock”. I love how the texture came out!

My only regret is not having smoothed the underlying cake surface better, as you can see the ridges of where the fondant curves around the cake layers…but the kids sure didn’t mind. It was a huge hit for the birthday boy and his friends.

Henri’s other birthday treats

This post may contain affiliate links. This means I might make a small commission on purchases made through the links, at no cost to you.


1 Comment

Paint Nite Cake and Cookies

A few years ago I made a dessert for my friend Debbie’s surprise Hallowe’en-themed party. I was given the option to make cookies or a cake, so I chose both! This Paint Nite-inspired cake and cookie set is easy to make and looks way harder than it is!

You can start with a store-bought cake, or bake one yourself and prepare it for decorating with a layer of fondant to look like a tablecloth. I used white so the rest would stand out but you could use any color.

To make the easels you will need narrow rectangular cookies. You can bake your own or go the faster route and buy them! I used Cadbury Fingers but any log or stick-shaped cookie will do. You will need candy melts as the “glue” to hold the easel together so just be sure to match the candy melt color to your chosen cookies. Note- you don’t want to use regular chocolate for this as it will soften at room temperature and your easels will fall apart.

First make an A shape with a cookie going horizontally across two others for the easel’s ledge, and then after the candy melts set up use a 4th cookie as the vertical support leg. It’s easy to work this assembly-line style, being sure to leave enough time for the chocolate to set hard. I found that I only had to hold them in place for about a minute before they were able to stand on their own.

Of course any Paint Nite needs something to paint on! You can bake cookies yourself or use any rectangular cookie that has at least one flat side, like Biscoff, butter biscuits or shortbreads.

To make edible “paint” mix icing sugar with small amounts of water until you get a loose icing consistency. Paint Nite projects often have a gradient background with a silhouette design on top, so I used that style for my mini paintings. I chose Fall colors with pumpkin orange and white for a sunset and as this was a Hallowe’en party I added a black cat on a fence silhouette and full moon. This also worked well with the Paint Nite habit of using few colors in beginner paintings.

I painted the cookies much as you would at an actual Paint Nite – first painting the gradient background, then once dry adding the top layer.

The fun part was making each one just slightly different, while still being the same image – exactly how the results at a true Paint Nite would be. Everyone follows the same process and comes out with mostly the same image yet they’re all slightly unique to the individual artists.

I also used a few extra cookies to write a message for the birthday girl on her big day.

Of course, every Paint Nite requires supplies, so we need to add the solo cups-as-water cups, Styrofoam plate “palettes” and big orange brushes.

I made all the accessories out of scraps of fondant. For the solo cups simply layer a thin strip of white on top of the red before cutting out a strip to roll into a cup shape. The brushes are narrow rolls of fondant with the brush end dipped into the icing “paint”. The plates are small discs of white fondant smeared with dollops of leftover paint from painting the cookies. To make the “dirty” paint water I swirled a bit of each paint icing into clear piping gel.

Staging the table was super fun! Unlike a real Paint Nite where I try to be as neat as possible, here I got to be messy! I “glued” the fondant accessories in place with a small dab of water and then added drips and splatters of the paint to really sell the “end of the night of crafting” look.

I was so thrilled with how the final cake came out! It was one of the most fun cakes to make and allows for a ton of personalization. All the components can be homemade or store-bought which means this design can work with all budgets, and you can tailor the paintings to match any theme.

This post may contain affiliate links. This means I might make a small commission on purchases made through the links, at no cost to you.


8 Comments

Super Smash Bros Ike Cake

Today’s the big day! Jakob is 15!! In honor, here’s the first of 2 cakes he got for his 9th birthday, back in 2016.

He asked for a “Super Smash Bros Brawl”-themed cake, specifically featuring Ike, a character from Nintendo’s Fire Emblem series.

This guy:

The first thing I did was isolate the logo:

Then I recreated it only now saying Happy Birthday Jakob.

This was done using my usual method of preparing the fondant cutouts in advance and then hand painting them with gel colors and vodka once they’d had a few days to harden.

I’m really happy with how he came out, even though his sword broke. The fondant wasn’t quite dry enough and the vodka didn’t evaporate fast enough so it cracked when I went to move it.

I was able to lay it together on the cake, however, so it wasn’t too big of a problem.

I prepared the cake with a really simple vanilla icing layer, in the exact manner I describe in my post on how to bake a cake and prepare it for decorating.

Considering the fondant pieces were done in advance, decorating cakes like this is really quick and easy to do. It was a big hit at his party- poor Ike never stood a chance!

Jakob’s other birthday cakes

This post may contain affiliate links. This means I might make a small commission on purchases made through the links, at no cost to you.


3 Comments

Pixar CARS Cake

In 2011 Jakob was all about Pixar’s CARS. CARS toys, CARS books, even CARS bedsheets. So when he turned 4 that year, of course I had to make a CARS-themed cake.

Like most of my cakes, this one started with a sketch.

It was box-mix vanilla cake with pudding and egg add-ins, and vanilla icing between the layers. Except for the LEGO Piston Cup and candle, all toppers were handmade with white fondant that I tinted with gel colors.

The silver logo around Jakob’s name was made from black-tinted fondant and painted with silver luster dust mixed with a bit of vodka.

The top and back have a black & white checkered race flag, and the base of the cake is trimmed with icing. I was still learning how to properly prep a cake for fondant and you can see how lumpy the cake is, especially where it is starting to sag in the back. There are also a few cracks in the fondant in places.

The side decors were fun to make! Sally was the easiest- mostly blue fondant with black wheels, a white windshield/eyes and handpainted details. Lightning McQueen and Mater were a bit more involved, having more details to copy. To fill in the sides I also added Lightning’s number and the Rust-eze logo. All painting was done with gel colors mixed with Wilton White-White to be more opaque.

It was one of the first “figure” cakes I’d made and a different challenge than others I’d done at that point. I’m really happy with how it turned out, and the birthday boy loved it.

Jakob’s other birthday cakes

This post may contain affiliate links. This means I might make a small commission on purchases made through the links, at no cost to you.


Leave a comment

Scrabble Cake for National Scrabble Day

Today is National Scrabble Day! Occurring annually on April 13, Scrabble Day celebrates the birthday of Scrabble’s inventor Alfred Mosher Butts.

I’m still working through my backlog of cakes and projects I’d never posted, and today is the perfect day to share this Scrabble-themed cake I made all the way back in 2012.

Unfortunately I hadn’t taken progress pics so this isn’t an actual tutorial, though I can talk through the basics. The bottom tier was a chocolate round, with an 8″ vanilla (I think) on top. Both layers were covered with icing then white fondant I’d tinted with gel colors.

The Scrabble board and pieces were made from fondant a few days in advance so they’d have time to harden before application on the cake.

Once set, the tiles were lettered with a black edible marker. Larger tiles around the base spelled out DAUGHTER, SISTER, MOTHER and FRIEND, each with the applicable letter score.

The smaller tiles on the board write out the message for the birthday girl: HAPPY SIXTIETH BIRTHDAY ESTHER.

For the board itself, I’d lightly etched guidelines for the grid and then filled in the colored multiplier squares with more edible markers, before lining the whole grid with royal icing. I’m not thrilled with the lines themselves – I wish they were straighter, but I remember being too afraid to try and remove wonky areas to redo them and risk messing up the colors underneath.

For more Scrabble history, click here!

This post may contain affiliate links. This means I might make a small commission on purchases made through the links, at no cost to you.


12 Comments

How to make a Fortnite Loot Lake cube cake

Today’s Henri’s 13th birthday and we’ve made it to his big, first “double-digits” birthday cake. Not only was Fortnite massive at the end of 2018/early 2019, but the Loot Lake cube event had just taken place and when asked what theme he wanted for his cake that year, there was zero hesitation. Easy for him to decide, but I’ll admit it took me a moment to figure out how to put it into action!

In the end I went with a cake that represented Loot Lake with the cube starting to submerge, and one of the wooden panels with Henri’s name on it. If curious about the cubes, you can read up on them here. You can actually watch the cube hit and go under here.

At this point this should be really familiar reading, but once again a few days before his party I baked cakes and prepared them as per my usual method. I also prepared my fondant pieces so they would have time to harden.

For the wooden panel I printed out his name in the Fortnite font and cut a rectangle around it with my dull blade cutter, freehanding the perpendicular planks.

I also cut out 6 1-inch squares to use for the cube. The grid on my measuring mat was perfect for this!

…except that it was too annoying to assemble the panels into a cube so instead I squished them all back together with some extra fondant and cut a 1″ cube out of the larger chunk.

I used my adjustable circle cutter to cut out a disk of fondant the same diameter as the top of my cake. I’d link it but can’t find it for sale any longer. I wonder if that’s because it isn’t that great – and tends to leave unsightly divots in the center of your fondant (like in the above image). You can either freehand cut a circle using a mat with markings like mine, or trace around your cake pan or same-sized bowl and cut that out instead.

At this point I set aside all the fondant pieces to air-dry, turning a few times daily so all sides could dry well.

The night before the party I levelled, torted and crumb-coated the cake as per my tutorial linked above.

While the cake was chilling in the fridge I painted the nameplate with gel colors diluted in vodka, using a quick version of my painting fondant to look like wood tutorial (another version of the wood also found here). I also cut an angled slice off of the cube so it could sit flush against the top of the cake and still look submerged, and inserted a bamboo skewer to help it anchor to the cake later.

The cake got a clean layer of white icing and then the fondant disk was placed on top so it would adhere well.

I used the back of a food-only paintbrush to lightly score demarcation lines for where the cube’s magical effect would spread to, using the game screenshots as color and placement references. (Oh yeah- the cube is magical. It turned the lake bouncy). I also gathered my supplies for food painting: more gel colors in my required colors, white icing tint, sparkle gel, water with a syringe, my gel paint palette, toothpicks, food-only paintbrushes and icing sugar to be the base of my “paint”.

To create the lake I added blue gel colors to some icing sugar and used a syringe to add water until I got a consistency similar to paint. The syringe helps avoid adding too much water at a time, but if it does get too watery you can thicken it back up with more icing sugar. Once it looked right I painted the lake blue, stopping at the demarcation line and feathering slightly over the edge so it wouldn’t be sharp or precise.

I mixed up more of the same color but runnier (similar to flood consistency, if you decorate cakes) and applied it all over the same sections, allowing it to self-level. Then I left the cake to set for 15 minutes.

Next I mixed up more icing paint in white and light blue and put dabs of each in an alternating pattern around the inner circle’s edge before using a toothpick to swirl them together. It’s ok if the darker blue bleeds into them a bit, as this was meant to be the edge where the lake water meets the rubberized water and has the magic glow effect.

To add more magical “oomph” I added sparkle gel around the edge, overlapping into the darker blue. Then I set it aside for another 15 minutes.

For the center where the lake has already transformed, first I mixed up a medium purple shade with a lot of the sparkle gel mixed in, as well as a lighter purple and white with sparkle. I filled the center circle with the medium purple and while it was still wet I dripped in the two lighter colors and swirled them gently. Once I was happy with how it looked I set it aside for another 15 minutes.

I tinted some vanilla icing green for the grassy land around the lake and covered the sides of the cake, slightly overlapping the disk on top to hide the fondant edges. I then textured the top bit to look more like grass. You can pipe around the base of the cake if desired (I’d run out of icing, oops).

I mixed up a darker purple for the cube and a brighter pink to be the glowing light where the cube touched the water, and painted the cube itself. Allow to dry for 15 minutes by either holding it (and enjoying a little break!) or you can push the skewer into a scrap chunk of fondant or styrofoam.

Tip: Save a bit of the dark purple in case you need to touch up the cube after you stick it on the cake.

Even though my fondant was white to start, I decided to paint over Henri’s name with the Wilton White-White. It doesn’t show much in the pic, but in person it made it much brighter.

The last step is to push the skewer into the cake and then the Fortnite Loot Lake cube cake is done!

I’d used a bit too much water in one of my purples, so the next day you can see that it cratered a bit when it dried down. But I’m still super pleased with how it turned out! I love the glowy swirl where the lake meets the “magic” and it really does look like the cube is sinking into the water.

Plus Henri was really happy with it, which was the most important part! ❤

I’ve had questions before about whether fondant topper painting adds extra thickness to the top of a cake, and as you can see from the cross-section, it really doesn’t.

Henri’s other birthday treats

This post may contain affiliate links. This means I might make a small commission on purchases made through the links, at no cost to you.


14 Comments

Neko Atsume Snowball Cake

A few years ago one of the games the kids were obsessed with was Neko Atsume. They loved collecting all the little cats and their toys and taking in-game Polaroids of the kitties doing cute things. Snowball was Henri’s favorite, and on his 9th birthday he asked for a Snowball pic cake.

First thing I did, as always, was to bake the cakes a few days before his party.

He couldn’t decide between cherry chip or vanilla cakes so I made one of each then set them aside to stay moist until time to decorate.

Next I made the fondant topper. Just as for the Tem Shop cake I like to make my fondant toppers in advance as well so they have time to harden and set before placing on the cake.

I’m a big proponent of using references, so once again I found a reference image and scaled it to my desired size. I couldn’t find one with the specific pose Henri wanted (Snowball holding the red ball) so I found separate references and combined them myself into one.

On the same day I baked the cakes I also rolled out some white fondant and cut it to the size of my Polaroid. I let it air dry until the night before the party, when I sat down to finish the cake.

I used a pin tool to lightly sketch the cat outline in place by tracing the Snowball cut out onto my fondant. Then I used edible ink markers to color in the image, finishing with black for the cartoon-look outline.

Using a reference image is a really great way to help get a result that you’re happy with!

I set the topper aside so the ink could dry and then it was time to focus on the cake! First step was to levelled and tort each cake, then stack them into place.

The trimmed bits of cake freeze really well for future snacking, or you can crumble them up and mix with your leftover icing to make cake pops (which also freeze well for future snacking!).

First the cake gets a crumb coat (above) and then later a second, clean layer of icing.

I applied the topper to the still-moist icing and then the cake was done!

The fondant topper doesn’t add too much extra thickness to the top of the cake and does not need to be removed for slicing. It’s also easily removable from the slice for anyone who doesn’t like the taste.

Henri’s other birthday treats

This post may contain affiliate links. This means I might make a small commission on purchases made through the links, at no cost to you.


12 Comments

How to make an Undertale Tem Shop Cake

Henri is going to be 13(!!) on Saturday, so between now and then I’m going to share some of his past birthday cakes that haven’t hit the blog yet, with full tutorials for the ones that are possible. First up is this Tem Shop cake from his 8th birthday, back in 2017

The kids (and I, if I’m being honest) were bit hard by the huge phenomena that was Toby Fox’s Undertale. The name “Flowey” instantly evokes a bigger horrorscape than the trippy sequence in Fantasia, we use “determination” in more sentences than appropriate and often have Megalovania and the rest of the incredible soundtrack on repeat. For a while Henri’s favorite character was Temmie and in addition to adding “Hoi!” to nearly everything he said, he was determined to have a Tem Shop birthday cake.

A few days before his party I baked up 2 cakes in my usual way and set them aside so I could work on the fondant toppers.

I found a reference image from the game online:

Then I resized it to the scale of my cakes, using the baking dish as a guide.

The bottom third of the cake would be the black text box that’s always present on screen, so I scaled my reference image to fit 2/3 of the cake and printed it out.

I rolled out some white fondant onto my Wilton measuring mat, using my roller with spacers to get an even thickness. Then I used the blade tool from my gum paste tool set to carefully cut out each piece.

I set the pieces aside for a few days, flipping them over about twice per day, so they would harden. The more moisture that gets removed from the fondant prior to painting the better, since painting will add moisture and I don’t want the sugar to melt down.

Anytime I do fondant painting (ex: Minecraft cake, Charlie & Lola cake, Skylanders cookies, Montreal Canadiens cake) I always like to assemble all my supplies within reach. This includes the paintbrushes and palette I use exclusively for food, Wilton and AmeriColor gel colors, a small jar of vodka for diluting icing gels, toothpicks for getting the gels out of the tubs, plus icing sugar for thickening my homemade edible “paints”.

Gel colors dilute super easily, so a tiny dab on a palette is often all you’ll need for beautiful, rich colors.

I painted each piece to match its in-game counterpart. Most are easy enough to eyeball but if ever you’re not sure of dimensions you can sketch lightly over the reference with the tip of a pin and emboss guide lines into the fondant.

Once the pieces were touch-dry I prepared the cake itself. First I gave it a crumb coat.

Then I tinted some icing to match the wood background of the shop and applied it over the shop section of the cake, making sure to apply it thick enough to lightly carve into without reaching the cake below.

I used a toothpick to score lines for the wood wall then diluted some brown gel color and carefully flooded it into the grooves.

The final touch was to add some nail heads, and the wall portion was done.

After that I tinted icing black for the text box.

Pro tip: if you start with chocolate icing (instead of white vanilla) you’ll use much less black coloring, which will avoid any bitter taste in the icing.

I covered the remaining part of the cake in black, and then added the figures, and then finished up the outside and edges of the cake with white icing to clean everything up.

If you add the fondant toppers while the icing is still moist, they’ll stick in place without issue. If your icing has already started to crust over then you can paint a little bit of water on the back of the fondant and that will adhere it in place. Try to avoid getting too close to the edges with the water, so it doesn’t leak out around the edges and cause bleeding onto the base icing.

Final step was to use a set of mini alphabet cutters to cut out the message in Temmie’s mixed-caps word style.

Again, for reference, here’s the image of the Tem Shop in the game:

and my cake:

RATED TEM OUT OF TEM 🙂

Henri’s other birthday treats

This post may contain affiliate links. This means I might make a small commission on purchases made through the links, at no cost to you.


2 Comments

Bowling Cookies

It’s National Homemade Cookie Day in the USA today, and even though I live in Canada, who could say no to cookies? They’re tasty, versatile, and in these mid-pandemic days, a great way to provide individual portions per person.

Here’s an easy way to make a set of fun bowling cookies that you could even bowl with!*

I made these a few years ago for Father’s Day, as bowling has been a family sport since I was a kid. My dad was on a league through until Covid, and most of my siblings and I were on leagues at various times as well.

Back in the blogging heyday I used to follow a handful of cookie decorators (Sweetopia, The Bearfoot Baker and SweetSugarBelle were 3 favorites) and a big lesson I learned was how to use cookie cutters in creative ways. After deciding on “bowling cookies” I went through my bin of cookie cutters and pulled out 3 that would be perfect for this project.

The square cutter is from a nesting set similar to this one. Using it to create the lanes, choose the size that works best to fit as a multiple on the serving tray you plan to use. Rectangles would also work just fine. In my case I used the roughly 2″ square. The circle cutter is from a set similar to these. Used for the bowling balls, choose a size that looks appropriate on your size lanes. Mine is roughly 1″ in diameter. As for the bowling pin, this is where you have an opportunity to be creative! They do make actual bowling-themed cookie cutters, but I don’t have any so I used a Christmas bulb from a set similar to this one.

Step 1: Bake your cookies. You can use your preferred recipe of choice; I used my standard sugar cookie recipe adapted to taste years ago from this old Martha Stewart recipe. You want to avoid your cookies spreading while baking so be sure to chill your dough (before cutting works but after cutting is even better). Make enough squares (or rectangles) to fill the shape of your bowling lanes, plus a few extra to account for breakage. Bowling uses 10 pins so you’ll need to make at least that many, plus again extra to account for breakage. Finally, use the rest of your dough to make as many round cookies as you’d like. You really only need one to be the bowling ball, but I was serving a crowd so I made as many as I could with the dough that remained.

Step 2: Fondant toppers. If you prefer royal icing you could certainly line and flood the cookies and decorate them that way, but I find fondant a quick and easy way to get them done faster. Another example of this technique is here, where I used fondant to turn round cookies into records for a music-themed set.

Roll out white, ivory or cream fondant and use the same square and pin/bulb/etc cutter that you used for the cookies to cut a topper for each one. Moisten the back of the fondant (or the top of the cookie) with a bit of water and press the fondant into place, one topper on each cookie.

The bowling balls are a great place to use up leftover scraps of fondant. Roll out some black fondant then tear little pieces of your other colors and place them randomly on the black. Then roll over it some more to blend out the colors. Once you have it looking the way you like, use the same circle cutter to cut out enough toppers and place them on the ball cookies in the same way as above.

Step 3: Turn your base cookies into lanes. Start by using a yellow, orange or brown edible marker and a straight edge to draw stripes down your lanes to represent the individual planks of wood. I used a yellow Wilton FoodWriter and the edge of my transparent cutting mat. I generally prefer these AmeriColor edible markers so I tend to save them for when I’ll be needing to draw details because the Foodwriters are more broad-tipped.

Step 4: Wood grain, part 1. Using a paintbrush that’s ONLY ever used for food, dip it into a pot of brown icing gel color and blot onto a paper towel to get most of the globs of gel color off. Cheap plastic paintbrushes like what come in childrens’ art kits are perfect for this, but it’s super important that the brushes are reserved strictly for food use. Don’t worry about the messy bristles- the messier the better for this technique! Splotch the brown gel color directly onto the fondant cookie toppers. Try to pounce in a direction in line with the stripes you’d drawn so your wood grain goes in the proper direction. Repeat until you’ve done one full vertical row. In theory you could repeat this process on all the cookies and then move on to the next step, but I didn’t want to take a chance on the gel drying too much to reactivate so to be safe I did one strip at a time.

Step 5: Wood grain, part 2. Dip the same scrappy paintbrush into water and then brush lightly over the cookie to reactivate the brown tint and spread it across the fondant. Ensure to always brush in a vertical direction to create a faux woodgrain texture. Make sure to thin down the color just enough so that the stripes you’d painted earlier just barely show through.

Once you’ve completed the entire vertical stripe, repeat steps 4 and 5 on the remaining stripes of cookies.

Here’s the final look.

If you’re a longtime follower of this blog you’ll remember I’ve used this technique before, to make the hot tub for the Betty Boop cake for my mom’s birthday.

Step 6: Marker details. Use a red edible marker to add the characteristic stripes on the bowling pins…

…a black marker to add three dots to represent holes on the bowling balls…

…and the red marker again to add the triangular lane markers onto the lanes.

And that’s it! Assemble your pins into place at the top of the lanes and your set of bowling cookies is complete! I added a quick fondant ribbon sign to mark the occasion but that’s completely optional.

*Can bowl with them: If you take “bowl” to mean “stand up the pin cookies and flick a ball cookie at them, hoping to not get caught on the lip of one of the lane cookies”

This post may contain affiliate links. This means I might make a small commission on purchases made through the links, at no cost to you.


1 Comment

Making a Pitfall: The Lost Expedition cake, day 03 part 3- finishing

It’s been brought to my attention (*cough*Michelle*cough*) that I never finished posting Henri’s Pitfall cake.  That is correct… February sort of got away from me, so I’ll take care of that right now.  This post will cover the final details of finishing the cake the night before the party, and my next post will show the final cake at the party, complete, and enjoyed.  🙂

In my last Pitfall cake post I left off with the cakes assembled and dirty-iced.  I set them aside for a little bit so the icing could crust and mixed up some green for the grass.  I deliberately gave it a bit of an aged, almost faded color so it would match the tones of the fondant leaves and the brick wall.  The wall was so dirty and stained/old-looking that a bright, primary-colored grass base would have looked really, really out of place. pitfallcakeday03part03-04

I covered the top cake with the same cake-filled chocolate icing as I used on the lower base, blocking out an area for the small pool at the top of the waterfall.  Then I used green icing to block out the larger pool at the bottom.  Once the brown and green were done I used more white icing to thicken the base coat on the various water areas.pitfallcakeday03part03-05

Then I realized that the pool I’d created wasn’t wide enough to fit the crocodile I’d already made.  Oops!  So I used more white icing to widen the water.

My cakes are often like this.  Very rarely is something sprung to life, fully formed, exactly as it was in my head.  It might be close, in the way this cake very closely resembles my initial sketch, but the actual details in the getting there are always very fluid, and often borne of the desperation and delirium that comes from cake decorating in the wee hours of the night when stores are closed and coffee is cooling.pitfallcakeday03part03-06

Next I mixed up some blue for the water and layered it on over the white.  I didn’t worry so much about the edges where the water and grass meet as I knew I’d be placing leaves there, and I deliberately left it choppy on the waterfall where I wanted it to look like there was some motion and churning.  I also played with swirling my knife around to make the water look a bit rough because the waterfall would prevent it from being a clear, calm pool.  Above you can see the cake as I worked on it (with the parchment protection) and then how it looks once I removed the parchment.  I always keep the parchment in place until I’m ready for the finishing details as it’s much easier to remove dirty parchment from around a cake than icing from the cake board.

One of the things I’d been thinking about in the days leading up to D-day (decorating day) was how to make vines.  I figured I’d just roll out some fondant pretty thin and hope it wouldn’t crack once it dried.  But when at the dollar store that afternoon during my unexpected child-free time I hit on the idea to try using caramels.  pitfallcakeday03part03-01

I figured they were already pliable, and edible, just like fondant… but had a better stretch.  Hmmm…could this work?

pitfallcakeday03part03-02

I’d decided to do a quick test before going to pick up the kids from the party.  I softened 2 caramels in the microwave and then when they’d cooled enough to touch, added a touch of green food gels.  I kneaded it together just like dough/fondant and was thrilled that the caramel took the color evenly, with no streaking or dissolving from the added moisture.  I quickly rolled out a quick, curly vine and set it aside to dry while I was out.pitfallcakeday03part03-03

This is what I came home to (above).  A perfect, jungly-green colored, held-its-shape vine that was smooth, crack-free and best of all, delicious.  (Okay, there had been 2.  Yum.)

Sweet!

(Pun intended).vinepintereststrip

For my Pinterest friends, here’s a graphic for you!

Now that I knew I had the solution for the perfect vines, I got to work.  I wanted to set the vines in place before finishing the grass because I knew working on one could destroy the other.pitfallcakeday03part03-07

I rolled and rolled and rolled and rolled and rolled, placing each vine in place before rolling out the next one.  The vines that draped around the wall stuck pretty well with a tiny touch of water, only on places where I wanted a curl or end to stay up.  For the most part, though, I left them unstuck so gravity would work on the caramel and make it look more natural.*

I had an image in my head of vines hanging down like curtains, helping to hide the secret healing spring.  So for those vines, as I made each one I used the tip of a knife to lift the cake board that the top cake was sitting on, just enough to wriggle the end of the caramel underneath, and poking it in with a needle tool if I had to.

After the vines were done I tackled the grass.  My first thought was to use my grass tip and pipe out the grass like I’d done around the Betty Boop cake.  Only problem was I knew I was going to use my remaining green icing to do grass around the edges of the cake where it met the board and I didn’t think I had enough icing left.  I was tapping some piping tips against my palm, trying to figure out if I had enough icing mixed up for all the grassy areas, when I looked at the marks I’d left on my skin and got another bout of inspiration.  (My pain = cake gain).pitfallcakeday03part03-08

I used an open star tip and basically poked the hell out of the grass areas.  My icing had crusted enough to be an ideal surface, but if your icing is still soft I’d stop every now and then to clean your tip, as the grass effect works better with smaller pokes vs larger flat areas.  It was remarkably convincing for grass, and I’m really, really happy with how it came out.

Plus it left me with enough green icing left to pipe long, marshy grass/weeds around the base of the cake.  I did that, then stuck down the leaves I’d darkened, then decided to call it a night.

pitfallcakeday03part03-09

In the back you can see the remaining leaves I didn’t end up using.  Don’t worry, they didn’t go to waste.  The kids ate them all over the next few days.  🙂

pitfallcakeday03part03-10

I tried to vary the lengths of the grasses to make it look more natural than an even, trimmed border.  pitfallcakeday03part03-11

In these final two pics you can see the two sides of the cake, and the finished vines and grasses.  I’d added some long grass to overhang the vines as well.pitfallcakeday03part03-12

Next time – the cake in situ!

*remember this for my next post :/