
Instead of cakes, or knitting, the projects I’ve been working on lately have been for the upcoming show I’m a part of. I’ve joined the Becket Players this year, and we are getting right down to the crunch before the show starts. (Literally… “Hell Week” starts tonight).
Actually, come to think of it I did make cookies, and knit something for the show, but that’s not the point. I’ve been taking step-by-step pics of the props so I can make tutorial posts, but I want to wait to post them after the show has finished the run. Not for EVERY prop I made, however… today I made some fake money for one scene and somehow I don’t think it’s a good idea to post a tutorial on “How To Print Money” 😛
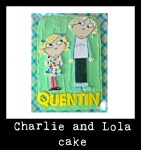
So since I can’t show you that stuff yet, I’m going to continue posting cakes and projects from the past. Today it’s the Charlie and Lola cake.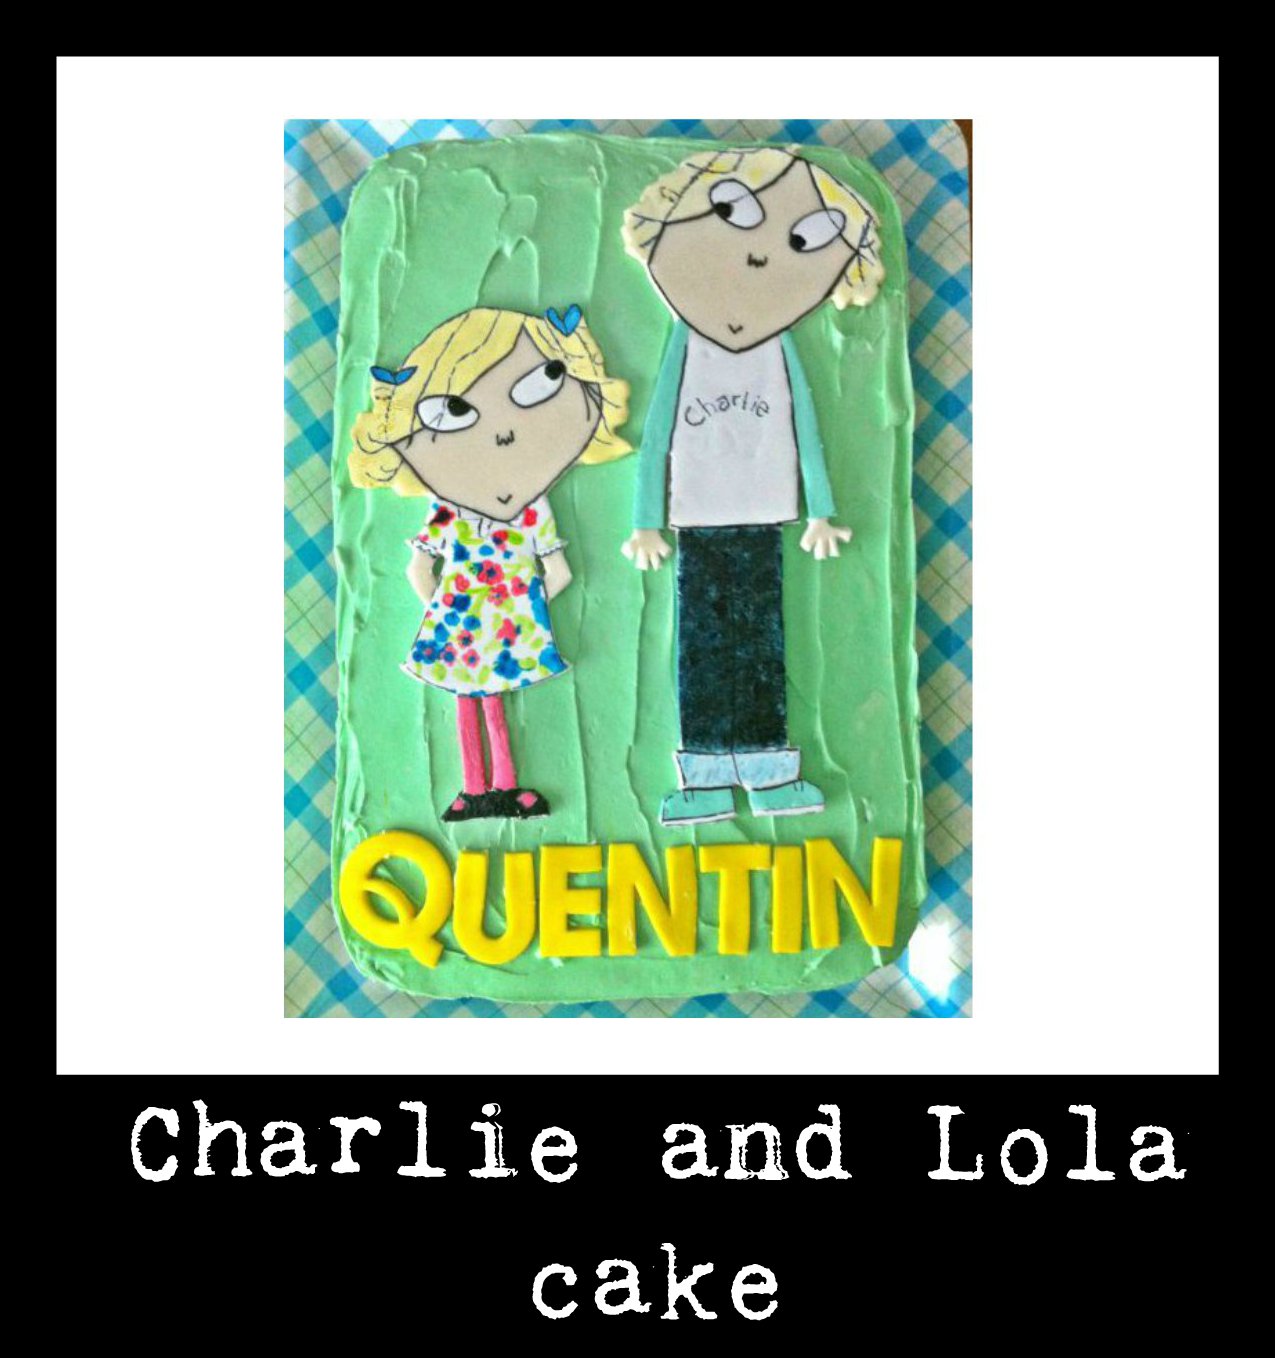
When I was asked to make this cake for Quentin’s birthday, all the way back in November 2013, I had no idea who Charlie and Lola were. Actually, I still don’t, beyond that link. So I went online and found this image to use as a reference:


Nailed it! 😀
About a week before the cake was due I cut out the letters for the name from yellow fondant, and set them aside to dry. I also cut out the figures from ivory fondant, tracing the images I’d printed off the internet, as I discuss here. I also set those aside to dry, and discovered that larger shapes take longer to dry. I knew that already with sculpted pieces, but was surprised that after 2 days of sitting out at room temperature these figures were still floppy. I tried moving them downstairs and had them spend the night on the washing machine, in front of the dehumidifier, but they still slowly sagged when I held only one end. Shoot.
A baker friend suggested submerging them in a bed of cornstarch to draw out moisture. Great- except I had none. So I set them for 24 hours in a bed of icing sugar instead. They weren’t as dry as I’d like, nowhere near the “ready-to-snap” aridity of the Jake figures, but dry enough to risk painting.
Overall, I’m happy with how these came out…mostly. I think they look like who they’re supposed to be, but there are some flaws that bug me when I look closely.
Not bad, right? Good from far but…
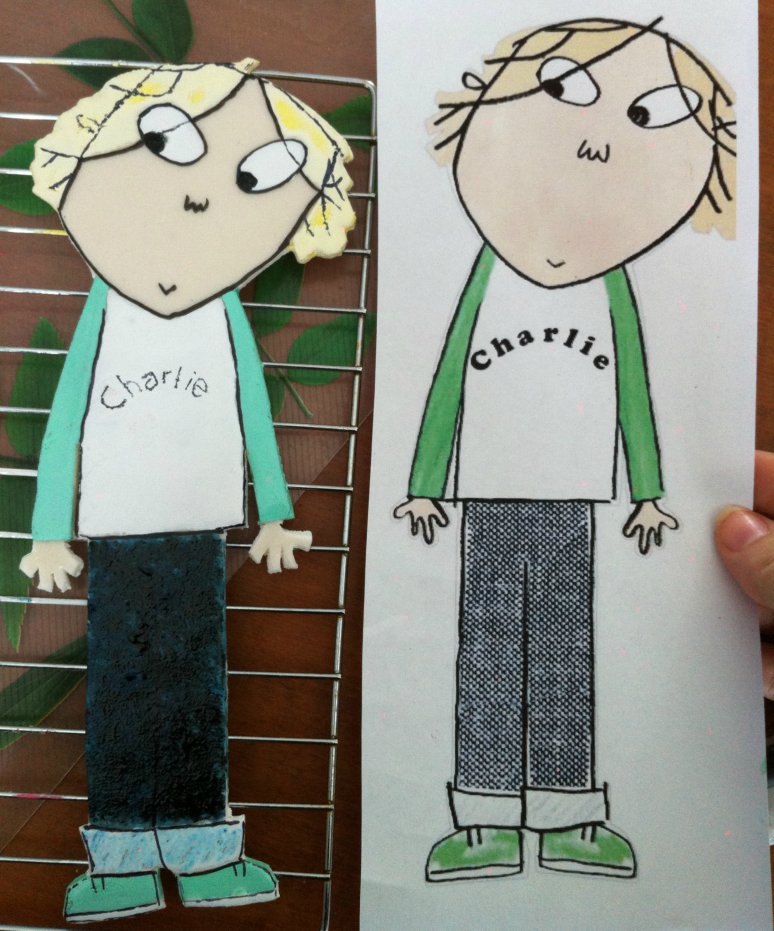
So much bothers me with this technique, and is the reason why I’ve switched to painting with icing instead of straight gels. The visible “skin tone” of the figures is the ivory fondant. The “paint” used was Wilton gel colors thinned with water, and a drop of Wilton White White to help it be opaque. On very small items, like the Jake figures, it covered well, dried fast, and was manageable. But these figures were almost the size of a 9×11″ cake, and it took a lot more “paint” to cover them.
 The first day, as I painted, they looked good. The yellow hair was brighter, and the white shirt seemed solid. The next day is when the flaws started to come out. The hair dried patchy, in some of the spots the gel color almost seemed to separate from the water. The painted areas were still glossy and tacky 2 days later, the longest I could wait to do the outlining and details, as it was the day of the party. As you can see, especially on the right eye and the shirt, the white was still not dry enough in the centers, and cracked and bled when I drew on it with my edible ink pen.

I was MUCH happier with the lower half. For his jeans, I painted the pants first with blue, then pounced/dry brushed blue, blue/black mix and straight black icing gels. The cuffs were scribbled just like the source drawing, and I really like the way they, the shoes and pants came out.
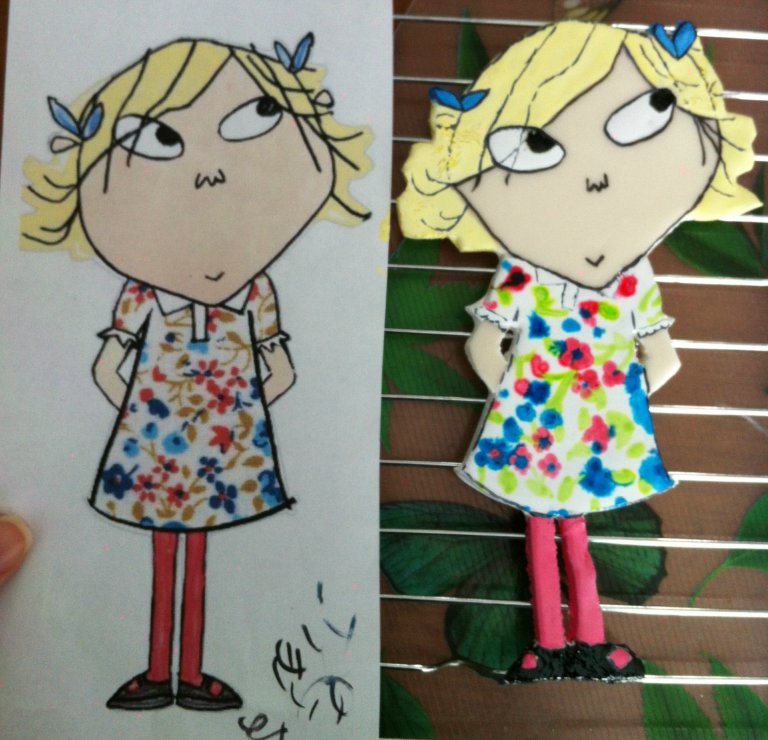
I had the same issues with Lola. I was quite happy with how her dress came out, not as much with the hair/eyes, mainly because of the color drying/bleeding.
The dress was a lot of fun to do. I put a base layer of white, then took advantage of the bleeding attributes to dot in the flowers (groupings of 4 or 5 dots). Once they’d had a chance to set up a bit I added the flower centers, and finally the leaves. If I’d been painting with real paint, or working with icing, I’d have started with the leaves, and built up, but that wouldn’t have worked here.

A little outlining at the end gave the finishing touch.

The cake itself was a chocolate 2-layer cake, iced and filled with vanilla icing. While the icing was still wet I put a row of purple Smarties around the base. The day of the party I attached the figures to the top with a little bit of icing, and added the name.


Pingback: How to Make Minecraft Cake/Cupcake Toppers |
May 4, 2015 at 10:44 pm
Charlie and Lola are outstanding and I love them!!! Super super cute!!!
LikeLike
May 21, 2015 at 9:07 pm
Thanks Sil!
LikeLike
Pingback: How to make an Undertale Tem Shop Cake |