

Update: This tutorial is now also available as a downloadable PDF here. More details at bottom of this post.
Some of you may, like me, be suddenly realizing there are only ten days left until Halloween. No stress – there’s still plenty of time to make a Minecraft Enderman costume, complete with a matching diamond block trick-or-treat basket!

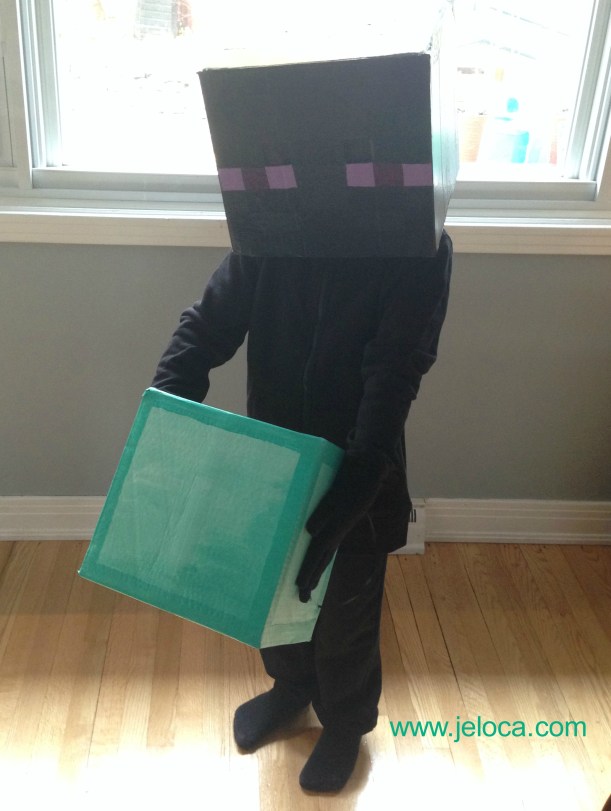
For Halloween last year Jakob wanted to be a Minecraft Enderman. For reference, these are the tall, spindly black figures who appear out of nowhere to steal your blocks. They’re neutral mobs who can teleport and will only attack when provoked by looking them in the eyes (which, to be honest, is kind of hard to avoid, seeing as how they’re the most vivid part of the things!).


In the game Enderman can’t actually pick up diamond blocks, but that’s what Jakob wanted anyways. To be an Enderman carrying a diamond block.
I was fresh off my “Skylanders Sprocket wrench pulling double-duty as secret purse” achievement so I thought if he’s gonna be schlepping a box around anyways… why not make it useful and turn it into his trick-or-treat basket? So that’s what I did. 🙂
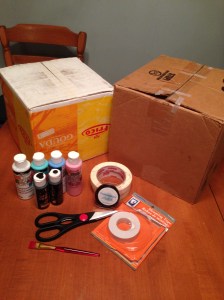
The first thing to do was assemble all materials. In total the two parts of the costume required the following:
- 2 boxes (one large enough to fit over the wearer’s head, & a second box to be the treat basket)
- craft paint in the appropriate colors
- masking tape
- ribbon
- double-sided tape
- scissors
- craft knife
- paint brushes
- something to use as a palette (I used a styrofoam plate)
- gauzy black fabric (optional, and I cut mine from a dollar store scarf)
- spray sealant (optional)

Everything but the boxes and scissors came from my local dollar store, making this not only an easy costume to make, but a really inexpensive one too.
ENDERMAN HEAD
Top row:
- Assemble all materials
- Cut off the flaps on the side of the box you want for the opening. Tape down all other flaps securely, cover all seams and use tape to cover the cut edges at the bottom.
- Measure out your grid on all 5 remaining sides of the box.
Middle row:
- Cut out the eye holes.
- Cover the cut edges of the eye holes with masking tape, then paint the Enderman’s eyes with two different shades of purple.
- Paint the rest of the Enderman’s head. I followed a actual chart pattern using shades of charcoal and black but you can just as easily paint the whole rest of the head solid black.
Bottom row:
- Optional: tape a piece of sheer black fabric over the eye holes so they don’t show from the outside but can still be seen through on the inside
- Enjoy your new Enderman head!
- Wear with black sweatpants, a black sweatshirt, and black stretchy gloves. Add a diamond block trick-or-treat basket for a complete Halloween costume!
- (optional- seal the paint with spray sealant, more on that below)


DIAMOND BLOCK TRICK-OR-TREAT BASKET
Top row:
- Assemble all materials
- Cut off the flaps on the side of the box you want for the opening. Tape down all other flaps securely, cover all seams on the outside and cover the cut edges at the bottom.
- Mix aqua and white together to get a few different light aqua shades.
Middle row:
- Following an in-game image of a diamond block, paint one side in shades of aqua, making one lower corner darker for shading. Repeat on the other 4 sides.
- Add a border to all 5 sides using the aqua paint at its full strength.
- Paint the inside of the box black.
If you prefer a more accurate version, I have compiled this tutorial into a downloadable PDF (linked at the bottom of the post) which includes full-color screen-accurate charts for both the Enderman and the 16×16 grid of the diamond block, including the hex codes for each color so you can color-match accurately.
Bottom row:
- Make 2 holes in 2 opposing sides. Knot ribbon through the holes to act as handles.
- Enjoy your diamond block trick-or-treat basket!
- Add to the Enderman head for a complete Halloween costume.

One optional step that I did but is not obligatory at all is to spray the painted sides with a sealant. I didn’t know what the weather would be like on Halloween and didn’t want to worry about rain causing the paint to run.
*Update in 2020: the heads are still going strong! The boys outgrew them of course, but we keep them as nerdy shelf displays and they look exactly the same as they did back when I made them.
And that’s it! The longest part in making these costume pieces is waiting for the paint to dry. 🙂
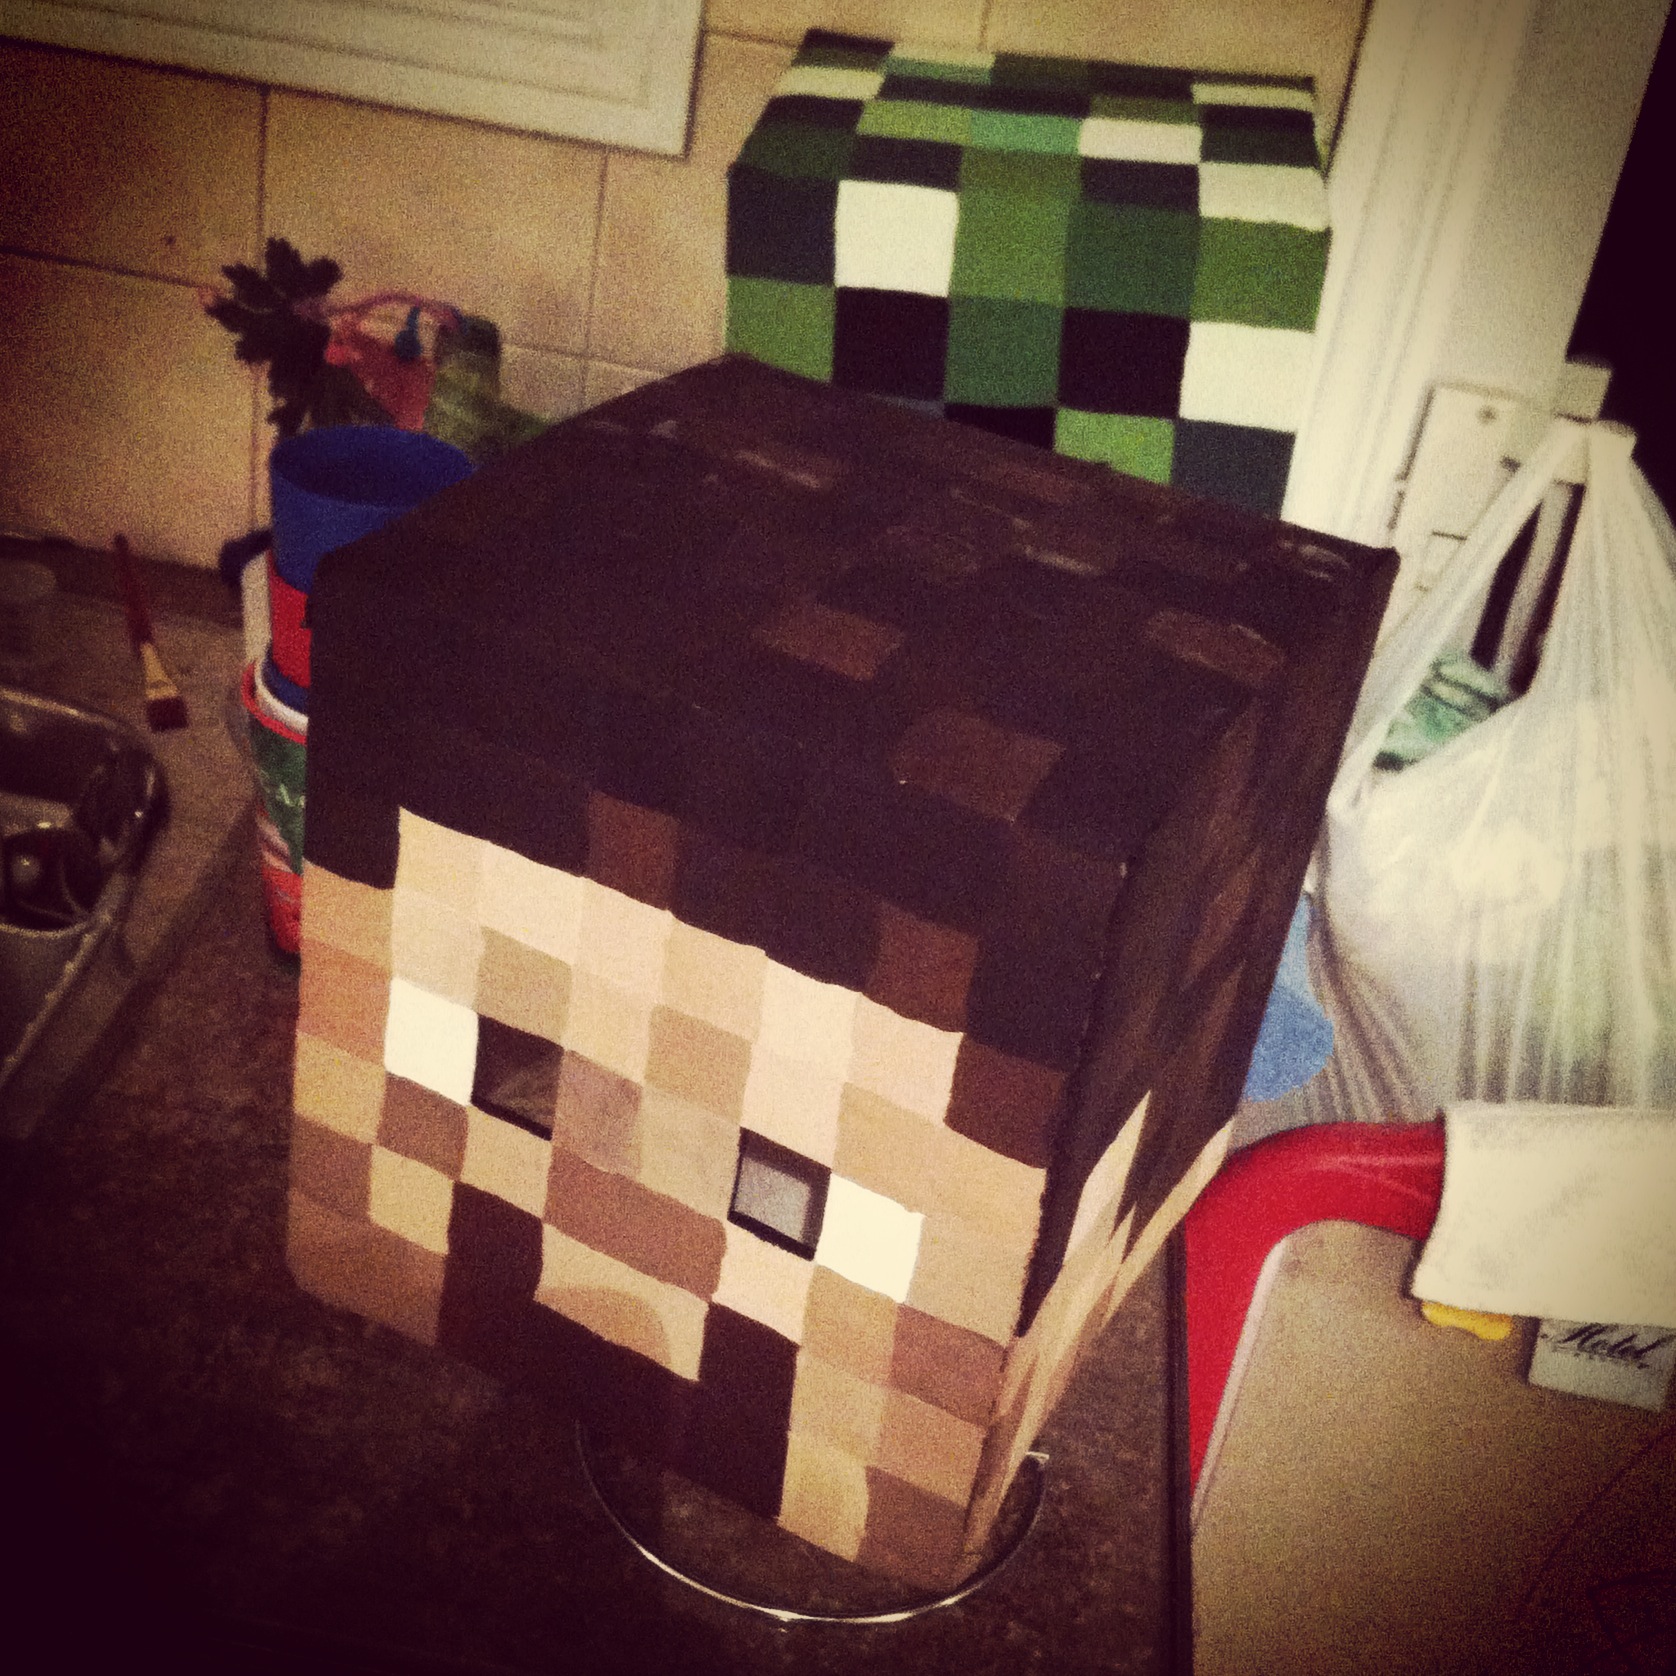
(PS: Looking for the big guy’s little buddies? Check out my tutorial for Minecraft Steve and Creeper heads here!)
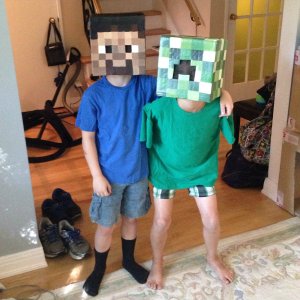
I hope this post shows you how easy and fast it can be to make your own Minecraft Steve and Creeper heads!
You can adapt the tutorial to make any Minecraft mob, and I’ve got an assortment compiled for you here.
As mentioned above, if you’d like an easy-to-print-and-save PDF version of this tutorial, I have made it available on Etsy here. The 12-page PDF includes full instructions with additional details, clear photographs, as well as game-accurate full-color numbered charts for all 5 sides of both the Enderman’s head and the diamond block, along with their hex codes for perfect color matching.
————-
More Minecraft-themed fun:
How to make a Minecraft Steve and Creeper Heads
How to make Minecraft Lootbags
How to make Minecraft Mob fondant cake/cupcake toppers
Throwing a Minecraft birthday party
Minecraft Jack-O’-Lantern Charts


