17 Comments

Skylanders Cookies and Cake Topper

We’ve now run through Henri’s 1st cake (football jersey), his 2nd (The Wiggles Big Red Car), his 3rd (Diego, Dora & friends), and his 4th (Jake & the Neverland Pirates).  His 6th cake, the Minecraft plains biome, was already posted as well, which leaves one missing, for those of you who can count.  😉

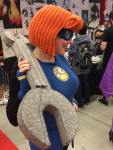
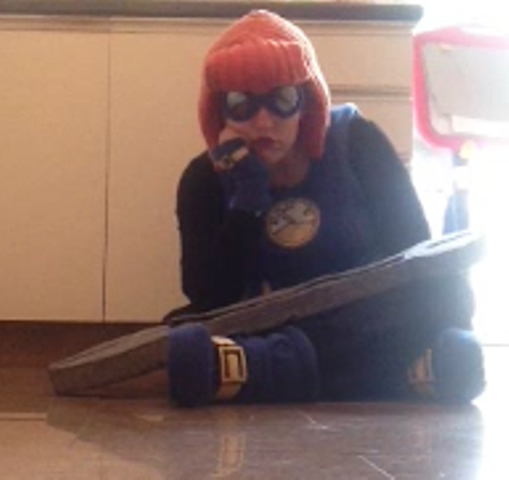
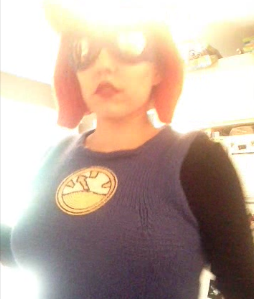
Sadly, for Henri’s 5th birthday, I didn’t make a cake.  His party was at the now-defunct Fundomondo and they provided a cake with the party package, and nothing I tried managed to convince them to swap the cake for something else so I could bring my own.  I didn’t see the need for cake redundancy, so I made cookies instead that fit the theme for that year, and also brought my own cake topper.  That year’s theme was Skylanders Swap Force so we had…skylanderscookiesandfondanttopper square insta

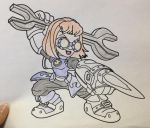
The first thing I did was bake my standard vanilla/shortbread cookies and leave them to cool.  While they did their thing I drew up a sketch for the topper I wanted for the cake and traced its shape onto a slab of white fondant.

After the fondant had dried a few days I traced a mirror image of my sketch onto wax paper, using a toothpick and black icing gel.  Then I carefully pressed the wet gel onto the fondant slap and pressed lightly to transfer the outlines.  The process is the same I explained here.skylanders cookies and fondant topper 01

I let the gel dry a bit so it wouldn’t smear when I sat down to work with it.  When it finally got no more than tacky I painted the topper with icing I’d tinted with gel colors, then set it aside to dry until the party.

Here it is on the generic cake they provided:skylanders cookies and fondant topper 02

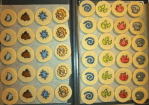
I used the same process to painstakingly transfer outlines of the 8 different Skylanders elements onto 4 dozen cookies.  Sometimes I had enough gel left on my little squares of wax paper that I could use the same transfer twice, but most of the time I had to re-trace each element each time.skylanders cookies and fondant topper 03

I let the gel dry a while just as I had for the cake topper, then painted in each outline with tinted icing.

skylanders cookies and fondant topper 04

Once they’d dried another day or so I carefully outlined each one with a black edible ink marker.  The icing dried hard enough that I was able to stack them to bring them to the party without any cracking or indents.  Because they were so thick they were still fresh-tasting and tender even after being worked on for a few days.  (I ate a tech one.  Because Sprocket).

Henri’s other birthday treats


3 Comments

Featured on KnitHacker.com!

Whoa… exactly what it says up there.  Thanks to a shout out from Laura on Twitter, my Skylanders Sprocket cosplay was featured on KnitHacker this morning, with dings going off on my Twitter, Facebook and Instagram all about it.

I’m so thrilled people like the costume.  I spent so much time working on it, staying up til 2-3am every night for 5 weeks… even bringing pieces to stitch while I waited at the daycare for my kids, or sneaking in a line or two in traffic.  With all that work it was still 2am the night before the con and I had no gauntlets/gloves, and I was feeling so dejected, like the whole thing would be a waste because of not enough time.  I ended up staying up til 4am knitting a quick set of fingerless mitts, and was so tired the following night I was asleep by 6:45.  😛  It wasn’t complete, it was far from perfect, but to see that it’s appreciated by more than just myself for my crazy efforts… it’s really awesome.

To anyone who stumbles this way and finds this: all the rest of the tutorials and step-by-steps are coming.  I have all the pics and just need to put them into a cohesive order.

You can check out the write-up here.  Thanks so much Laura, and thank you Danielle for posting it!

kroon skylanders sprocket(Also thanks to Jenna at Kroon Designs for the great pic!)


Leave a comment

Post-Con Blues

skylanders sprocket post con blues

There’s a letdown that comes after 5 weeks of non-stop rushing.  Instead of reaching for my project bag I’m avoiding it ‘cus it’s only filled with the left-over odds and ends that need sorting and putting away.  My thumb has a sore spot from forcing my needle around awkward angles.  I have this weird amount of this strange thing called time.

I’m putting the time to good use, sorting through all my pics to prepare coherent posts.  I’ve got all the rest of the step-by-steps and a ton of completed pics from the con itself and afterwards.  I’ll probably post the rest of the WIP stuff first, then close with the FOsskylanders sprocket teaser

If you’re in Montreal, and have some free time today, I highly recommend checking out the final day of Montreal Comiccon 2015!


Leave a comment

Skylanders Sprocket Cosplay – getting down to the wire

sprocket progress 02

Montreal ComicCon is in 2 days.  Well it starts earlier, but I’m only going on Saturday.  Forgive the lack of updates, I’ve been working my fingers off til roughly 3am every night the last few weeks, hoping to be done on time.  (I’ve been taking progress/step-by-step pics but those posts will have to wait until AFTER the Con).  With only 2 days to go, here is my current progress.

Cosplay progress completed parts to-date:

  • shirt
  • pants
  • vest
  • wig
  • wrench/purse
  • goggles
  • gauge

Cosplay wip:

  • belt/peplums – 80% complete
  • boots – 40% complete
  • gauntlets/gloves – 0% complete


Leave a comment

Skylanders Sprocket Cosplay – Vest Part 4

It’s done! On Tuesday I finished the vest, and was able to move on to the next part of the Sprocket cosplay.

I ended up picking up stitches around the armholes then working a 3-st, i-cord BO/applied i-cord around the edge, grafting the ends together.  I didn’t bother with a provisional CO, I just used the yarn tail to duplicate stitch the join so it looked flush.  In this image you can see the difference between the before (left) and the after (right).

skylanders sprocket vest fo 01

I did the same thing for the neckline, with one minor tweak.  The edges were curling, and I preferred the lower edge.  So when I picked up the sts I picked up about 3 rows down in the flat sections, turning that extra fabric to the back.  After working the i-cord I took another length of yarn and tacked that little flap down on the insides.skylanders sprocket vest fo 02

You can just barely see it on the inside, and see a slight ridge on the outside, but I don’t mind.

The lighting in my kitchen sucks, but here’s the back…

skylanders sprocket vest fo 03

… and the front.  And Sam, for some reason.skylanders sprocket vest fo 04I’m wearing it over the shirt and pants I bought for the costume, so this is the best progress pic so far.  😀

Plus- it fits!skylanders sprocket vest collageCosplay progress completed parts to-date:

  • shirt
  • pants
  • vest

sprocket progress 01


Leave a comment

Skylanders Sprocket Cosplay – Vest Part 3

By Monday night I had a complete vest.

skylanders sprocket vest wip2 01The back, after seaming the sides and shoulders…skylanders sprocket vest wip2 04…and the front.

Heh.  Those darts look rather silly when laid flat like that, don’t they?  As soon as I realized that I slipped a bra inside to help, erm, fill things out a little. skylanders sprocket vest wip2 02

That’s better… if a little scandalous-looking.

skylanders sprocket vest wip2 03At some point I will be making the gauge Sprocket wears on her chest, and I wanted to make sure I had enough room to place it flat on my chestbone.  I do, and discovered that the neckline was actually a little higher than I needed.  I prefer it falling as low as it is curving, not where it would be if the bound-off sts were actually laying flat.

This was where I set it aside for the night.  I wanted to look up armhole finishing techniques, and was unsure if I wanted to do an icord BO/applied icord around the exposed edges, or pick up, knit a few rows and bind off, leaving a curled edge.  It was late, so I decided to sleep on it.


Leave a comment

Skylanders Sprocket Cosplay – Vest Part 2

The back of Sprocket’s vest complete, it was time to design the front.  Sunday morning we slept in after a lovely and decadent family wedding, and then while Yannick mowed the lawn I drank some coffee and did maths.skylanders sprocket vest sketch 02Before even beginning to decide how to tackle the front, I wanted a map of exactly how many rows my back piece was.  I wasn’t concerned about matching width, but it would sure suck to start seaming the sides and realize my rows were way off.  I pinned the back out to a blocking board, double-checked my hasty pattern, and filled in my sketch.

Now I knew I had 140 rows total for the front, and to make them even I could ‘spend’ 6 rows on the lower ribbing, 78 rows making my way to the armhole decreases, then jigger the bust however it took as long as I squished it all into 56 rows.  On the width issue, my only requirement was that I finish the shoulders at 16 sts each, so I could do a 3ndl bind off on them later.

By this point Yannick had come inside to join me, and was playing Mario Kart while I did more maths. skylanders sprocket vest sketch 03Which led to way more maths and a minor tease of a headache.

skylanders sprocket vest sketch 04

But in the end I figured it out.  I would cast on enough sts for my belly, and work the rib to match the back.  Mosey my way up to my waist, working darts to decrease towards my narrower point, and then after a bit worked even I’d re-increase along the same dart lines to fit my bust.  More working even, and that should get me to the armholes.  Then I’d decrease for the armholes AND the top of the bust darts at the same time, narrowing the whole top to the same 15″ across as the back.  Work the straps, ending with 16 sts each.  Easy peasy lemon squeezy, as Henri would say.

And?

It worked!  I got all the way up to the bust increases done on Sunday and after brunch with friends on Monday morning I came home and seamed the sides so I could try it on.

skylanders sprocket vest wip 02After trying this I have to say I’m hooked on darts.  I think any knitted top that isn’t complicated by patterning, that I want to be somewhat fitted, will now have waist and bust darts.  Or at least bust darts.  The difference they make is astounding.


1 Comment

Skylanders Sprocket Cosplay – Vest Part 1

With last Friday bringing Sprocket’s wrench to a place where seaming was all that remained, I needed to keep going and come up with a new portable part of the project.  I knew I’d be going to see a movie that night and was loath to give up on the possible knitting time, so I hurried to sketch up a quick plan of attack.

sprocket2My working model of Sprocket is going to be a mix of the original (above) and this drawing I found on DeviantArt:

sprocket devartI contacted the artist, DizPlicity, on Facebook, and got permission to work from her design.  Yay!

In both cases Sprocket wears a blue ‘vest’ over black long sleeves and black pants.  A few weeks ago I went to Value Village and picked up those two items, so I tried on the top over the bra I planned to wear and took a few measurements.

The first thing I realized was that knitting the vest in the round would not work without some serious math.  I have a lot more…uh… mass in the front than I do in my back, and simply measuring around my body and dividing in 2 would result in a front that pulls, and a back that sags and bunches.  I had an idea for knitting the front in a way to incorporate bust darts for some serious shaping, but hadn’t quite figured out how to do that, so the easiest thing would be to start with the back.

My back, both in real life and for the back of the vest, is pretty straightforwards.

skylanders sprocket vest sketch 01I knocked out a fast sketch of the shape and dimensions I wanted.  I swatched my yarn (Red Heart Super Saver in Blue Suede, and 5mm Addi circs) and once I had my gauge I plopped those numbers into Excel and did the maths to write up a pattern for the back.  I decided to work from the bottom up so I could have a ways to go before getting into any shaping – perfect for darkened theater knitting.

skylanders sprocket vest wip 01

This, in case you’re wondering, is how much knitting one can get done during Avengers: Age of Ultron.  I knit the ribbing before leaving and all the rest during the movie.  By the time I got home I was only 10 rows short of my armhole decreases. skylanders sprocket vest wip 03And here’s the completed back.  Next up, the hard part – the front.


3 Comments

Skylanders Sprocket Cosplay – Wrench Part 3

In my last post I explained how to calculate yarn yardage needed for plastic canvas stitching.  Here’s the breakdown of how that applies to my project, Sprocket’s wrench.

The following chart shows each piece I’ll need to stitch, its dimensions, and what the resulting area is (in ‘holes’).

wrenchyardage All that figuring tells me I need 189.18 yards of yarn to stitch the wrench NOT counting any edging or whipstitching to join.  Sadly I only had 160y of my first choice yarn, a skein of gray acrylic from my stash.  I went stashdiving (virtually, thanks to a long weekend spent entering everything into Ravelry) and discovered 2 other possible gray yarns.  Briggs & Little’s Tuffy in Smoke, of which I have 10 skeins, and the gray localspun wool from my frogged Linden.  I went initially to the localspun but in the light the natural wool, blended from assorted animals, was overall too creamy for this project.  There were a lot of beige tones that wouldn’t work well to represent metal.  I’d been hoping to avoid breaking into the Tuffy so I could keep the lot for some other project, but I realized that I’d been holding onto it, unused, for about 10 years now.  Time to use it.

I’ve been toting around my bag of project pieces everywhere I went, using every minute of available time to stitch.  It’s dawning on me just how close July 4th is, and how ambitious my version of this costume is, and I’m realizing I might have to cut corners somewhere, but using spare time wisely will help me get the most done.  So whether I’m waiting for my kids at daycare or sitting in a waiting room or in line at the grocery store, I’ve been pulling out a piece of canvas and stitching wherever I was.

And it paid off.  As of yesterday, June 12, the wrench pieces are complete.

skylanders sprocket wrench parts

All that remains now is to stitch them together into the assembled, 3D wrench/purse.

And then make a vest, goggles, wig, gauntlets, chest plate, belt and boots.

In two weeks.


1 Comment

How to Calculate Yardage Needed for Plastic Canvas Stitching

how to calculate yardage for plastic canvas

Sometimes you have a project in mind, and yarn on hand, and boy it sure would suck to get mostly completed and realize you don’t have enough yarn to finish. In my case, I’m impatient.  Sunday night I had one hank of appropriately-colored gray yarn, and a gray wrench to stitch, and I would have loved to get started… but first I needed to know if I had enough yarn to fully cover the entire thing.

Here’s how you figure it out.

sprocket wrench wip 13

Step 1- Cut a set length of yarn.  In my case I cut a strand of yarn that is 36 inches long.  A few reasons for this- 1) my measuring tape is in inches, making that a convenient measure, 2) 36 inches = 1 yard, and yarn labels list yardage, so I won’t have to do any conversions, and 3) 36 inches is a comfortable working length for when actually stitching, so my beginning and ending tails can be reasonably included in these figures.

Note- this will only be a helpful estimate if you use yarn that is the same, or at least the same thickness, as the yarn you plan to use in your project.sprocket wrench wip 14

Step 2- Take a scrap piece of plastic canvas, the same gauge as your project, and begin stitching.

Make sure to use the same stitch you will be using in your project, as some stitches take up more yarn than others, for example cross-stitch uses more than Continental.

Keep going until the yarn is nearly done, and fasten off as usual.sprocket wrench wip 15

Step 3- Do some math.  My 36″ of yarn allowed me to fill an area that was 6 holes wide by 19 holes high.  Yes, I’m counting in HOLES, not stitches.  Why?  Because some of my pieces are oddly-shaped and the stitches I’m using are slanted and I don’t feel like having to figure out how many stitches will fill irregular areas.  Counting the holes is simply faster for me.  You can count stitches if you prefer as long as you make sure to count total STITCHES needed later.

So. 1 yard (36″) of yarn will allow me to stitch an area comprised of 114 stitches.

Then all you have to do is count the number of holes in the project (or stitches, if you’re doing it that way), divide that by your swatch yardage (in my case: 114) and the result will tell you how many yards of yarn you need to fill it.

To that resulting number I would pad it based on certain factors- areas where you have to cut excess away, areas where you accidentally used too much to tie-on and get a few stitches short on that piece, etc.  So for smaller projects I’d say this is a good way to know if a finite amount of yarn will work.  For larger projects I’d say this was a good way to estimate the minimum amount of yarn you’d need.

Make sense?

If you were going to purchase yarn for this project and the count you end up with gives you the yardage of just UNDER a ball of your required yarn, I’d spring for an extra ball.  Best case scenario: you don’t end up using it and can return it.  Middle-of-the-night-likely scenario: you remember you have that second ball once you run out of yarn.  For Sprocket’s wrench, I’m trying to avoid buying yarn.  I have two different yarns in an appropriate gray that I can use, but one of them only has one, already-started, skein.  I’d prefer to use that one, but I don’t want to risk running short.  So I’ll count up how much my pieces will use without padding for any extra.  If I see it’s pretty close to the amount of my preferred yarn I have I won’t bother starting with it, and I’ll use the other one instead.

Note– this method does NOT include yardage for whipstitching the edges together.  That’s fine with me, because some of my edges are joined with a different color, of which I have plenty, and if I run out of my gray for the sewing-up I don’t mind using a slightly different shade for the assembly.