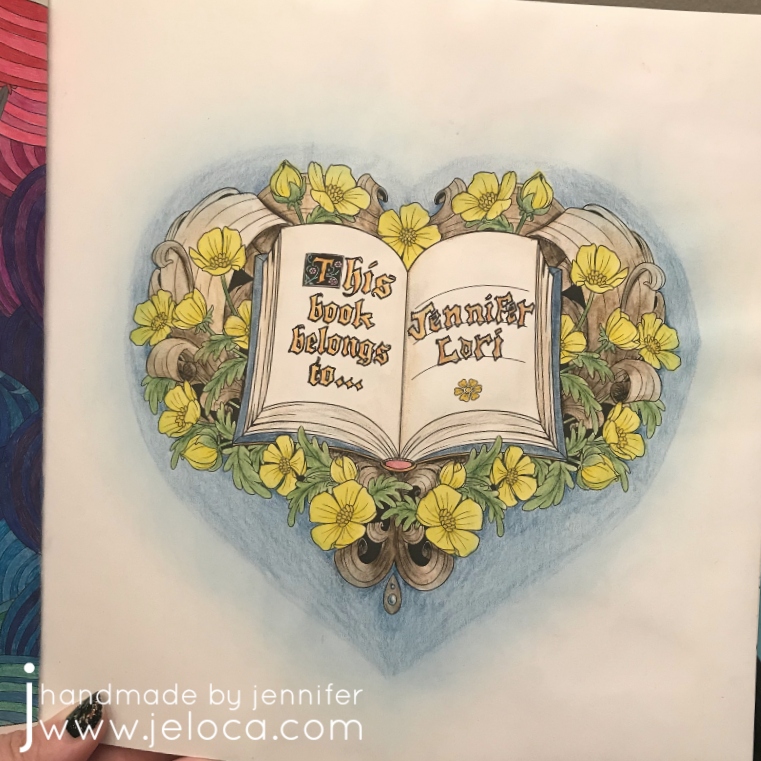
Today’s Princess Bride Month post is the ownership page from The Princess Bride Coloring Book. It has the same carved wood and buttercups as the title page, and features an open book where you can write your name.
I’d written about this page previously and detailed how I tried to match my name to the font style of the text on the facing page. I wasn’t very happy with it until I outlined the book’s letters as well, so the two would visually match.
In the end there wasn’t very much left to do on this page to consider it complete. I added a bit of shading with Polychromos colored pencils and then augmented the heart shape of the florals with a soft blue heart background. I wish I’d done it more diffused but it doesn’t bother me enough to change it at this point.
In random other news – yesterday was this blog’s 18th birthday!
Bonus: Every post this month will have a fun fact about the movie. This month’s little-know detail: Did you know the movie is even a hit with the mafia? Per director Rob Reiner: Yeah, I walked outside the restaurant, and John Gotti was there with six wiseguys. There was a guy beside the limo who looked like Luca Brasi. He looked at me, and said: ‘You killed my father … Prepare to die!’ I almost went right then! [Laughter.] He said, ‘I love dat movie, da Princess Bride!’ (Source)
This post may contain affiliate links. This means I might make a small commission on purchases made through the links, at no cost to you.
All last month I posted completed coloring pages from my 2019-19-WIP-to-FO Challenge. When I looked through the assortment of pages I’d originally posted to see what was finished, I noticed the cover of The Princess Bride coloring book.
Specifically it was the gold banner in the top corner that caught my eye. 30th anniversary hmmm? I was pretty sure I’d received the book about 4-5 years prior so did a little digging and, sure enough it was 5 years ago, meaning that THIS year will be the 35th anniversary since The Princess Bride movie was released!
The official release date seems to vary, with the majority of sites listing it as September 25th 1987, a few listing October 9th 1987, and one saying October 1st. I’m going to go with the majority on this one and officially designate this September as The Princess Bride month! I’ve got a few long-term WIPs that have finally been finished and will be shared over the month, along with a brand new double-page spread that I completed last month specifically for the 35th anniversary and will have a tutorial to go along with it.
The first of these pages (literally, as it is the first in the book!) is the copy of the title page itself.
I was pretty happy with where I’d left off but decided the page needed a background to properly look complete. I selected 4 shades of green and lightly filled in the page with small sections of each color, being sure to overlap them slightly. I then went in with the Prismacolor Colorless Blender (one of my FAVORITE tools) and blended it out. In the image on the right you can see the left half has been blended but the upper right bit has not.
The background came out exactly as I’d hoped – soft, muted and almost velvety! I’m really pleased with it, and find it gave the page the finished look I was after.
With that, at long last, my very first page from The Princess Bride coloring book was complete. All posts referencing this book can be found via the Coloring page up top, or directly here.
Bonus: Every post this month will have a fun fact about the movie. This month’s little-know detail: The R.O.U.S.s were played by grown men in rat suits! One of them got into a fight with his wife and burned down their kennel, so the film crew bailed him out of jail so he could film the Fire Swamp scene. (Source)
This post may contain affiliate links. This means I might make a small commission on purchases made through the links, at no cost to you.
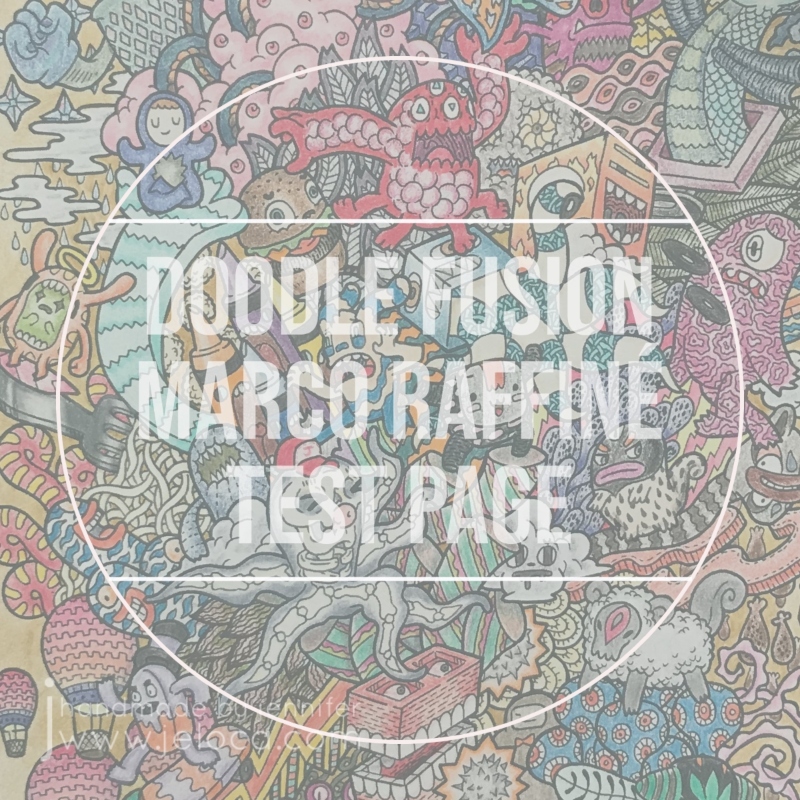
The next 2019 WIP to FO Challenge update (posted a whole 3 years later…sigh) is this page from Doodle Fusion. I love this silly book so much and have completed a bunch of pages from it (unposted), as well as prepped some in my color wash attempts. As they’re all filled with an assortment of wacky monsters it’s hard to come up with a unique name to identify some of the pages so since this one was deliberately done solely with the Marco Raffiné oil-based colored pencils, it’s become known as my test page of such.
I started this Doodle Fusion page on September 8 2019 with the intent of completing an entire page with the Marco Raffinés to really get a feel of how they work and blend.
I really like these pencils! They’re inexpensive (especially compared to the Polychromos or Premiers), and though the different pencils can’t truly be compared as oil-based vs wax-based will give different results and be preferred for different projects by different artists, they have their own unique charm and have been a joy to use. They’re less vibrant than some other brands but are no less pigmented, so while you won’t get neon brights (making them not a good choice for a fun 80s page) they’re great for softer, almost whimsical looks. They’re also slightly water-soluble, as per my tests here.
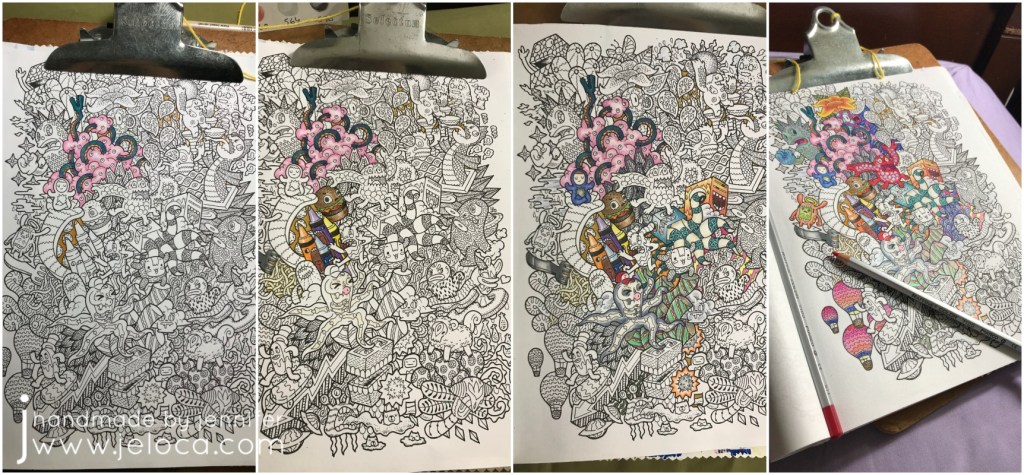
The first three images below show the lazy progress made over the rest of that month. I’d worked on the page slowly, picking out individual creatures and sections at random depending on my mood at the time.
Posting my WIP-to-FO challenge publicly spurred me to continue working on it, and the fourth picture above was done in January of 2019. I did a bit more work that month and then my attention waned again…
…until October 2020 when I finally picked it back up, determined to finish it once and for all.
I added a fading border to the outer edges in order to test the pencils’ (and my own) shading and fading capabilities. Once that was complete I finished the remaining creatures and doodles.
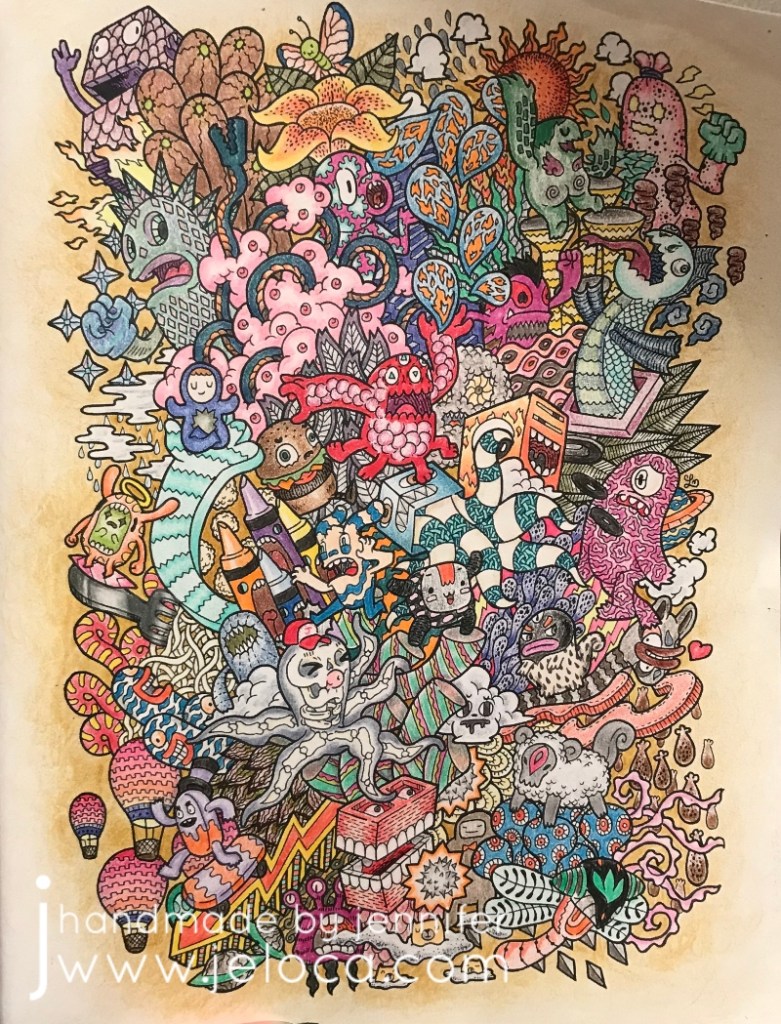
Overall I think these pencils work wonderfully in this book. It’s a plain-paper coloring book which can make using wet media difficult (although the pictures are one-sided so bleeding won’t be an issue if you protect the subsequent pages with a sheet of cardstock or something. There isn’t a lot of tooth to the page which isn’t the best for colored pencils generally, but these have enough “stick” to really take to the page well. After 2 years the page looks identical to the image above with no bloom (as can happen with wax-based pencils) and no apparent fading.
The only flaw I can see with the Marco Raffinés is the color payout. A number of sections above (ie: the red ball cap, the red 6-legged monster near the middle, the purple creature at the bottom center, the crayon bodies) were colored with maximum pressure to get the darkest, fullest coverage possible. As you can see there are solid, even sections of color but no real “brightness”. To me, all of the colors have a softness to them, even at full strength making them feel almost desaturated. You can see the difference more clearly in my swatches below.
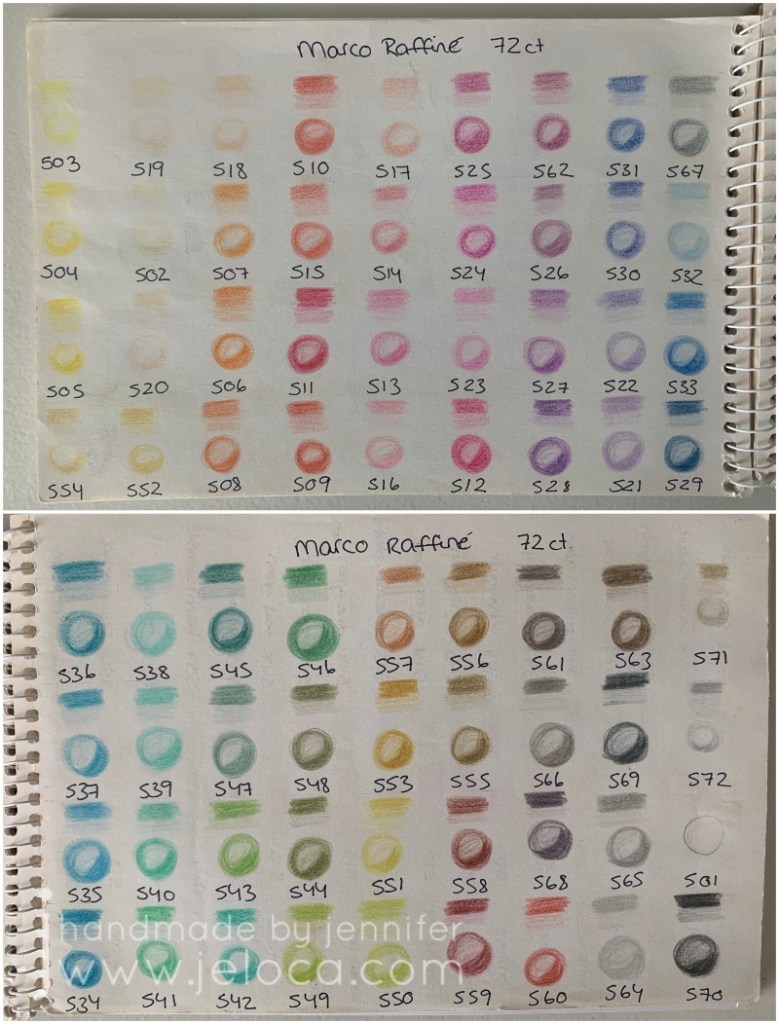
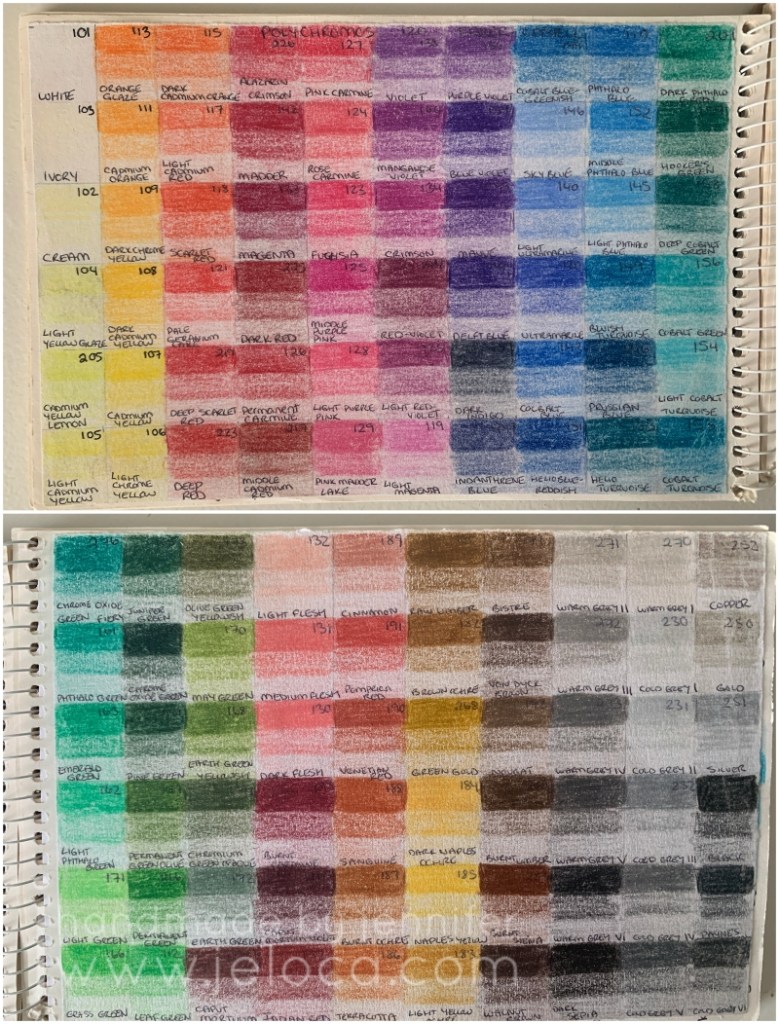
Every time I get new colored pencils I swatch them, labelling the swatches with the color name or number. The oil-based Marco Raffiné pencils (above) are lovely and soft, and very similar in tone to the Faber-Castell Polychromos (below), which are also oil-based.
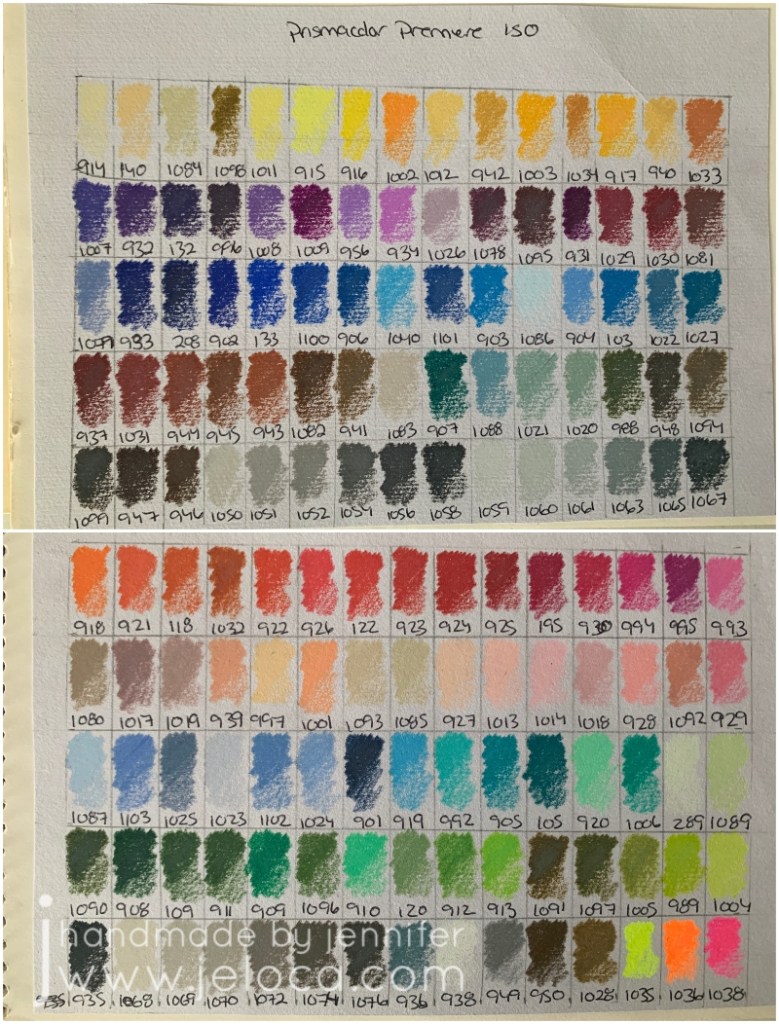
The Polys have more colors but the feeling of the individual shades is still softer, almost velvety, whereas the wax-based Primsacolor Premier pencils (below) are brighter and more vivid. (Click on any of the swatch images for a better view).
If you’re looking for deep, bright colors then you might be dissatisfied with these…but for anyone else they make a great, inexpensive option to have in your coloring toolkit.
This post may contain affiliate links. This means I might make a small commission on purchases made through the links, at no cost to you.
Today, September 14th, is National Coloring Day. Of course coloring isn’t limited to coloring books, but over the last few years they’ve definitely become more prevalent! Whether they’re your preferred place to apply color or something you only do with kids, you’ve likely noticed that the paper quality can vary greatly. From thick cardstock to what’s basically printer paper, the type of paper will affect everything from what media you can use in the book to if you can actually color both sides of the same page.
On average, most adult coloring books use a slightly thicker-weight white paper that can handle all dry media as well as water-based markers, with some bleed-through if you press too hard or go over the same spot repeatedly. Crayons and colored pencils will lay down pretty evenly as the paper has little-to-no tooth, but if you’re the kind of artist who prefers to work with a more textured paper, here’s a tip that can help transform the books you already own – sandpaper!
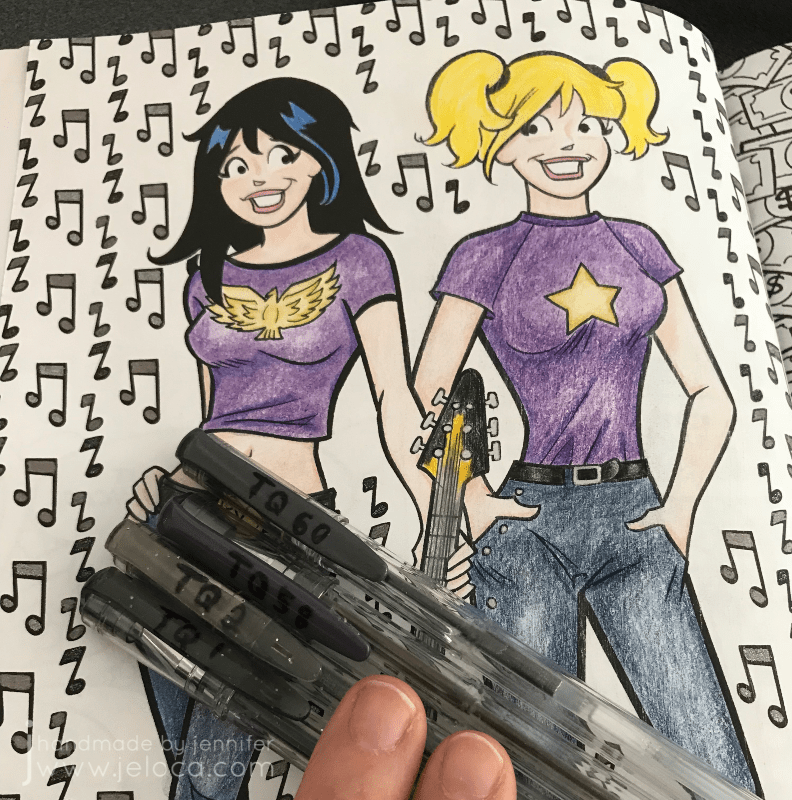
I’ll demonstrate this in my copy Archie’s Coloring Book (and there’s a video demonstration at the end of the post).
This is a great book that is jam-packed with tons of images of Archie and the gang, showcasing everyone from the core trio to side characters (Dilton, Moose, Cheryl, Sabrina, Josie and the Pussycats, Miss Grundy, Mr. Weatherbee), to the ‘Lil Archie gang. Even Jughead’s dog Hotdog appears in all his shaggy glory!
I first thought about this back in 2017 after watching one of SuperRaeDizzle’s videos on dollar store art supplies. If you don’t follow her you really should – she’s a fantastic artist who does a lot of art supply reviews and draws/paints with incredible realism. In the linked video she uses a sanding block to rough up a sheet of inexpensive Bristol board to give it a better drawing surface.
I thought it was really cool but didn’t think it applied to me – until I started wondering if the same technique would work in what I was using a lot of at the time – coloring books. In theory it seemed like it should work but with the paper so much thinner than Bristol board I didn’t know if it would work. Would it tear the paper? Would it destroy the printed outlines? Would the ink bleed?
I had to try it for myself. To make the results as clear as possible I chose a page that allowed me to clearly divide the page into two halves.
I left the Veronica side of the page untouched and sandpaper I had on-hand to lightly rough up the Betty side of the page.
Here you can see the before (left) and after (right). There’s no obvious distress to the page though if you look closely at the black line of Betty’s shirt near the guitar you can see faint striae where the ink was removed.
To hold the book open while I worked I used my pants hanger hack. Still highly recommend!
I then set about coloring the page with Faber-Castell Polychromos colored pencils. I was careful to color in both girls the same way, using the same colors and applying the same amount of pressure.
Right away you can see a difference! Coloring on the Veronica side was exactly like coloring with colored pencils on computer printer paper (though I think this paper is slightly thicker). It’s super smooth and flat without any tooth or texture at all, and the colored pencil glided over the page really easily. On the Betty side I could feel the roughened-up surface of the page and it gave the colored pencil something to grab to, making coloring a very different experience.
It’s difficult to put the feeling into words but coloring the Veronica side felt like I had to concentrate more, because my natural tendency was to use more pressure to get more color payoff, whereas on the Betty side the same amount of barely-there pressure gave a richer color payoff.
Coloring on the super-smooth side made me very conscious of trying to not color too hard because it took more work to lay color down. On the flip side, coloring on the textured side of the page made color application a breeze, to the point where I had to concentrate on not applying too much and losing any highlights.
Both sides are colored the exact same way, using different colors for shading. I didn’t want to do anything too fancy because this was only a test; it was more about seeing if the sandpaper would ruin the book or any attempts to color vs me trying to get a professional-looking result.
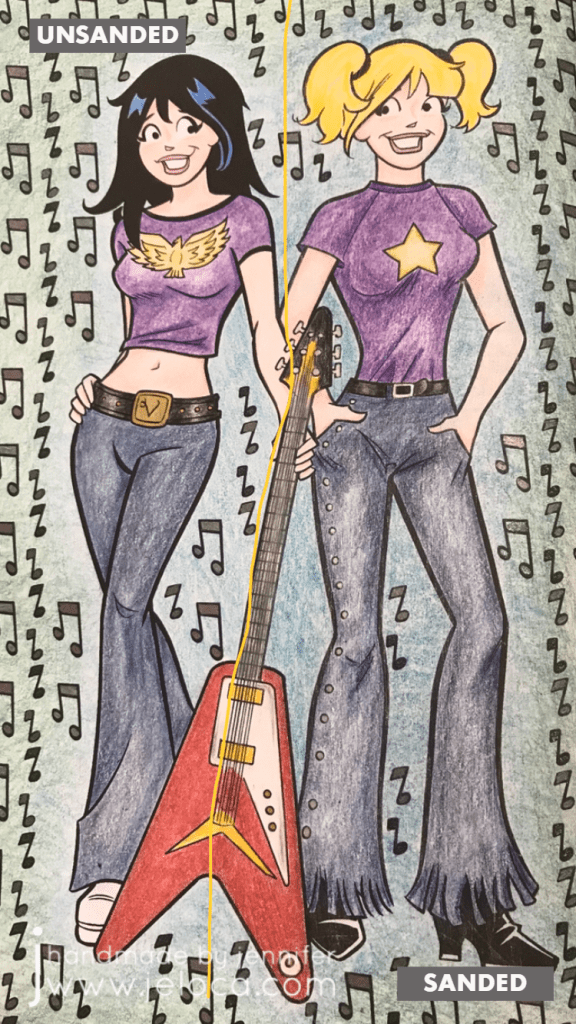
I’d sanded the guitar evenly down the middle and thought there would be a more obvious difference between the two sides but I’d say it’s pretty subtle. Again- the sanded side has more depth and more color payoff while using the exact same pressure as the unsanded side.
I was also curious if sanding the paper would affect marker application, so decided to fill in the music notes with a mix of sparkle and metallic gel pens, in black and charcoal. I was really happy to see that there didn’t seem to be any effect on how the gel ink applied, and that both sides had the same amount of glitter and shine in the light.
Finally I wanted to see if there would be any issues coloring on larger open areas, so I picked two colors and experimented with blending them to each other. In my first layer of color (2nd image from the left) you can see that both sides are streaky but the funny thing is it’s for different reasons!
Veronica’s side is streaky because I struggle with laying down barely any color…though I probably didn’t have a proper point on my pencil, which didn’t help. Whereas Betty’s side is streaky because that’s the grain from the direction I’d sanded. You can see it better in the image below (though I sort of like the streaky look on her jeans because it makes them look more like real denim LOL)
The last test that I did was to compare the difference that burnishing would make on either side. I went over both sides of the guitar with my beloved Prismacolor Premiere colorless blender and really tried to smooth any grain down and move the color to fill any remaining white areas. I have the page open in front of me as I type this and while my fingertip can tell the difference between the two sides it is SLIGHT, and definitely not as much of a contrast as the rest of the page halves.
(And truthfully I’m not completely convinced that I’d feel a texture difference there at all if I hadn’t sanded too hard in that spot, as you can see by the diagonal lines of indentation on the lower right of the guitar)
Here’s the completed page. If I didn’t know that one side had been sanded I would think that I’d colored harder on the right side, and possibly used a different color for Betty’s jeans and background, as I do feel that there’s a visible difference in this closeup.
I don’t find the difference is as obvious in this image, though I’m not sure if it’s because the black background is causing a distraction.
After trying this once I’m a convert! I have a large collection of coloring books and I think this technique opens up a world of possibilities for getting different effects and results with colored pencils, crayons, and pastels. The opportunities expand even further if you experiment with different grits of sandpaper!
Imagine coloring a fantasy scene and sanding a grassy area with one grade of sandpaper, bricks of a castle with another, and the bark of a tree with a third… you could get a whole range of textural effects within the image all before even laying down any color!
Other notes: in the video below you’ll see a little bit of ink smearing. That was due to pressing too hard with the sandpaper, so it’s avoidable but something to watch out for. I was happy to see that there was no consequence to the back of the sanded page, nor any texture transfer on the facing page.
Here’s a graphic for those of you who like to pin my posts, and as promised above, here below is a video showing this technique in action.
This post may contain affiliate links. This means I might make a small commission on purchases made through the links, at no cost to you.
October’s Create This Book challenge page was a fail from the start, because we should have picked a page we could complete with a Halloween theme. Fail #2 was not posting it within the actual month of October. But the page itself isn’t a fail, because I’m really happy with how it came out!
For anyone not following, every month in 2020 my 11yo son Henri and I are choosing a page from Moriah Elizabeth‘s Create This Book (vol 1) and each of us completing the page in our own books. There’s a link to all past pages at the bottom of this post.
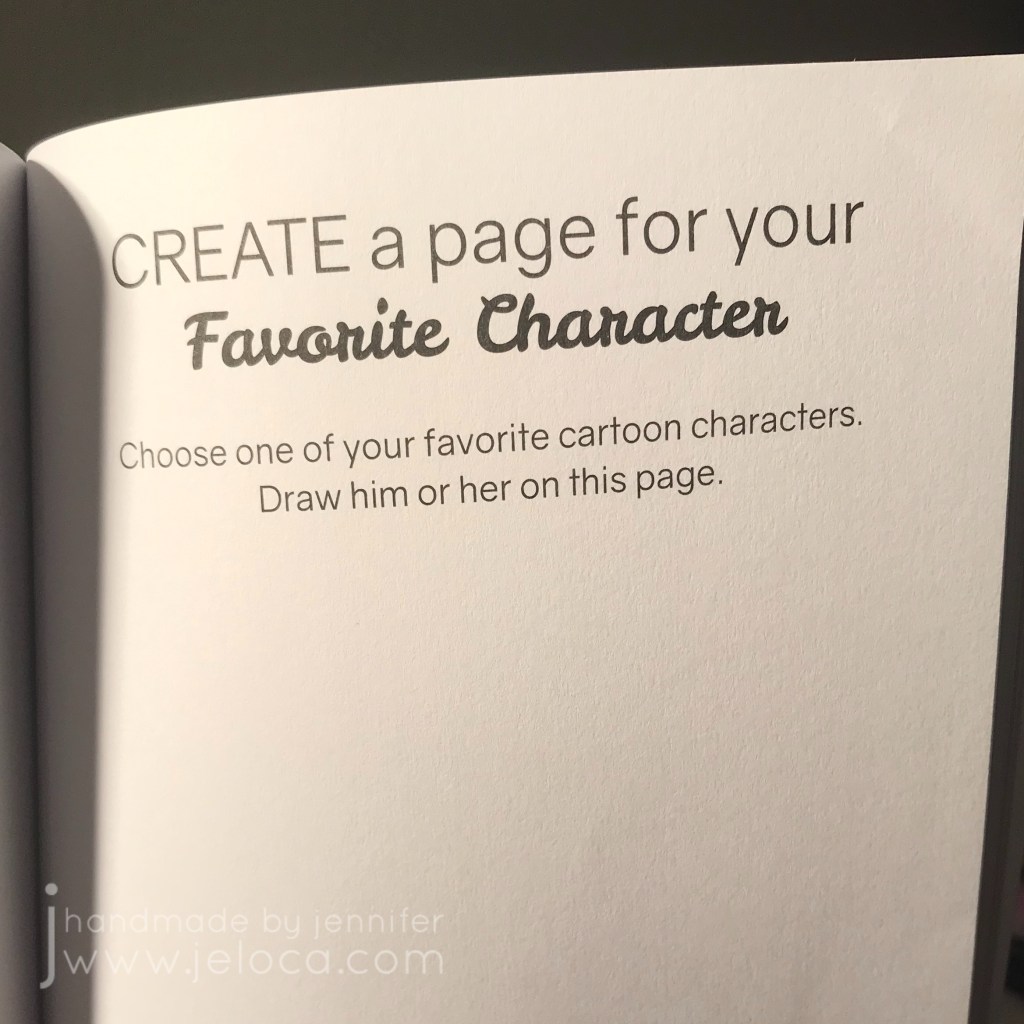
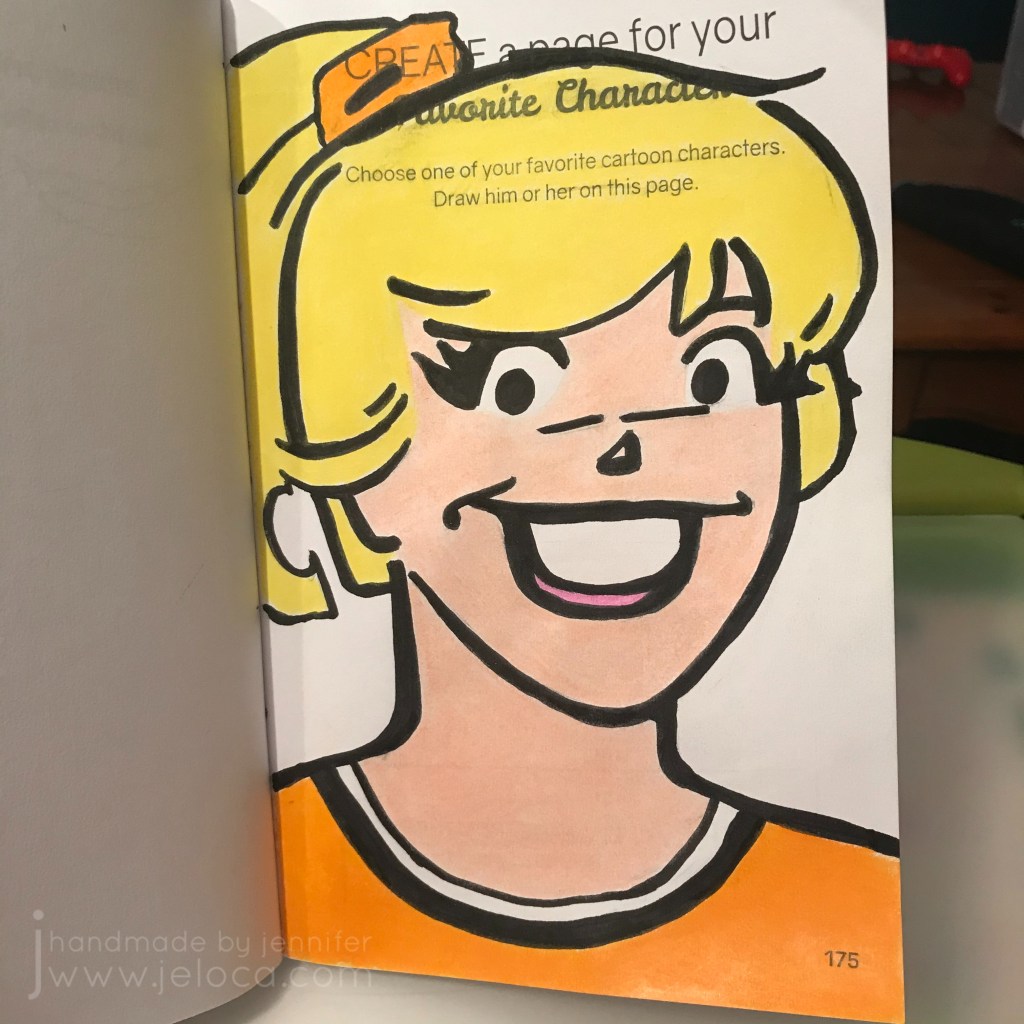
For this month Henri picked the “favorite cartoon character” theme on page 175.
Henri’s still on a Henry Stickmin kick and drew a few moments from the game. He traced a glue stick to get perfect circles for Henry, Ellie and Charles’ heads, and then freehanded the rest.
I love how easily he’s able to recreate what he sees freehanded (and often without reference photos), and I especially love the touches he added like the shadow under Ellie.
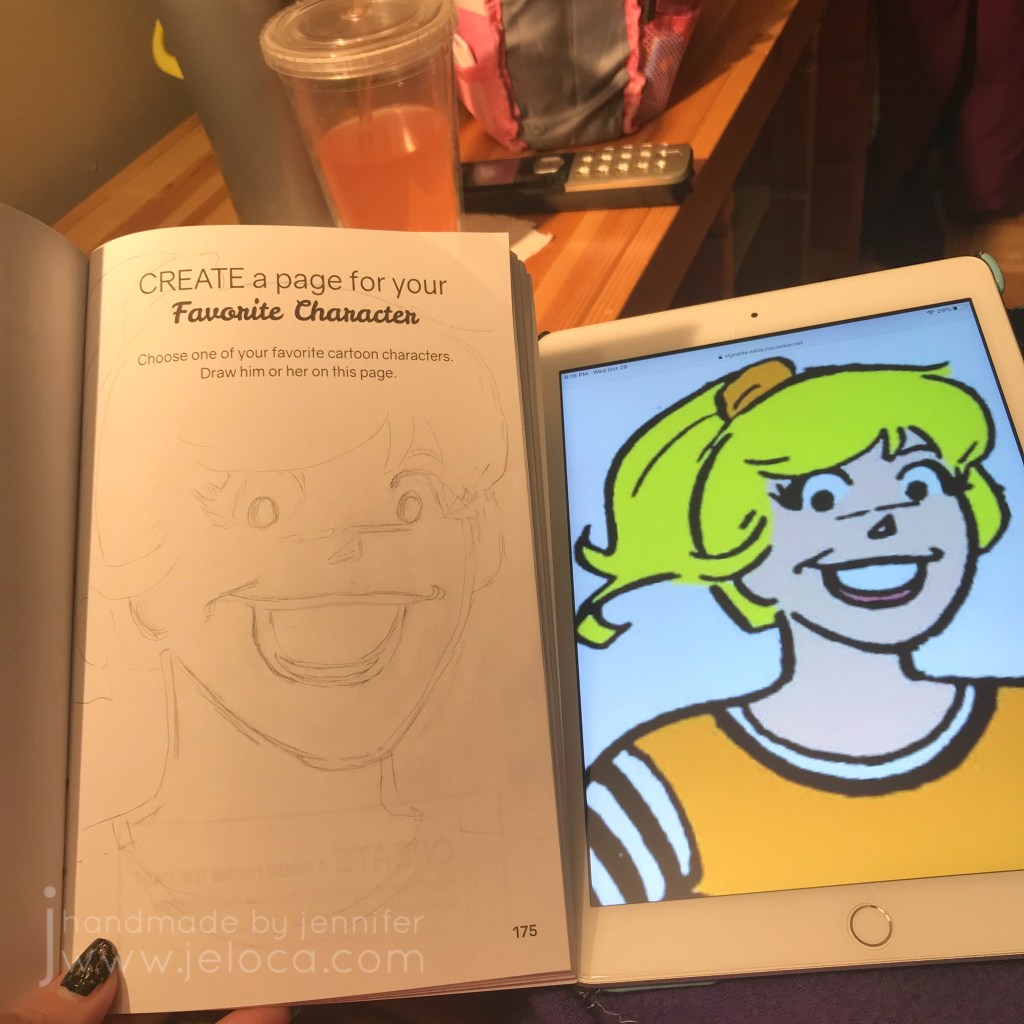
I was going to sketch up Harley Quinn but decided instead to go with my girl, Betty Cooper (from the comics, not the show). I found an image I liked online, and I’ll be honest- I was going to trace it. I was in the mood to color, but not to draw so I planned to take the easy way out.
And then I decided to draw after all, and accept however it turned out.
I started by sketching the outline of the face and then started blocking in the features.
Thickening the lines to match the widths of the comic really did a lot to make it look more accurate, though it did take me a lot of erasing and redoing until I got it to a point I was happy with.
It’s not quite perfect – her face should be longer so she’s a little squished between the nose and chin… but all in all I’m happy with my accuracy.
I filled in the inking lines with the brush end of my Feela markers. (There will be a full review on those coming soon, I’ve been using them a lot and really love them, especially for coloring book fans). Adding the black lines really helped me to see what worked and what didn’t. It still looks pretty good, but I can still see the shortened face.
The paper in this book is thin, and the water-based marker does bleed and ghost. But the page on the back asks one to “attach” something so I don’t think it will be an issue to cover in the future.
The next step was coloring, which I was really down for. I was watching the Big Brother 22 (All Stars 2) finale and it was something relaxing to do while enjoying the drama on screen.
Betty’s pretty simple, in terms of color. No shading, no highlights, just block color fills in the outlined areas.
I could have left the page as-is, but long-time blog readers will know I’m growing addicted to colorless blenders. I have a bad habit of “saving” things I like and not using them, and I’ve been trying to force myself to USE these things and not worry I’m “wasting” them by using them for their intended purpose. (Plus, it’s 2020. If ever there was a time for enjoying the little things, it’s now!)
Here you can see the difference before and after. Betty’s face was colored only with the Polychromos, but her neck has been gone over with the colorless blender. Just colored as you would normally, only instead of adding pigment, it blends the existing pigment together, smoothing it and filling in the white areas left on the paper. (Effectively, this burnishes the coloring, so you only want to do this after you’re done coloring, because it would be very difficult to lay down any more color afterwards).
Here’s Betty after I’ve blended the whole page. It really transforms the look! I find it makes it look more complete, and more professional. I’m always looking to improve my skills so these blenders are one tool I’m thrilled to have discovered.
Finally, I went back over some of the black lines with the brush end of my marker, to touch up areas where I’d gone out of the lines and the colored pencil showed on top of the borders.
Complete list of 2020 Create This Book Challenge pages:
I haven’t posted since my February Create This Book Challenge post, and I spent a lot of time in the last few weeks debating posting this, or other planned projects. With so much going on in the world, it hardly seems important to share silly doodles.
Or so I thought, until I watched my kids spend an entire afternoon at the table, elbows-deep in my art supplies. Creating is important. It feels good. It can bring peace and calm amid chaos, and it gives a sense of accomplishment that can be difficult to find when schedules and routine are in upheaval.
So I asked Henri to pick the page for this month, and we both set to work.
For those who haven’t been following along, every month in 2020 my 11-year-old son Henri and I will be completing a challenge from Moriah Elizabeth‘s Create This Book (vol 1). For January we choose the “create an empty setting” on page 163, for February it was the “food” page on page 208, and for March he decided to go with the “something different” challenge on page 207.
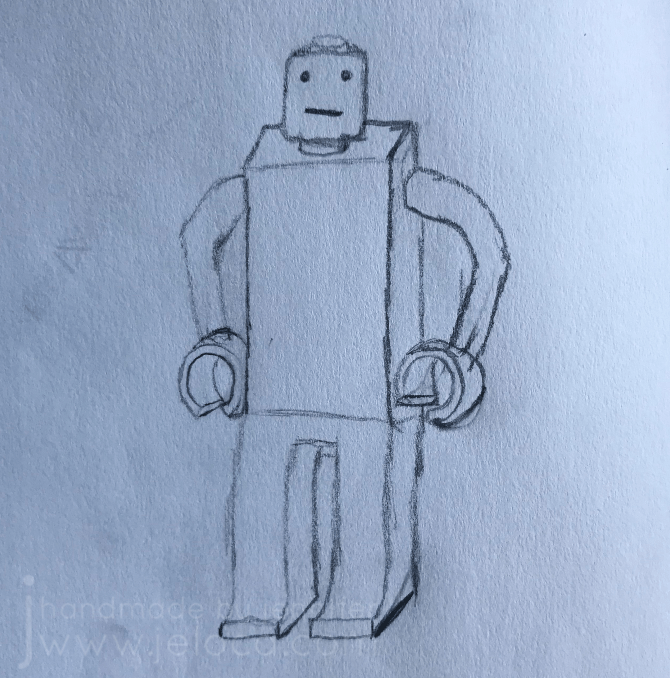
Henri has 2 current obsessions – LEGO and The Legend of Zelda – and since he draws/makes/sculpts Link and the Master Sword incessantly, he decided to draw a LEGO minifig on his page, as he’d never drawn one before.
I love how the minifig looks resolute. Like “meh”. LOL
It took me a little while to come up with an idea for my page. I’ve been drawing/etc since I was very young, so it’s hard to come up with an idea that was truly new and not break the spirit of the challenge. In the end I decided to follow a YouTube drawing tutorial. I’ve watched many craft tutorials on everything from bookbinding to watercolors, but I’ve never actually followed a drawing/sketching one.
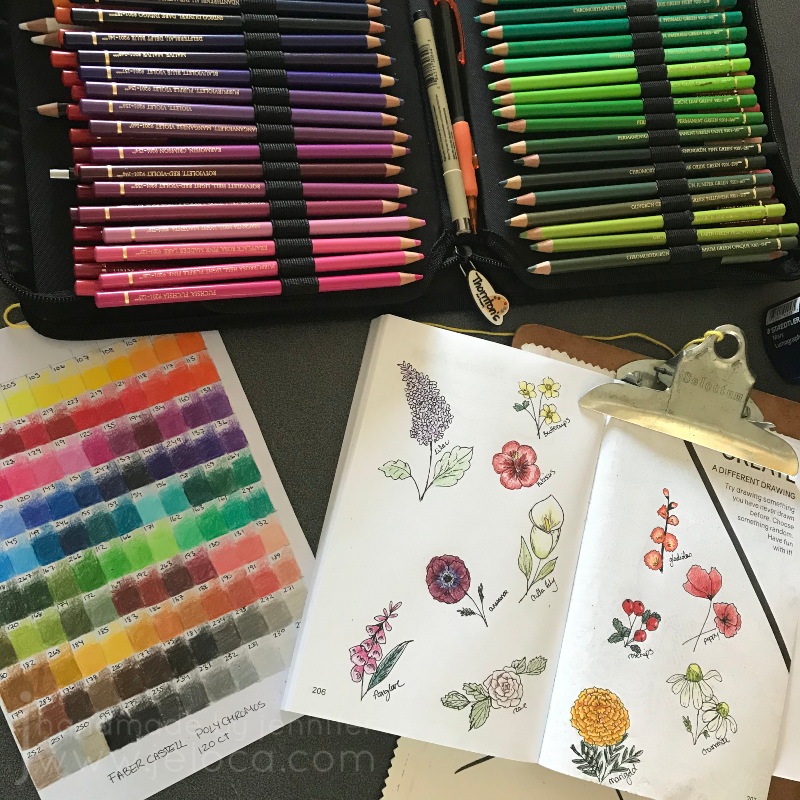
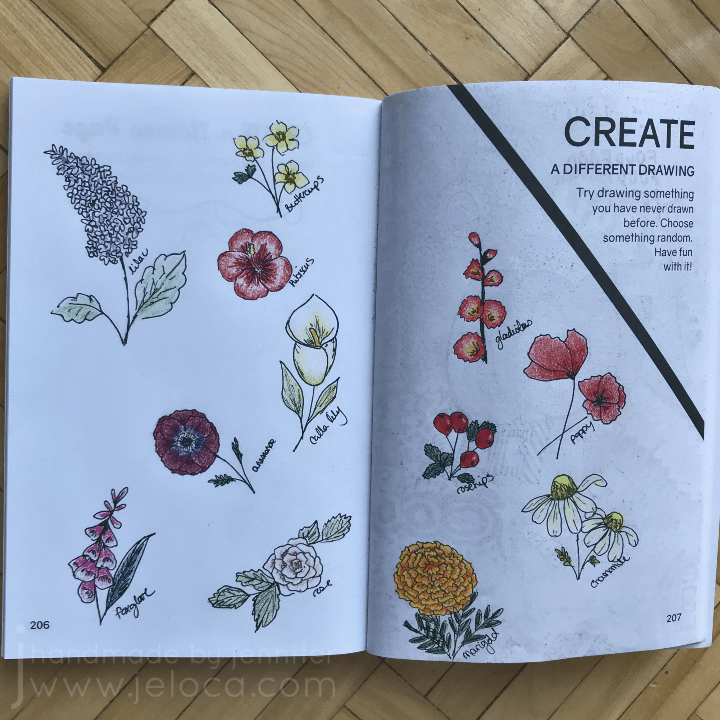
A quick search brought me to Shayda Campbell’s “Twelve Easy Flower Doodles You Need To Know” video. Shayda has a TON of help for new artists and tips and tricks on her channel, which I highly recommend. I almost never draw flowers so this seemed like a great fit. (At least until I was finished and turned to see if my ink had bled and saw the page on the back is “draw a nature scene”… oops!).
I settled down with a mechanical pencil from the dollar store, an 05 Micron fineliner, and an eraser pencil from Faber-Castell (the Perfection 7056).
I followed along with the steps in the video while listening to Jonathan Kellerman’s The Museum of Desire (an Alex Delaware novel) on loan from my local library. I admit I really wasn’t feeling my sketches until I was dne and looked at the page as a whole. Seeing them all together makes me happy, they look better than I’d thought! While nose deep in the book they really didn’t look as good 😛
This morning I realized it was the last day of the month, thus my last day to post this on time. I’d planned to merely take pics in sunlight and post them, but last-minute I decided to add a bit of color to the pages, so I pulled out my Polychromos and quickly finished off each flower.
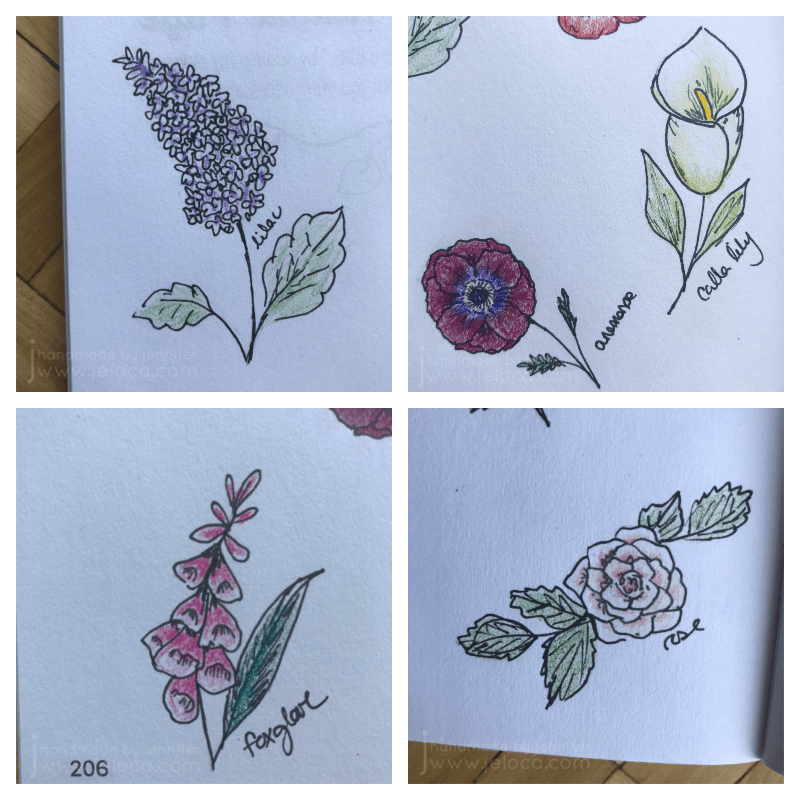
Here’s the final results! I don’t think I’ll remember how to draw any of these by heart, but I’m really happy with how they turned out.
In particular I’m fond of the lilac…
…the hibiscus and the rosehips.
You can see some shadowing on page 207… that’s the fineliner doodles of “food” that I did for Februrary’s page. I was pretty confident that it wouldn’t interfere with completing this page, and I’m glad to see that it didn’t get in the way at all. It’s more apparent in the pictures than it is in real life – I didn’t even notice it while sketching.
Keep creating, stay indoors, stay healthy, and stay safe. ❤
Complete list of 2020 Create This Book Challenge pages:
We did it! Coming in just under the wire, here are mine and Henri’s completed Create This Book pages for January.
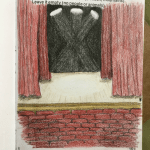
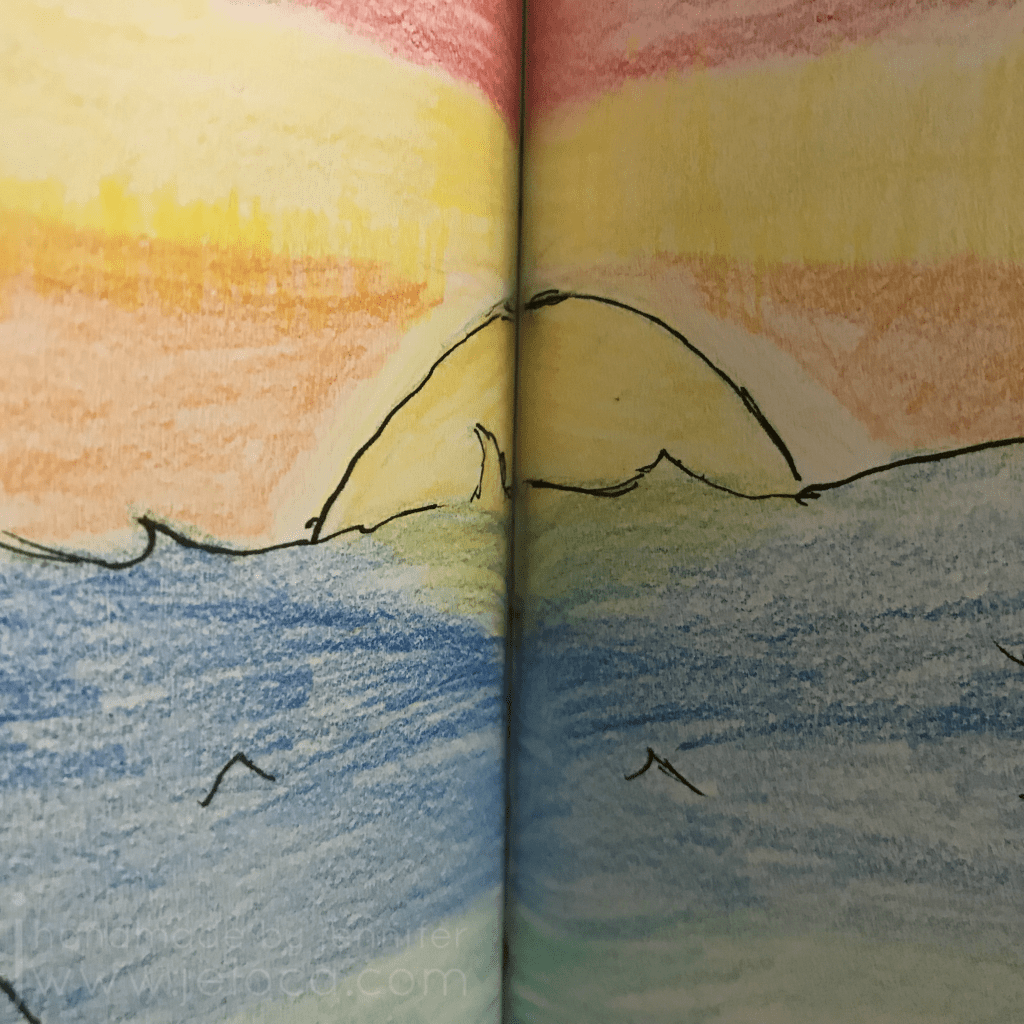
As I mentioned in my intro post, every month in 2020 my 11-year-old son Henri and I will be completing a challenge from Moriah Elizabeth‘s Create This Book (vol 1). For January we choose the “create an empty setting” page seen here:
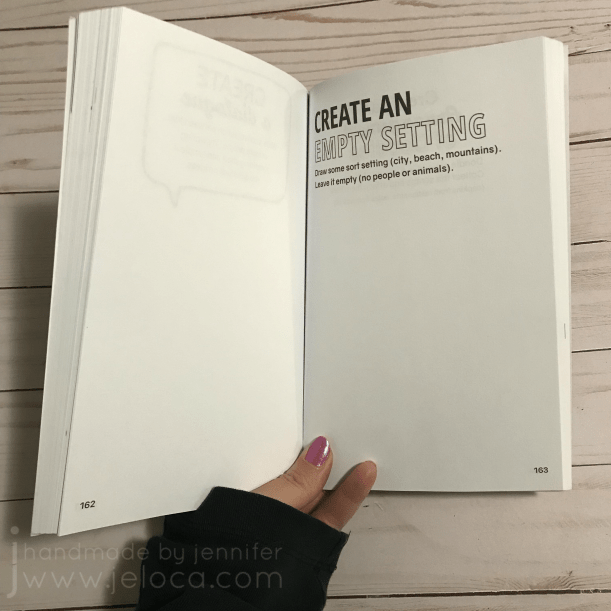
Henri used colored pencils for his page, creating a beach scene. He made it a double-page spread, with a multi-colored sunset over the water.
I love the little details I can pick up of how he went about planning his page, like how he clearly sketched out his ideas in pencil before outlining in fineliner…
…or how he blended the sun’s reflection into the water.
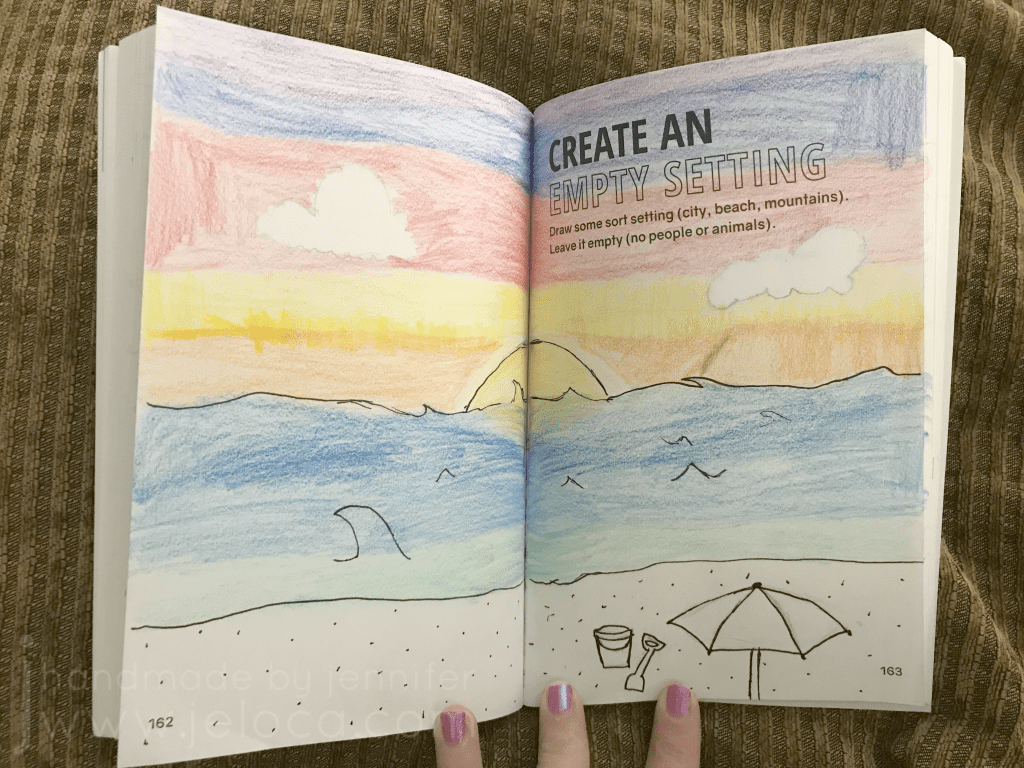
For my page, I went with a bit of a more literally definition of a setting – an actual stage set LOL.
First I sketched it out in pencil. Whenever I’m working in a coloring book with regular paper I always use a sheet of cardstock underneath the page. This prevents any impressions from affecting the following pages and ghosting through when I try to color them. This time I used a remnant of bristol board that has seen many, many coloring pages… though most obviously the one where I colored an entire background with black Sharpie.
After that I put on a podcast (HDTGM FTW), pulled out my Polychromos and colored until I was happy(ish) with the image. I did a few base layers of brown and green into the black back wall to prep before going over it with a black pencil, and roughed in the colors for the wooden stage, then later did the same for the red curtains and seats.
I say “happy-ish” because I’m not 100% thrilled with how the lights came out. I’d planned to color the background solid black and then erase the light paths but when I tried it looked just… I don’t know. Meh. I wound up coloring over most of it and leaving only the spotlight on the stage floor.
And there’s my final image. I decided against making it a two-page spread like Henri because I didn’t feel like coloring nearly two solid pages of red. In the end I’m mostly happy with it, though I see a lot of flaws that make me cringe. That said- my goal with this monthly challenge was NOT to create perfect, ideal art. It was simply to CREATE.
Complete list of 2020 Create This Book Challenge pages:
January – page 163 “Create an Empty Setting” – this post
Last January I set up a challenge on this blog- to celebrate 2019 I would convert 19 long-languishing WIPs (works in progress) into FOs (finished objects).
This year I’ve set a new challenge for myself, one with a bit of a lighter workload since I’ve got so many other things on my plate.
We’re big Moriah Elizabeth fans in this house (the sprinkle song is our jam!) and while I’ve managed to distract Henri from wanting his very own Pickle plushie, I did cave and buy him Create This Book for Hanukkah.
I ordered volume 1, and when it arrived I realized I’d accidentally put 2 copies in my cart. We took a quick household vote and instead of returning it, we decided to keep the second copy for me and Jakob to use. Thus starts the first monthly segment of our Create This Book v1 adventures.
It’s the 2020 Create This Book Monthly Page Create-a-long!
There’s also a volume 2 but we’ll be starting with the first book and working our way forwards.
Henri picked this page to start with in his book, so to catch up I’ll be making that my January page as well. My goal is to do (at least) one page each month. 12 pages doesn’t seem like a lot, but I’ve got a TON of stuff going on this year and don’t want to over-commit.
I have six days to come up with an idea, draw/color the page and then post it to the blog. The idea hasn’t come yet but the supplies have been decided- I’ll be coloring the page with my adored Faber-Castel Polychromos. I can’t help but hear Mike Myers in my head when I use them because they color so smoothly that it’s just like butter.
Talk amongst yourselves.
By the way – if you’re always in search of new, better pencil/pen cases like me, I can happily recommend the Thornton case pictured above. I own a lot of colored pencil sets with 100+ colors and quickly outgrew the 32, 48, 56 and 72-pc sets I’d invested in years ago. Last winter I did my research and bought a few larger cases in different styles then spent a cozy snowed-in winter weekend reorganizing all my pencils. (Yes, it’s the little things that make me happy LOL). Now I have enough room to store the full 120pc pencil set plus additional tools like a fineliner, stick eraser, my favorite blender pencil, and a white marker*.
Note- in Canada at least, the listing for the empty case itself seems to be sold out. The exact case full of 150 of their own-branded colored pencils, however, is available here.
*Money-saving tip: There are a LOT of white markers out there for adding highlights to your drawings and coloring. Sakura Gelly roll white pens are great, Sharpie paint markers can be fantastic, and many other brands have good ones too. But my favorite white “pen” is 100% the Liquid Paper or Wite-Out corrector pens. They give the most opaque, solid coverage because that’s literally what they’re designed for, and can very often be found in the stationary aisle of your local dollar store. (I get mine at Dollarama).
This post may contain affiliate links. This means I might make a small commission on purchases made through the links, at no cost to you.