More progress on Sprocket’s giant wrench. First I traced out the shape for the smaller set of jaws by placing plastic canvas directly on top of my to-size sketch. The resulting shape isn’t completely round, but I’m ok with that, considering my medium. Plus I’m getting a slight Millennium Falcon vibe I’m completely cool with. 😀
I cut out that piece and then traced it onto more plastic canvas so I’d have an exact duplicate.
I used a dollar store permanent marker to do my tracing. It didn’t rub off while I worked, either on the plastic or my hands, which was a welcome surprise. I didn’t want to risk it showing through the stitching later, so I tested out removing it with some water and a Q-Tip I had handy. When I saw it would work I moved to the sink and most of it came off quite easily with a quick scrub under running water.
There are five more pieces needed to complete the smaller jaw- two 3 hole by 10 hole rectangles (to connect the top and bottom at the flat ends where the jaws are open), and three strips, one for each outer edge and one for the inside curve of the jaws.
I wasn’t quite sure how long they would be. I guessed it would be one square long for each square around, but I didn’t want to assume that, cut and stitch them, and find they didn’t perfectly fit when eased around the curves. Plus, being familiar with knitting and easing neckbands and sleeves into curves, I know sometimes you need a bit extra to ease into place. The answer?
Pac Man!
Basting, actually. Starting with the inner piece, I cut my 10-hole-wide strip longer than I needed and basted it in place, starting with the center 4 holes and working out to either side.
Voila. A strip I know fits because it, well, fits.
😀 Amazing how that works! Hehe.
It turned out to be 10 holes wide by 62 holes long. Last thing for the smaller jaws was to use the same basting technique to figure out how long to cut the 2 strips for the outsides of the jaws, and they turned out to be 10 holes wide by 47 holes long.
On to the larger jaws…but first… cutting plastic canvas leaves a lot of smaller pieces, many of which can be saved and used in other projects. The problem with keeping all the cut-offs is that they can get easily confused with the pieces I do need.
To minimize confusion, I ran a length of waste yarn through the good pieces, keeping them grouped by section so I didn’t risk mixing anything up. Once that was done and things looked a little less messy, I moved onto the larger jaws. I worked them the same as the smaller- tracing the shape onto plastic canvas, then cutting it out.
Instead of tracing the cut shape for my duplicate, this time I tried tracing the uncut shape and it worked just fine. (Laying a fresh piece of plastic canvas over the one with the dark outline). Then I cut the 2 3 hole by 10 hole pieces for the two narrow tips.
I did the same trick of basting in longer pieces to figure out how long a strip to cut for the lining of the inside of the jaws (10 holes wide by 88 holes long) and for the jaws’ outside curves (2 strips each 10 holes wide by 73 holes long.)
I completely forgot to take pics of the large jaws so picture the exact same process as the smaller ones, but… uh, bigger.
Technically I’m done, but I want to give it a little more stability on the inside, so I cut some spacers, 20 holes long by 10 holes wide, that I can tack into place along the inside of the wrench’s handle.
The last pieces to calculate and cut are the decorative trims…except…
This is where I stalled.
Because I had an idea and I wasn’t sure how to execute it.
See I figured… I’m gonna be in full costume, carrying around a giant wrench, and there was only one spot in the outfit that might work to incorporate pockets. So between my phone, my ID, money (cus shopping!), and the entry program, I’d have ‘stuff’. Plus I’d likely accumulate more ‘stuff’… business cards and things. But I really don’t want to have to carry a purse. So what if… I mean, I’m carrying around a giant, hollow object…
See where I’m going with this?
😀
The wrench is going to be my purse.
The 17″ wide handle is perfect, giving me a 5″ section I can keep my phone and ID in, and a 12″ section plenty big enough to hold a rolled-up program or any art I might get. (I’m hoping to get something Archie-related).
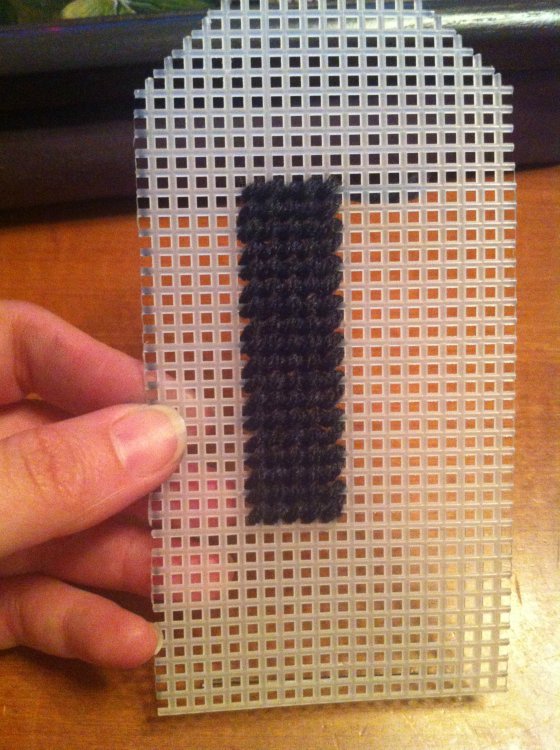
The only thing giving me a hard time was how to handle the closure. I spent some time drawing sketches and ruling stuff out, then when I hit upon a possible solution I made a little swatch to try it:

What I wasn’t sure of was whether or not a hinged lid with a stitched lip would stick out over a stitched base.  Seeing how well it lays flush over an unstitched base, I’m going to go with that. I showed my sample to Yannick and he suggested flipping it on its side, so the handle opens along its narrow end. I told him I’d already thought of that and discounted it because I couldn’t figure out how to not make the sealing flap look silly. He suggested hiding it along the decorative trip that would already be visible.
And just like that, it clicked.
Here’s what I’m planning:

Kinda like this. Ish.
I re-cut and adjusted the top of the handle to reflect that, and then cut the 2 small and 2 large decorative trims for the jaws.
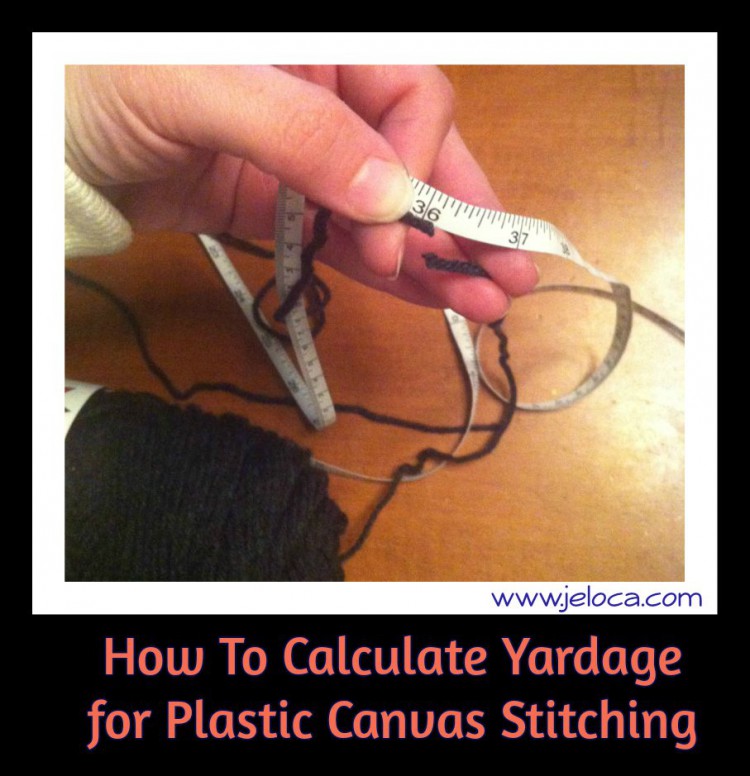
With that, I think all the strips (except the velcro lining bits) are cut. Next post- how to calculate how much yarn I’ll need.


 All that figuring tells me I need 189.18 yards of yarn to stitch the wrench NOT counting any edging or whipstitching to join. Sadly I only had 160y of my first choice yarn, a skein of gray acrylic from my stash. I went stashdiving (virtually, thanks to a long weekend spent entering everything into Ravelry) and discovered 2 other possible gray yarns. Briggs & Little’s Tuffy in Smoke, of which I have 10 skeins, and the gray localspun wool from my frogged Linden. I went initially to the localspun but in the light the natural wool, blended from assorted animals, was overall too creamy for this project. There were a lot of beige tones that wouldn’t work well to represent metal. I’d been hoping to avoid breaking into the Tuffy so I could keep the lot for some other project, but I realized that I’d been holding onto it, unused, for about 10 years now. Time to use it.