Leave a comment

New York cake

New York Cake

I’ve showed this finished cake before but never actually posted detail shots.  Let’s remedy that.

A few years ago a co-worker of my brother’s asked if I could make a cake matching an image she’d found online.

nycake
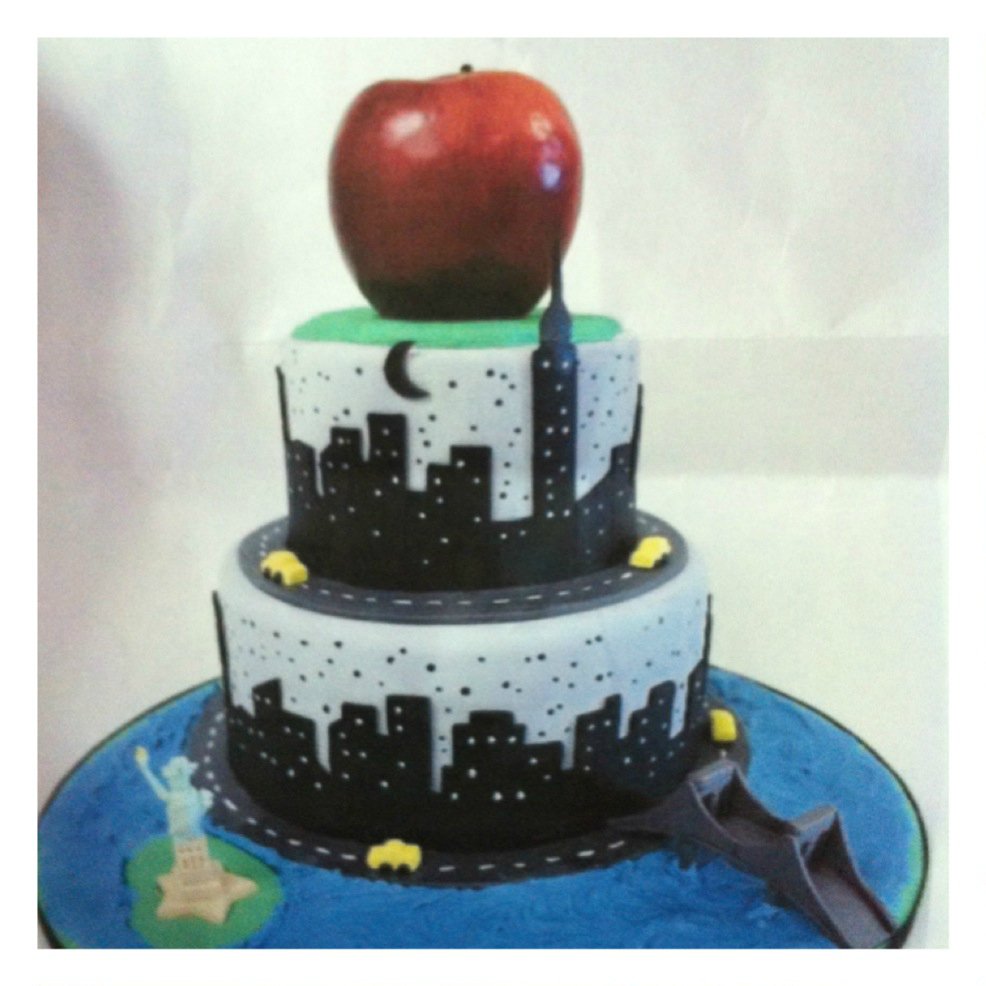
At the time it didn’t occur to me to check online to see whose design it was.  I just looked now and can’t find an exact source.  I can see it listed on Cake Picture Gallery without a source, and a very similar design here on cakesdecor.com credited to Berliosca Cake Boutique in BC.  I don’t know whose came first.  In any case, I was asked to make just one tier, no water/bridge/statue, and told she’d provide the apple herself.

I decided to build it up with a checkerboard cake, partly because I needed the height from the three layers to fit the skyline, and partly because I loved the idea of a New York-themed cake having a taxi cab-esque checkerboard on the inside.  (It’s deliciouser on the inside.  Heh.)

IMG_0226

I leveled the cakes and filled them with homemade buttercream, then did a crumb coat around the entire cake.  I let that set up in the fridge while tinting some store-bought white fondant into the pale gray-ish blue color.  Rolled it out and covered the cake.

IMG_0227

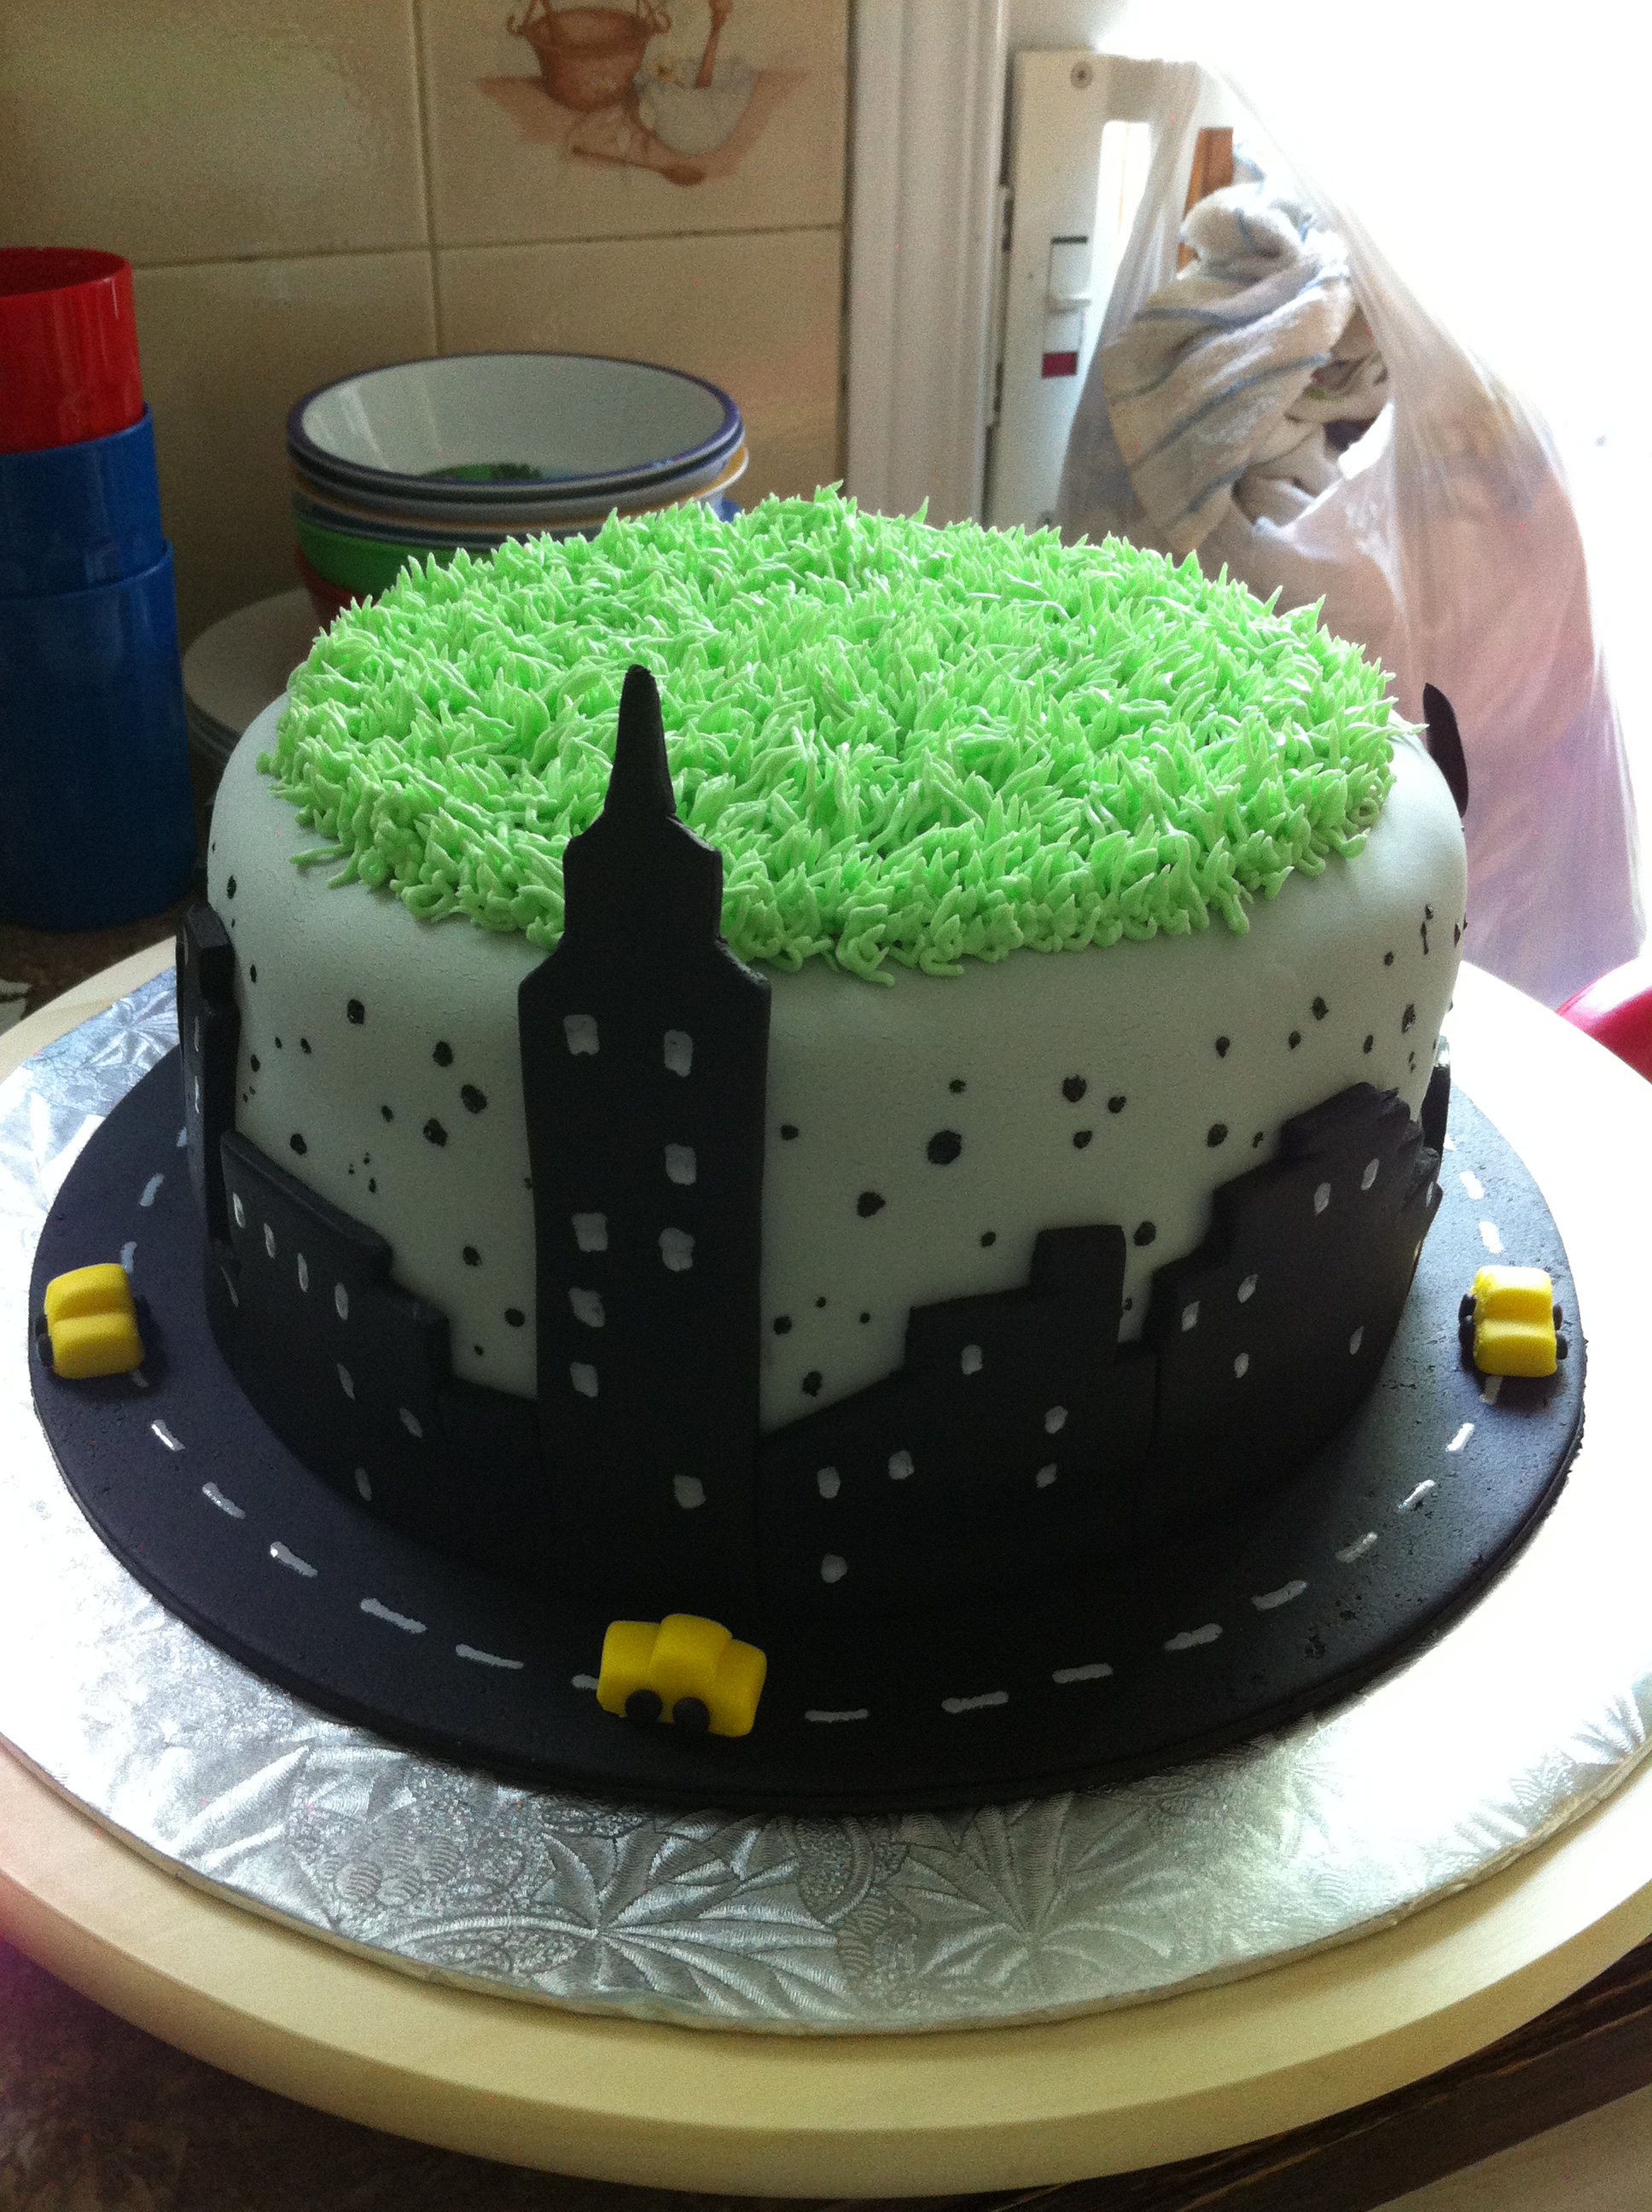
I bought pre-tinted black fondant and rolled out a thick disc to set the cake on, then rolled out some strips the height of my tallest building.  I eyeballed the building placement, going off the sample pic and just tried to make sure I had some variation in heights for interest.  You can see in the pic below that I used a toothpick to support the tallest building.  I cut out the buildings in groupings of 2-3 and ‘glued’ them around the cake with a bit of water.  I stuck them on after setting the cake in place, so I could make sure to butt them down as low as possible to the ‘road’.

IMG_0228  
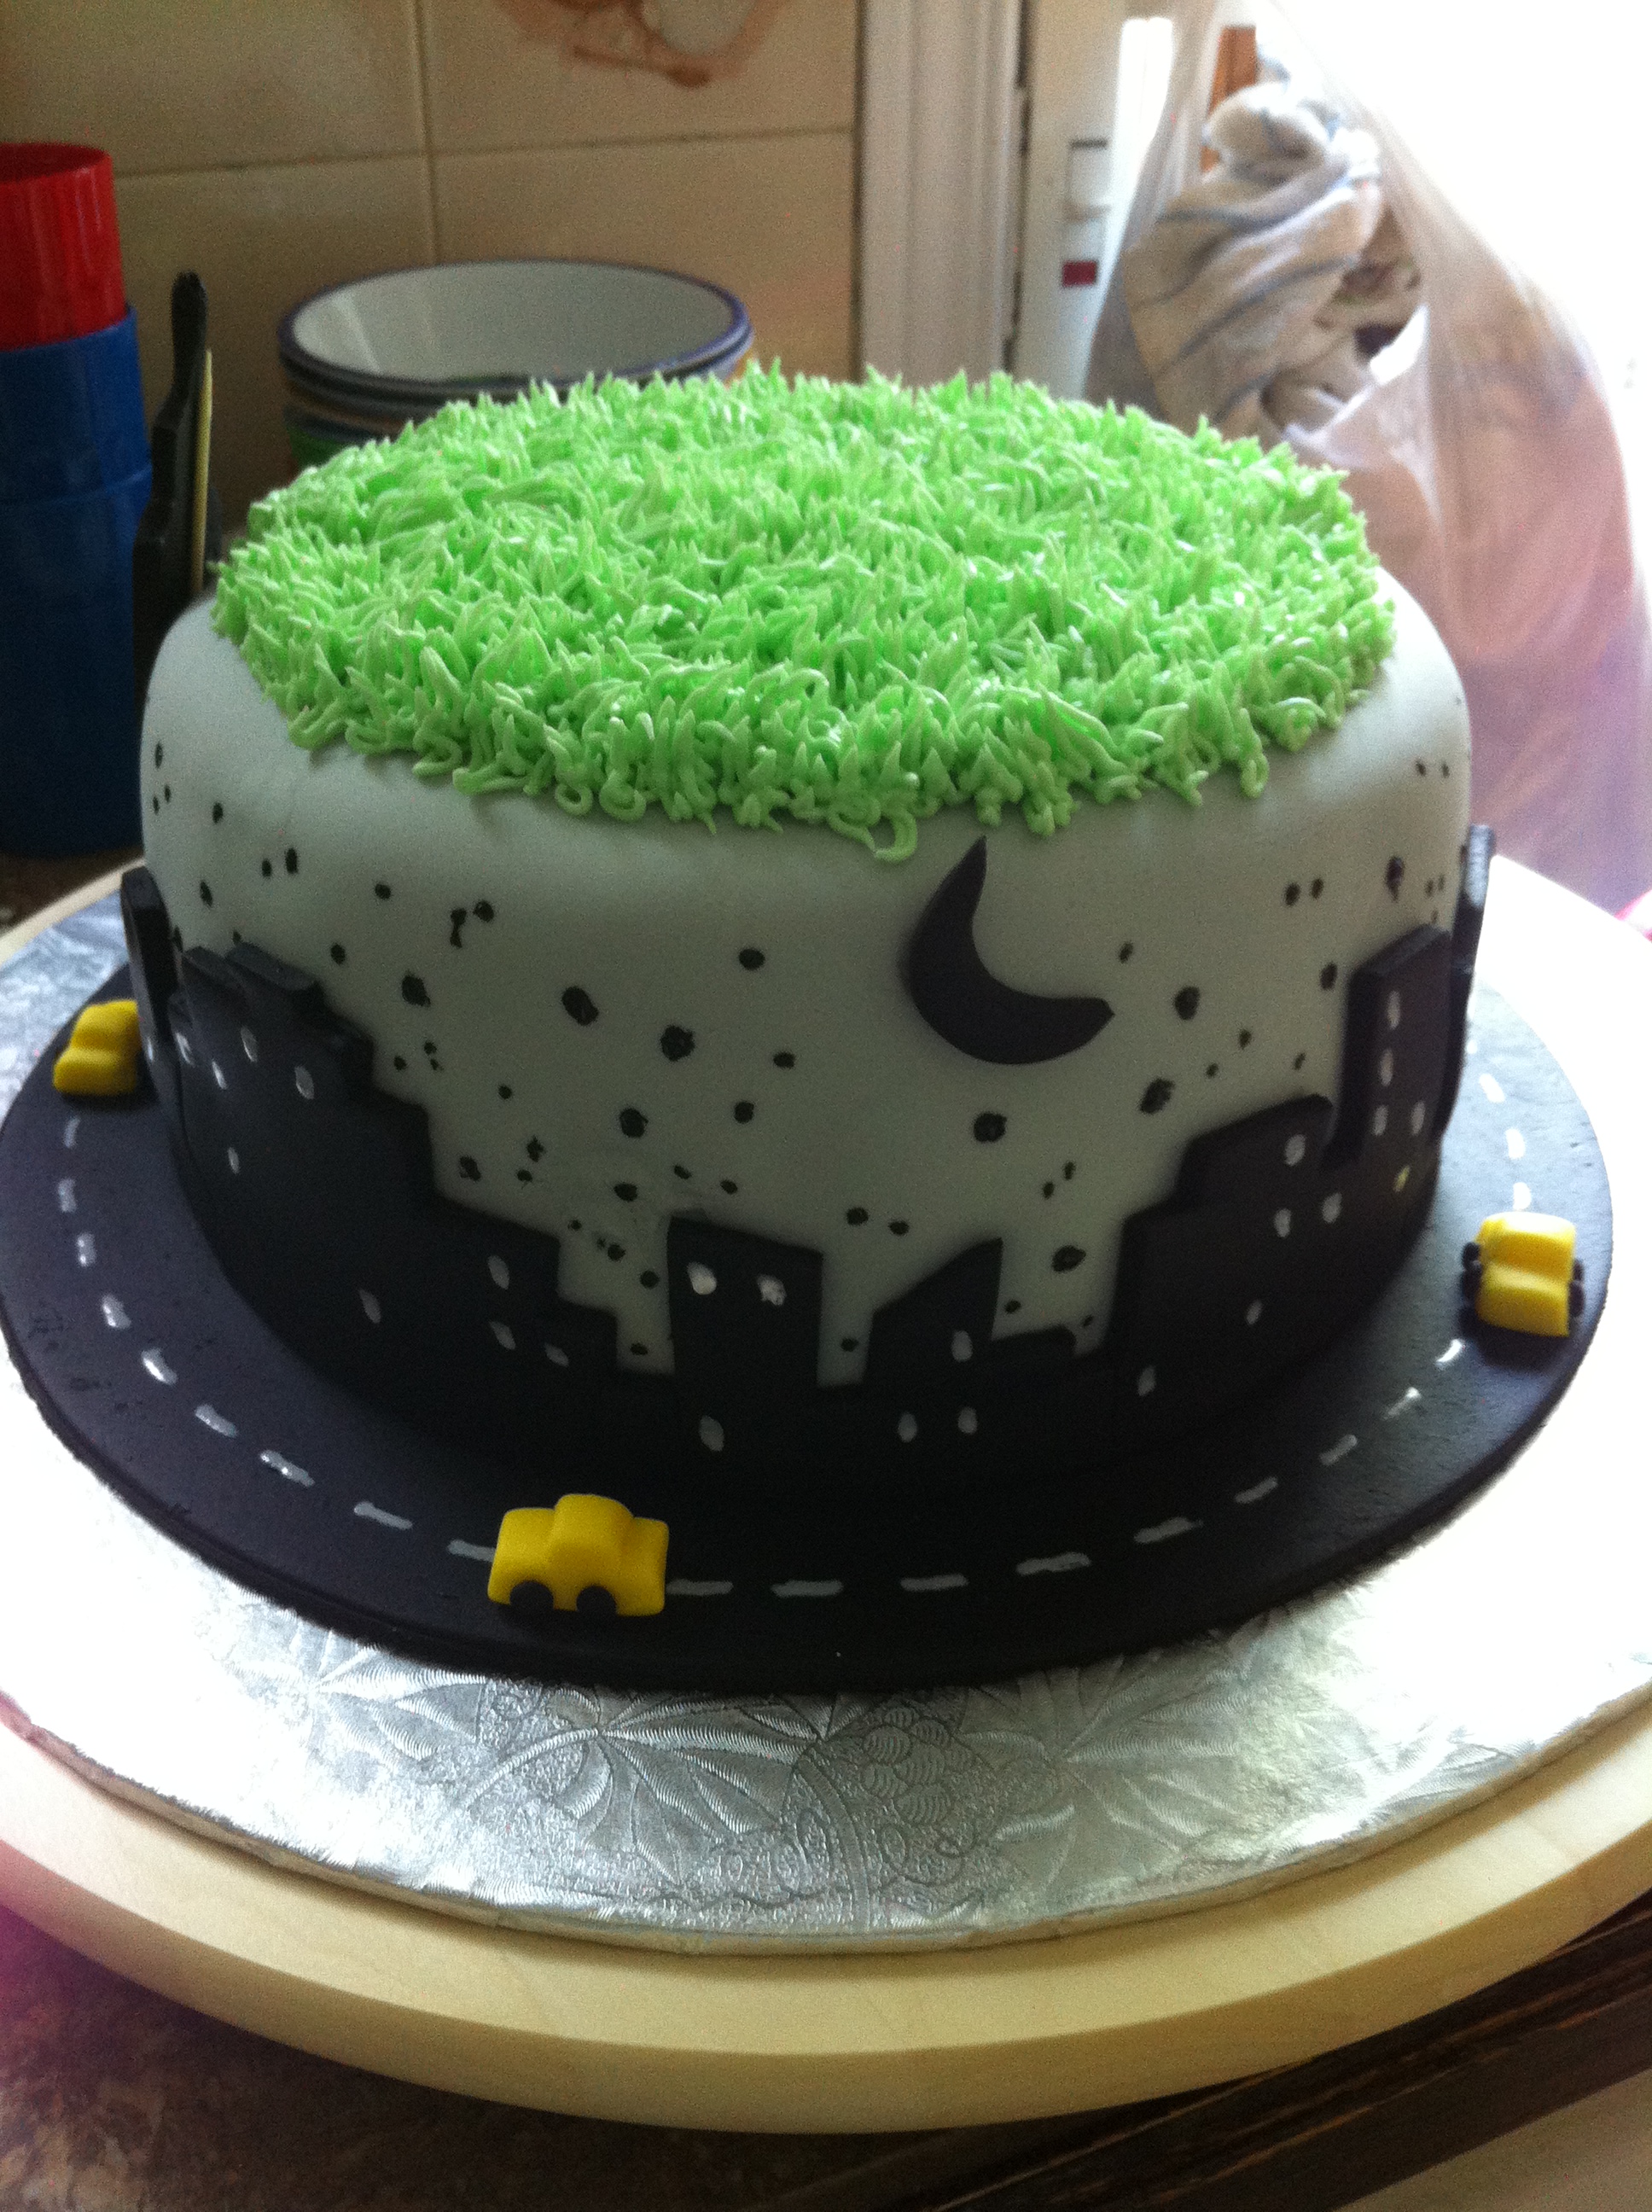
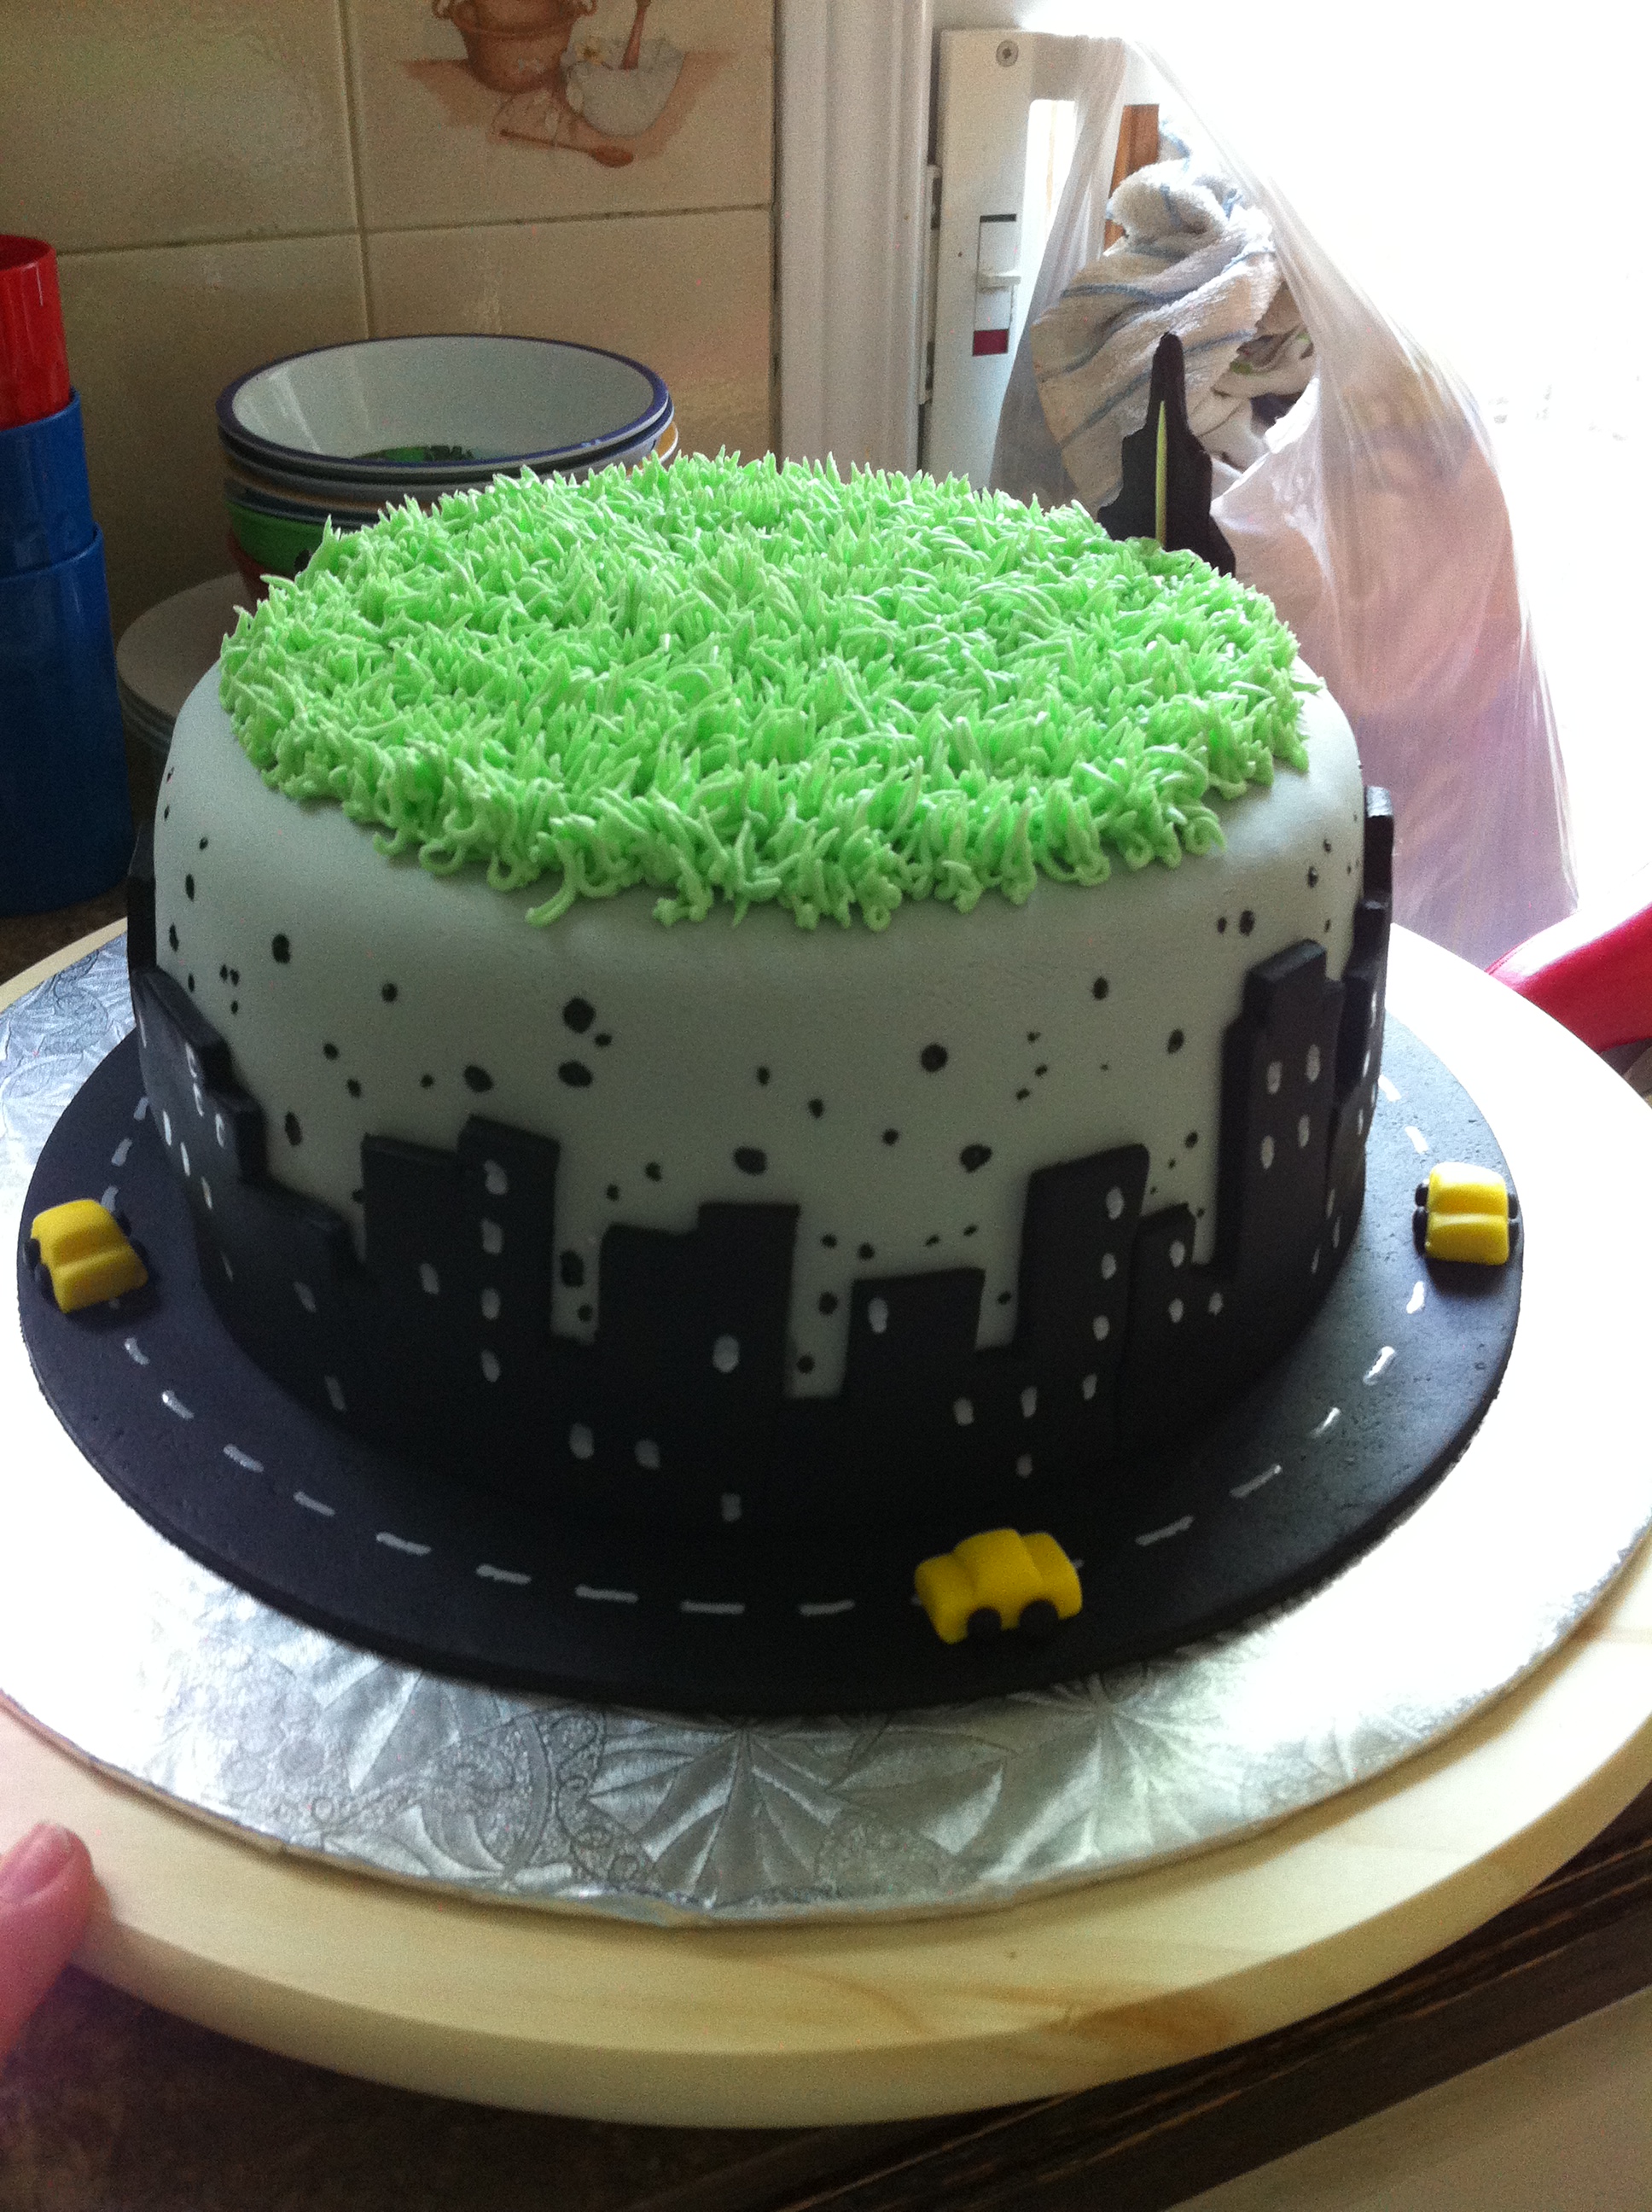
I thinned some black food gel and dotted the ‘stars’ around the sky, and used Wilton whitener for the road markings and the ‘windows’.  Sadly I didn’t think to thicken the whitener with a bit of icing sugar, so it paled considerably once dried, and I had to do a second coat on most of them.  To make the adorable taxis I tinted some white fondant yellow and shaped it into a rectangular brick.  I cut off the outside corners with a sharp knife then sliced the resulting “T” shape into car-appropriate widths.  The wheels are tiny flattened disks of black fondant, everything ‘glued’ together with a bit of water.IMG_0233


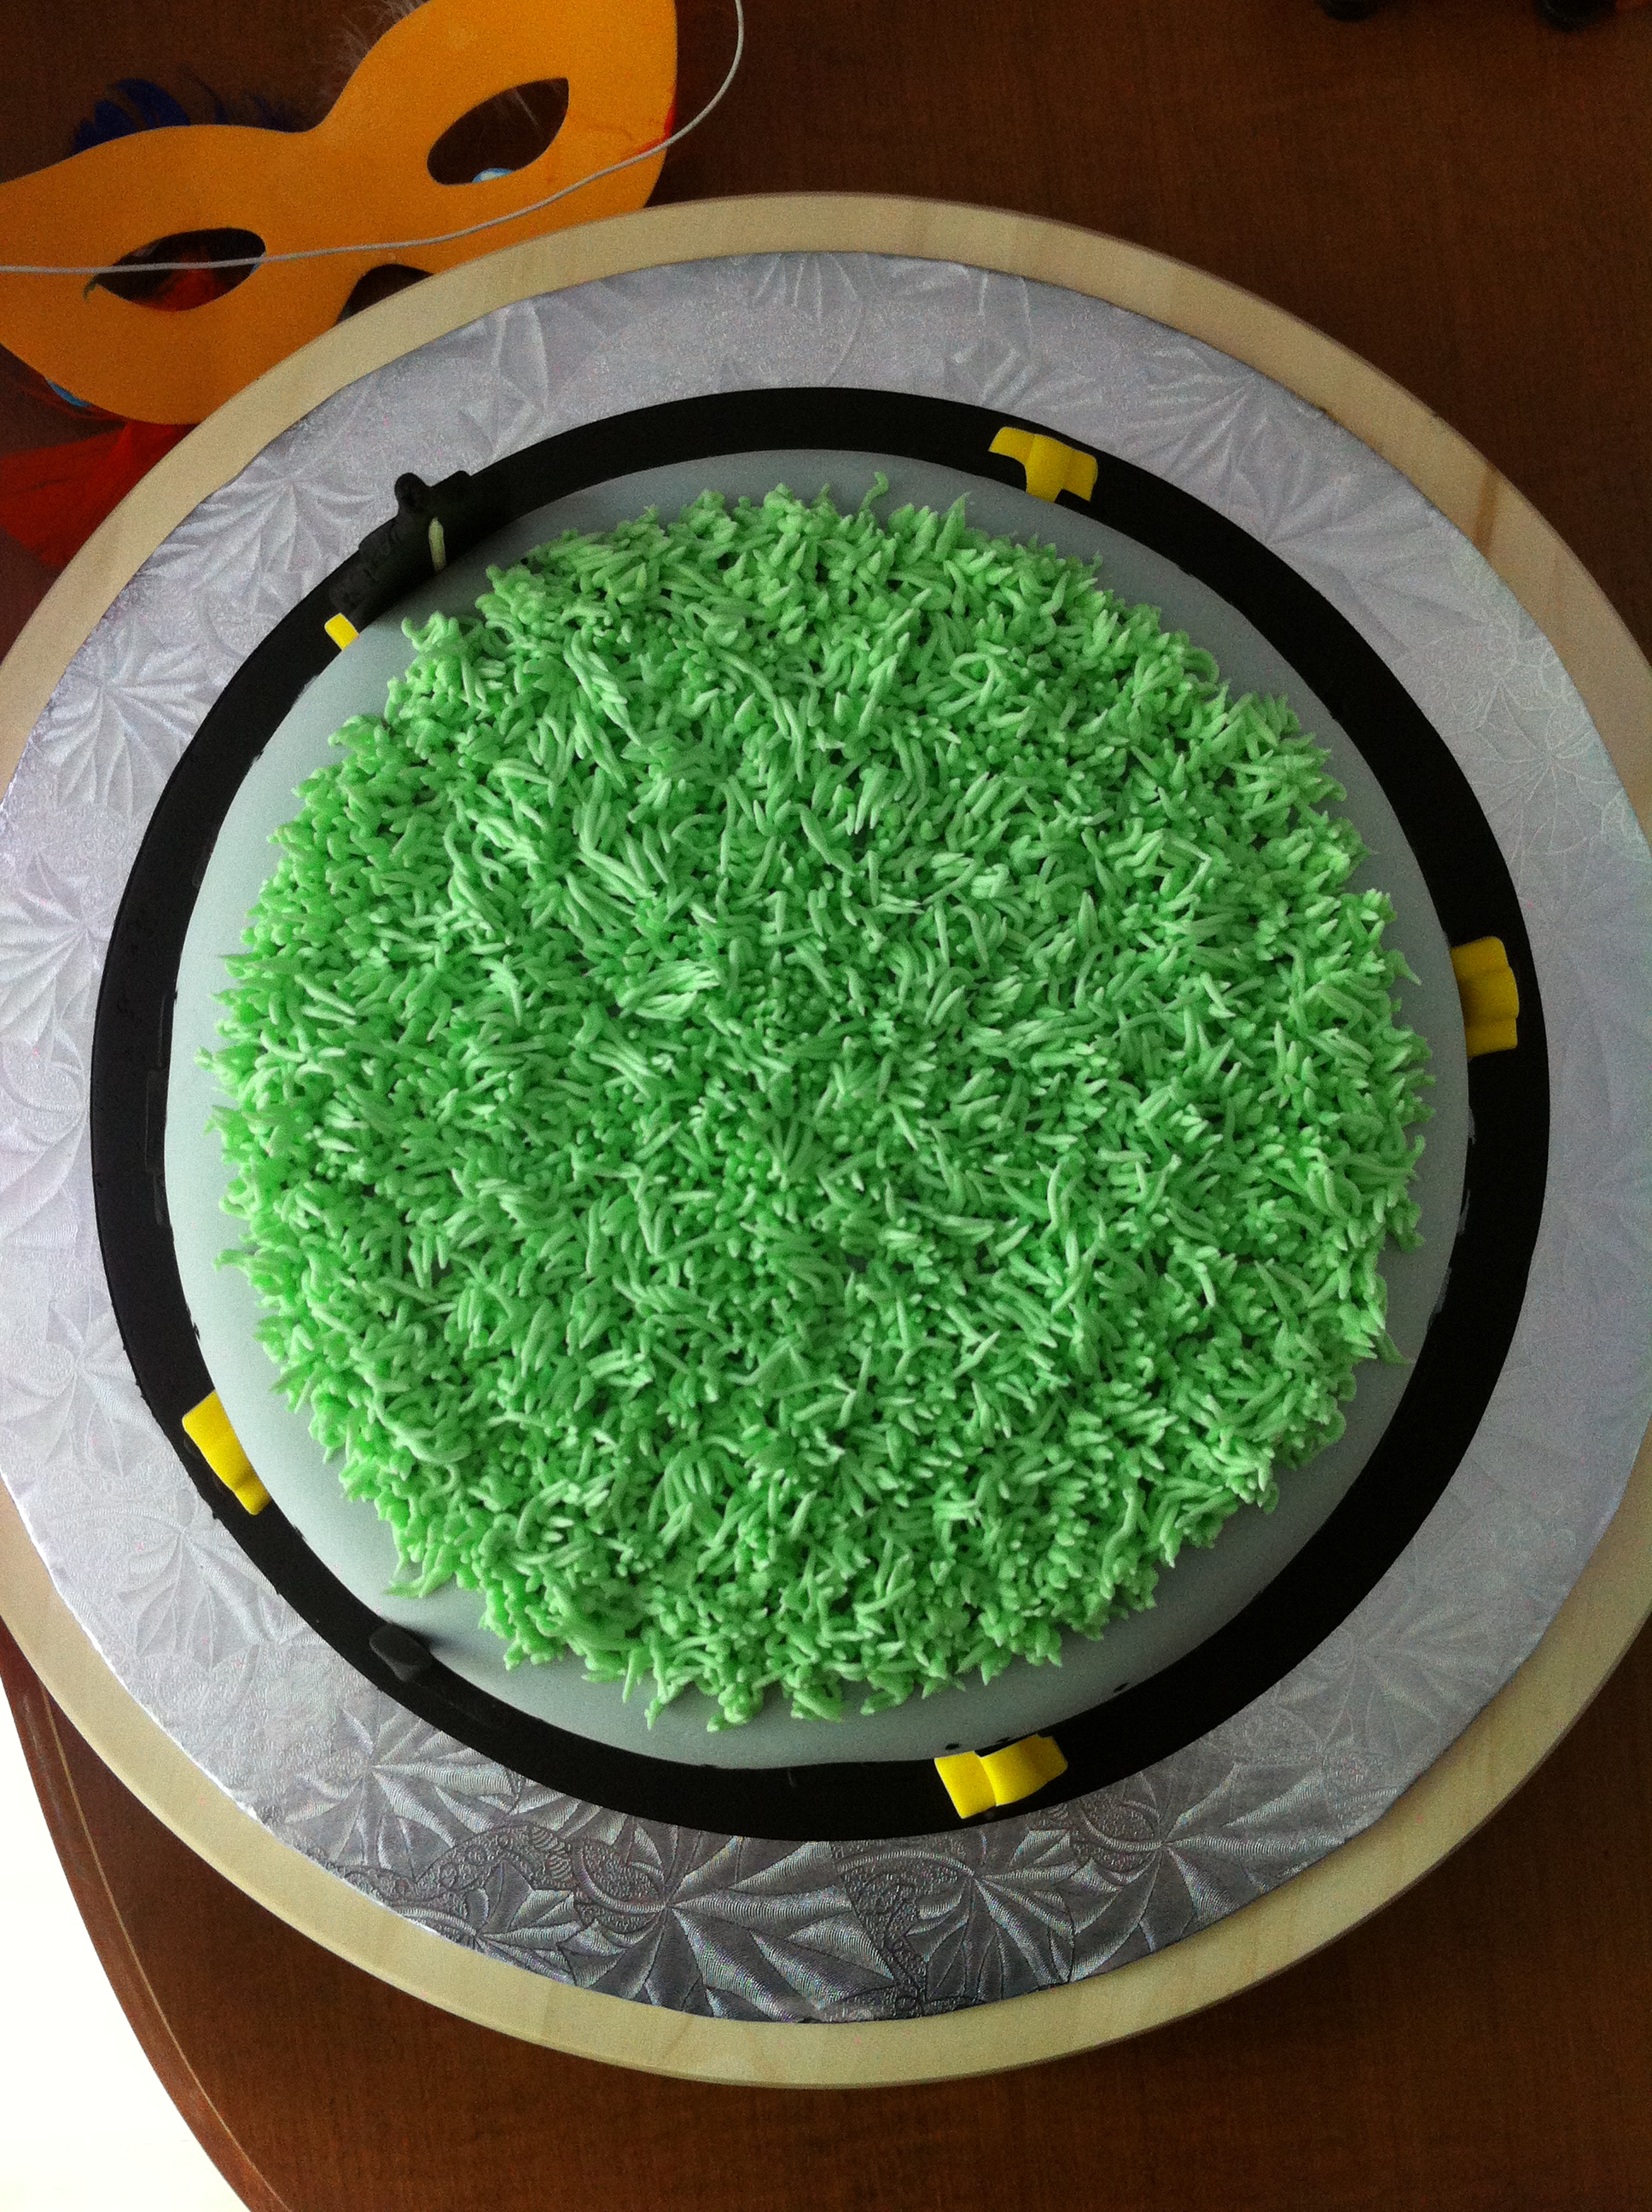
The last thing to do was the grass for the top.  I knew they’d be adding the apple on-site, but making a green fondant disk felt too easy.  I had leftover buttercream so I tinted it green and hand-piped the blades of grass with a piping bag and multi-holed icing tip. OLYMPUS DIGITAL CAMERA
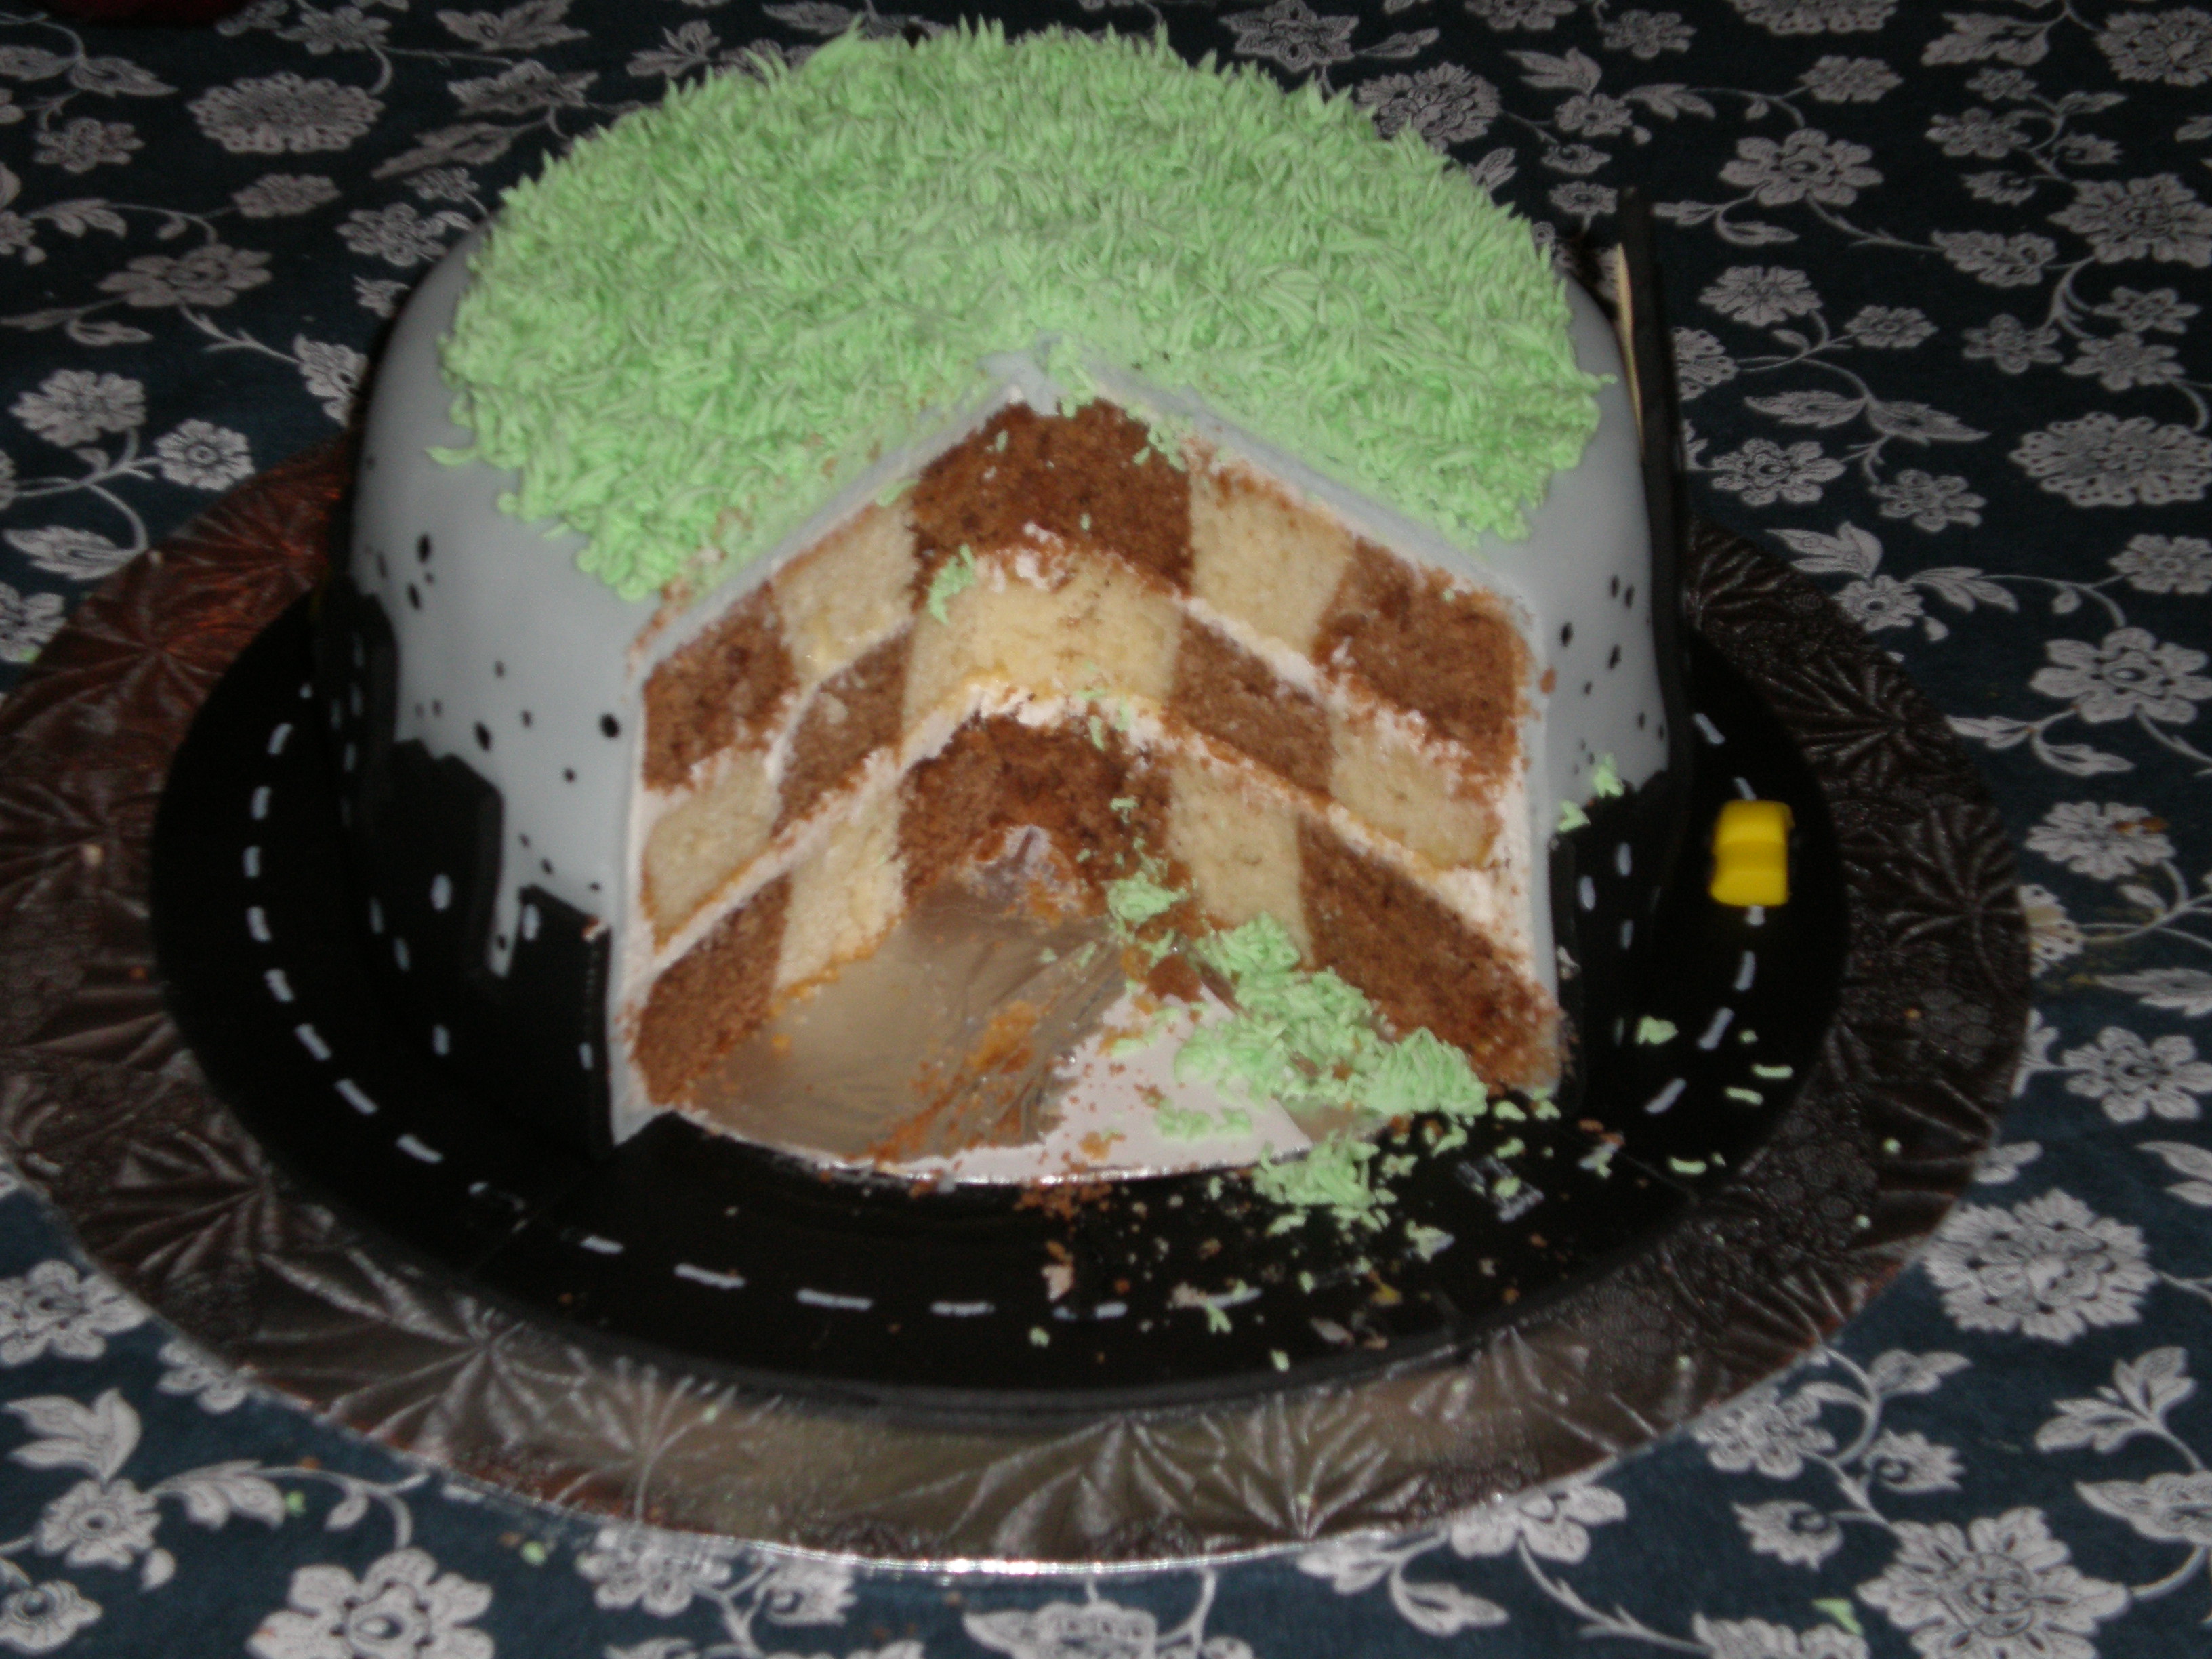
I later received this pic from the woman who’d bought the cake.  I love seeing the inside, seeing that the checkerboard lined up properly!  😀


Leave a comment

*waves*

Remember me?  That whole blog redesign thing I said was coming?  Well guess what….?

(It’s coming).

LOL

Ok it’s in progress, better?  I was going to wait until everything was up and running but something tells me that means I will never started so… as a friend said, and I’m paraphrasing, go with 85%.  I don’t know if I’m quite at 85% but I’m gonna go with it anyways.

To anyone who still had me gathering dust in their blog reader, welcome back!  To anyone who finds me now, thanks to Facebook/etc*, welcome.  If you like crafty, nerdy stuff, you’re my peeps.

Mmmmm…. peeps….

*Oh yeah.  I’m not anonymous any more.  The blog is now (soon to be) linked to my real Facebook account, and cross posted there, along with my real Twitter and real Instagram (once I get the widget working).  For reals.


1 Comment

Stay tuned!

Major blog redesign coming!

Knitting, crochet, cakes, crafts, stitching, the kids, even me… soon we’ll all have our own place and everything will be organized properly.  I’m going to go through the older posts and repost anything of note, and share all the cool new things that I’ve worked on in the last year or so.  Hope it’s worth the wait!


2 Comments

happy new year!

It’s 2013!  If I go back through my archives I’ve been blogging since September 2004.  In September 2014 I’ll have been blogging for 10 years.  Whoa.

It’s a new year, and instead of making resolutions to DO, I’m making resolutions to TRY.

I’m going to TRY to blog more.  I’m going to TRY to knit for ME.  I’m going to TRY to publish more patterns, or at least let you know about ones that have been published.  (Did any of you know I’ve got a pattern in the Interweave Knits Holiday Gifts Issue?  Didn’t think so).

We started the new year off right by doing something different.  We took a family vacation!  Plattsburgh, NY is under 2 hours away, and there’s a hotel there with lots of activities for the kids.

Image

(ps that tarp isn’t because of any leak- they were getting ready to fill it with balloons to drop at midnight on NYE)

There are good restaurants in the area and right near a 24 hour Walmart, a Sally’s Beauty Supply, a Michael’s… 😀

Image

We drove down with 5 other families that have kids about the same ages, and in the hotel were other groups of 2-5 families that we all knew, so we were always around friends.  We did a lot of shopping, a lot of socializing and I even managed to squeeze in a bit of knitting while the boys watched TV as we changed for dinner.

Image

I worked on my fun fur vest…no pics yet ‘cus I keep forgetting to take one.

Speaking of shopping in the States…the shopping carts for when out with kids are awesome!  If the store doesn’t have a double-seater cart, my boys have to take turns walking, or scrounge around for one of the few carts with a car attached to the front.  But checkit the carts at Price Chopper:

Image

Awesome no?


3 Comments

timing is everything

I started a vest for myself.  I shouldn’t have, but I did.

At guild on Tuesday I won a mini raffle we did, and got a 2012/2013 Bergere de France magazine.  There are some GORGEOUS patterns in there, but I was taken by 2 in particular.  One of them I’m not sure what yarn to use, but the other…well…it’s a fun fur vest.  I know.

I know.

I KNOW.

But it’s really cute, and worse comes to worst I’m always cold at home so….  Yeah.  Moving on…

The body is worked on 8mm needles so it’s a fast knit.  It’s kinda a shrug/vest hybrid, and on Wednesday night I cast on.  I finished the back ribbing and the first few rows of the body.  And then I brought it to work with me on Thursday so I could photocopy the pattern out of the magazine to make it easier to work on.

Now, I shouldn’t have started this project on Wed.  I had realized just that morning that Christmas might be in 2 weeks, but the last day of daycare/kindergarten is next week, which means I’m running out of time to do the holiday teachers’ gifts which I haven’t started yet.  I *should* have started those.  But I didn’t.

Which makes it only fitting that I forgot the project at work last night, and then today both boys woke up with fevers, meaning I had to keep them home, and be home all day, and NOT be able to work on the vest.

Which means that in about 5 minutes I’ll be starting the holiday teachers’ gifts, all due next week.  🙂


4 Comments

i’m a proud crafty mama!

I’m so proud of Jakob!

For a while now he’s had “His Knitting” on the living room side table. It’s worsted weight, garter stitch and it’s red of course, and every few weeks he asks if he could knit and I remind him how and he does a stitch or two before getting distracted and then I finish the row so we can put it aside again.

20121123-101756.jpg

Last night after I picked him up from school we detoured at my LYS before going to get his brother. I had Spidey with me to find yarn to BO and work the spines. At the door I happened to notice a knitting nancy…a modern plastic version of the old spool knitters used for “French knitting”. Jakob saw it too, didn’t know what it was, but wanted it. When I explained it could help him knit but faster than the two needles for while he was learning, he really wanted it.  It was the Clover Wonder Knitter.

I think I have an old spool knitter somewhere but have no idea where to look, and this version, while modern and plastic, also has a nice hook, and 3 interchangeable heads with different post numbers, and is designed for working with beads so the central opening is quite large. It’s quite easy to work with because they designed a really smart groove down the side if each post, making it super easy to get the hook down into the stitch to pull up/over.

Today is a ped day for the elementary schools so I sent Henri off to daycare for a rare one-on-one day with Jakob.

After lunch we’re going to the library to get him some audiobooks for bedtime, and then to Tim’s for hot chocolate. But first this morning I taught him to spool knit. And he rocks.

20121123-102621.jpg

This post may contain affiliate links. This means I might make a small commission on purchases made through the links, at no cost to you.


2 Comments

go figure

So. Cast on for a special blankie for my 2nd child in July of 2009. Spent the last 3 years slogging through ever-increasing rows that started with 14 sts and ended at 728 sts per row. Just finished the last, 149th row. About to work row 150- the bind off. And ran out of yarn.

20121121-225811.jpg


6 Comments

how to make a viking vest

Henri has wanted to be a viking for a while now.  Not for Halloween, I mean he wants to be a viking in general.  (It’s either viking or pirate, depending on the day).

Jakob got a light-up viking helmet at the How To Train Your Dragon Live Spectacular, and unfortunately when we brought Henri the next day they were all sold out of helmets, so he got a Toothless plushie instead.  (Jakob, you’ll remember, got the one I knitted for his birthday…which I think I never blogged.  Oops).

The kids share the helmet, and last month when it was time to pick costumes for ComicCon (which I think I also forgot to blog…crap) Henri REALLY wanted to wear the helmet and be a viking, but a quick search through the closets revealed that we didn’t have any viking clothes.  All we had even close to a viking vest (like Hiccup wears in the movie) was a gray zippered sweatshirt-style vest.  The kids dressed as Avengers instead but Henri had it stuck in his mind that that was his viking vest and he has worn it non-stop ever since.  He’s worn it to school on back-to-back days, he’s worn it over his fall jacket, he wears it around the house, and on more times than I can count I check on him at night to find that he’s put it on over his pjs and worn it to sleep.

(Something about a 3 year old with tousled sleep hair in footie-pjs, amirite?)

He stops strangers to point out his “viking vest”, but commented a few weeks ago how “it’s not a REAL viking vest, Mommy, because it has a zipper and REAL viking vests have buttons”.  Oh.  Right.  ‘Cus vikings didn’t have zippers.

I promised I’d make him a viking vest, and yesterday I did just that.  I took photos throughout so if you want to make one, you can too.

I used some fur fabric my neighbor gave me, a sheet of newspaper, a sharpie & a pair of scissors, plus a sharp large-eyed needle, black acrylic yarn and white cotton yarn.  The only other thing you need is a vest that fits your child (or you!).

I started by laying the vest on the paper and traced half of it.  I used my finger to push down then traced to know where the neckline in the middle lined up.

I knew I wanted to add some length to the bottom and the armhole so it would fit him longer, as well as lowering the neckline to a v-neck, so I made those changes on my template.

I cut it out and checked against the vest.

I decided I wanted to make the neckline more sloped so marked off the changes on the pattern…

…then cut it out and checked again.

I was happy with the shape so I traced it onto my fabric.  It’s hard to see, but I traced out the half-vest pattern, flipped it and traced again for the other front, then traced it back-to-back, flipped, for a piece to fit the back.  The only thing I didn’t realize is that the fur fabric had a direction to it in which the fur laid flat.  I tried to be as economical with the fabric as possible so didn’t have a choice, but you would probably rather make sure you’re lying the pieces with the fur running from up to down, like natural fur.

I cut the pieces out on the porch which was a great idea because there were bits of fur flying EVERYWHERE.  I used my fingers to fluff up and pick at all the edges to make sure I’d gotten as many stray cut bits as possible before bringing it into the house.

I used a sharp needle and black chunky acrylic yarn from a big-box store to work a blanket stitch edging around each piece.  I eyeballed it, placing the stitches roughly 0.5″ apart, and 0.5″ down into the fabric.

The simple edging really gave the pieces a finished, yet still “handmade by Vikings” look.  (In this light you can see my fur runs in the opposite direction from how the vest will be worn, oops!)

This is the inside of the pieces, for those who like that kinda thing.  🙂

I used the same black yarn to seam the two sides and the shoulders together.  I did something similar to mattress stitch, butting up the two pieces to be joined and catching a loop from each edge all the way along.

Almost done!

Inside shot.

For a finishing touch I used white worsted-weight cotton yarn (dishcloth cotton) and made large stitches across the joined pieces.  This is purely decorative, but makes it look like Vikings really made it! according to my 3 and 5 year olds, and I trust them.

This is Henri’s final costume- a green long-sleeved tee, brown cords, his new vest and the light-up plastic helmet.  I may make a Viking axe if I have time/remember by Halloween.

Henri the Brave!

Back view.

He thought he was dancing for me.  I just wanted to see the decorative stitches.

That’s one happy Viking!


4 Comments

useful skills

It’s a good thing I can crochet without looking, because I’m trying to watch last night’s episode of CSI:NY and so far its a silent episode! It’s like Buffy’s HUSH all over again, except this one seems to be sponsored by Green Day.

20121020-124309.jpg