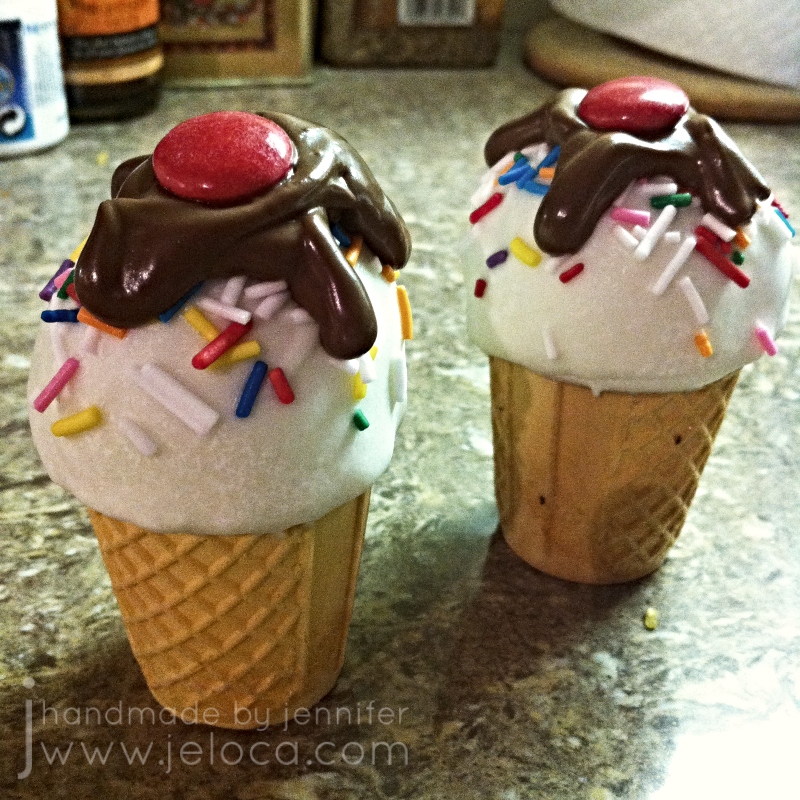
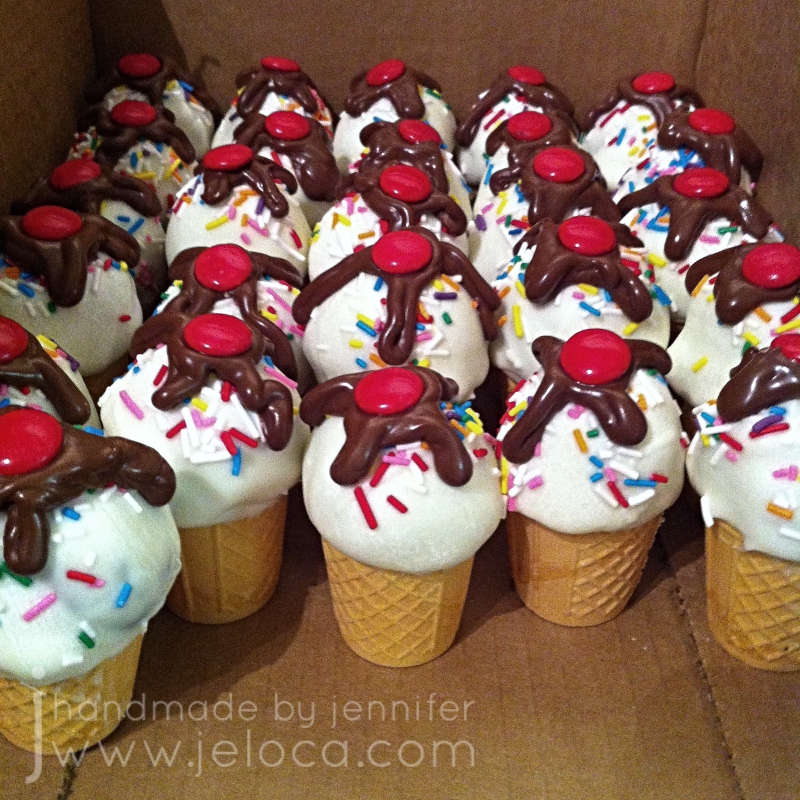
In honor of today being National Ice Cream Cake Day, here are some ice cream cones I made out of cake!
Cake pops are a great way to use up the extra cake bits you get from leveling or carving your cakes. I usually like to crumble the cakes into leftover icing, mix in sprinkles or peanut butter or some other add-in, then roll the mixture into balls and store in my freezer for future snacking.
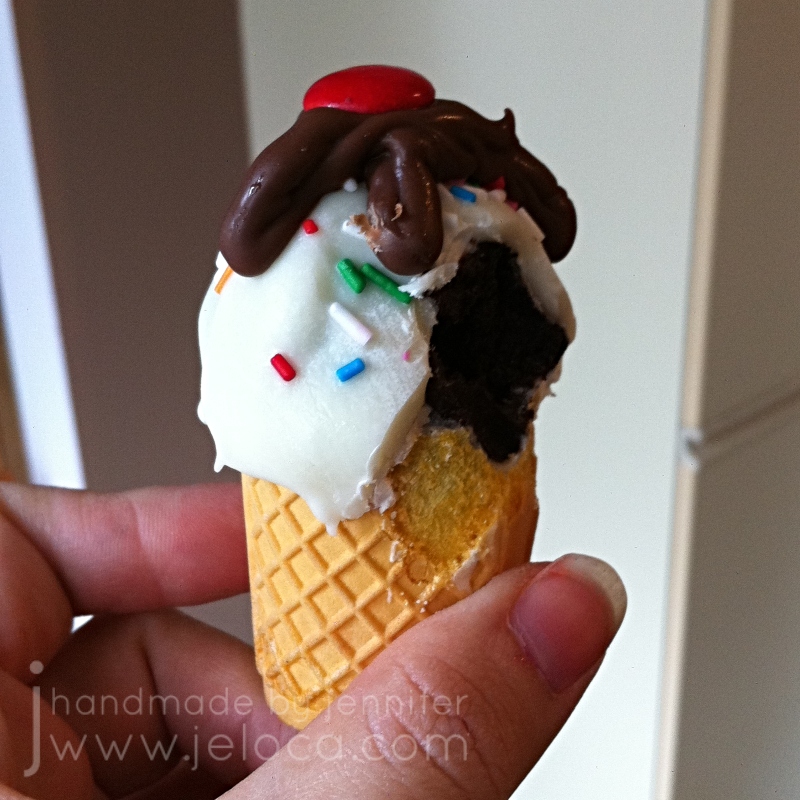
In this case I’d mixed chocolate cake with crushed Oreos and vanilla icing and pressed the resulting cake balls into mini ice cream cones.
The ice cream “shell” is white candy melts heated in the microwave. Dip the cone in a few times to build up a thicker layer then top with sprinkles while the final layer is still wet.
Brown candy melt “chocolate syrup” and a red Smarties “cherry” make the final touch to help sell the illusion!
In honor of my province’s provincial holiday today I’m re-sharing the fleur-de-lys pattern I published many, many years ago. The design was intended as a dishcloth or washcloth, but with a simple swap of yarn choice can easily be reworked as a blanket square or even a flag to share your Quebec pride.
The pattern comes with 3 fully charted sizes and can be purchased through Etsy here or through your Ravelry library here.
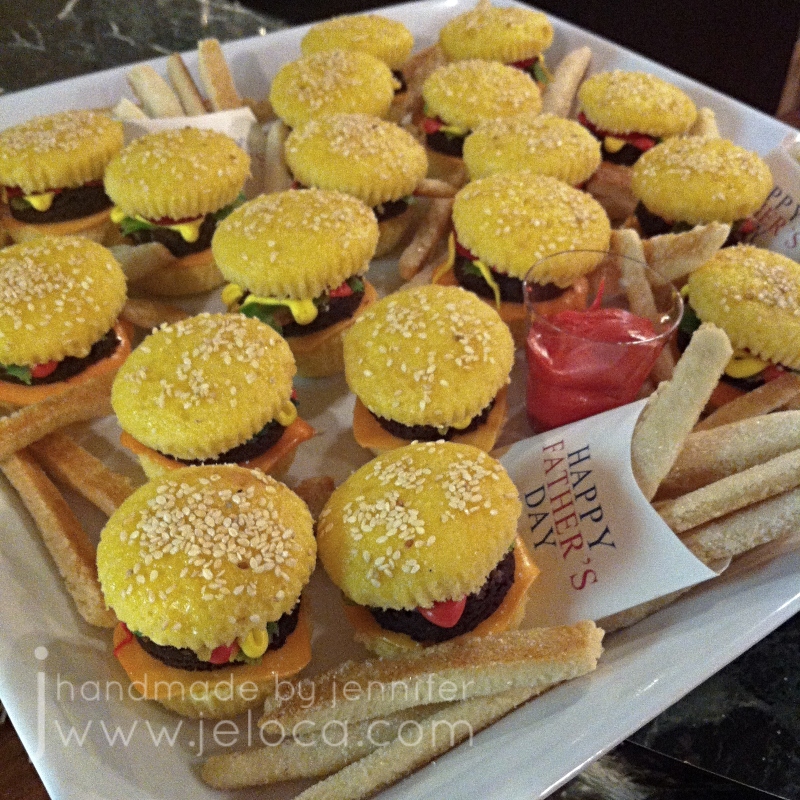
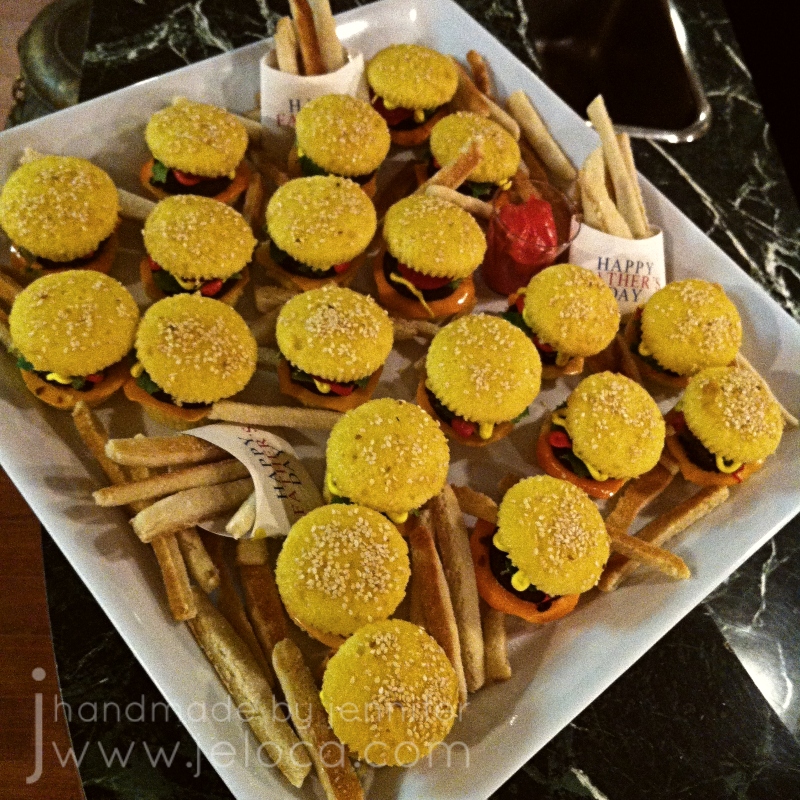
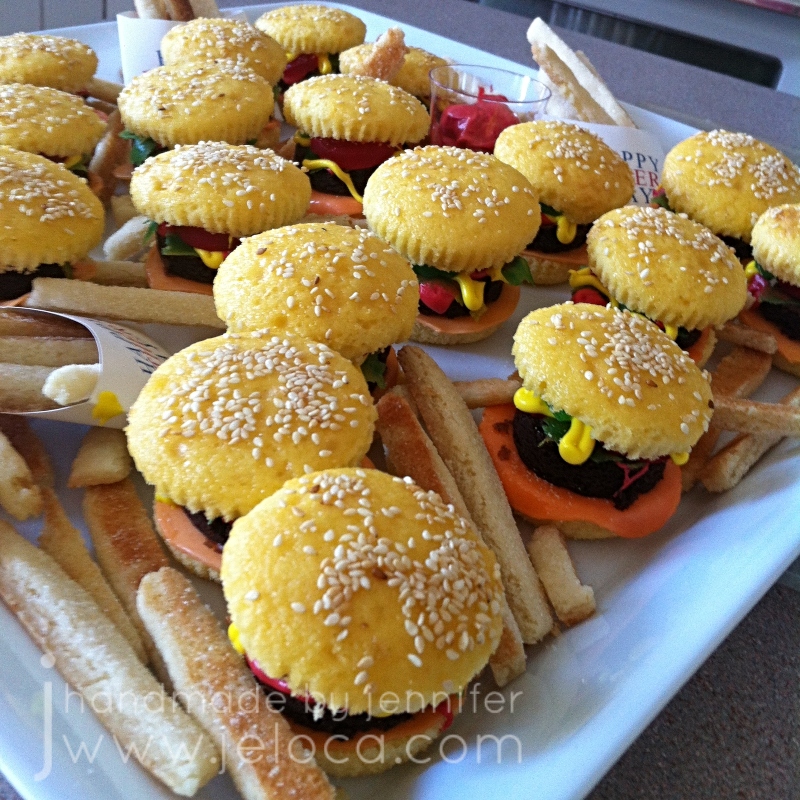
In today’s post I’m going to show you the super easy steps to make these yummy cake/brownie mini “sliders” that you can pair with sugar cookie “fries” for this adorable tromp l’oeuil dessert platter. While they’re a fun surprise for any occasion they work especially well for Father’s Day which happens to be tomorrow. Since they can be made with all store-bought supplies they can be whipped up last minute meaning you still have time to make them yourself!
These sweet treats have been around the internet for a LONG time, so this is by no means my idea. I actually got the idea from Bakerella’s blog back in 2009 and made my version pictured here for Father’s Day for my dad in 2014.
Angie’s original post is linked above, and she reissued it here with updated templates for other holidays and occasions including birthdays, Canada Day and the 4th of July.
Foodstuffs you will need:
vanilla cupcakes – “buns”
brownies – “burgers”
sesame seeds
sugar cookie mix – “fries”
Toppings: (all optional as desired)
icing – “ketchup” & “mustard”
granulated sugar – “salt”
orange starburst (or other taffy-type candy) – “cheese slices”
red gummy candy – “tomato slices”
green gummy candy – “pickle slices”
green candy tape/roll up – “lettuce”
Other candies to make any other desired burger toppings
optional: condiment cups for “ketchup” and “mustard” dipping
I forgot to take pics of the fries-making process, but you can find the full instructions at the Bakerella blog post. Basically you bake vanilla or sugar cookies (I used Betty Crocker Sugar Cookie mix) and bake the cookies as wide rectangles which you slice into “french fry” strips once baked and then toss in or sprinkle with granulated sugar to simulate salt crystals.
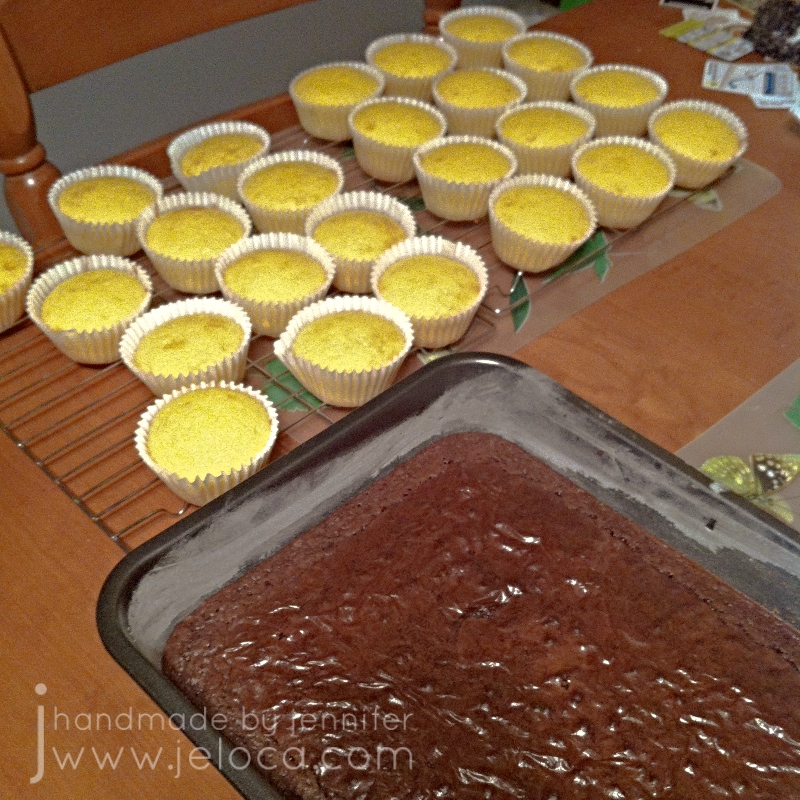
Most versions of the faux sliders start with vanilla cupcakes for the buns and brownies for the burgers.
I baked mine using store-bought box mix but you can go an even easier route and purchase ready-made plain cupcakes and brownies to skip this baking step completely. Slice all cupcakes in half horizontally and then use a cookie cutter that best matches the bun diameter to cut burger “patties” from the brownies.
For the burger toppings I’d basically wandered the aisles at my local bulk store looking for candies that could pull double-duty as other foods.
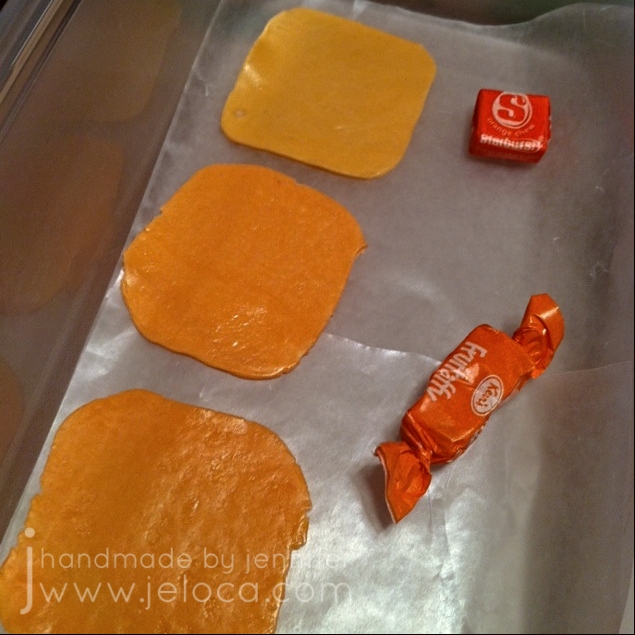
I tested out a few orange taffy-type candies for the cheese slice and in the end went with orange Starburst. Laffy Taffy, Airheads or any other orange taffy that can be rolled flat would also work well. I found it easiest to squish the candy flat and then roll it out between two sheets of parchment paper. You can also use wax paper if necessary, as I did here for storing the candies and keeping the layers from sticking together.
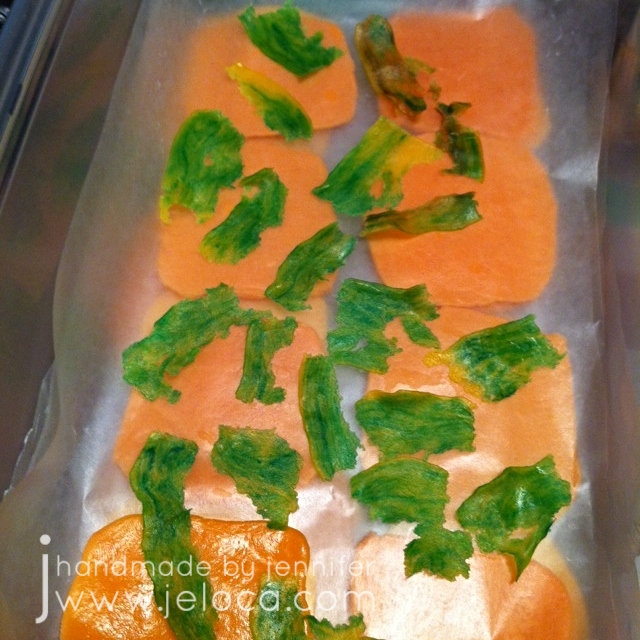
I used the green portion from rainbow Fruit by the Foot to simulate lettuce by tearing it into jagged strips. If you can find an all-green version that would be even better, though my kids didn’t mind eating the other colors that were left over after I harvested all the green bits!
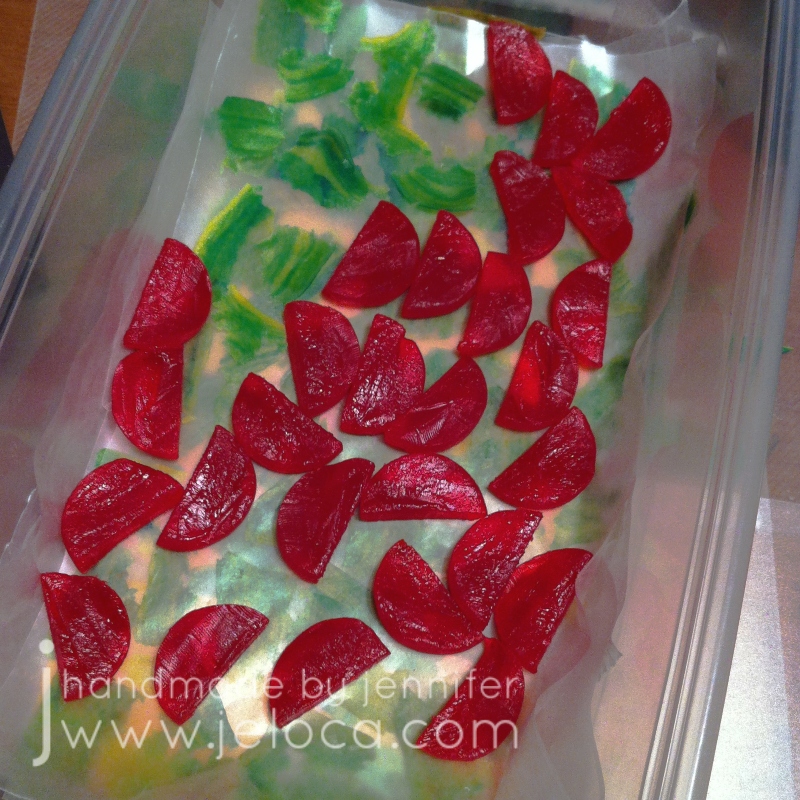
I used red gummy disks for tomato slices, first cutting them in half widthwise to get thinner discs, then I cut those in half again as a full circle of red candy would be a bit much with all the other candy.
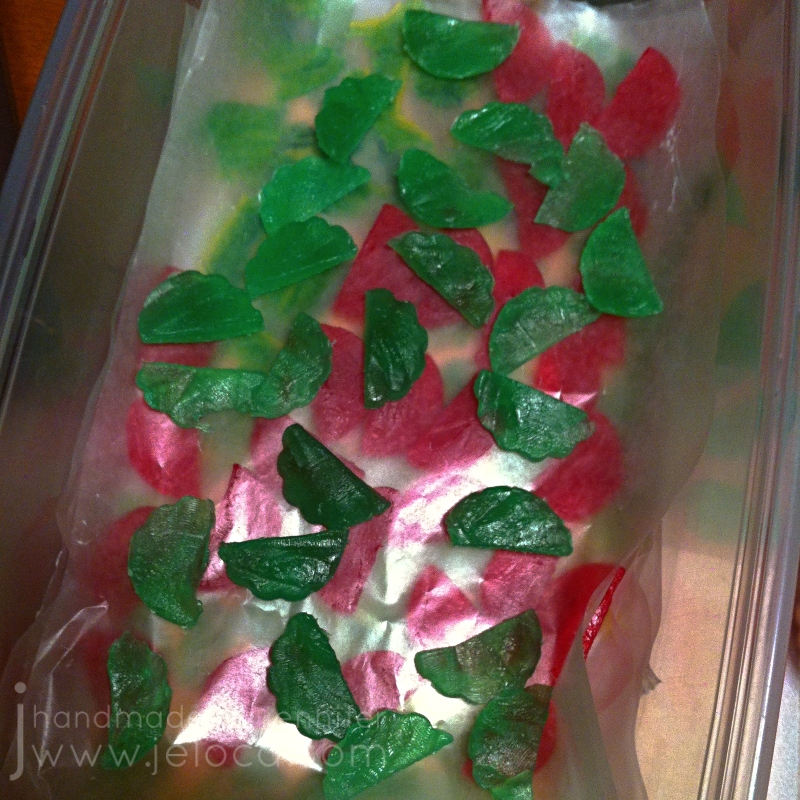
My store didn’t have plain green gummy rounds to use for pickle slices, so I cut up some mint-leaf shaped ones instead.
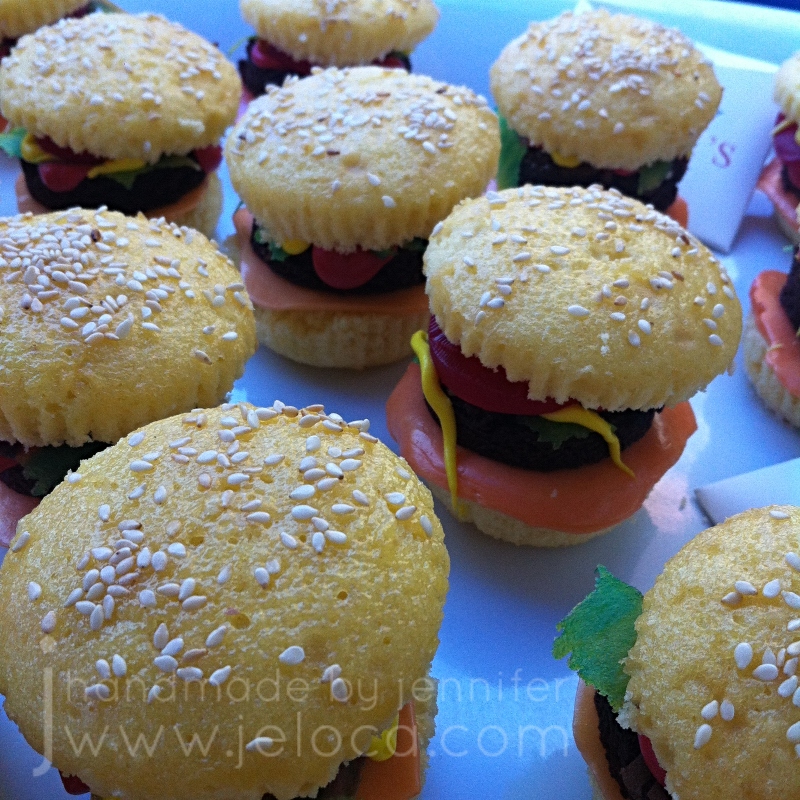
Once you have all your toppings ready, tint some icing red and yellow to simulate ketchup and mustard, and then assemble your burgers as desired.
Mine had a slice of “cheese” on the lower “bun”, then the patty, and then tomatos, pickles and lettuce, all arranged to slightly overlap the sides so they’d be visible.
A drizzle of “ketchup” and “mustard” was the last step before placing the top half of the “bun” on top.
To really finish the look brush the tops of the cupcakes with a bit of water and then sprinkle on some sesame seeds.
Arrange them on a platter and sprinkle the faux fries around. If desired you can add condiment cups or little puddles of “ketchup” and “mustard” for dipping the fries into. These were as much fun to eat as they were to make and all these years later Henri still keeps asking me to make them again, which is the real testament to how much of a hit these were!
This post may contain affiliate links. This means I might make a small commission on purchases made through the links, at no cost to you.
Today is World Wide Knit in Public Day! I’ve usually got knitting out in the wild with me, but it felt especially required on today of all days.
I brought my current “purse project” with me to sound check before the Becket Players’ performance at the West Island Relay for Life event tonight. Didn’t get much knitting done but we did have a successful set up. We’ll be playing some great music for a great cause so if you’ll be around the Rive Boisée area come on by and check it out!
Whenever I would use a peelable base coat (like ÜNT’s Ready For Takeoff) I’d be lucky if my manicure lasted 8 hours, whereas with a regular basecoat I can get at least 2 weeks. I’d go about doing normal things and suddenly discover a thumbnail peelie in my dishes or pinky nail peelie in my sock. It was super frustrating so I looked it up and it turns out it wasn’t just me! While the ease of removal made it perfect for nail polish bloggers and reviewers, many people were complaining about the base not “sticking” long enough to make it worth it for regular use.
I’d written to my place of purchase and their reply was:
Your complaint isn’t unique. I have heard that some people’s problem with ÜNT’s peel off base coat is “that it works too well”. However, we can’t seem to discern as to why some people have such success with it, and others don’t.
The conclusion the nail community has come to is that personal biological factors can affect a product’s success. Meaning, your body’s natural oils and your nail’s health may be the cause of a polishes’ or base coat’s success. The nail is often considered an impermeable barrier, but this is not true. In fact, it is much more permeable than the skin, and the composition of the nail includes 7–12% water.
Following that I wrote to ÜNT themselves but their replies were unsatisfactory and seemed like a copy/paste:
We are sorry to hear that our product is not 100% satisfactory. I would like to further explain several possible reasons for this to happen:
1. READY FOR TAKEOFF or nail lacquer did not dry completely
2. Coat of READY FOR TAKEOFF not thick enough (if READY FOR TAKEOFF is applied very thin, it takes more effort to remove. We suggest applying 3-4 thin coats.)
3. If READY FOR TAKEOFF is applied unevenly, some parts of it may dry quicker than others, thus causing the issue.
So in the end I decided to try and figure out my own solution. I know the exact ÜNT product I have is no longer available but they have a different peelable line and Holo Taco has its own Peely Base and I really wanted to make these products (and my existing UNT bottles) work for me.
After a bit of trial and error (note- do NOT try filing down the surface of your nails to make the base coat grip better!) I found a solution that actually made the product usable, and in honor of today being Nail Polish Day, I’m sharing it publicly. Bonus: it’s something I bet you already own!
Another base coat!
I use Orly’s Bonder as it’s what I have on hand but any clear base coat will work. (I don’t recommend a creamy base coat like a smoothing base for this).
All you need to do is apply one thin coat of the regular base BEFORE applying the recommended 2-3 coats of the peelable polish. The peelable polish will grip better to the base than to your nail surface, and the manicure will last much longer. It’s a really simple trick but it helps to make the peelable products actually work for those of us who have a hard time with them.
This post may contain affiliate links. This means I might make a small commission on purchases made through the links, at no cost to you.