

Two weeks ago I shared the cake I made for my sister’s bridal shower. As the saying goes, first comes love, then comes marriage, then comes Mommy with the baby carriage.
Sure enough, about a year later I got to make a baby shower cake for my first niece*!
This post isn’t going to be a full walkthrough, but rather a look at the process for designing and making a baby shower cake. As explained in my “how to bake a cake” post, it’s important to do as much prep as you can in advance. Not only do cakes need time to cool fully before you start to decorate, but some decor pieces need time to dry or set up.
My cakes always start with a sketch and some research. In this case I knew the number of people it would be serving, and that it was for a baby girl, but the rest was up to me. I decided on a layered cake with some kind of topper, and after looking at sample cakes online I vetoed a crib in favor of a baby on top of the cake.
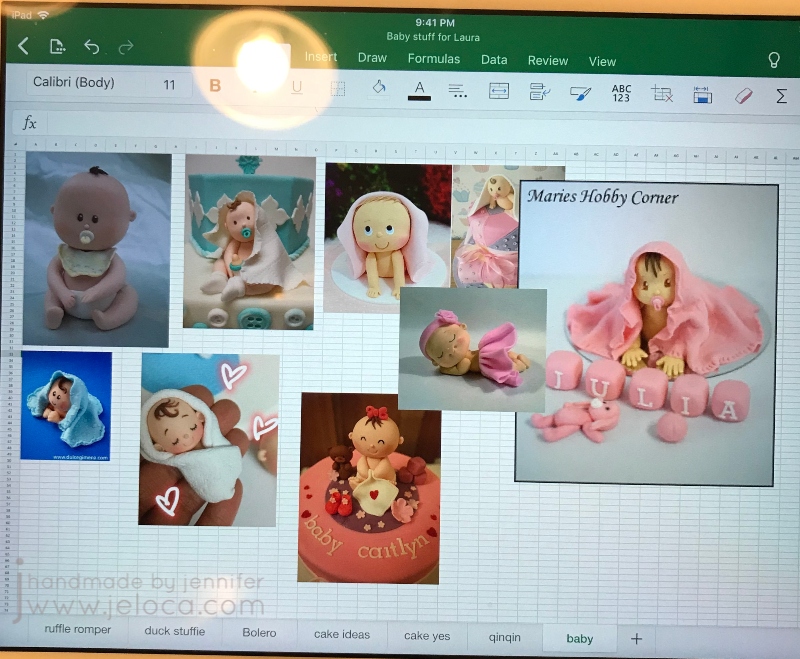
I always make an Excel file with inspiration samples. The goal is not to straight copy anything you find, but to have a sense of what’s possible. At the time I didn’t yet have a baby mold so since I’d be hand-sculpting I collected an assortment of toppers that looked like something I could do.
I’d enjoyed texturing the fondant into ribbons for Laura’s bridal shower cake and so to tie the two cakes together I chose to make a sort of flower shape by flanging out the edges of pre-cut circles. The only thing I had to decide was if I’d color the edges or the centers of the flowers. I also had to make the fondant topper so it would have time to solidify before setting atop the cake.
The baby shower was on a Saturday and I still had residual exhaustion from finishing her last cake at 5am the morning of her party, so I got started early – on Wednesday.
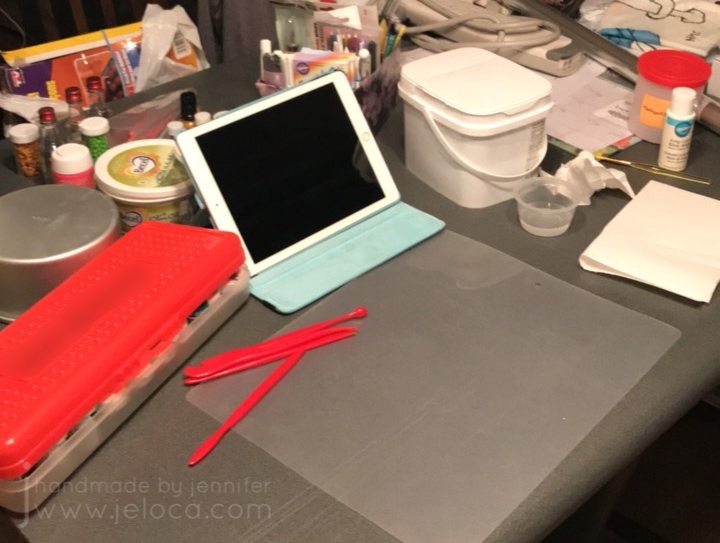
I always like to assemble my supplies before I start. There’s a tub of white fondant, fondant shaping tools, my organized container of tools, paintbrushes and edible markers, my collection of gel colors, water, mini vodka bottles (for fondant painting), paper towels for blotting, and most importantly – the cake tin I’d be using for the top tier (so I could scale my topper appropriately. Plus my iPad for both inspiration and entertainment while working.

To make the flowers I used my fondant roller and silicone mat to roll out some fondant to about 2mm thick. I used a 1.5″ circle cutter to cut out 3 circles for each flower sample and flared out the edges by rolling over them with a ball tool on a foam mat. Using a food-only paintbrush and some pink edible color dust, I brushed the center of 3 of the disks and the edges of the other 3, and then loosely squished each circle with my fingers and pressed them together. I much preferred the pink-center version, so now I was able to make a proper sketch and decide on my topper (as I still wasn’t sure if I wanted a seated figure or the laying-down-with-blanket style.

A sketch really helps to visualize your plans. Once I saw how busy the cake would look with the lower tier covered in flowers I decided the blanket baby would be too much.
Next was to make the baby. In my research I found that the creator of the first baby in my inspo pic had a full YouTube tutorial available. Don’t shy away from tutorials, that’s what they’re there for! I keep up this blog specifically so my tutorials can help others, and to share what I’ve found. Here is the designer’s website with instructions on making the baby boy, and the video I followed for the baby girl:

How could I not recommend it? Look how cute it turned out!

Seriously, I love her!! My only mistake was in laying the head down while I worked on the body. Unfortunately it flattened out and I didn’t want to mess up the face by trying to round it out again. So my figure looks great from the front but her head is clearly a little squished from a side view – oops! I’d recommend perhaps laying the head in a bowl of icing sugar, flour or corn starch to hold it without applying pressure to any of the sides.
On the Thursday night I baked 2 cakes, and prepped them to cool as per my post linked above. Then Friday night was for putting it all together.

First I covered each tier in fondant – white for the flower base and a pink matching the baby diaper for the upper tier.

Knowing how heavy the solid-fondant baby figure was, I inserted a wide straw (ones for slushies are perfect) and cut it to be flush with the top tier. This would provide support and hold the weight of the figure so the cakes wouldn’t compress.

Next was to make more flowers. As for my sample, I rolled out a workable section of fondant, cut a bunch of circles, added some color to the center then squished the sides in. Be careful to not roll out more than you can handle at a time, so they don’t harden before you can flare the edges and squish them into shape. The flowers were applied to the cake with a bit of water on the cake and the adjacent petals. If necessary hold into place for a few seconds until it stays. Cover the entire base.

Remember to look at your cake from different angles. I hadn’t – I remained seated the entire time – and so I didn’t realize until I was looking at it later from above that there was a gap along the edge of the top cake where you could see the unfinished edge. Had I noticed in time I’d have pushed the top edge of petals up higher to fully encircle the top tier.

I had a few extra flowers in the end so I placed them around the baby figure, though that’s completely optional.

And there’s the finished cake! I absolutely love how it turned out. The flowers/petals give a great visual payoff that belies how EASY they are to make. Looks great and easy to customize with your choice of colors – I highly recommend!

And just as for her bridal shower cake, here’s a bonus pic of the mom-to-be with her baby shower cake. ❤

*whose arrival was followed immediately after – as in, less than 24 hours later!! – by my second niece! ❤


