

Did you know that February 21st is “Card Reading Day”? According to Checkiday.com this is a day for reading and enjoying cards that you’ve received over the years, that you’ve held on to for sentimental reasons. Here’s a quick and easy card project you can make with your kids to give others something they can hold on to and re-read on future Card Reading days.
To make a talking greeting card you will need:
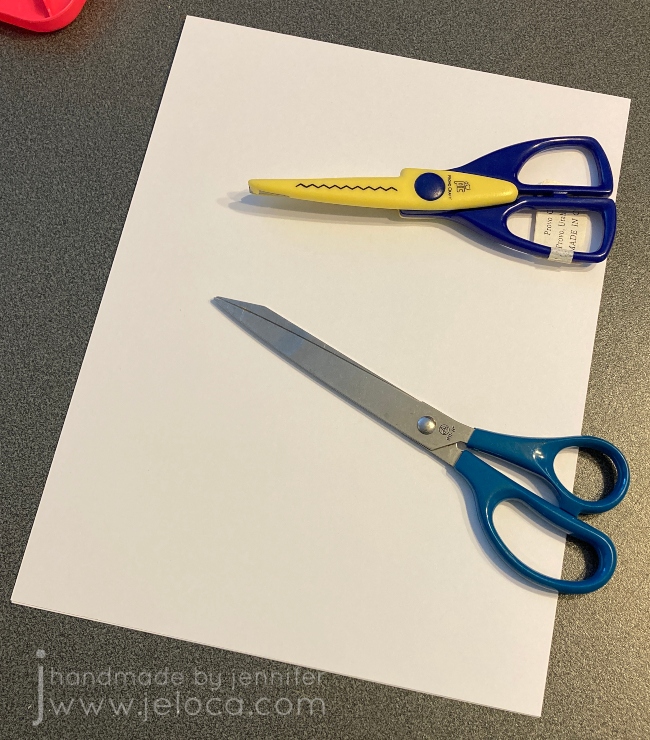
- paper or cardstock
- scissors (plain or with a creative edge)
- bone folder (optional)
- pencil
- supplies of choice for decorating (markers, colored pencil, construction paper, glue, etc)
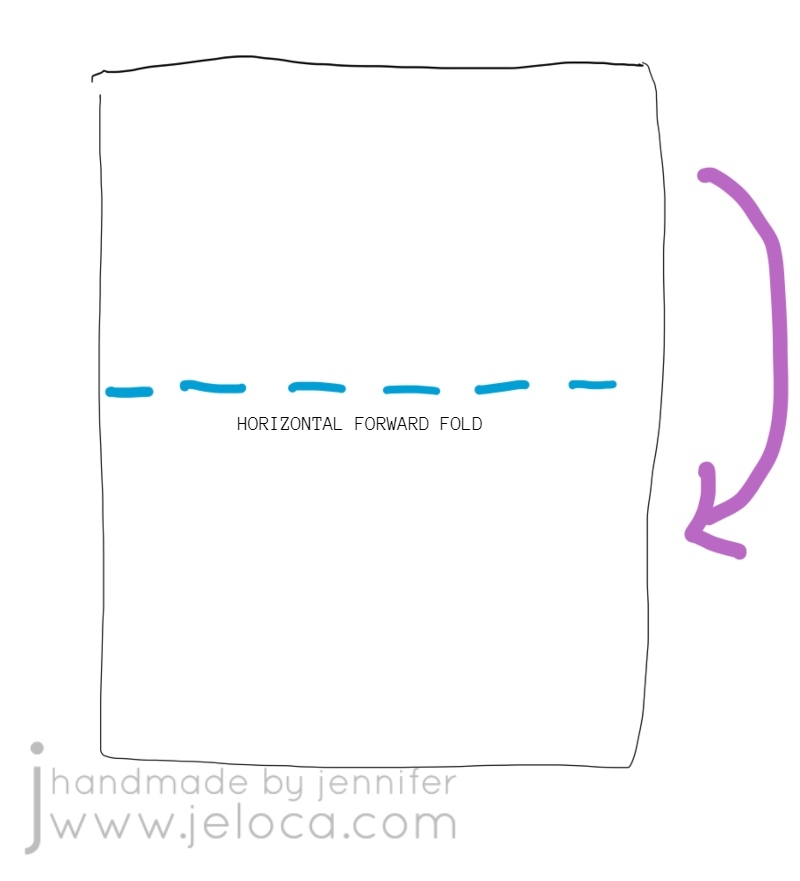
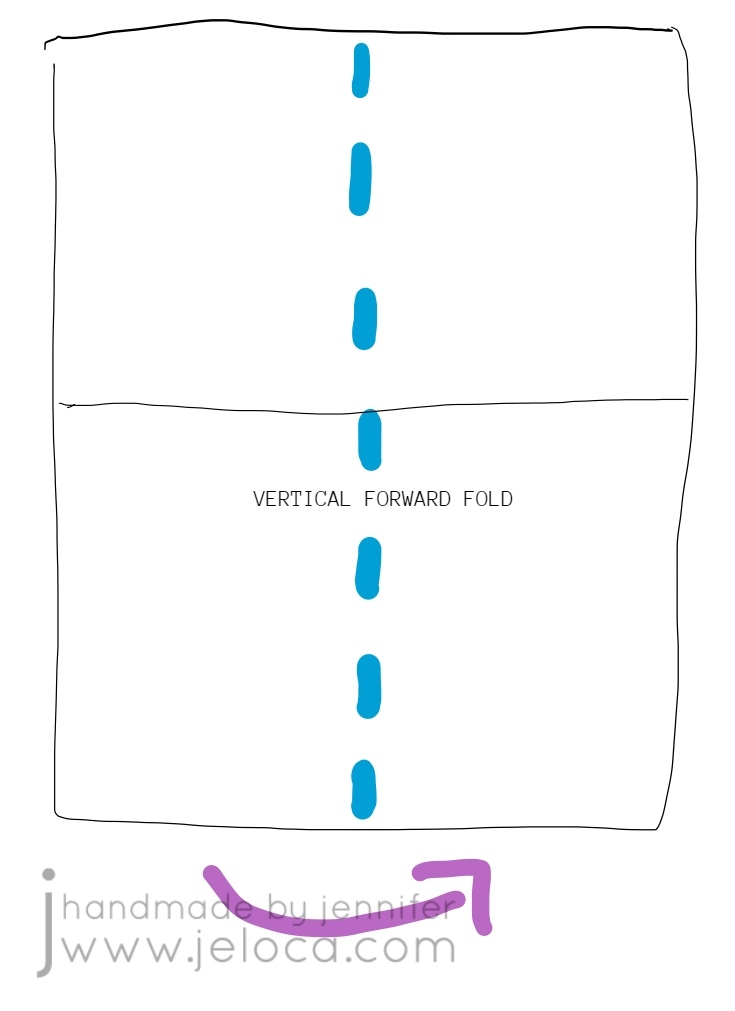
STEP 1- with your paper placed vertically in front of you (taller than wider), fold the top edge down to meet the bottom edge, then press fold flat
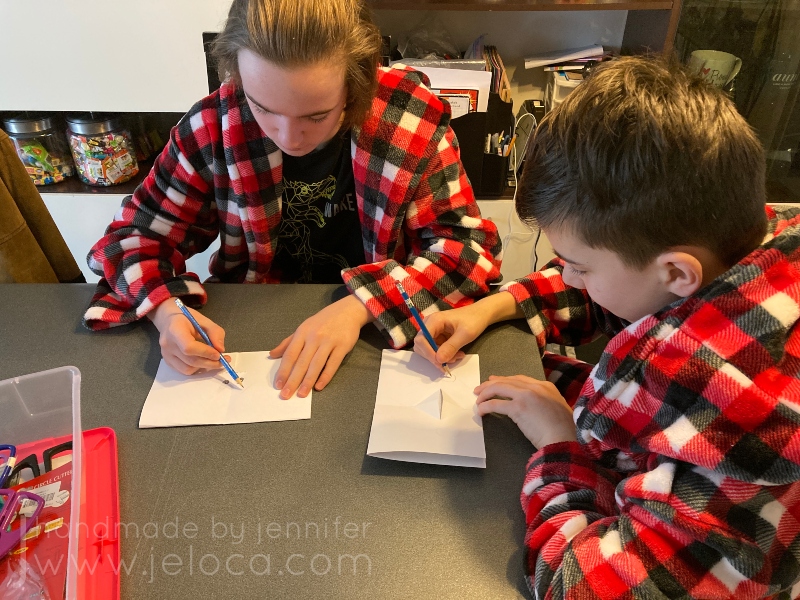
My kids decided to try out this project, so I talked them through it while making my sample and let them have full creative control over their own.
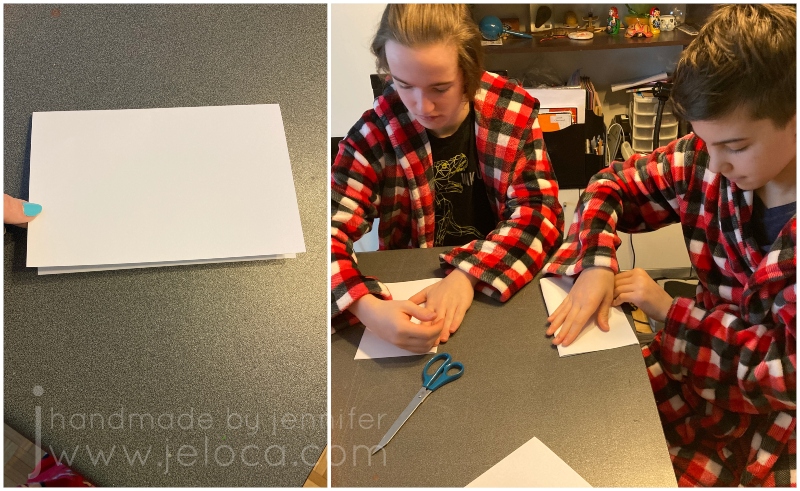
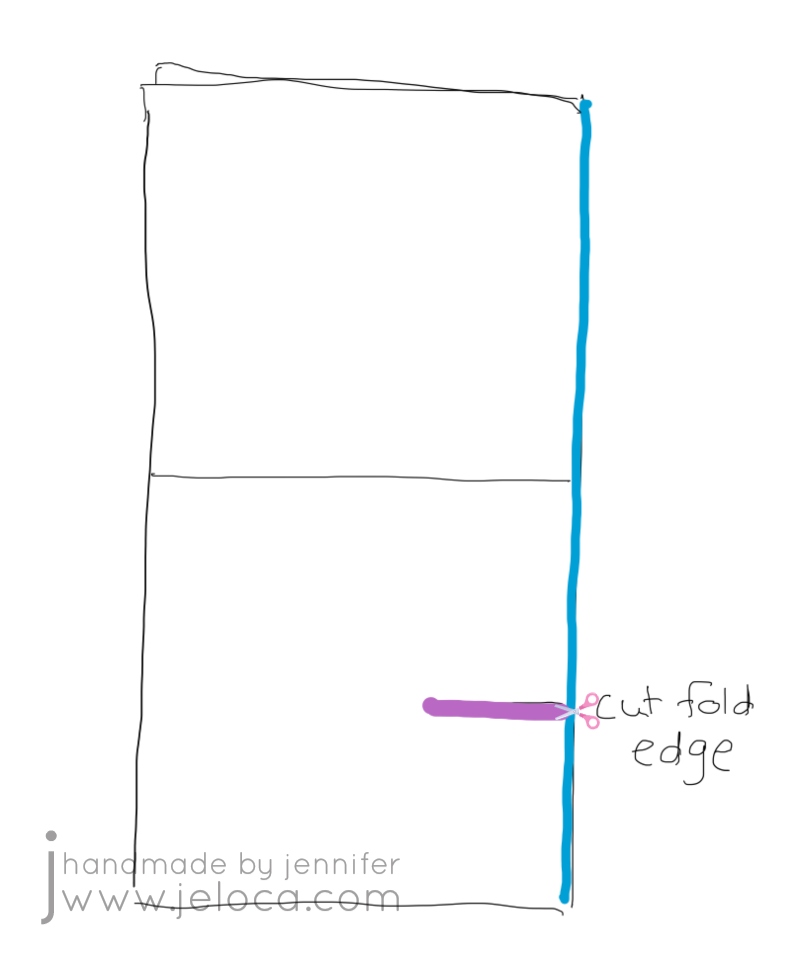
STEP 2- unfold your paper and this time fold it vertically, so the left edge goes behind and under the right edge.
I’d first learned this card at an art class when I was a bit younger than my boys are now, so it was cool to be teaching it to them now, and passing it on.

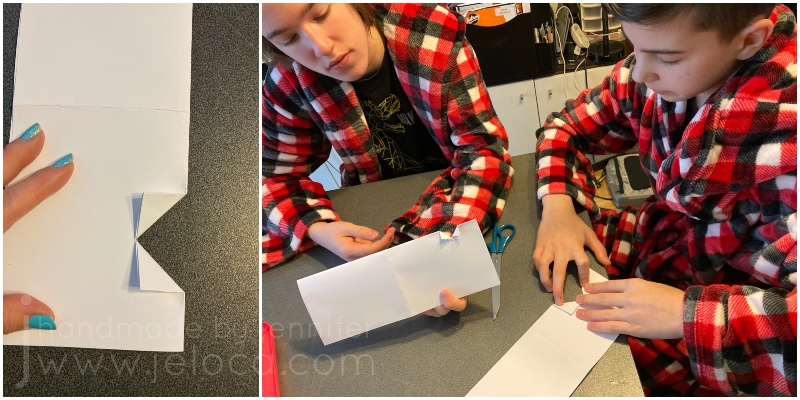
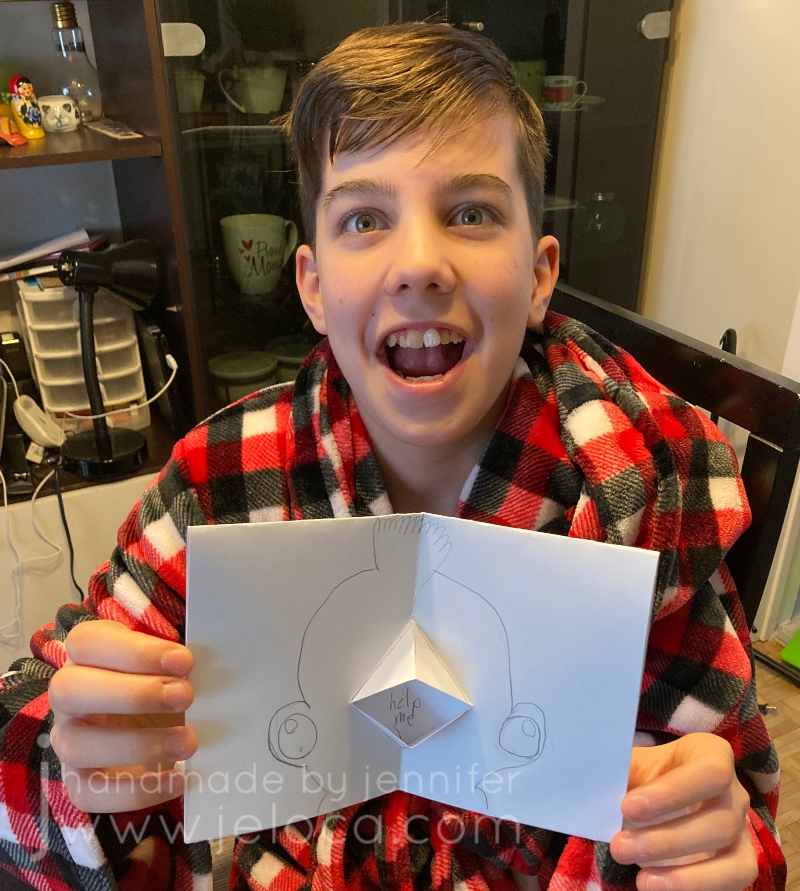
STEP 3- orient the card so the fold is on the right. Figure out where you want the mouth to be and make a straight cut.
Your mouth can be as high or low on the card as you would like, but remember that you will be folding the edges on the diagonal, so if you want to place it closer to the upper or lower edges, you will need to make your cut shorter. (So you don’t surpass the upper or lower edge of the inner card face – this will become clearer after the next step).
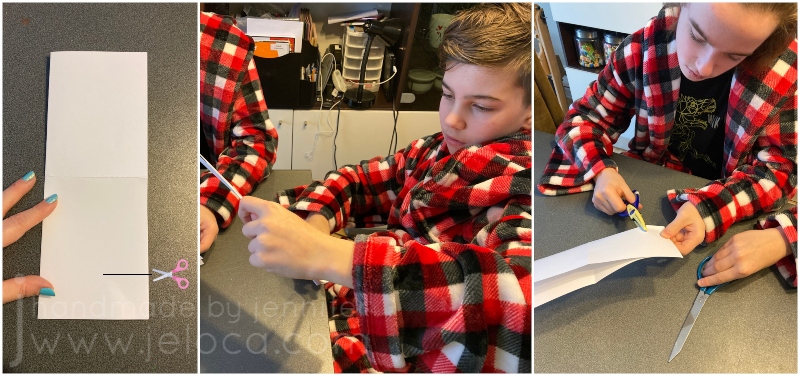
Henri and I used regular scissors for a straight cut, and Jakob chose ones with a pinking blade to get a zigzag edge to his mouth.
STEP 4- fold either side of the cut edges up, and press firmly. Repeat the same folds to the other side. If you think of the mouth as a bird’s beak, you are folding at the beak’s outer edges.
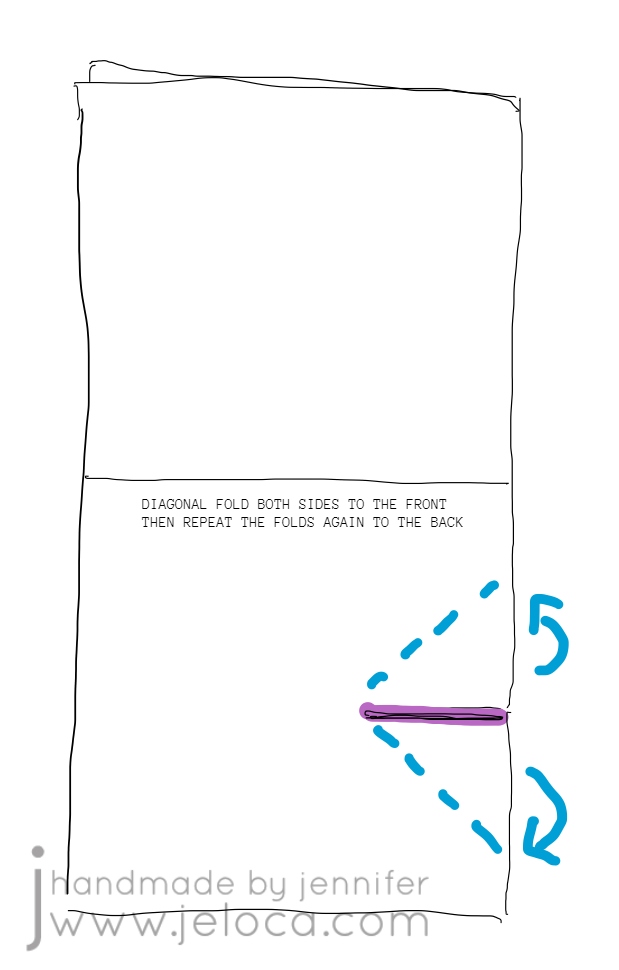
Our examples are shown with the folds at roughly 45 degrees but you can get creative with this. With a shorter cut you can fold at 45 degrees for a smaller mouth or you can fold at a narrower angle for a bigger mouth (with a small opening).
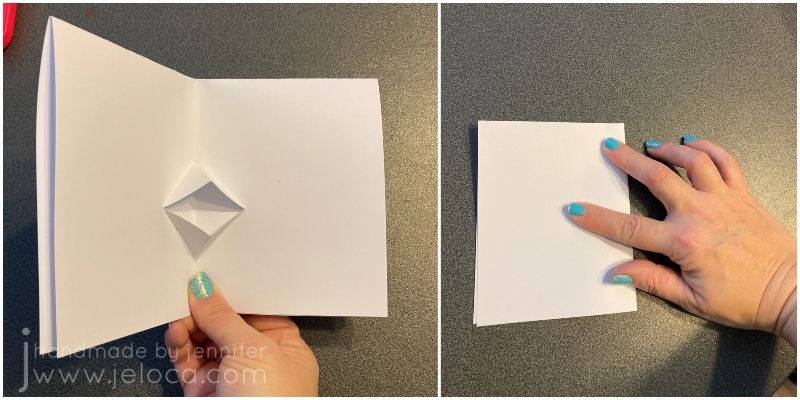
STEP 5- once you have folded the cut edges to both sides of the card, smooth them flat then fold the top half of the card down to the back.
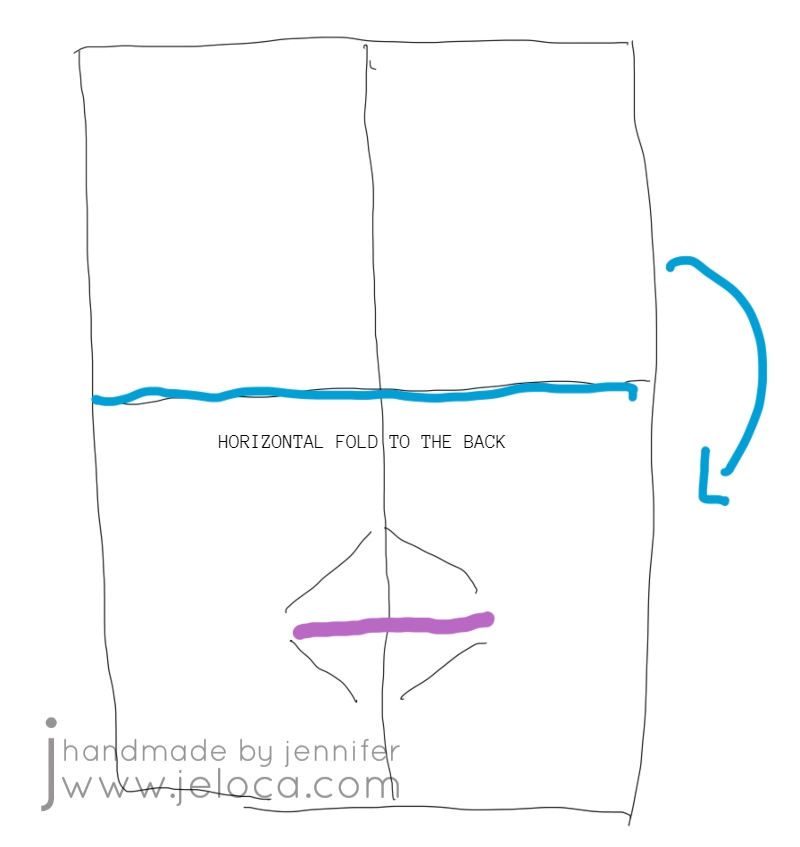
This puts the 2 solid faces on the outside for the front and back of the card and the mouth on the inside.
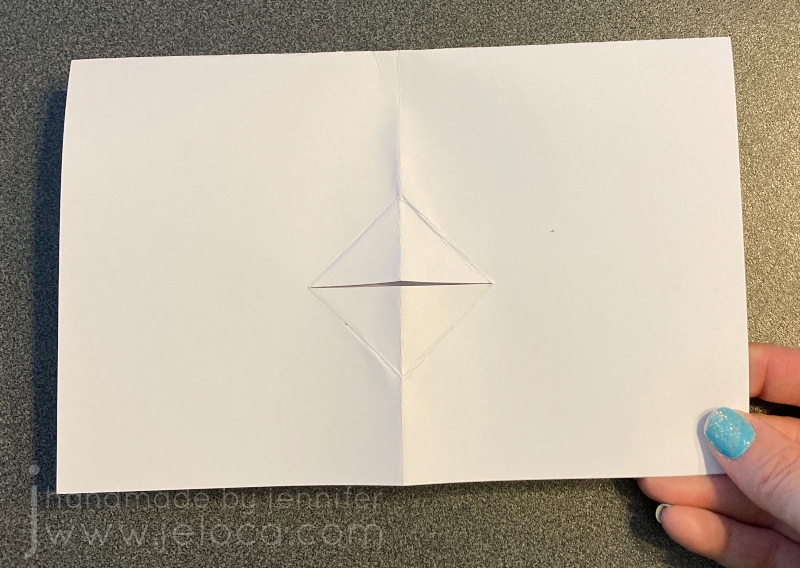
STEP 6- use your fingers to tuck the mouth/beak folds outwards while keeping the card folding inwards. Then press the card flat and smooth over it a few times, to “set” that fold.
This is the mouth that will open and close as you open and close the card, making it look like your card is “talking”!
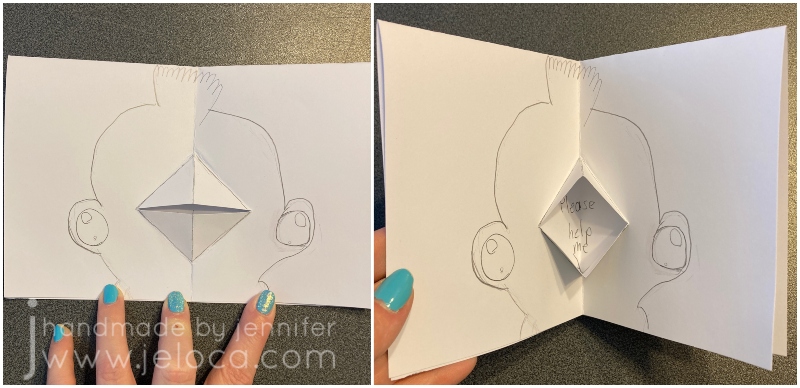
STEP 7- the final step is to use a pencil to lightly trace the inside mouth corners to mark off the boundaries of where you can put your “spoken” message.
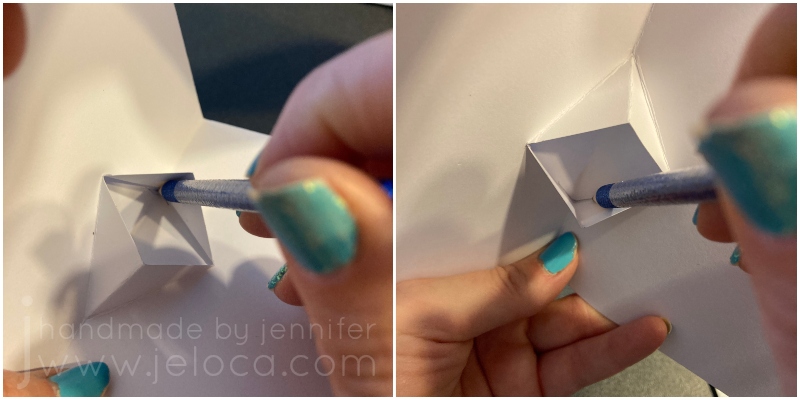
You want to use a pencil for two reasons: 1) a pen or marker might bleed through your paper to the outside faces of the card, and 2) you can erase the border after creating your message, for a cleaner look.
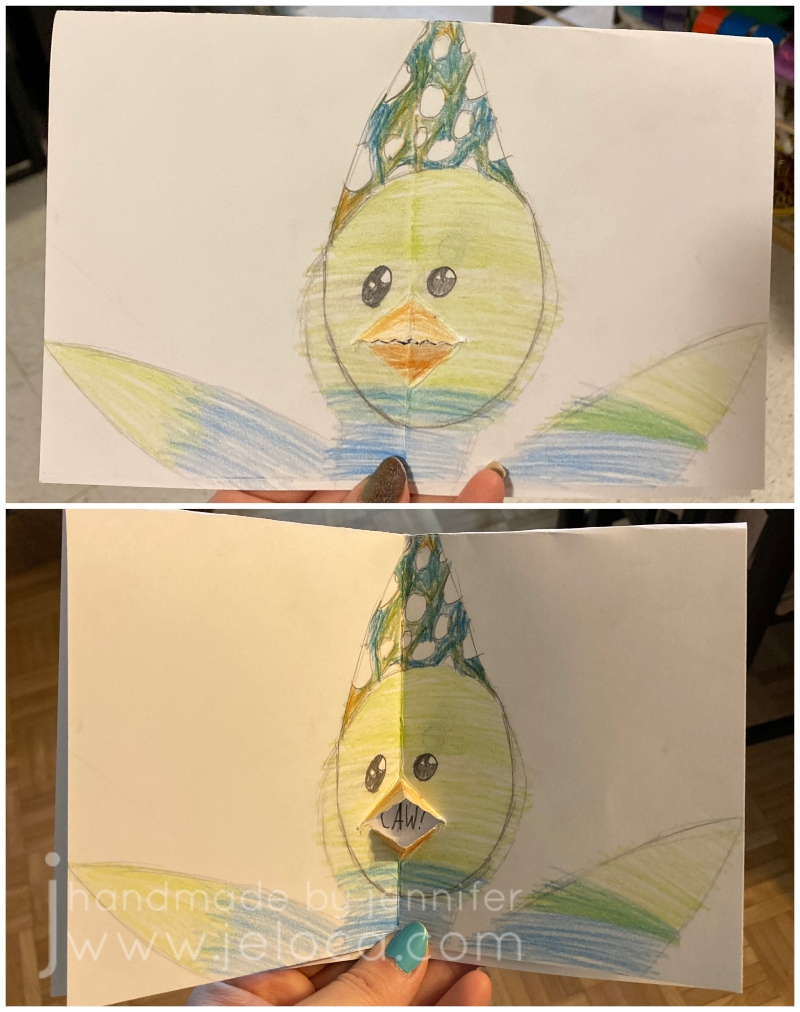
From this point on you can decorate the card however you like!
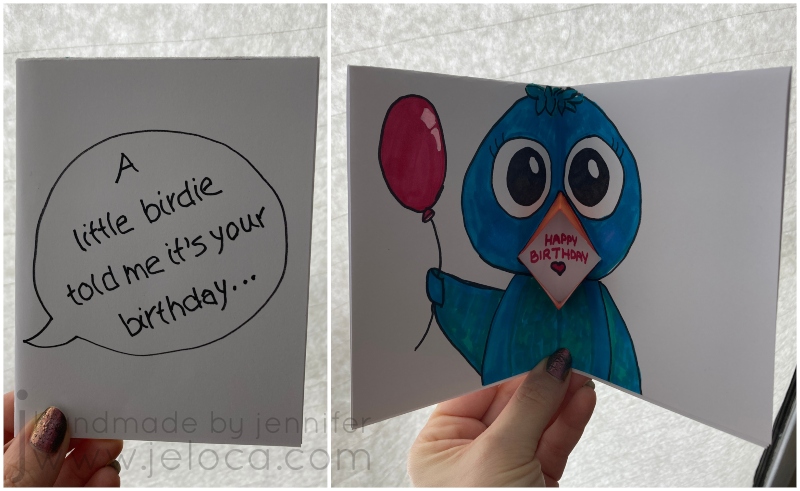
We all ended up taking inspiration from the mouth looking like a beak, and created bird-themed cards.
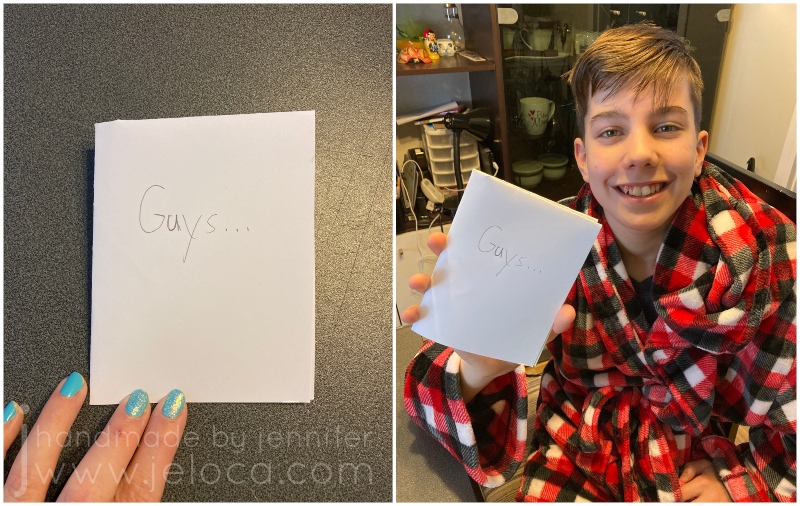
Jakob and I went for sweet birthday messages…
…while Henri went a bit rogue!
Reinforcing how well he takes after his punny mom, Jakob made a cute BIRD-day card.
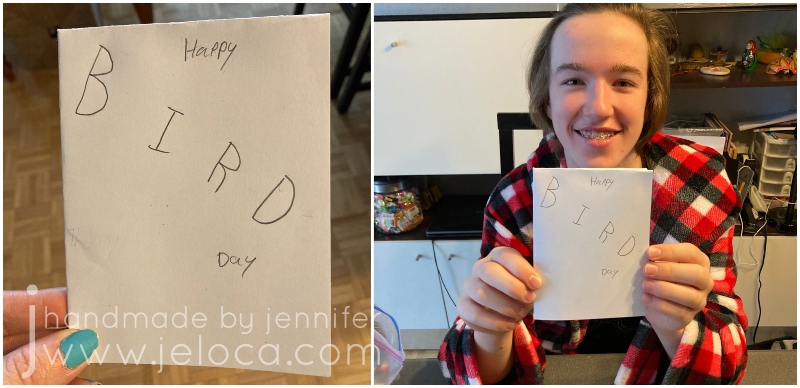
I think it’s really TWEET!
He was so proud he just had to CROW about it. (Ok I’ll stop)

I went for a similar theme with mine.
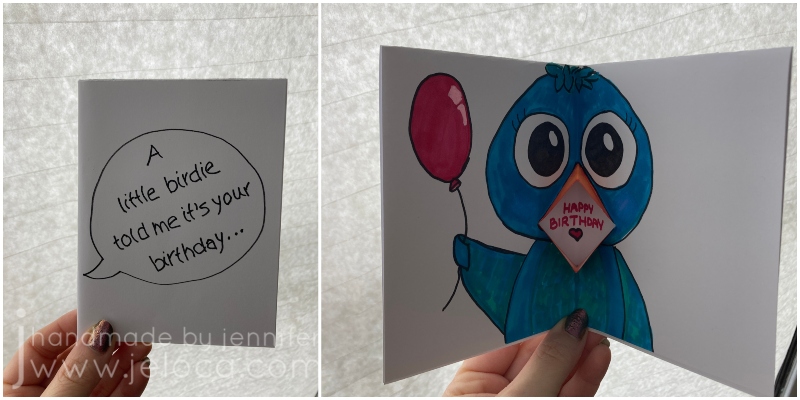
Because the inside of the card isn’t visible (except for where the message is) you can use alcohol markers or other media that might bleed through your paper. You can avoid the message area or glue in a clean bit of white paper after decorating the rest of the card, enabling you to get as creative as you’d like and not be limited to dry media.
I’m so glad I got to pass on this easy card-making method. I hope you (or your kids) make some cute, creative cards that can be someone’s sentimental memory to look at fondly in the future. ❤


