

Three-years ago today my baby sister Laura got married. Since I never shared the cake I’d made for her bridal shower, here’s a full step-by-step tutorial on how to make your own Barbie/Fashion Doll wedding dress cake!
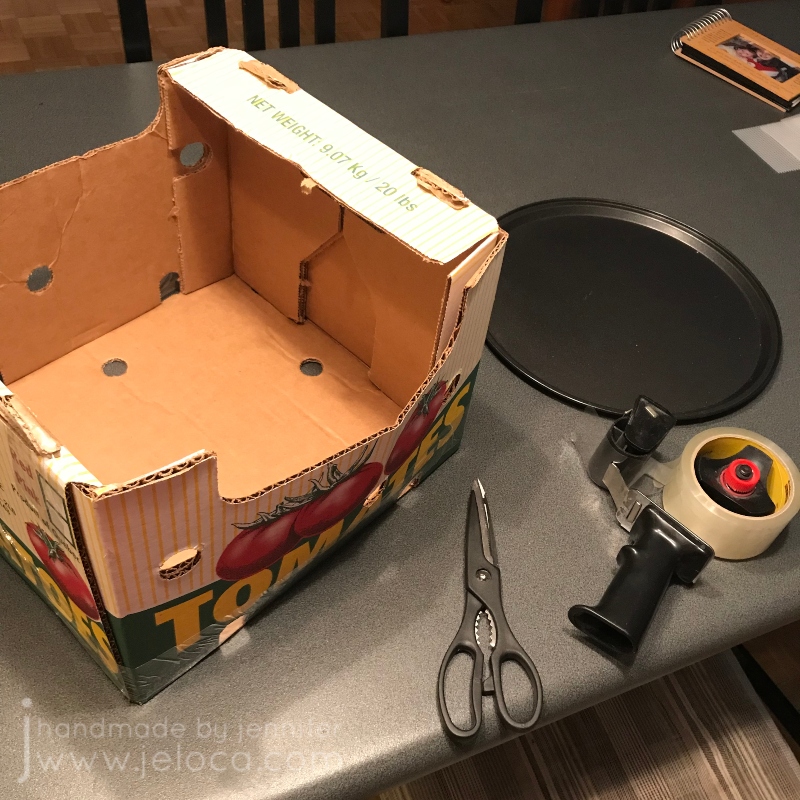
One important step that often gets overlooked is transport. As I’d be driving the cake to the party, before even starting to bake I had to make sure I had a way to bring the cake with me safely. First I selected the platter I wanted to use – in this case a pizza oven tray – and made sure I had a box that fit. This crate saved from a Costco run worked perfectly. I used scissors to cut one of the sides so I could flatten it and slide the cake in, and the packing tape was there to re-tape the box again for the ride.
Once I knew I had a way to get the cake to the party I was able to plan the cake itself. My mom and I had spent an afternoon looking for a brunette Barbie/generic “Fashion Doll” that would resemble my sister. Knowing the doll’s height allowed me to plan how many cakes I’d need to bake. I used a Wilton “Wonder Mold” dress pan to bake a vanilla cake and added height with an additional chocolate cake baked in a pan that matched the width of the dress mold.
Note- as this is a very picture-heavy post I tried to group as many together as possible. You can click on any image to view it larger if desired.
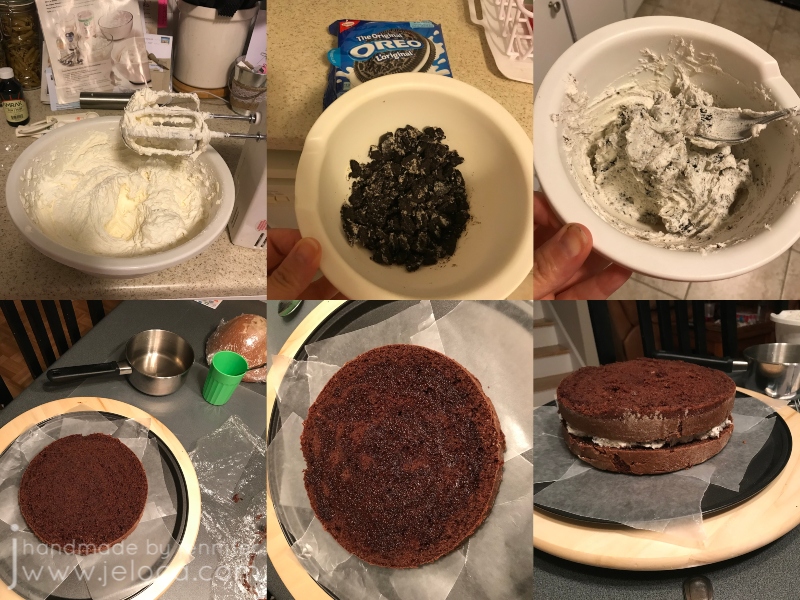
As explained in my “How to bake a cake” post, I always bake a few days in advance. Optional: make a simple syrup by boiling together an equal amount of white sugar and water and set that aside to cool completely. While it’s cooling prepare a few batches of buttercream icing using your favorite recipe. I used Wilton’s. You can flavor them as you like; in my case most of it was left plain but I took out enough to fill the chocolate cake and mixed in crushed Oreo cookies to make an Oreo icing. After the syrup is fully cooled, tort and fill each cake (I like using my favorite cake leveling helper) adding a drizzle of syrup to the layers to keep the cake moist until the party. For mine, the chocolate cake was split into two layers with the Oreo icing in between, and the vanilla cake was split into three with the plain vanilla icing. Don’t forget to “glue” your cake to your platter of choice with a dollop of icing.

You can see the significant height difference achieved by torting & filling the cakes!
Once the cake base was ready I used watercolor pencils to change the doll’s eyes to match my sister (using techniques from Poppen Atelier) and tucked the doll’s hair up to keep it out of the way. I also wrapped her lower body in saran wrap. It’s an optional step but as I wanted my sister to be able to keep the doll it made it easier to keep it clean.

Decide where the doll would be inserted and use a knife to carve out a channel for her legs. Note- I didn’t realize my channel was off-center. This resulted in the dress looking bulkier in the front than the back. Just something to keep in mind when making your own.
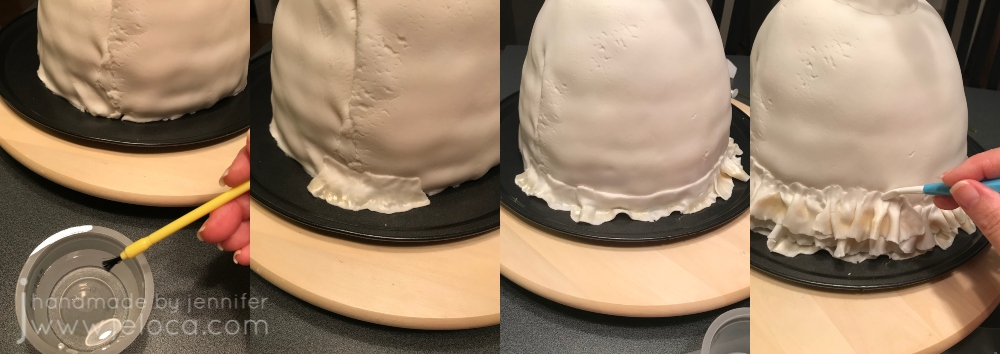
Then cover the cake using the remaining icing. Smooth it but don’t stress about making it too even as it won’t be seen later. Once fully covered, roll out white fondant to a diameter matching the height of the cake, doubled. Using a rolling pin with levelers can help keep your work even.

Cover the cake base with the fondant and trim the lower edge. Use a separate piece of fondant to make a dress bodice and moisten the inside with a bit of water to help adhere it to the doll, then insert the doll. To finish prepping the dress, roll out a fondant snake to fill in the gap between the dress and bodice, and smooth to blend evenly.
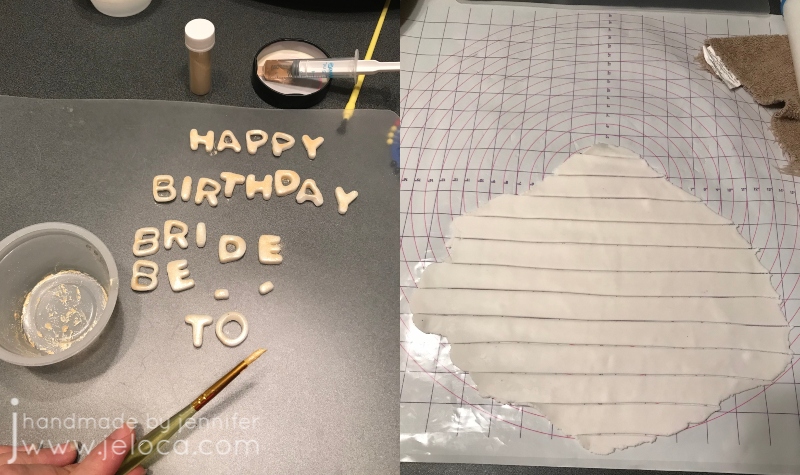
If you are planning to have wording around the base of the cake platter, cut out your fondant letters now so they have a chance to harden. We were having the party right after my sister’s birthday so I cut out the words “HAPPY BIRTHDAY BRIDE-TO-BE” and brushed them with gold “paint” made by mixing pearl dust with vodka. Tip: use a medicine syringe for easy dispensing of small amounts of vodka to avoid over-diluting your dust and needing to add more.
Now you’re ready to work on the dress’ ruffles. Be forewarned – this takes a long time. Cake decorating always does, but looking at timestamps from my images I can see the ruffles portion alone took about 3.5 hours. (It also adds a lot of extra weight to the cake which is partly why I used the pizza tray as my platter – I didn’t want to take a chance on a plastic platter cracking under the weight).
Roll out a piece of fondant and cut it into strips. My Wilton fondant mat was really helpful here for easily cutting at 1-inch intervals. Cut enough strips so that you’re not stopping too often but not so many that they stiffen or harden too much to be usable by the time you get to them.
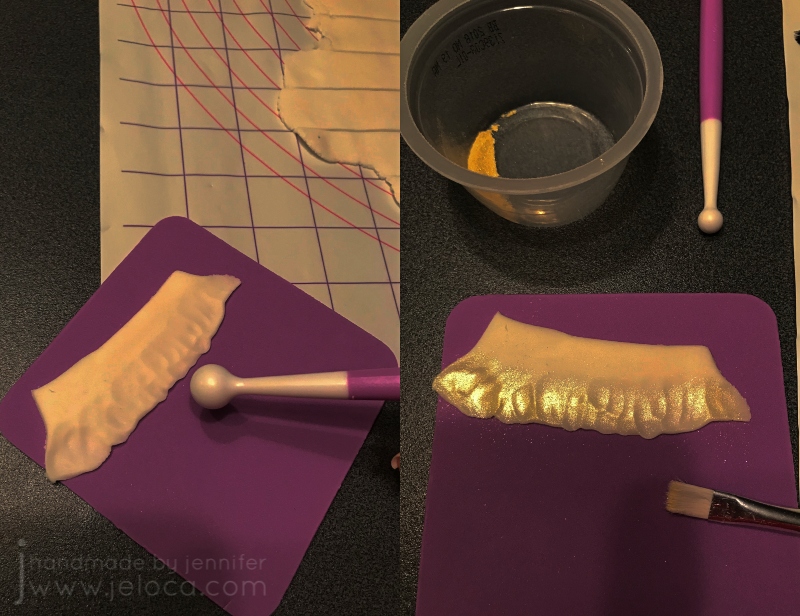
You will need a ball tool and shaping foam mat in order to make the ruffles. Note: I’ve deliberately darkened the contrast & shadows in this image to show you the ruffle texture. Using the ball tool, roll over one edge of your fondant strip to thin and flare it out. Don’t go so thin that it tears through. As I was making my dress have an ombre effect, I used more pearl dust gold “paint” to add sheen to the ruffled edge. Don’t bother painting the flat edge as it won’t be seen.
Use water and a food-only paintbrush to moisten the back of the ruffle’s flat edge and add it to the cake. You can use a smoothing tool or your fingers to help secure.

For the ombre effect, vary the tone of your colors as you go. In my case I lowered the ratio of gold pearl dust to vodka as I went, so the lower tiers have a darker gold shine and it fades to white as it goes upwards.
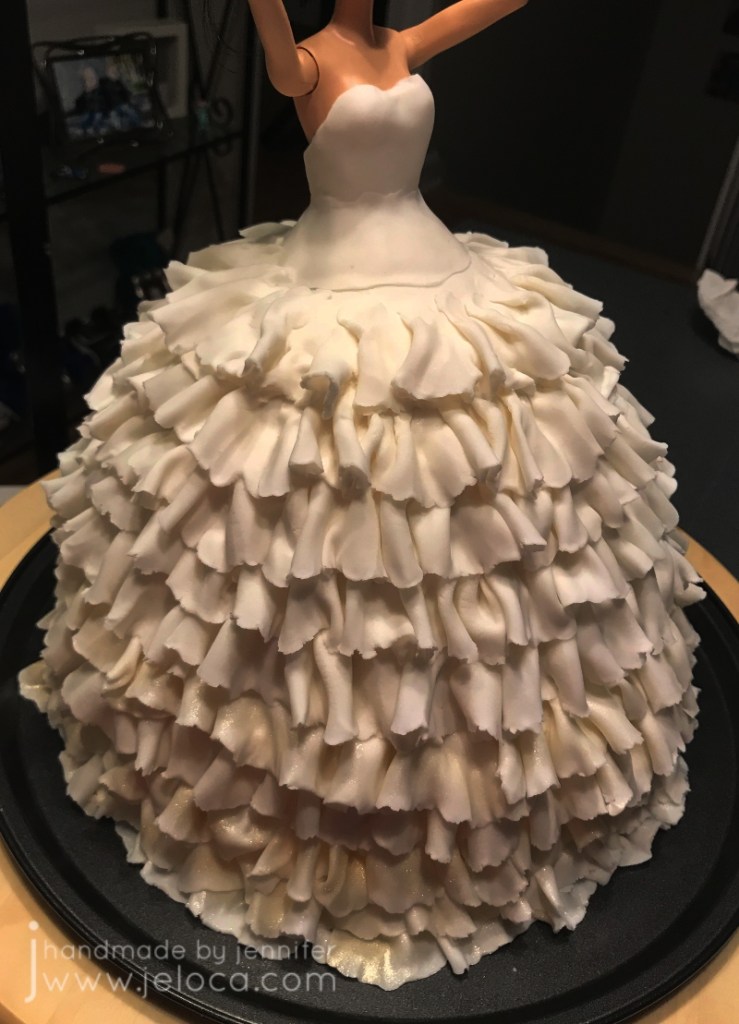
Repeat the process until you’ve covered the whole cake. Just like when icing or other decorating, a turntable is REALLY helpful during this process.
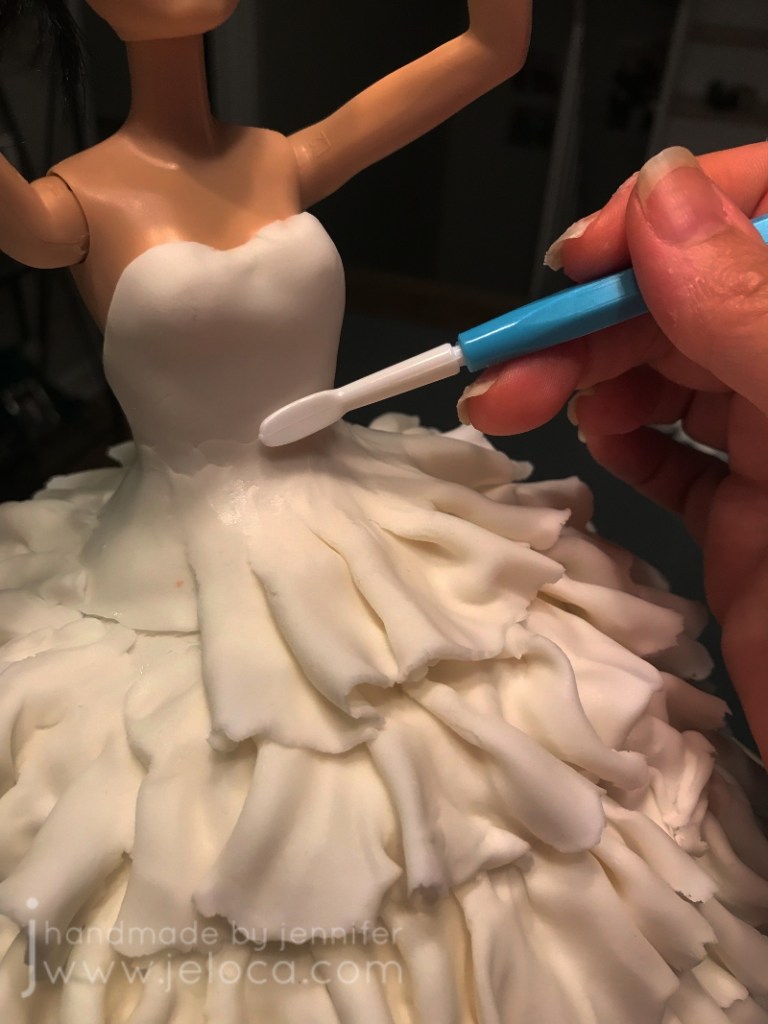
On your final layer, smooth out the ruffle’s flat edge to blend into the bodice.

Make sure to smooth it on all sides. You can stop there or add decorative finishing details.
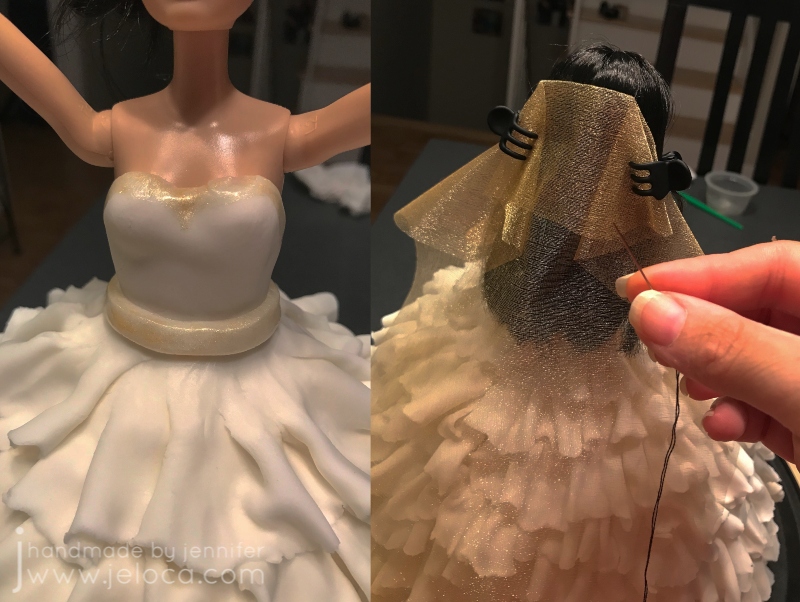
I added a gold paint trim and a fondant “belt”, and then sewed some gold tulle fabric into place as a veil using thread that matched the doll’s hair color. I also added the doll’s original gold bracelet.

Add your lettering (if using) and you’re done!

Here you can see how I’d accidentally offset the doll’s placement. I would prefer to have her centered, or at least have the extra pouf in the back, but I didn’t realize until too late. A good reminder to always view your cake from all angles, not just the front!
Make sure to leave yourself enough time to decorate! I wound up finishing the cake at around 5:00am and had to be at the bridal shower by 11:30 to help set up.

I slid the cake into the box and then taped the front back up into place using packing tape. This made it really easy to carry the box around and the dab of icing under the cakes guaranteed it didn’t slide around on the platter.

The cake slices do wind up very tall, but it did give the option of splitting a piece so one person could have the vanilla half and the other the chocolate.
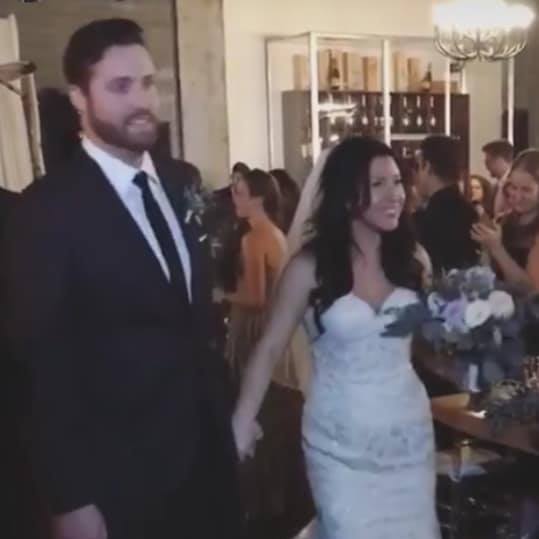
As a bonus for those who made it this far down, here’s a pic of my sister at her wedding. 🙂
I hope this post helps someone create their own wedding dress cake! The customization options are endless, and you can really have fund with the details.


