
In a recent post celebrating The Princess Bride movie’s 35th anniversary I shared my completion of a double-page spread from the official The Princess Bride adult coloring book and teased a special secret that allowed me to blend Crayola markers as if they were Copics.

We’re not talking some special “Premium” art supply here – these were regular old water-based Crayola Super Tips markers, and as you can see in the finished page not only was I able to blend two shades each of red and green to get a subtle watercolor effect in the roses, but I was also able to get a beautiful gradient using 5 shades through the sunset and again in the hill.
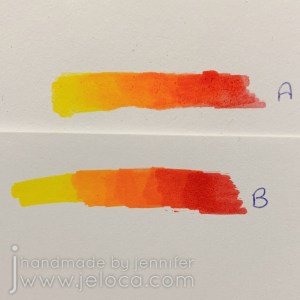
Even preschoolers know that if you try to layer non-alcohol markers on regular paper you end up with streaks or smears and not a blended gradient, just like you see in example B below. While the paper in this book is decently thick it’s still just regular light cardstock – heavy enough to hold up to water applications but definitely not special blending paper.
So if the trick isn’t the markers, and it isn’t the paper, what is it?
It’s what goes in between!

That’s right – this painter’s supply is an excellent addition to a coloring crafter too. Unlike the opaque white variety that is generally used to prime wood or canvas for painting, clear gesso is completely transparent and can be used on regular paper or within coloring books to protect the page from water damage and bleed-through. I don’t claim that using gesso in a coloring book is my unique, original idea. However it is the unexpected benefit of what this will allow you to do that I haven’t seen shared anywhere before.

Any brand will work, with the main distinction being that you use clear and not white. Liquitex is a great brand, I used Mont Marte as it’s what I happened to have, and Amazon has the U.S. Art Supply brand for a good price.
The idea came to mind when I picked the As You Wish/silhouette roses spread as my WIP. Not having used clear gesso before, I felt it would be smart to test it out before tackling my coloring page. I wanted to make sure that not only would I be able to see the printed lines clearly, but that they wouldn’t smear or bleed. I was also curious if the gesso would discolor the paper.
In order to properly test things out I marked off a square in a corner of one of the tester pages at the back of the coloring book and painted it with clear gesso and allowed it to dry fully.

While there is clearly an addition of texture to the page I was very happy to see that there was no discoloration or ink smearing. I then got to work testing an assortment of media to see how they worked with the gessoed page.
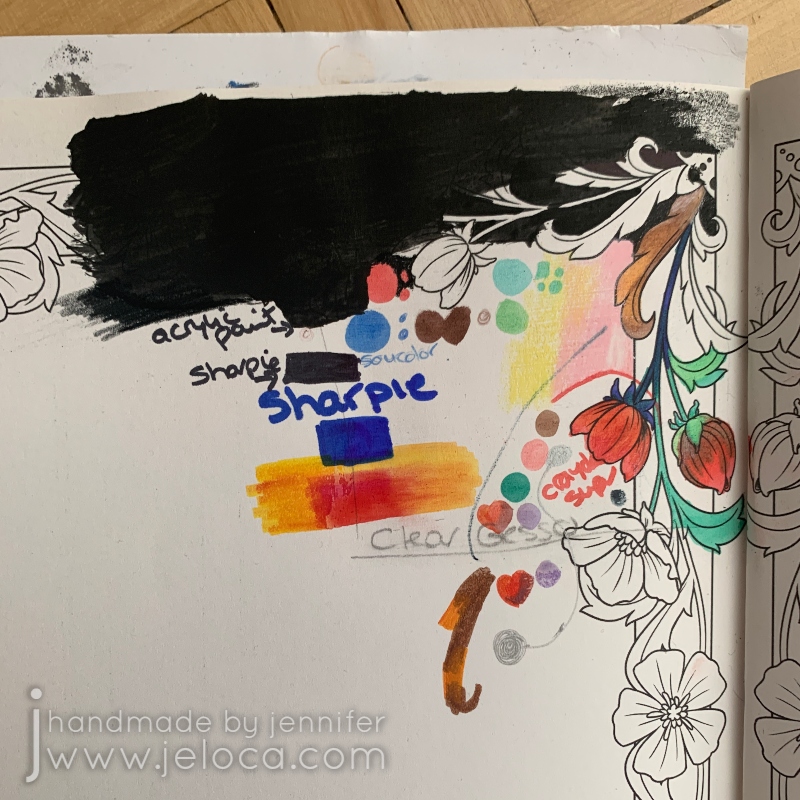
At the time I’d been debating painting the background black, so I tried that at the top of the page, followed below with black and colored Sharpies. I did a little colored pencil (the pink and yellow stripes) and a little with my brush tip/fineliner markers (the ones I used for the Eagle pointilism image), but spent most of my effort playing around with the Crayola Super Tips I intended to use on the actual coloring page. In order to compare the difference between the protected and untreated paper I deliberately overlapped my testing samples across the border of the gessoed section.
A quick look at the back of the page showed it was working! None of the media bled through the treated side of the paper!
This is also where I first realized that the Crayola markers were blending. To be sure I tested across both sides of the paper and, indeed, on the gessoed side the orange and red were forming a gradient whereas on the plain paper side they were overlapping with blocky, chunky edges.
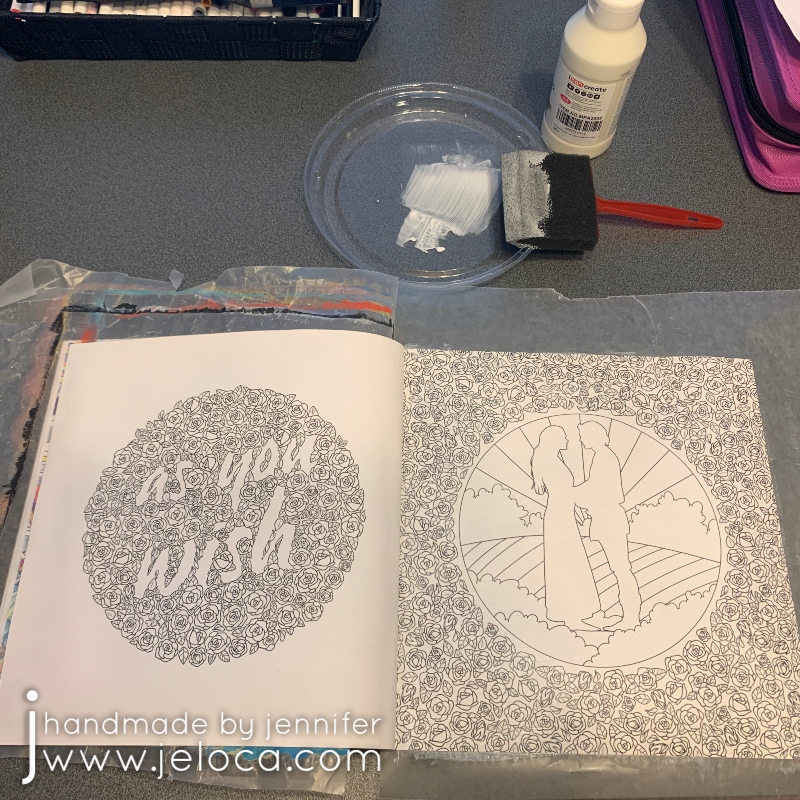
Now that I knew it would work I was able to start on the actual pages. A little goes a long way with gesso and it didn’t take much to evenly coat both pages with a thin layer. I like protecting the underneath pages with a bit of wax paper and the lid from a takeout container makes a great palette.

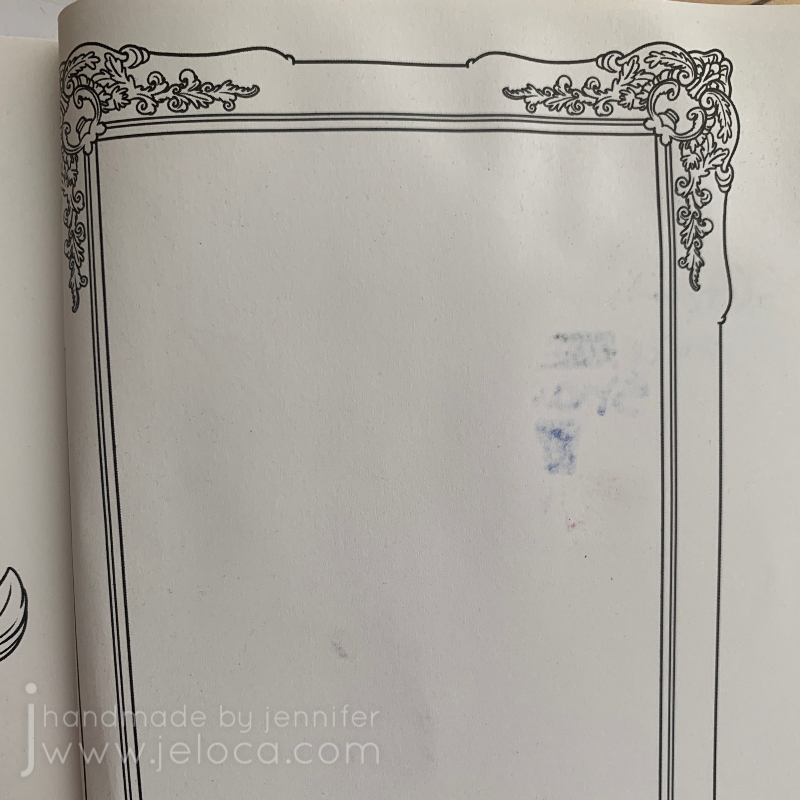
This is a closeup of the dried, treated page. As you can see there’s no discoloration to speak of and no ink smears. There is a faint bit of grainy texture which would make this an equally excellent tip for use with colored pencils though you’d need to be conscious of your brush strokes and try to keep everything even and not streaky.
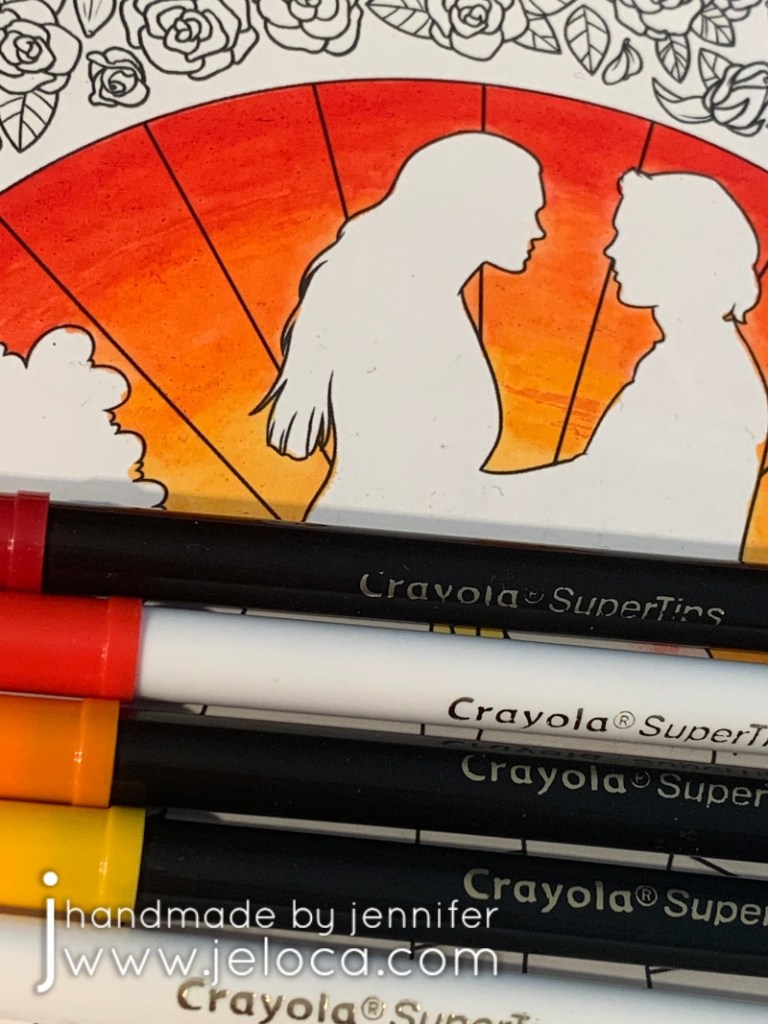
The coloring part itself is no different than were you to be using colored pencils or alcohol markers. You can blend the shades by overlapping them and blending out with the lighter color. In this example I colored horizontal sections of the 5 colors chosen for my sunset and then blended them by using the lightest yellow overlapping onto the yellow/orange, and then that marker overlapping onto the orange, which then overlapped onto the red, and then finally overlapped into the darkest red section.
Much like alcohol markers you have a long working time as applying new color will allow you to mix and move the colors below.

Just keep in mind that since the gesso stops the water-based markers from absorbing immediately into the page they will be transferrable until they dry completely. So be careful to avoid smudging or smearing the wet marker with your fingers or the side of your hand.
I found this to be a wonderful, fun process and absolutely adore how the final image turned out. I enjoy finding new ways to use existing supplies and love that this one product opens the door to so many coloring possibilities!


