1 Comment

scary new tools

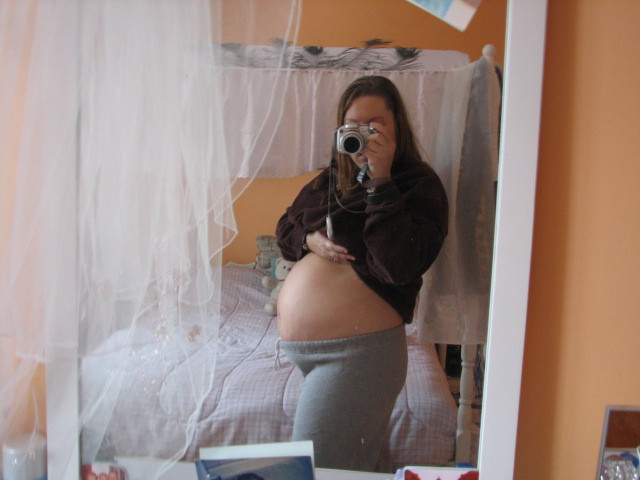
Here’s a belly shot of me at 24 weeks (last week). I’m at 24 wks and 3 of 7 days today, according to the hospital’s calendar. I can’t believe that in a few short weeks I’ll be in the third trimester already (27wks)! As you can see, the baby bump is WELL pronounced! I (luckily) don’t seem to be gaining much weight in other areas, although my face is rounder and fuller. I shouldn’t complain, because I’ve only gained around 10 lbs so far. It seems the baby is burning off what I eat, and the rest of my fat is slowly migrating to my midsection from the other areas on my body.

Speaking of what I eat and what the baby is doing…

Think this looks scary? I did, last week when they gave it to me. My glucose levels were high so I had to go in and speak with a dietician. If I understood what they said, at the 2nd glucose test, the 75g one, you have to fast over night then go in and have your blood taken. Then you drink 75g of this nasty, orange-soda-resembling, syrupy liquid. Then you wait an hour, then they take your blood again. Then you wait ANOTHER hour, and they take your blood again. Then you get to go home and pig out ‘cus you are so hungry at this point.

I had done that test a few weeks ago, after having done the 50g test on Jan 9th (at the 50g you only do no fasting, drink 50g of the stuff, wait an hour and do 1 blood test. It’s to see if you need to bother going for the 75g.) My levels were slighly high, so I had to go for the 75g. Now, here’s how I believe it breaks down. If 2 or more of your results from the 75g are high, (so 2 or 3 out of 3) then you are considered as having Gestational Diabetes. If only 1 of the 3 blood tests comes back as being high, then you have Impaired Glucose Tolerance. I could be wrong, but I believe the nurse told me that IGT doesn’t have as high risks as GD, for example it is more likely to go away after you give birth, and it doesn’t have as high a risk of you getting Type II Diabetes later on in life. I’m not 100% sure about that, though. In any case, I have IGT. My initial test, after fasting over night, was high.

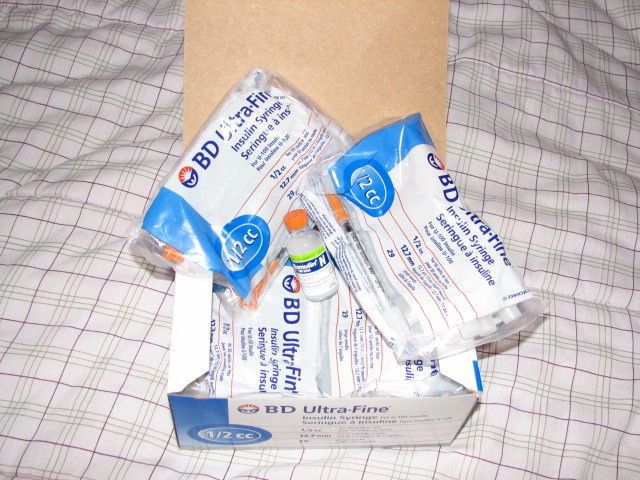
Last Monday I was given that lovely little kit up there, and an rx for lancets, test strips and keytone testing sticks, met with a dietician, and found out that for the rest of the pregnancy I need to test 4 times a day: first thing in the morning, 1 hr after breakfast, 1 hr after lunch and 1 hr after supper. I also need to eat 3 full meals and 3 snacks a day- hard for me right now ‘cus I’ve had NO appetite since being pregnant.

Anyways, my baby’s health is the most important thing, so for the last week I’ve been following this plan, recording what I eat and my sugar levels (although I did make myself a new form in Excel because theirs was NOT user-friendly to me and I knew I could do better). I was pleasantly surprised to find out that pricking my fingers to test doesn’t actually hurt at all, although if I look closely at my fingertips I can see a bunch of fading red dots.

I thought I was doing ok.

Trust me…that kit up there does NOT look scary at all when you are faced with this:

Yeah. Insulin.

Turns out I have been doing a great job at watching what I eat. My daytime levels are great. Unfortunately my first-thing-in-the-morning levels have been high for 4 of the 7 days I tested. This means my body is not producing enough insulin while it is fasting (overnight while I sleep). I thought that meant I wasn’t eating enough at my bedtime snack, or maybe I was eating too much…how do I fix that? Well, apparently it has nothing to do with what I eat. It’s just how my body reacts to being pregnant. You know, the nurse, the doctor and the dietician all tried to make it clear to me that it’s not my fault, it has nothing to do with what I have eaten, or my lifestyle, or the fact that I was overweight, or anything. It’s just how my body reacts. But still…I can’t help but feel like I failed. Like I did something wrong and put my baby’s health at risk. Let me tell you I was not happy to find out I have to give myself nightly injections, and nearly started crying in front of the doctor.

So the nurse showed me how to load the syringe, flick out the air bubbles, and told me how to inject it. (As an aside- I wonder why I was given an actual syringe and not a trigger-type gun thingy like the finger-pricking tester? Wouldn’t that be easier for someone who has never injected themselves with anything?) She couldn’t show me how to actually inject it because I have to do it at night before going to bed, after my bedtime snack. Tonight I get to try it out for the first time.

Apparently you can inject on the outsides of either thigh, or the fleshy part on the back of your arm, or the stomach. Now, even though I have the easiest time “pinching an inch” on my stomach, the thought that there is a baby in there does NOT have me wanting to “shoot up” there. Plus I heard it hurts more on the stomach. I have an easy time squishing my upper arm against the back of a chair to find a fleshy spot, but once I have it pinched I no longer have a hand to inject with! (I guess I could keep my arm pushed against the chair to hold the skin up and shoot with the other hand, but that’s a little too awkward for me to contemplate at the moment). That leaves the outside of either leg. I can’t really pinch anything on my legs but I guess I’ll figure it out tonight. I’ve asked Yannick to be home for moral support but I don’t know how well that will go since the only thing he’s *afraid* of is needles. (I’m sorry. He’s a man. He’s not afraid, he just doesn’t like them. Forget I said anything about being afraid.)

I’m sure that once I do it once it will be fine, and that the buildup is scarier than actually sticking that thing into my leg. Yeah. By tomorrow I’ll be laughing. Unfortunately I have to get through tonight first. I try to tell myself…I did an amnio…I can do this! (I just wasn’t the one holding the needle during the amnio…)

I’ll post a follow-up tomorrow and let you know how it goes. Let’s see if I can get some knitting done tonight and forget about it for a bit.


2 Comments

moving on up

It’s depressing to look at my blog. I know I haven’t posted since, what-? Last Monday? Forgive me, please. I just hit 24 wks (6 months) pregnant and I’m TIRED. By the time I get home from work I’m lucky if I manage to watch an episode of TV, much less knit anything, MUCH less blog. The lack of knitting and lack of anything interesting in life leaves me with pretty much nothing to blog about.

But there might be stuff soon. Yannick and I have 90% officially decided that we will be moving. Yes, at 6 months pregnant, we are going to be putting our house on the market. (As an aside- forget getting married and having a baby…there’s something about saying “we’re putting our house on the market” that makes me feel oddly grown-up).

We have met with an agent to evaluate our home and tomorrow he is coming back to take photos and measurements and so on, and by next week I think we’ll be listed on MLS. ACK. He’s of the “sell first, buy later” camp, figuring it will be harder to get a buyer than it is to find a house we like, so we should ensure that we’re not stuck with 2 mortgages by selling first. Our only condition is that we sell by March 31st (sell- not move) because if we haven’t sold by then, we will have only a month and a half to get our house ready for baby. I refuse to cut it closer than that. I’m not sure when we’ll actually move…I guess sometime in the end of June or later, or if it is sooner then it will have to be before the 3rd week of April in case this kid is early. If the move is sooner it would be a huge rush to pack, but we can do it if we work hard. If it is later we’ll have more time to pack slowly, but I won’t be able to help as much ‘cus I’ll be busy with the little one.

So we’ll see. I’ll update with more info as I have it, but for now that’s all I know. We’re going on the market, and then the house-hunting will commence in earnest!


3 Comments

FO: Moss Block Cardigan

Update: see end of post for information about a downloadable pattern pdf

I finished this cardigan on December 28th 2006 but it was blocking and I never remembered to take a photo of it, so I took a few quick ones today before putting it away in the pile of knits “to be washed” with baby detergent for our baby.

This is the front of the cardigan. You can see how the texture blocks carry over onto the sleeves.

This is the yarn I got from Mona and Veronik at one of the last Montreal Knits meetups I’d attended. I knew I wanted to use it for a cabled cardi because I loved the color and thought it would look so cute with a wee pair of jeans. Unfortunately after swatching some cables I didn’t like how the cotton blend held up the cables. It was too floppy for my liking, so I played around with other textures and came up with the idea of mixing stockinette and moss stitch in large blocks that extended down over the sleeves too.

This is the back of the cardigan.

Yarn: 3 balls of Schewe Baumwoll-Mix (50g/120m, 50% cotton, 50% acrylic)
Needles: 3.25mm for ribbing and 3.5mm for body
Pattern: My own. I used fully-fashioned raglan decreases as I felt they blended better with the look of the moss stitch, as opposed to the smooth diagonal line you get when you angle the decreases with the slant of the shaping.

I wrote the pattern for one size, roughly 6-12 months. But you can get a larger or small sweater by changing your yarn and using the appropriate needles.

Gauge: 24 sts x 32 rows = 4″ st st with larger needle

Notions: tapestry needle, stitch marker, 5 buttons

The back again. This photo doesn’t show the color too well but it shows off the texture better than the other photos.

Pattern notes

This sweater has shaping worked within moss stitch. When the increases or decreases are done at the edges of moss stitch work the increase or decrease then resume the moss stitch as established.

Except for when working ribbing, the first and last st of every row are worked in stockinette for ease when seaming later.

Pattern Instructions

Back

CO 58 sts with 3 US / 3.25mm needle

Work in 2×2 rib for 11 rows: *k2, p2, rep from * to end of row

Work 1 more row of ribbing, increasing 2 sts evenly across (60 sts)

Change to 4 US / 3.5mm needle

Next row: (RS) k30, pm, *p1, k1, rep from * to end of row

Next row: (WS) *k1, p1, rep from * to marker, slip marker, p to end of row

Repeat last 2 rows until 44 rows have been worked (not including ribbing), ending after a WS row

Next row: (RS) *k1, p1, rep from * to marker, slip marker, k to end of row

Next row: (WS) p30, slip marker, *p1, k1, rep from * to end of row

Repeat last 2 rows 4 more times

Armhole

BO 2 sts at beginning of next 2 rows (56 sts rem)

Dec row: (RS) k1, k2tog, work in est patt to last 3 sts, ssk, k1

Repeat decrease row on every RS row 16 more times

BO remaining 22 sts for back of neck

Left Front

CO 30 sts with 3 US / 3.25mm needle

Work in 2×2 rib for 12 rows: *k2, p2, rep from * to end of row

Change to 4 US / 3.5mm needle

Next row: (RS) *k1, p1, repeat to last st, k1

Next row: (WS) *p1, k1, repeat to last st, p1

Continue as established in moss st for 44 rows (not including ribbing), ending after a WS row

Next row: (RS) k across row

Next row: (WS) p across rowContinue as established in st st for 8 more rows

Left Front Armhole

RS- BO 2 sts at armhole edge (28 sts rem)

WS- p across row

Dec row: (RS) k1, k2tog, k to end of row

Repeat decrease row on every RS row 6 more times (21 sts rem)

Neckline and Armhole Shaping

Dec row: (RS) k1, k2tog, k to last 3 sts, ssk, k1

Repeat decrease row on every RS row until 5 sts remai

Next row:  k1, sl 1, k2tog, psso, k1

Next WS row: continue as established

Next RS row: sl 1, k2tog, psso

Cut yarn and pull it through last st

Right Front

CO 30 sts with 3 US / 3.25mm needle

Work in 2×2 rib for 12 rows: *k2, p2, rep from * to end of row

Change to 4 US / 3.5mm needle

Next row: (RS) k across row

Next row: (WS) p across row

Continue as established in st st until 44 rows have been worked (not including ribbing), ending after a WS row

Next row: (RS) *k1, p1, repeat to last st, k1

Next row: (WS) *p1, k1, repeat to last st, p1

Continue as established in moss st for 8 more rows

Right Front Armhole

WS- BO 2 sts at armhole edge

Dec row: (RS) work in est patt to last 3 sts, ssk, k1

Repeat decrease row on every RS row 6 more times (21 sts rem)

Neckline and Armhole Shaping

Dec row: (RS) k1, k2tog, work in est patt to last 3 sts, ssk, k1

Repeat decrease row on every RS row until 5 sts remain

Next row:  k1, sl 1, ssk, psso, k1

Next WS row: continue as established

Next RS row: sl 1, ssk, psso

Cut yarn and pull it through last st

Sleeve 1

CO 34 sts with 3 US / 3.25mm needle.

Work in 2×2 rib for 11 rows: *k2, p2, rep from * to end of row

Work 1 more row of ribbing, increasing 2 sts evenly across (36 sts)

Change to 4 US / 3.5mm needle.

Work 6 rows st st

Inc row: k1, m1, work in est patt to last st, m1, k1 (38 sts)

Repeat increase row every 8 rows 3 more times (44 sts)

Work 7 rows st st

Change to moss st, and work inc row as follows:

Moss inc row: k1, m1, *k1, p1, repeat from * to last st, m1, k1 (46 sts)

Work 7 rows moss st

Repeat moss inc row 1 more time (48 sts)

Work 1 more row moss st as established

Armhole

BO 2 sts at beg of next 2 rows (44 sts rem)

Dec row: (RS) k1, k2tog, work in moss st to last 3 sts, ssk, k1 (42 sts rem)

Repeat decrease row on every RS row 16 more times

BO remaining 10 sts in knit.

Sleeve 2

CO 34 sts with 3 US / 3.25mm needle.

Work in 2×2 rib for 11 rows: *k2, p2, rep from * to end of row

Work 1 more row of ribbing, increasing 2 sts evenly across (36 sts)

Change to 4 US / 3.5mm needle.

Work 6 rows moss st

Moss Inc row: k1, m1, work in moss st to last st, m1, k1 (38 sts)

Repeat moss increase row every 8 rows 3 more times (44 sts)

Work 7 rows moss st

Change to st st, and work inc row as follows:

Inc row: k1, m1, k to last st, m1, k1 (46 sts)

Work 7 rows st st.

Repeat inc row 1 more time (48 sts)

Work 1 more row st st as established

Armhole

BO 2 sts at beg of next 2 rows (44 sts rem)

Dec row: (RS) k1, k2tog, work in st st to last 3 sts, ssk, k1 (42 sts rem)

Repeat decrease row on every RS row 16 more times

BO remaining 10 sts in knit

Seam both sleeves into place

Button Bands

Note: As this is a unisex sweater, it is designed with the button holes on the left (boys’) side.

With 3 US / 3.25mm needle and RS facing, beginning at ribbing of Right Front, pu&k 8 sts along edge of ribbing, 30 sts along st st section, 14 sts along moss section, 3 sts at base of v-neck (1 right before the turn, 1 at the corner, and 1 right after the turn- this is to ease the curve around to the neckline), 13 sts along v-neck, 10 sts along BO sts at top of arm, 22 sts along BO sts at back of neck, 10 sts along BO sts at top of other arm, 13 sts to base of v-neck on left side, 3 sts at base of v-neck, 14 sts along st st section, 30 sts along moss section, and 8 sts along left side ribbing (178 sts)

Next row: (WS) k across row

Work in 2×2 rib for 2 rows: *k2, p2, rep from * to end of row

Buttonhole row: (RS) work as est for 124 sts, k2, *p2tog, yo, rib 10 sts, rep from * 3 more times, p2tog, yo, k2

Work in 2×2 rib for 2 rows: *k2, p2, rep from * to end of row

BO in ribbing

Seam sides and sleeves

Attach buttons to line up with buttonholes

Weave in all ends

A close-up detail shot of the back where the texture switches. Because of the stitch pattern difference, the moss and stockinette sections of the same number of rows won’t seem to be the same size, but the minor difference eased out very well in seaming and blocking.


This photo is just to show off the cute wooden buttons that I found at the Wool Shop in Pointe-Claire. They match perfectly!

Update!

This pattern is on Ravelry here.

This pattern is provided for free above, but if you’d prefer an easy-to-print PDF version, I have made it available here for a very small fee. The PDF includes the full instructions, abbreviation definitions, an easy to read layout and newer, full color images.

*Updated January 2020


Leave a comment

frappr

Hey…if there are still any of you out there reading my blog after my holiday absence…can you please click on the link under my photo and add yourself to my frappr map? It’s quick and easy and is a fun way for me to know where you are from!

Thanks!


2 Comments

Meme: Weird Things

Robyn tagged me, so I’m playing along.

THE RULES: Each player of this game starts with the 6 weird things about you. People who get tagged need to write a blog of their own 6 weird things as well as state this rule clearly. In the end, you need to choose 6 people to be tagged and list their names. Don’t forget to leave a comment that says you are tagged in their comments and tell them to read your blog.

My gosh…there are so many weird things about me, why can’t I think of any to get this started?

1) I don’t like chocolate. I will eat certain kinds if there are nuts or nougat or caramel or something in it, but I am definately NOT one of those women who would pick chocolate over…well…anything. 😉

2) I love bagels with cream cheese and onion, but will not touch cream cheese and lox. I hate lox. For some reason, I like smoked salmon. I know they are the same thing. Give it to me on a plate with some onion slivers, sour cream and capers, maybe on a bed of lettuce or crustini and I’m happy. Give it to me on a bagel or toast with cream cheese and I’m nauseous.

3) I love school supplies. Even if there is nothing I actually need at the time, I can spend hours browsing through Bureau en Gros and find stuff to buy. A girl can never have enough pens, paper, highlighters, notebooks, etc…

4) I love onions and have often eaten one as a snack. I’d cut it into a flower shape (kinda like a Bloomin’ Onion) and pop it in the microwave with a small pat of butter. Yummy!

5) I am scared of spiders. Ants, earwigs, centipedes, any other kind of bug with 1-7 or 9+ legs are fun. Not arachnids. (And no, spiders with missing legs are still spiders). I am finally at the point where I *can* kill them myself…but I prefer to have a large man, brave friend or central vacuuming hose around to do the job for me. I’m always afraid it will move and crawl onto my hand. And you can’t just crumple the tissue and throw it in the garbage- spiders MUST be flushed. How else do you know that it isn’t still alive in the tissue and won’t crawl out later? (I was forced to watch Arachnaphobia once. I gnawed my thumb so hard with fear or tension that I had a dent for a week!) Luckily, I am unaffected by Spiderman and have managed to enjoy all incarnations of that series.

6) I don’t like alcohol. I can’t stand Sex on the Beach, Screwdrivers, Vodka-Cranberry, Martinis in any flavor, or any of the other typical “chick” drinks. If given the opportunity, I will choose “virgin” versions of a drink 100% of the time. I hate the feeling of being drunk or even tipsy. I also don’t like wine or beer. There is one sparkling wine I like only because it tastes like Sprite. The only mixed drinks I can say I enjoy are Brown Cows, Kahlua and Milk and Amaretto Sours, and these are only for the flavor of the drink. If I could get the same taste sans alcohol I would prefer it. I did, however, love being a bartender (and loved being the only sober person at the end of the night).

I’m not tagging anyone because the only people I know for sure read my blog have done it already. But if you read this and decide to play, leave me a comment and I’ll update this post.


4 Comments

my own provisional or invisible cast on alternative

Sometimes a pattern will call for an invisible cast on. An invisible cast on is when you cast on with your yarn and a waste yarn (usually a smooth yarn like cotton in a contrasting color). The way you twist the yarns as you cast on will result in giving you the “backs” of the stitches to pick up later. This means that if you cast on 40 sts, you will have 40 sts ready with your working yarn to knit up right away, and then later when you unpick the waste yarn you will have 40 more sts waiting for you to slip on a needle and begin knitting in the other direction.

This can also be called a “provisional” cast on, and the directions can call for you to crochet a long chain and knit your first row into the back “bumps” of the chain. When you use this method the crocheted chain holds your first row “live” and you can “unzip” the crochet chain later and put the freed stitches back on the needle to knit in the other direction.

I’ve had to use this many times-
– my favorite toe-up sock pattern has you start with an invisible cast on, knit the toe section, then put the other half of the cast on sts on two more needles so you can start knitting the foot in the round.
a gift scarf I knit once had you start with an invisible cast on, knit half of the funky cable pattern, bind off, then put the other half of the cast on sts on the needle so you could repeat the scarf for the other side, ensuring that both halves of the scarf were the same and knit in the same direction (instead of casting on at one end, knitting to the other end, then binding off).
the Samantha baby sweater dress I had knit for my friend’s daughter also has you cast on with an invisible cast on, work a picot edging, then later release the other half of the live cast on sts to hem them up by folding along a turning row and then sewing the hem in place.

It’s that last one that led to my latest ah-ha! unvention. I had decided early on that I was too lazy to sew the bottom hem up later, when I could easily knit it in as I went. Instead of waiting until the piece was done, undoing the waste yarn, threading the long tail on a needle and sewing down each loop of live stitch, I would instead work the hem as directed, but once I’d worked to a point even with the length of the hem (for example 8 hem rows, turning row, 8 body rows) I would release the waste yarn sts to another needle and knit them together with the next body row. This works much as one would do a 3-needle bind off, except you don’t bind off. You just knit a stitch from each needle together.

That worked perfectly, except for one thing: I hate picking out the waste yarn from when you do a typical cast on of this type. Because the only thing done in the waste yarn was to cast on there is only that bottom edge of a contrast, and it is not always easy to find the stitches of your first actual row. I always feel like I’m going to lose a stitch, especially the end ones.

So I came up with an easier idea. In my case I’m going to show you how to use it to knit in a hem, but you can skip the hem part and just use the technique to have your stitches ready to knit your ribbing or hem later if you’re not sure what you want to do yet, or to knit in the other direction (like a scarf or shawl).


I still cast on with waste yarn, only this time I knit a row or so. Enough to give you a row of knit stitches that you can see easily.


Then switch to your pattern yarn and work as you like until the point where you want to knit in the hem. (In this example, I think I’d knit 5 rows, purled a row as a turning row, then knit 5 more rows).

Many times I have been in the middle of a project when I notice an error that can’t be corrected by dropping down just a few stitches. In these cases, instead of just ripping back I sometimes like to insert the needle into the knitting first, then rip. This way I can’t rip too far, and all the sts end up sitting there on the needle for me. This works the same way.

Insert a second (slightly smaller) needle into one half of each of the sts in the first row of your pattern yarn. Make sure you have done this for all the sts (if your row has 32 sts make sure you pick up half each of 32 sts).

Cut the waste yarn in a few random spots in the first row. Make sure to not cut the pattern yarn!


This shows the cut end starting to be unpicked from the knitting.


Use a needle or the points of your scissors to help you pick out the first row of waste yarn.


This leaves the pattern yarn sitting there on your needle, all the stitches looking pretty and ready to knit! This gives you the same result as the traditional invisible cast on, without the fiddly cast on itself and the trial-and-error I always experience when picking out the waste yarn.

And that’s all there is to it! Now the cast on row is ready to do whatever you want. Again, in my case I have done it after some extra hem rows because I will be turning the hem and knitting it in, but you could easily have done this just at the beginning of your regular knitting pattern and then the stitches would be ready to knit your ribbings, lengthen your garment, knit in the other direction, graft something, or do whatever you like!

I’m going to continue the directions for how to knit in the hem for those of you who would like to try this.


Then, to knit in the hem as I did, all you need to do is fold it up and knit a stitch from each needle together. Once that’s done, you just keep knitting your pattern as usual.


This shows the front of the hemmed piece after the hem was knit in and I’d knit about 5 more rows. The turned edge is nice and flat because of the turning row (you can also use a picot edge or anything you like). The bottom is thicker and doubled with a nice, sturdy hem that will not unravel, and the two sides are open so you can insert an elastic if you like. If not then the sides will close when you seam the piece, or you can just seam them shut later.


This shows the back. You can see the stockinette section at the bottom which is the folded hem, and then the reverse stockinette section which is the back of the right-side stockinette part. It’s neat and simple!

This method can be used in any instance where an invisible or provisional cast on is required.

I really got this idea because I have no problem picking up one side of each stitch when ripping back, and that helps me often. I thought, “wouldn’t that be easier than picking out a cast on row and trying to find the sts?” For me, this was much easier, I didn’t need directions on how to cast on, nor a crochet hook. Quick, simple and painless. Hope this helps someone like it did me!


2 Comments

blame blogger

I spent so long trying to post this morning that I thought I would be late for work. I had written up a great long post about an alternative to the provisional cast-on method used in some patterns, and I had even taken step-by-step photos of the process. The final step was to post it- and Blogger was having “issues” with uploading photos again. I tried to upload the images to my Photobucket account so I could finish up the post from work and wouldn’t you know it- Photobucket was down for maintenance.

So you’re getting a photo-less post today, folks.

First of all, a big HELLO and THANKS to all the people who came on by from the Knitlist after I put out the message telling you about the free pattern for the Bowling Socks. I know you’re not really coming to see me, you’re coming for the free goodies, but maybe one or two of you will stick around so I’m thanking you in advance. Quite a lot of you have taken me up on that free pattern offer- a few days ago my Yahoo group had 55 members and now I have over 140! I promise to keep working on some more free patterns to make it worth your whiles. I have a moss block baby cardigan that I designed which I will most probably put up as a free pattern, and a pattern for Sweetheart Mittens from two years ago that I just need to get around to typing up.

What’s going on with me? Lately it seems like I’m only getting real knitting time in on Sundays and Mondays (my days off). I used to get home from work, make supper then park myself in bed and knit while watching TV until 11:00 or 12:00 then get into bed, play a few games on my Palm then go to sleep. These days? I’m lucky if I’m still out of bed by 9:30/10:00! ALL I want to do these days is sleep. Sleep in all morning and go to bed as early as I can at night. I thought that I was supposed to be more tired in the first and last trimesters, but instead, smack dab in the middle of the 5th month, NOW exhaustion is hitting me hard. I have to tape whatever shows I really want to watch and instead watch something else on TV because I have no guarantee of being awake long enough for the first show! Monday night I was in bed by 8:15. 8:15!!!! And I would have been asleep right away too if Yannick hadn’t been in a chatty mood.

The pregnancy is going good otherwise. I’m still not hungry, and still have only gained a couple of pounds, but my (old) doctor doesn’t think that is anything to worry about. I will ask my new doctor when I see her for the first time on the 30th. I am starting to feel the baby move a bit more, but it’s still not regular and still not more than occassional tickles. No hard kicks or punches yet, except for 1 time- at my 5 month ultrasound last Tuesday the technician was pushing really hard and when she dipped into my belly button and was pushing I guess baby felt really squished and kicked the wand away. I couldn’t stop laughing which made the rest of the ultrasound take longer, but I didn’t mind (more time to see my baby!) I love ultrasounds- I love the window into my baby’s world. I will take any opportunity I can get to see this little one before its first appearance.

I’ve been knitting tons of stuff for baby too. The Froggy and Ducky Hat/Socks sets were finished a while ago (and blogged, plus there are photos in the sidebar). I finished the Moss Block Baby Cardigan which was from my own design, and now that it is finished blocking I will try to remember to take a photo and post it.

I’m still working on a sock yarn cardigan using one of the Regia Canadian Colors…I forget which one offhand but it’s mainly yellow with some irregular stripes of brown, purple and lime green. I have the back done and am about to the armhole shaping on the first of the two fronts.

I have started the Debbie Bliss Alphabet Baby Blanket. The rows go a bit faster than I’d thought and the charts aren’t hard to follow at all. The first day I started it (about 2 Mondays ago) I managed to nearly finish the lower block of letters. I have only done a few rows since. It will be a slow project because I don’t plan on it being portable. I tend to leave my chart-heavy projects at home and tote around stuff that is easier to work on here and there.

Speaking of easier to work on…I have also started an entrelac blankie for the baby. It is using two colors of Patons Decor and I love the squooshy woven look. I have finished one full ball of each color and for the size I made (the blocks are 10 sts wide) it will probably take 2 or 2.5 balls of each color for the blanket then an extra ball of one color for a border. I haven’t figured out the border yet- the blankie is of my own design and I’ll worry about the border once I’ve finished the main part.

For the last few days I’ve been knitting exclusively on a pair of black gloves. The MKG is having a Mitten Challenge which is due by our next meeting (the 2nd Tues of February). One of the catergories is to design your own, which I am doing. Thanks to Yannick’s great suggestion when I asked him what would be an interesting new mitten or glove, I am designing a pair of Knitter’s Gloves. I have 2 more fingers (well, 1 finger and 1 thumb) to go on the first of the pair. (I had to call the guild president and make sure that gloves were ok because the newsletter only talked about mittens, but she assured me that any type of cold-weather hand coverings were fine).

So that’s what I’m knitting these days. I didn’t do much on Sunday except in the car because we had Robyn’s son Sean’s bris in the afternoon. He was a real trouper and barely cried! Yannick was a chicken and stayed at the back of the room lest he accidentally see what was going on at the front. Men! The bris included lunch/lupper then afterwards my sister Laura and her boyfriend Mike came back with us. We played Taboo (and us girls won!) then went to my parents’ house for supper. By the time we got home I was exhausted (again) so I went to bed soon after.

Monday I had to go to the Jewish to redo my glucose test. I worked on the glove in the waiting room during both hours between blood tests. I was supposed to go to Robyn’s for a bit in the afternoon but we got hit with such nasty weather that I just went straight home. I ate quite a bit for once (I had been fasting for the blood test) then cozied up in bed with the glove and my tapes from the last few weeks. Within ten minutes I was ready for sleep. I fought it off and stayed up until Yannick came home for supper, but it really was a struggle all day to fight off from falling asleep. By the end of the day I had a headache already from being so tired and I wasn’t even hungry, so Yannick finished my meal (again) and as I said earlier, I was in bed by 8:15.

Last night I did 2 hours of knitting while watching the American Idol premiere then got into bed. I had taken a book on pregnancy massage out of the library and Yannick had a great time going through all the photos and making funny remarks. Then we went through the latest month in his pregnancy book. We have 3 but 2 are mine and 1 is his. Mine are What to Expect When You’re Expecting and The Mother of All Pregnancy Books. His is The Expectant Father and it is a good, funny and informative book. The only problem is that Yannick forgets to read it, so we tend to go through it together when I remember. He particularily enjoyed a passage we read last night about how a woman’s brain actually shrinks during pregnancy.

Tonight is a Montreal Knits (link in sidebar) meeting but I’m really tired and it’s really cold outside so I will be skipping it in favor of going home and taking a bath. I just might get to knit a stitch or two as well.


2 Comments

who do we look like?

This was fun! I completely imitated the inimitable (sp?) Deawn. I enjoyed it so much that I ran it for almost every friend/family member whose photo I had on my work computer. Enjoy!

(Note: if anyone wants me to remove their photo just email me and I’ll take it down. For some of you I only had old photos too, so I did the best I could.)

Me:

Yannick:

My brother Mike:

My brother Aaron:

My sister Laura:

My friend Debbie:

My friend Julie:

My friend Jackie:

My friend Kevin:

My friend Rich:
Shoot- I don’t have a photo of Rich online. Sorry Rich! Email me one if you want me to make one up!

It’s fun! Go try it out!